I recently got to teach a class on Router basics. Other than it having to be rushed due to the time constraints, it went well. I’ll be converting the documentation for this class into a post on this website, much like I did with my Dado Information class.
I was also working on a beginning woodworking class for Skillshare but life got in the way and I wasn’t able to finish it before the deadline. While making the class, I realized that the subject matter was much too broad for the amount of time I had to put it together. I’m still going to put together some Skillshare classes but I’m going to have them be more focused and less broad.
Filming
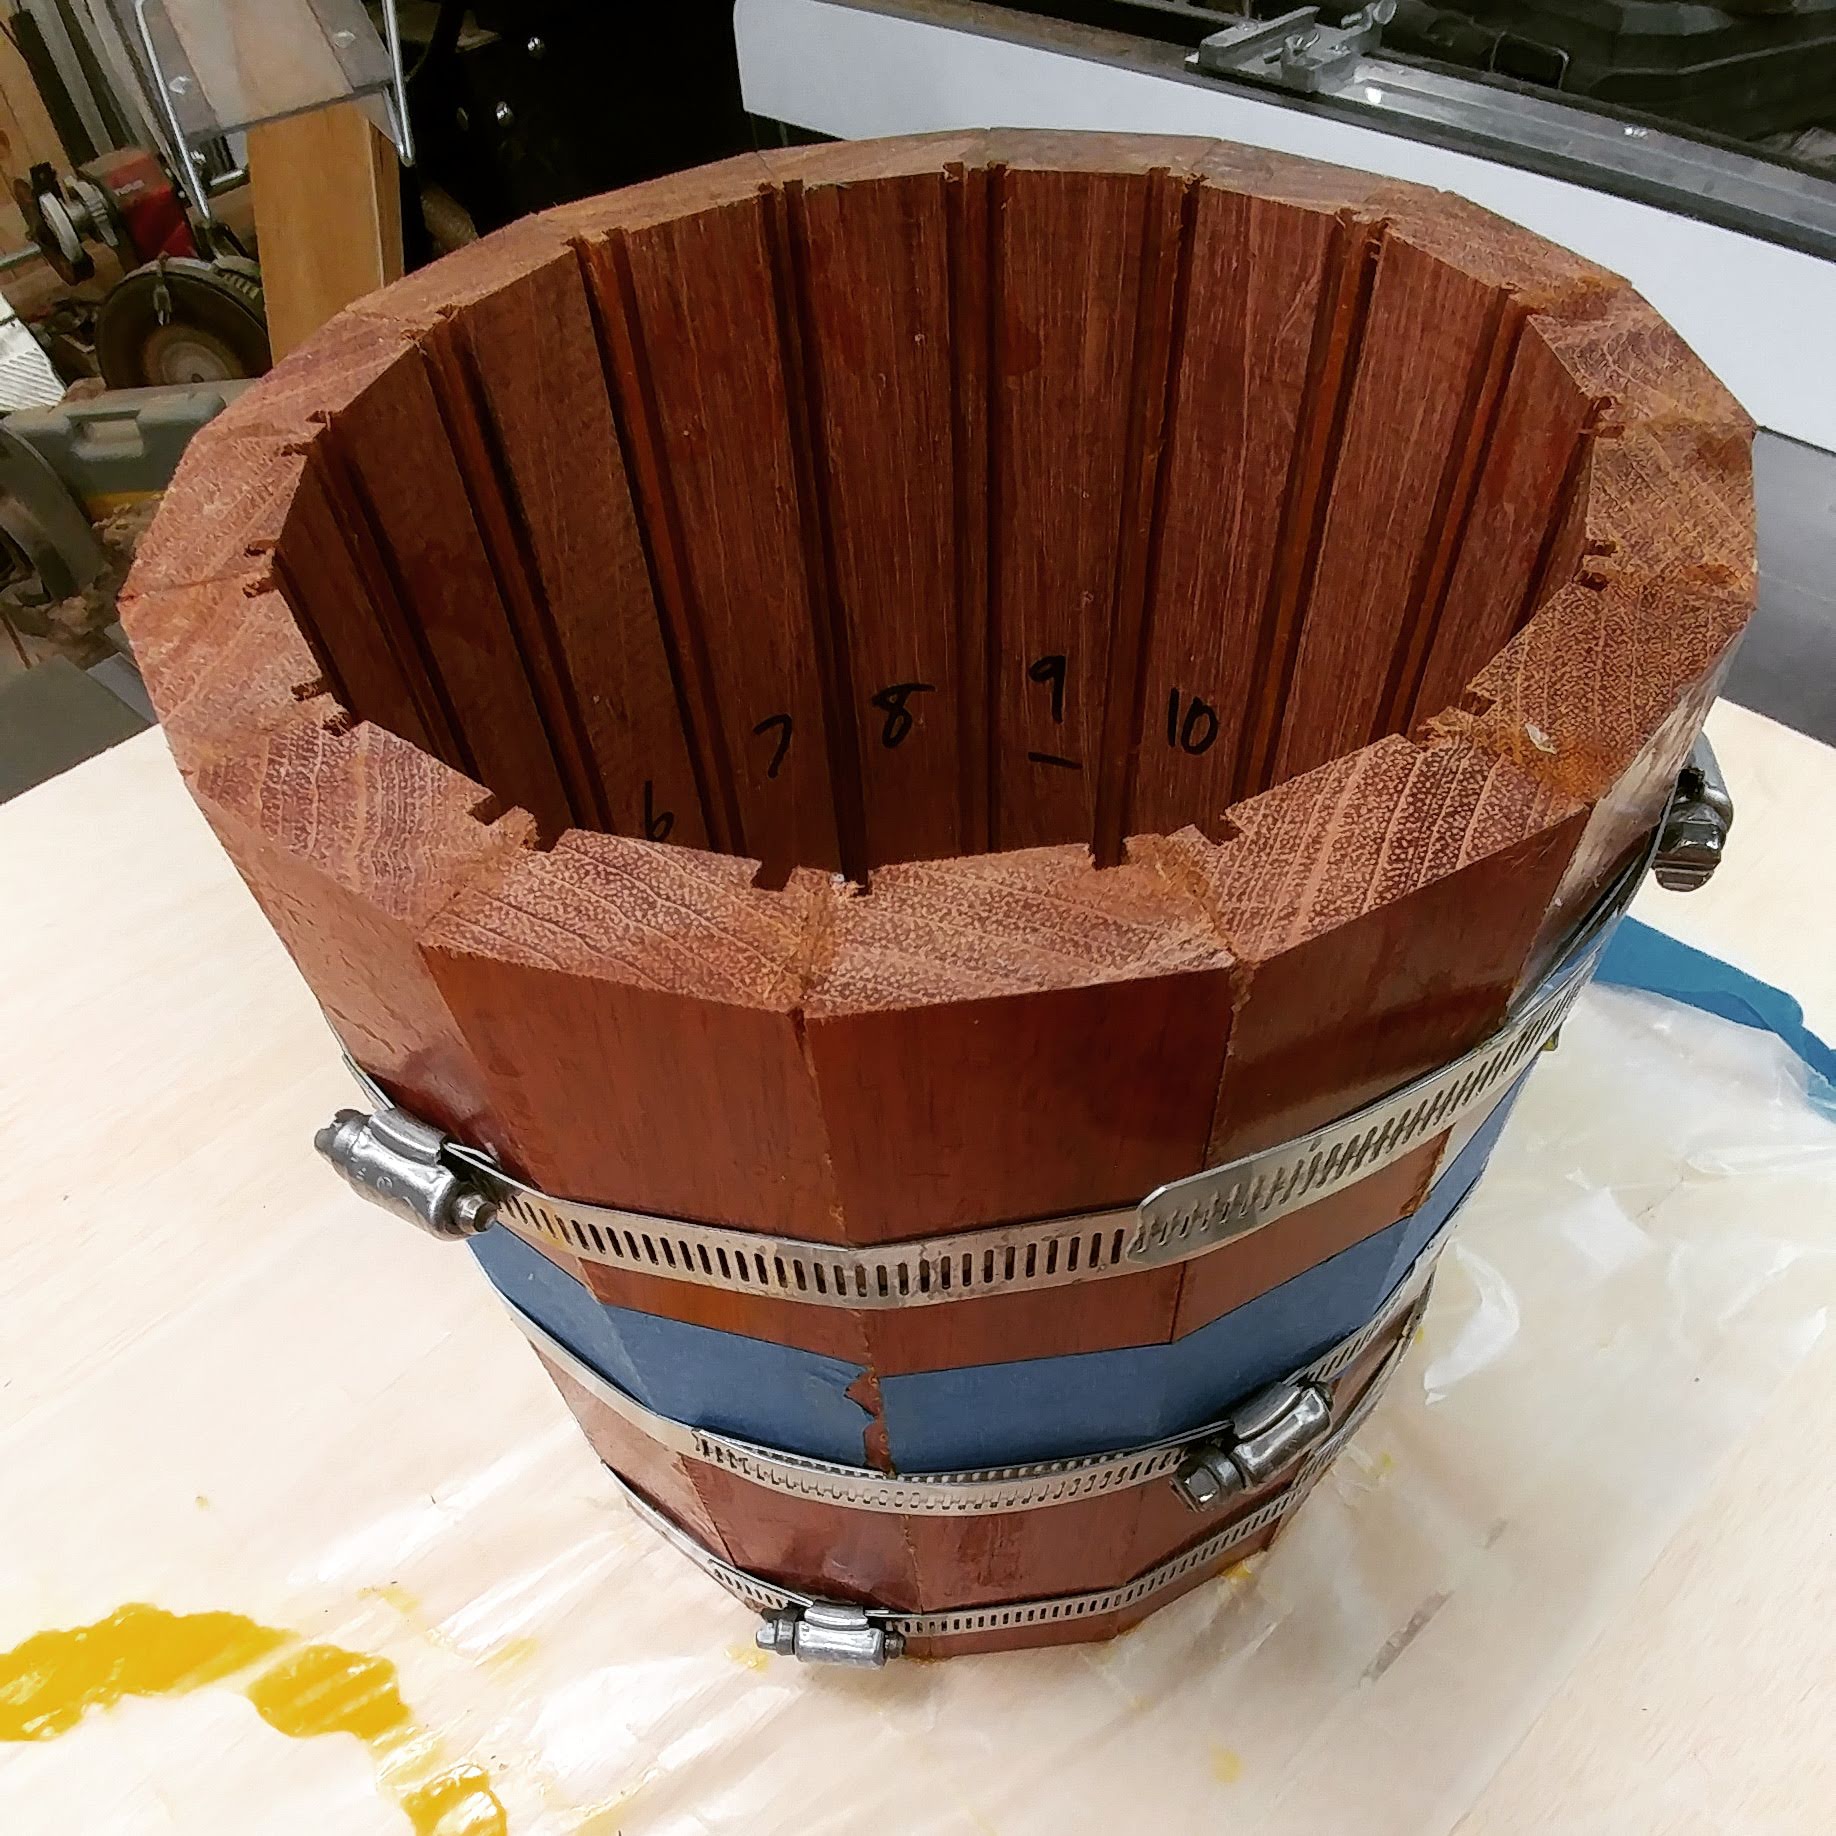
I’m working on a video that will walk through how I am making a small 8″ snare drum using stave construction. I filmed Day 1, which ended up covering everything up to the glue-up. As the glue was curing, I started editing the video. That’s where I discovered a pretty big problem.
Lets see if I can explain this…
My snare drum is going to consist of 16 staves. A circle, as you are aware, has 360 degrees. which divided by 16 is 22.5. This amount gets divided by two, since the staves will each have two sides, so each edge needs to have an 11.25 degree bevel.
Still with me?
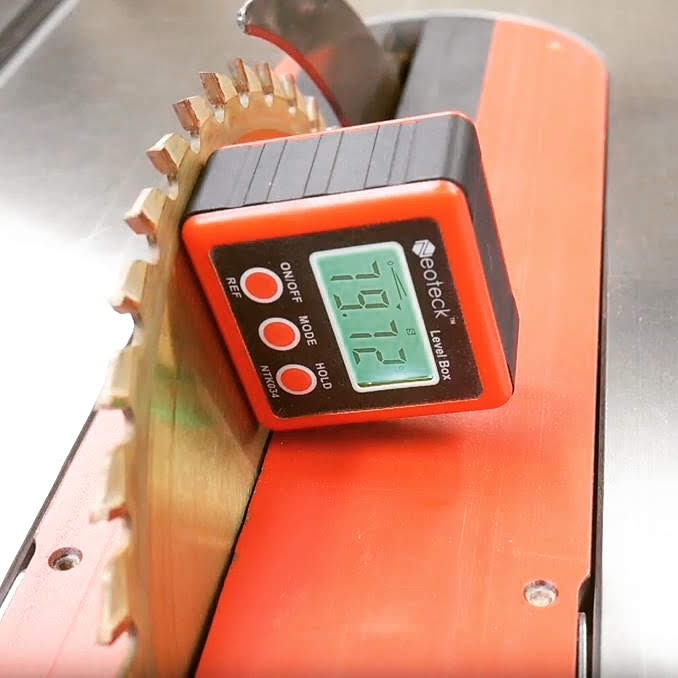
Now, I use a digital angle gauge. I first square it to the table, then attach it magnetically to the blade. When I do that, it changes from 0-degrees to 90-degrees. This means that when I angle the blade, I need to set it to 90-degrees minus 11.25 degrees. This comes to 78.75 degrees. I knew this, but for some stupid reason (probably because I was distracted with trying to get this on video) I accidentally set it to 79.75 degrees. This makes each edge of each stave one-degree off, which multiplied by 32 edges comes to a total of a 32 degree gap for the drum shell.
Of course, being an idiot I just assumed that the gluewas making things too tight so I clamped it down and didn’t think much of how off my measurements were. I didn’t notice the actual problem and its cause until I was editing the video. By this point, the glue had pretty much cured so there wasn’t anything I could do about it.
It’s time to start from scratch, being a little more careful this time.
As a present for you, since you’ve been so patient with me sharing this story, I’ve decided to upload the edit of the video I shot. Keep in mind that it’s a very early update. I was leaving room for a voice-over in parts so some of the shots are too long since I was going to edit in the voice-over then cut as the video to work with the audio.
Turning
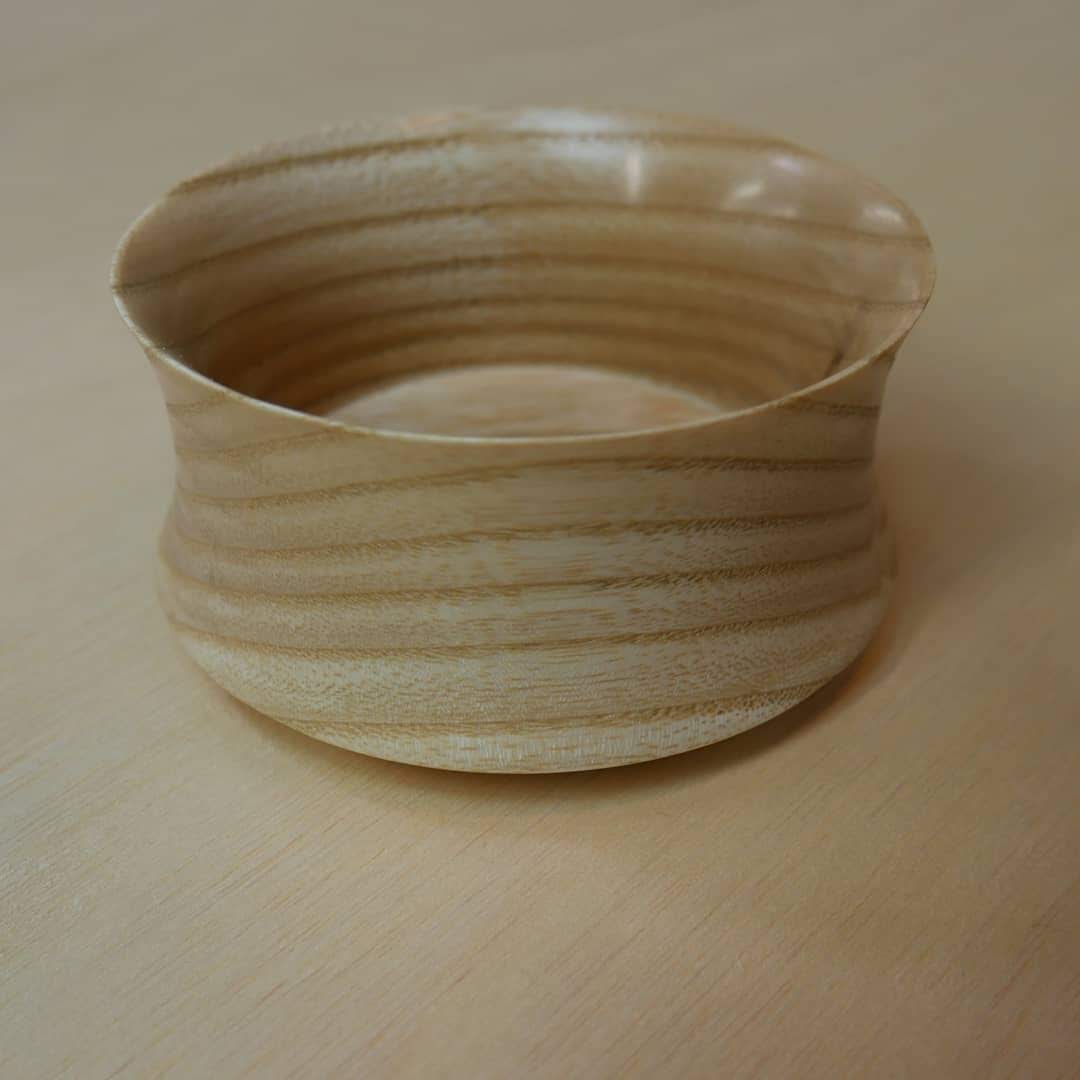
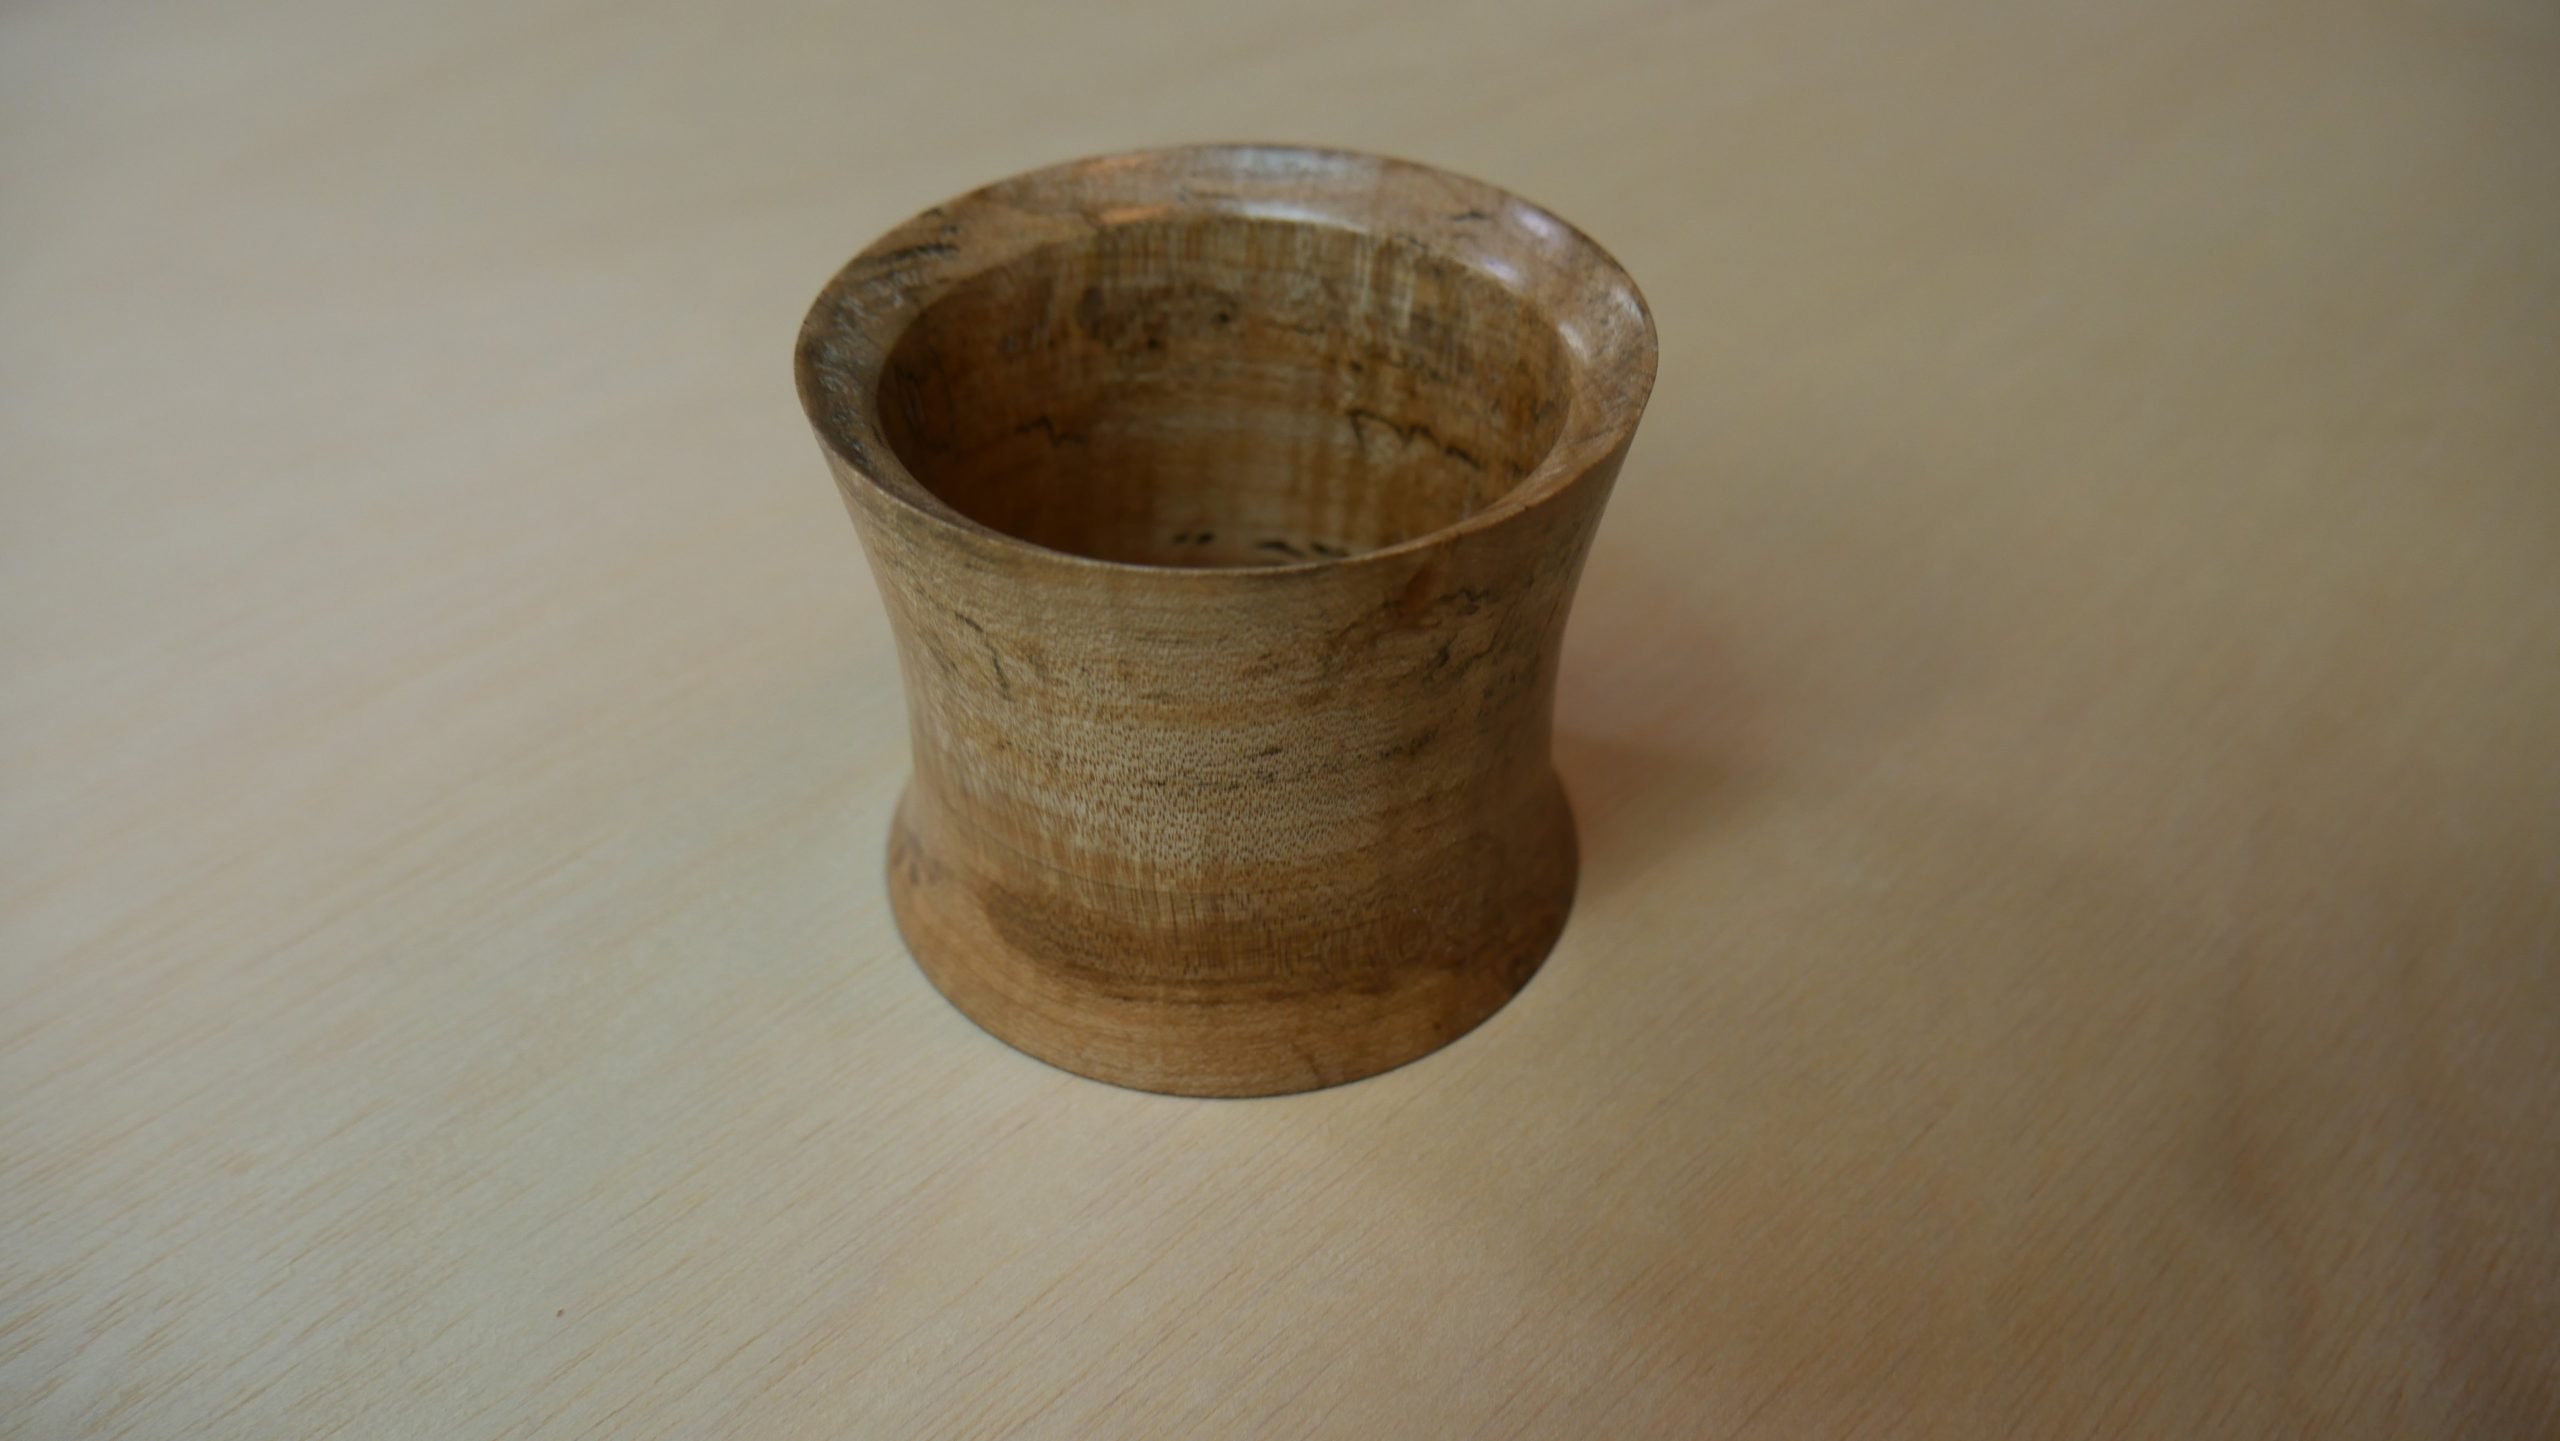
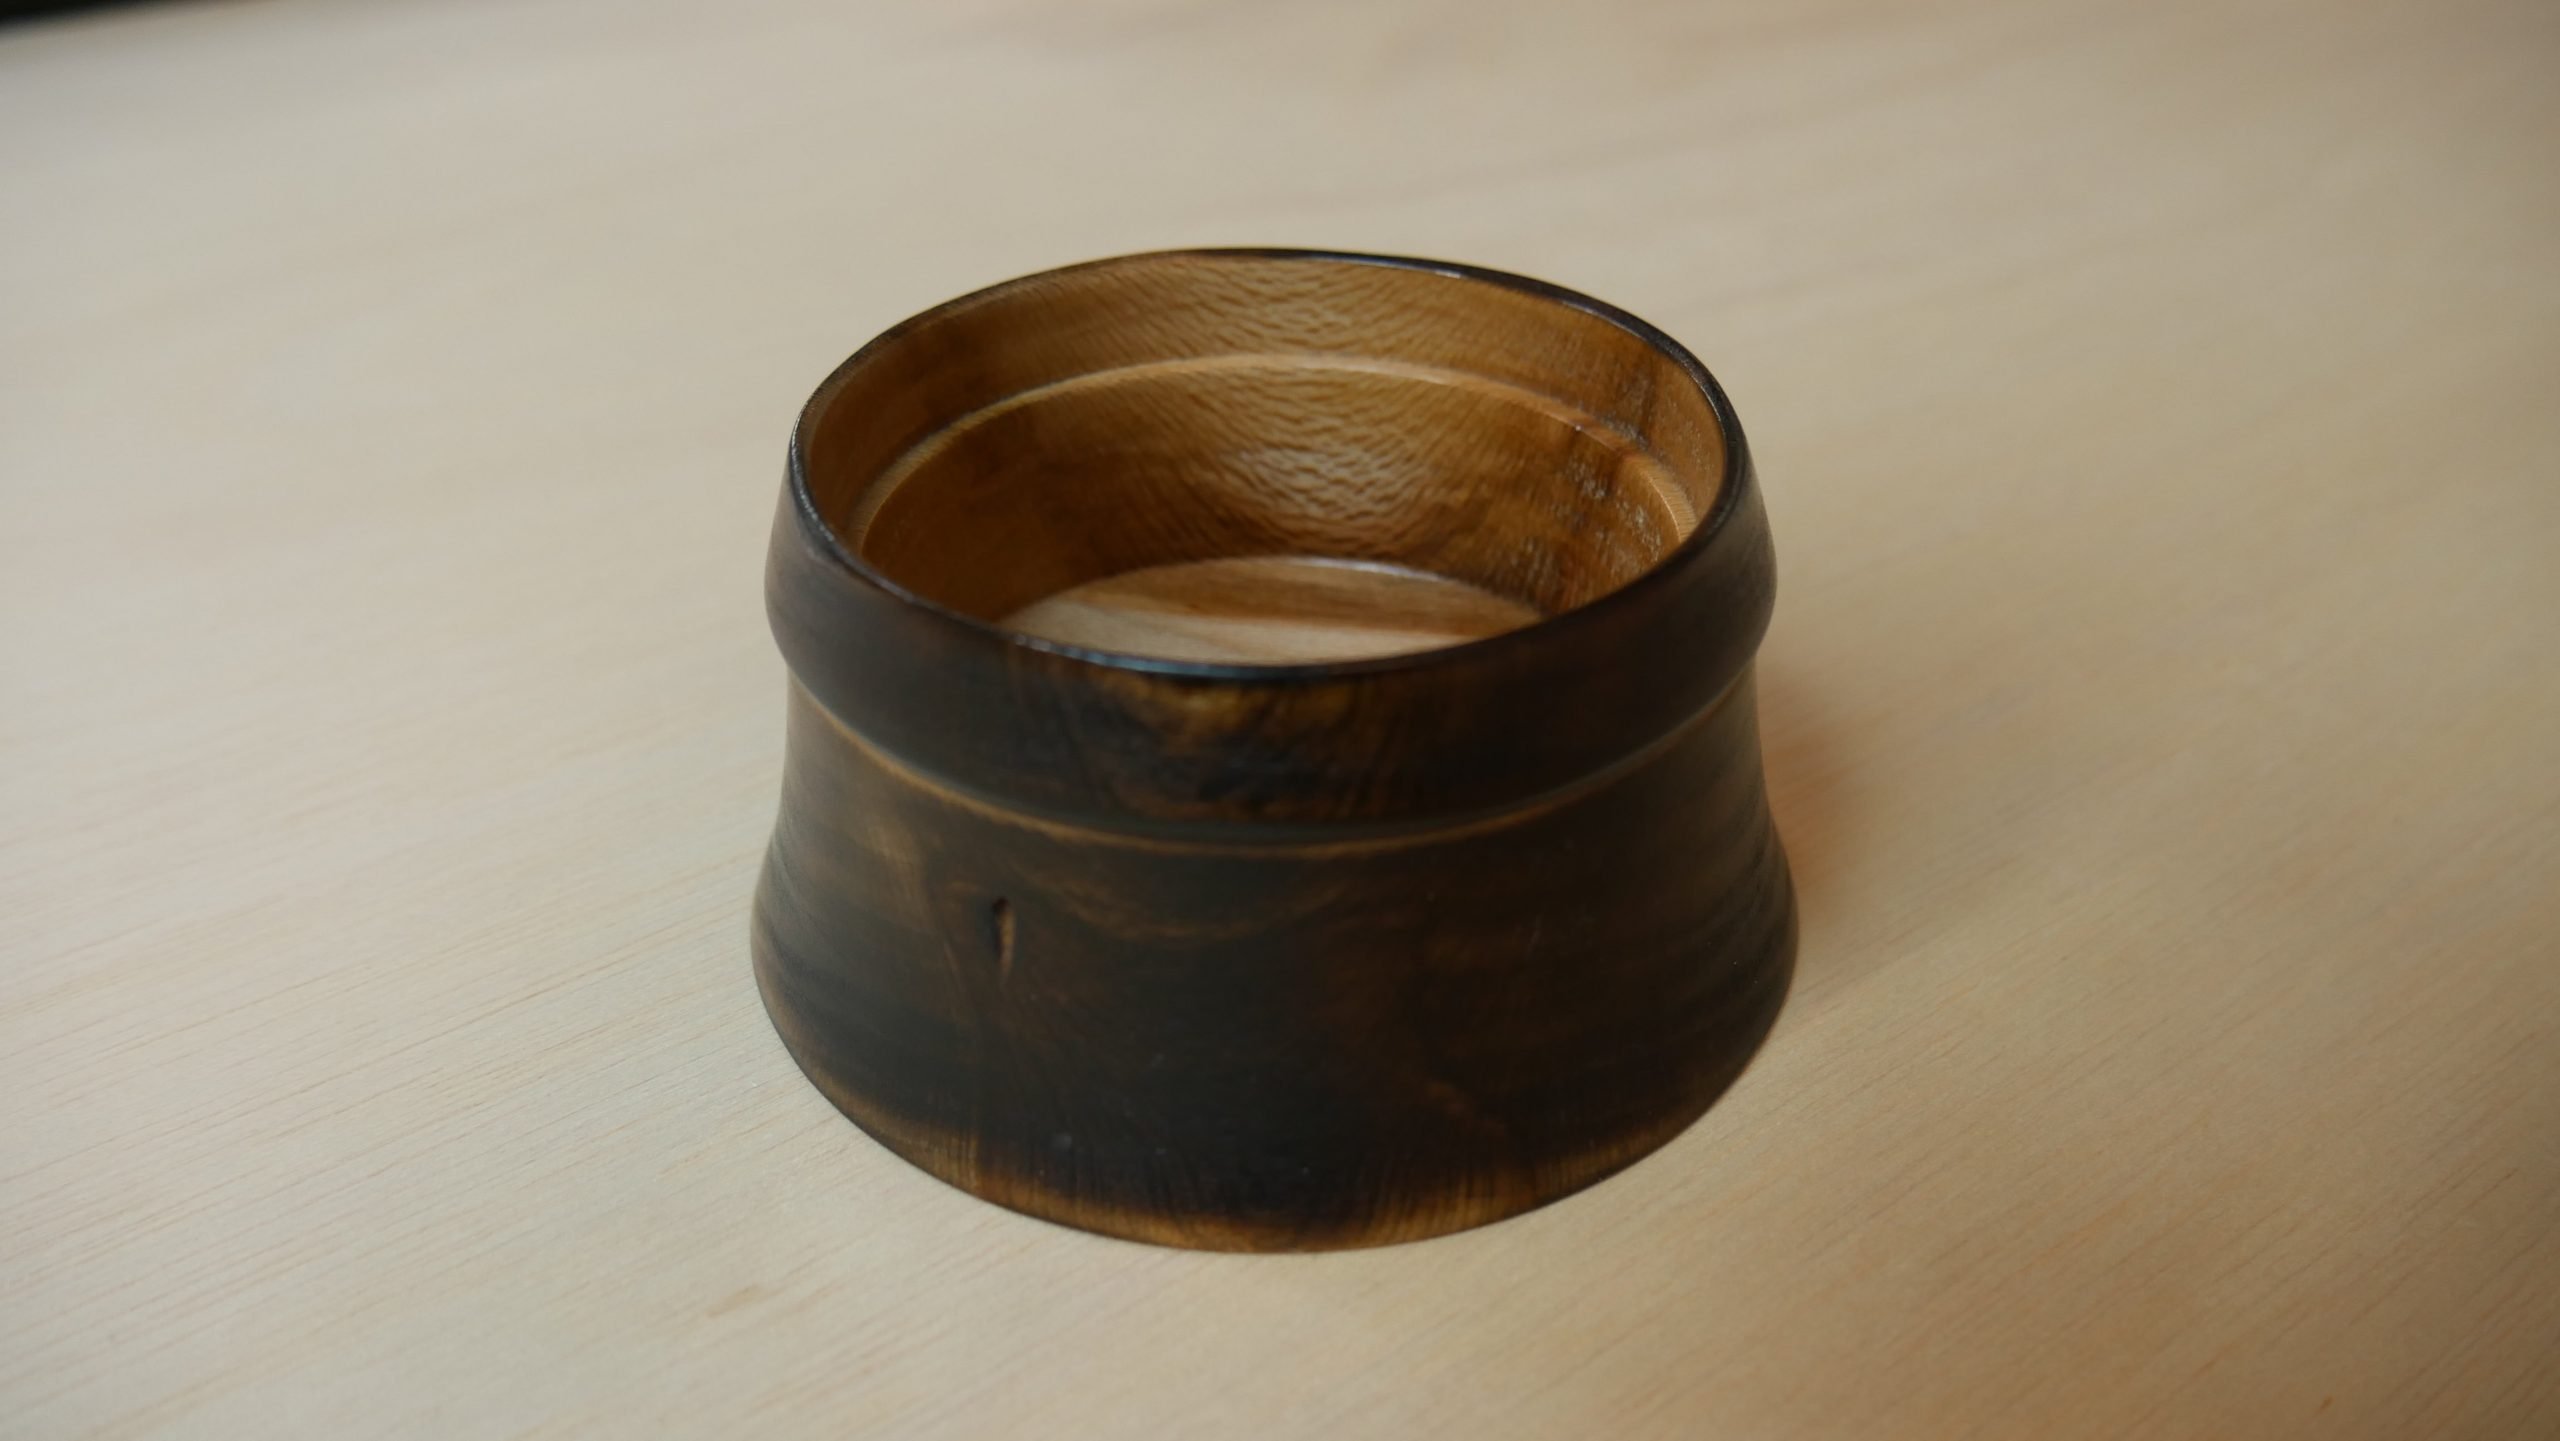
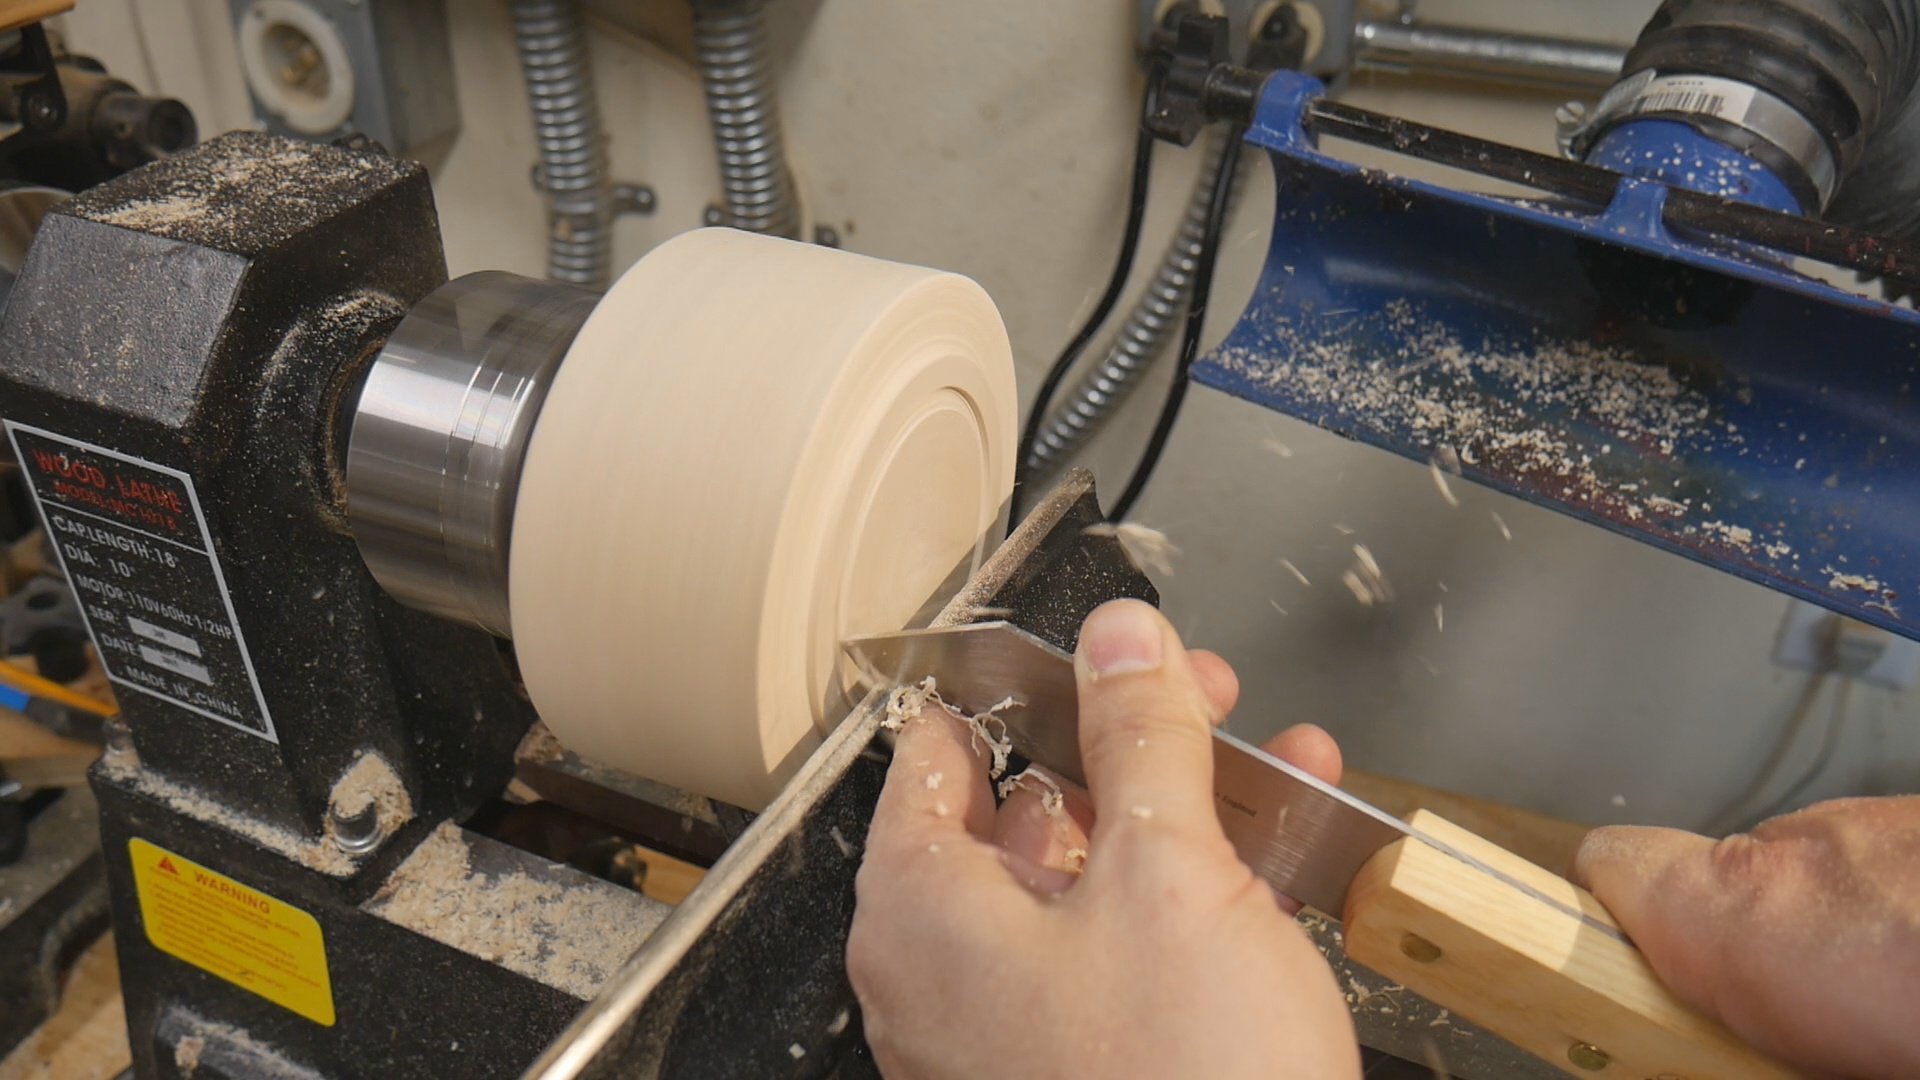
I’ve been doing a good amount of woodturning lately and I’ve been getting into bowl-making, which although I’ve been turning for years, I never really got into. Below are some examples of my turning experiments.
One downside to bowl-turning is that I really don’t have anything to do with these. I don’t have a desire to place decorative wooden bowls around my house and most of these don’t have a food-safe finish so they’re not really functional. This is why I wasn’t really interested in bowl-turning in the first place. I like that I’m learning some new techniques but I suspect that I won’t be making a whole lot more bowls.
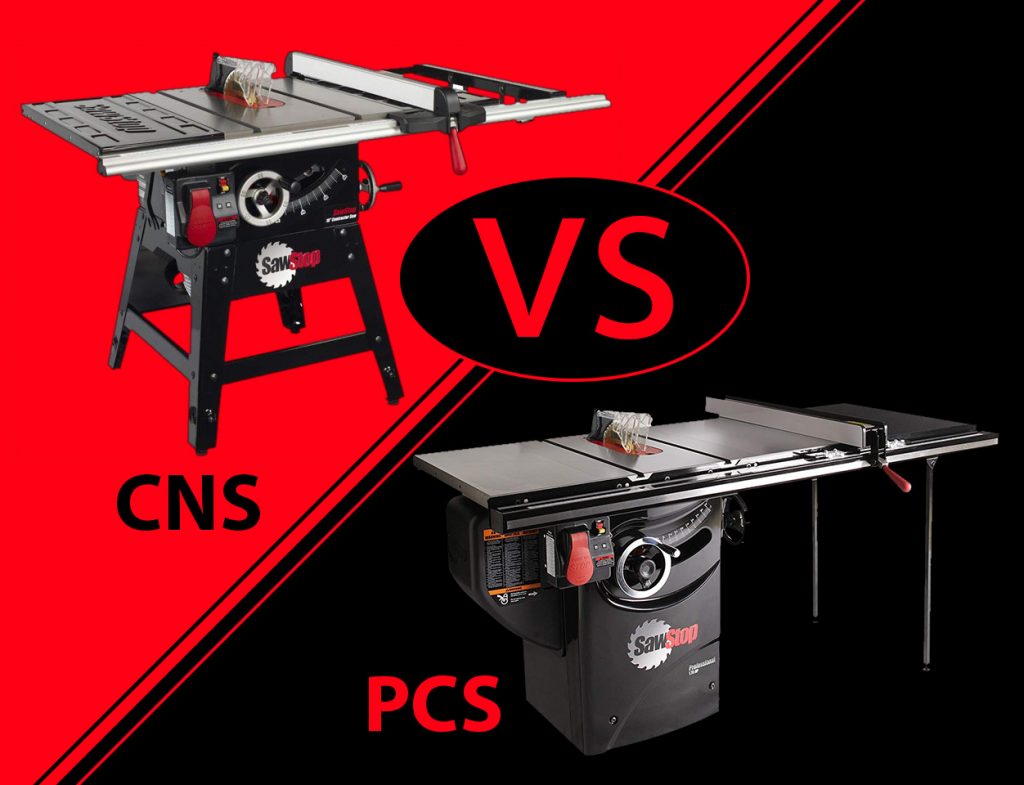
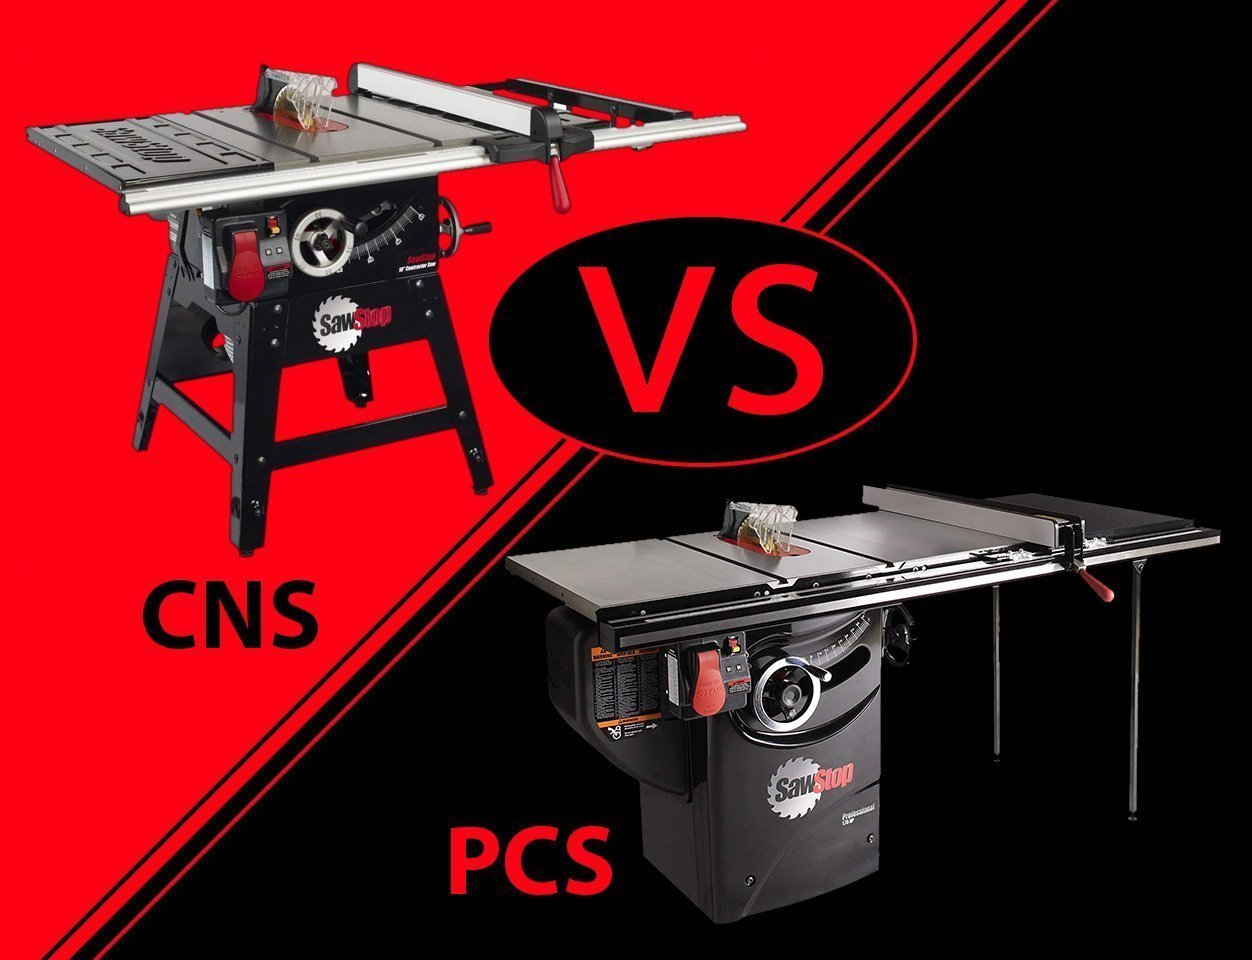
I have finally completed the first article in my Choosing a SawStop series of articles. This one covers the differences between the SawStop Contractor Saw and the Professional Saw.
My next article will cover the differences between the Professional Saw and the Industrial Saw.
After that I will cover the differences between the JobSite Saw and the Contractor Saw.
YouTube Video Progress
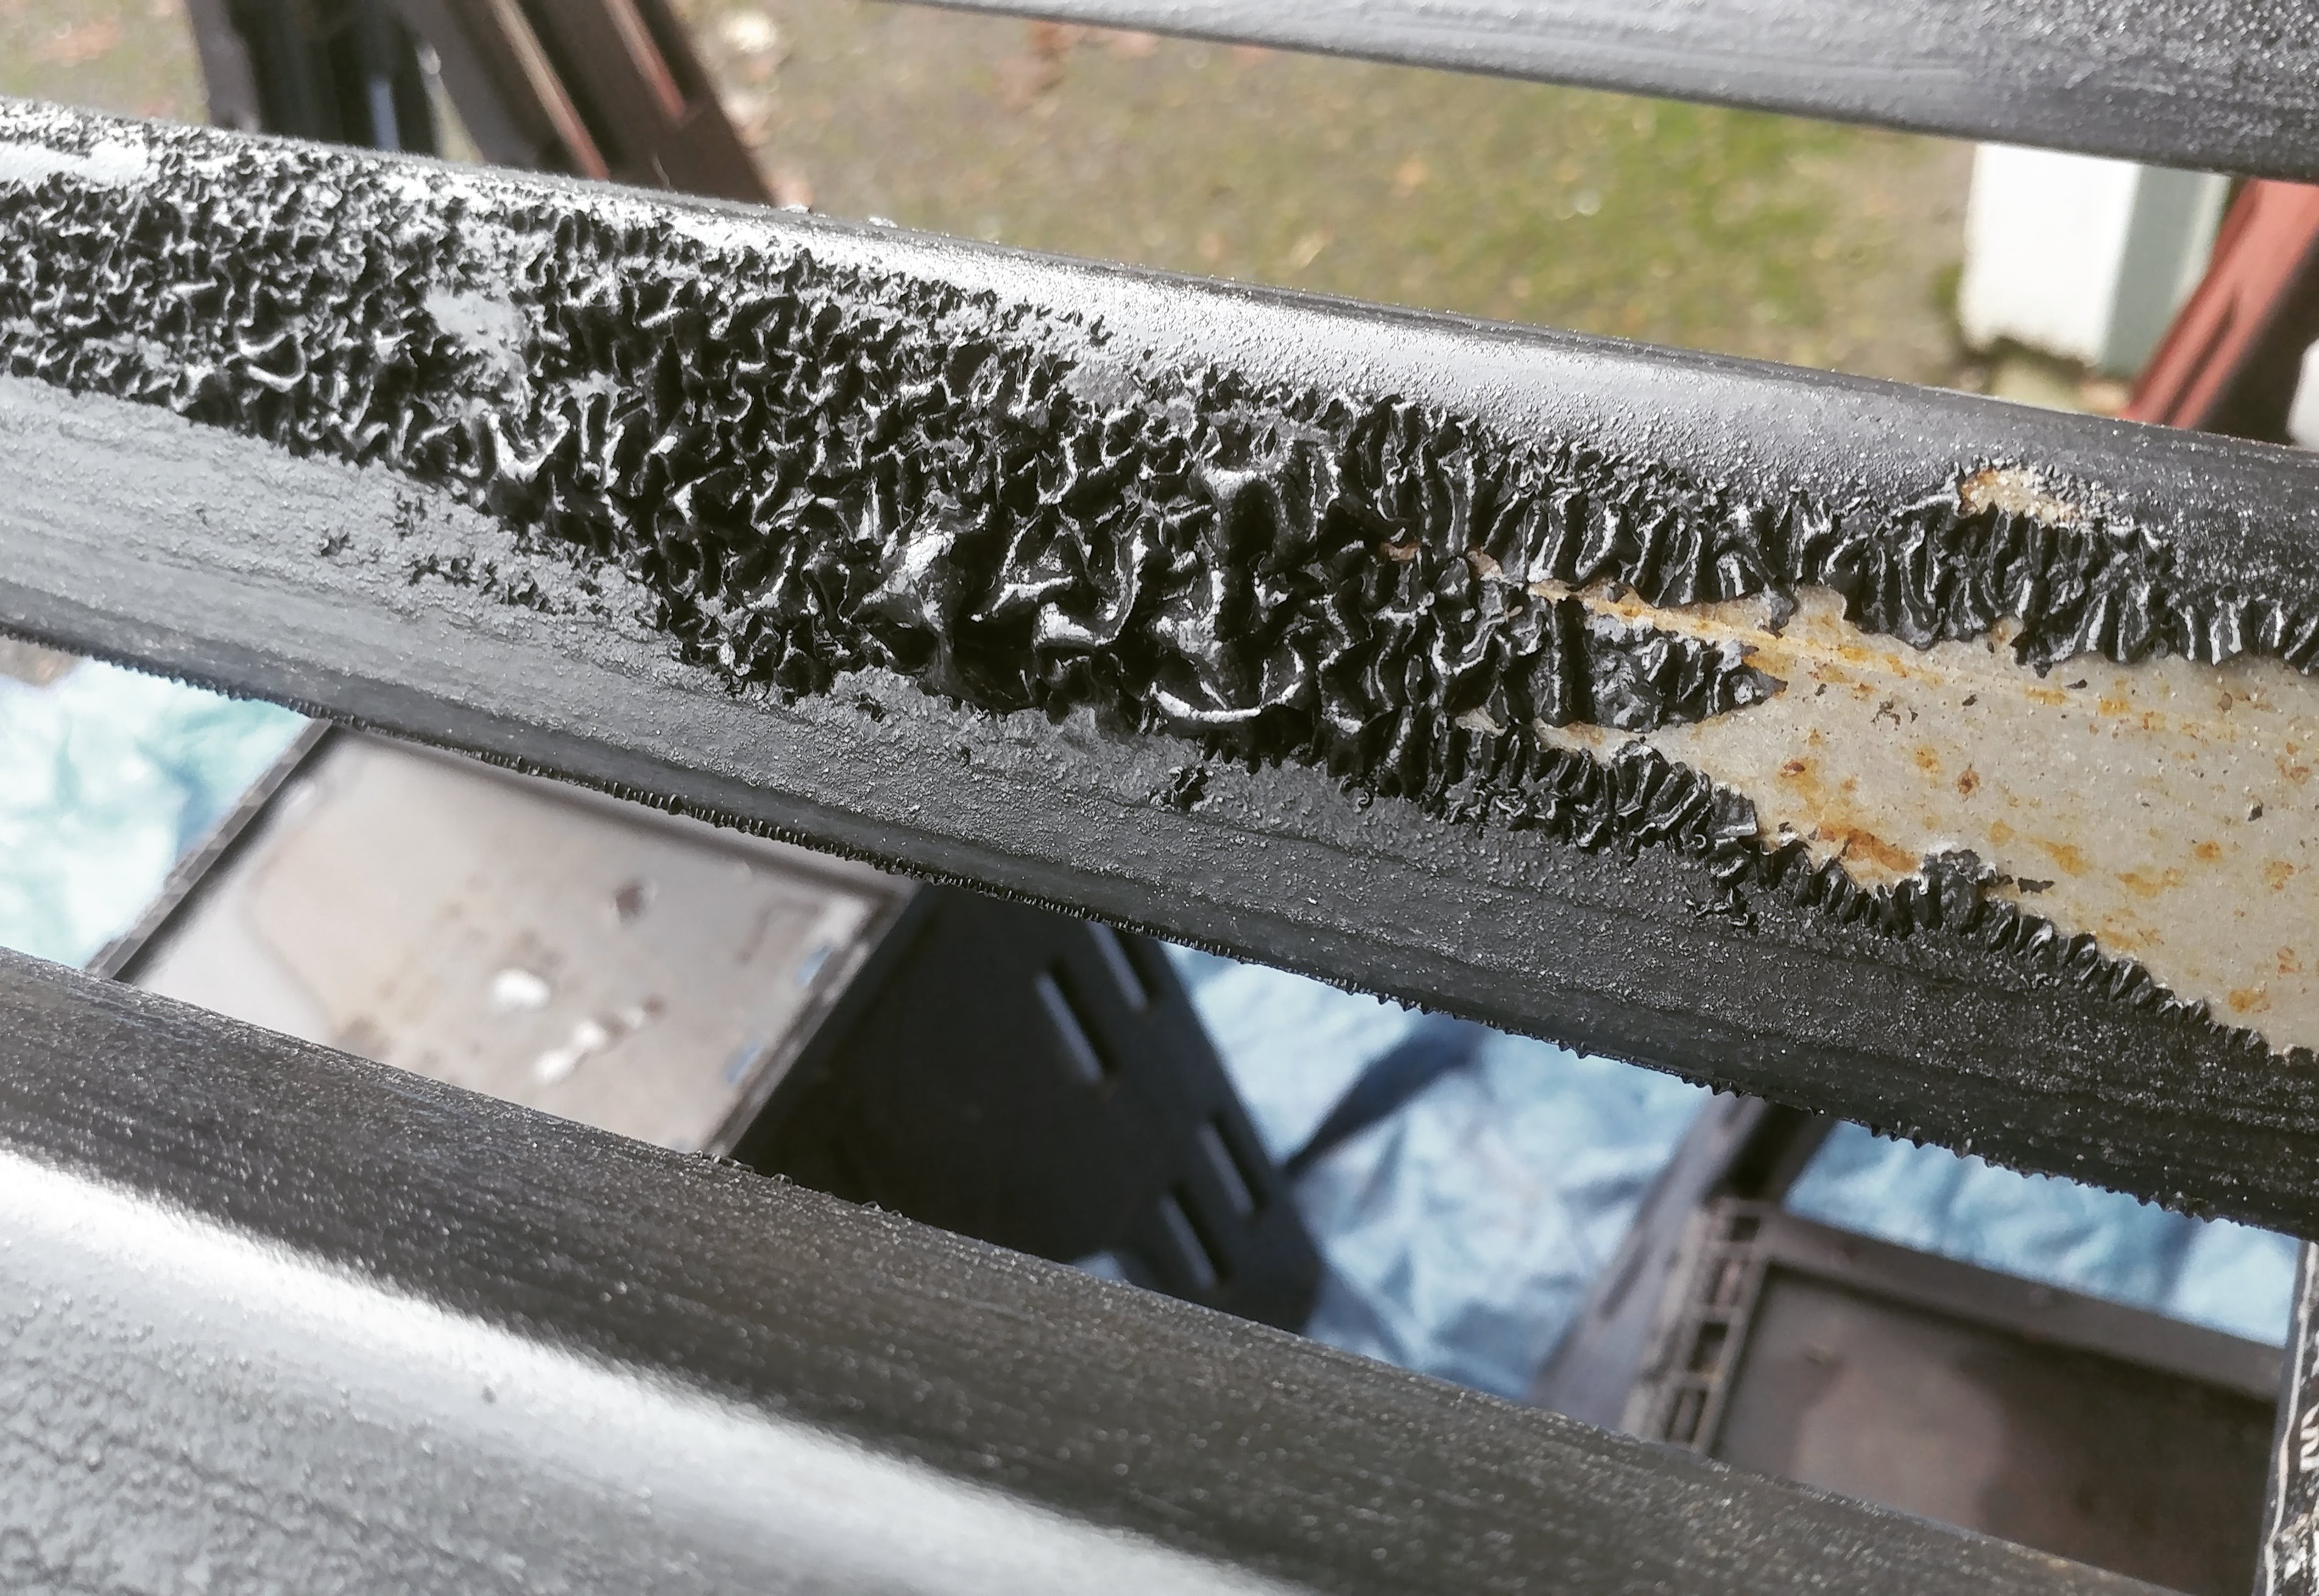
I’ve been working on another YouTube video where I show how I’m building a cart out of angle-iron for holding a bunch of cracked cymbals.
Since the angle-iron I’m using is powder-coated, I want to remove all that so I have some good clean metal to work with.
The photo to the right shows the effects of Rust-Oleum Aircraft Remover after sitting on the powder-coating for about 15 minutes. As you can see, the powder-coating is basically dissolving, allowing it to be scraped off easily.
Choosing a table saw for a home shop can be frustrating. Especially for the more advanced home shop. While I can’t tell you which saw will be best for you, I can help you decide for yourself.
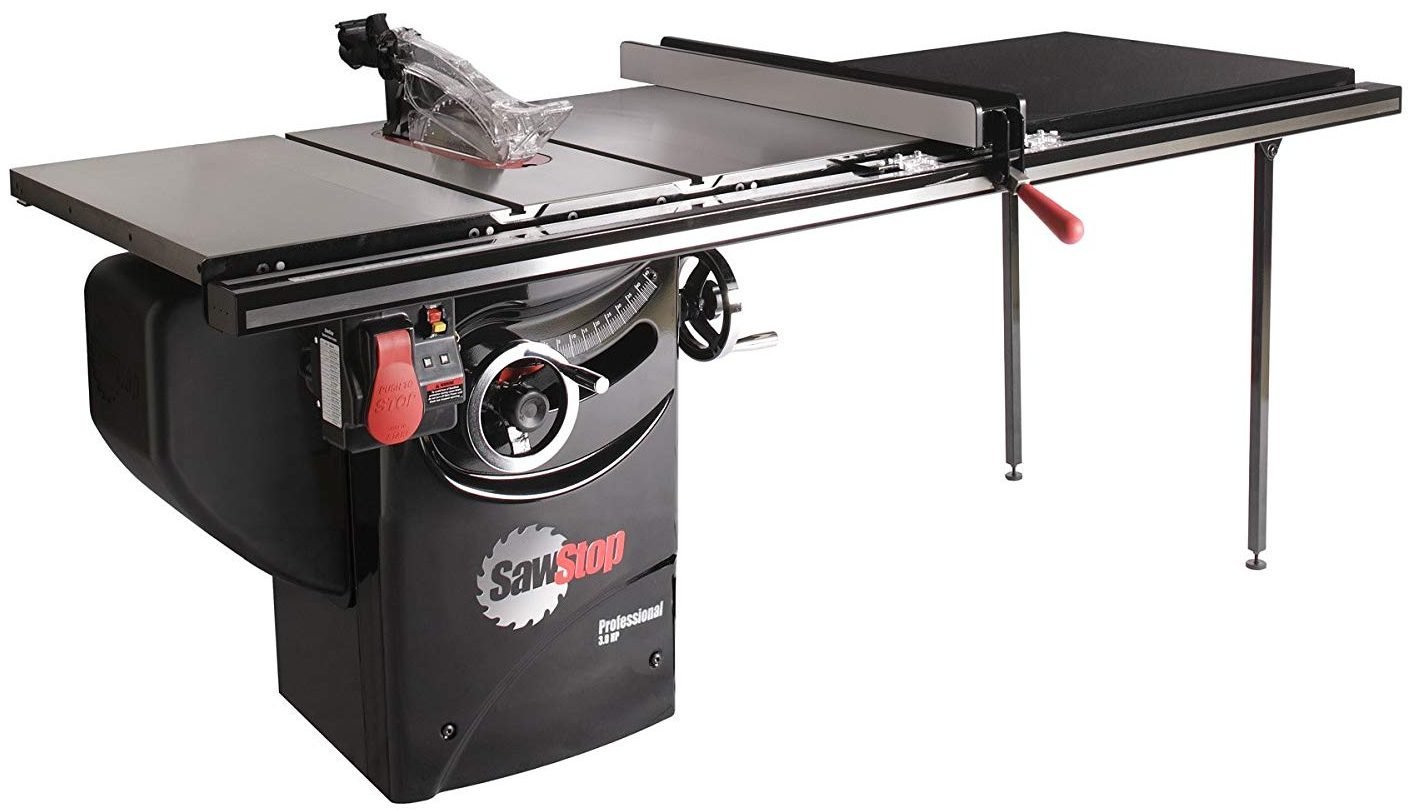
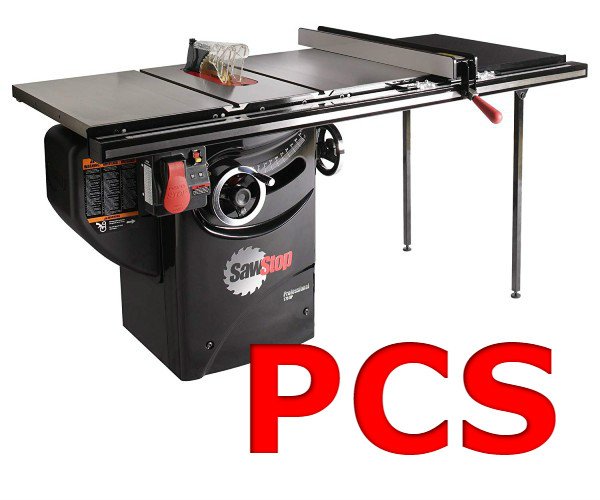
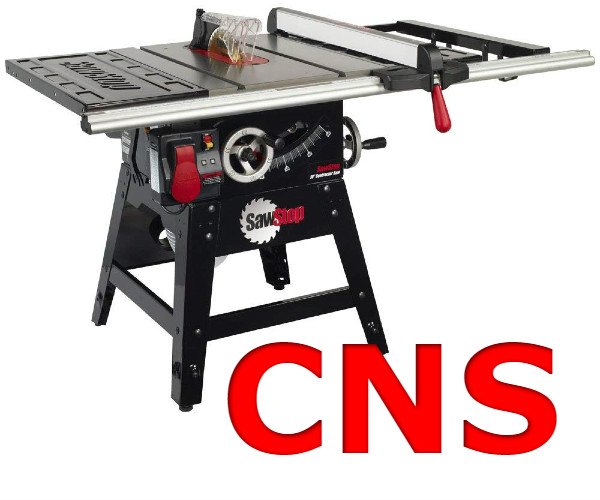
I want to discuss the differences between the SawStop Contractor Saw (CNS175) and the SawStop Professional Saw (PCS175 and PCS31230). I’m going to take the approach of looking at what may be important to you and address them in turn. If I have failed to cover something that you consider important please let me know in the comments below and I will update this article.
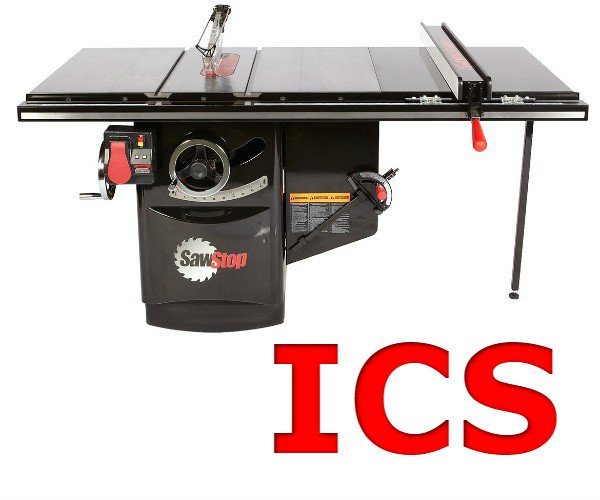
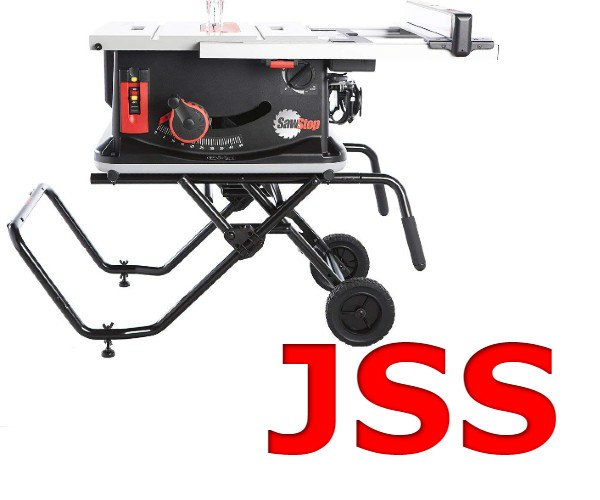
Keep in mind that this particular article is only discussing the differences between the CNS and the PCS saws. I will write separate articles discussing the JobSite Saw (JSS) and the Industrial Saw (ICS).
With that said, let’s get started with the details.
Portability
All SawStop saws can be made portable to a certain degree. The ultimate in portability is the JobSite Saw, but in the early days before SawStop made the JobSite Saw, the Contractor Saw was the go-to option for portability.
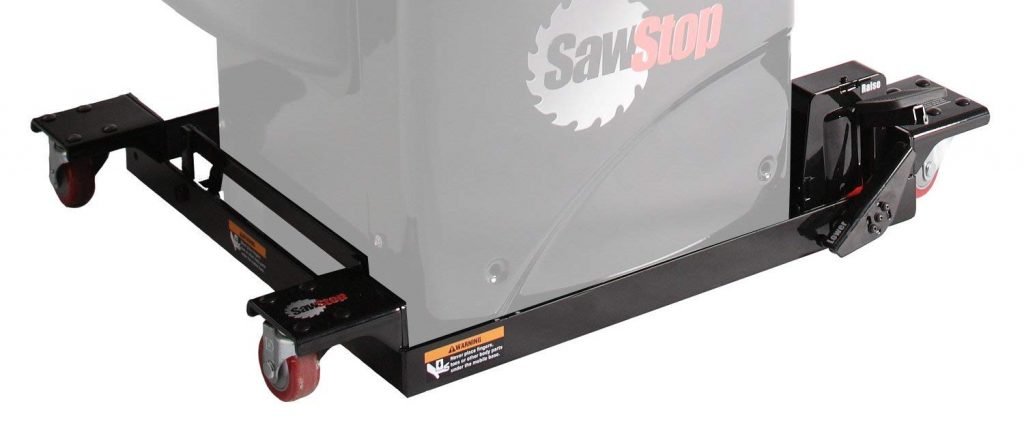
The CNS Mobile Base uses two fixed and two swivel casters to move the saw around. There is a weight limit with this mobile base so adding accessories such as a cast-iron router table may not be an option.
Pros:
Easy to maneuver compared to some other mobile bases.
Four wheels are very stable compared to three-wheel mobile bases by other manufacturers.
Cons:
Assembly can be difficult for some.
Two fixed casters are typical with most mobile bases but not as easy to maneuver as a mobile base with four swivel casters.
Doesn’t lift optional outfeed table.
Weight limits can make certain accessories technically incompatible.
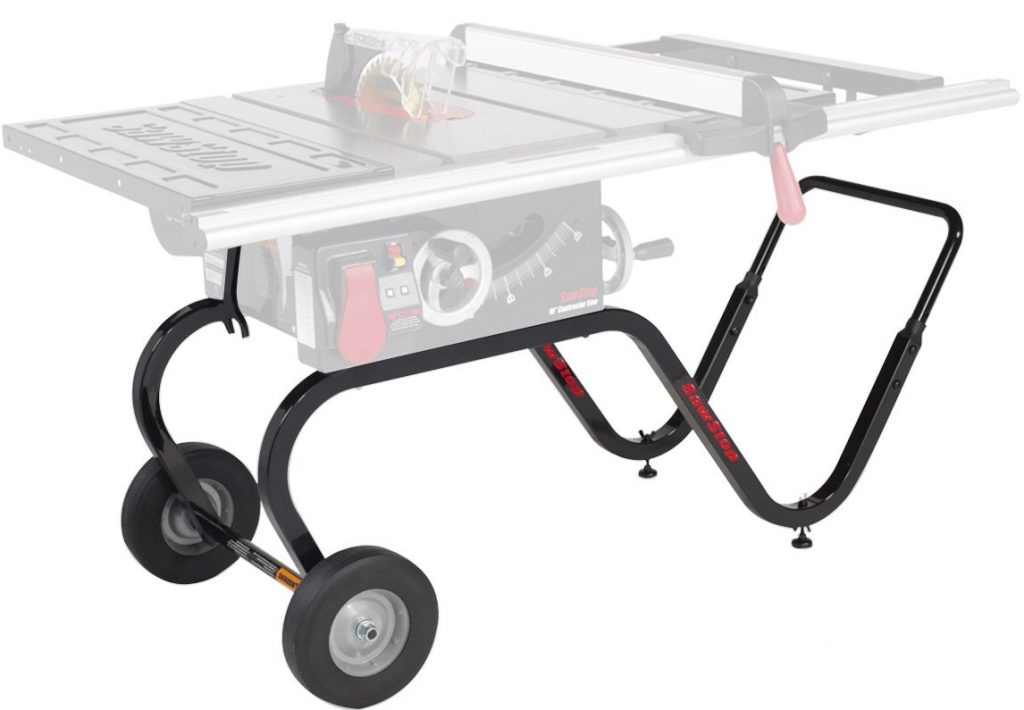
The CNS Mobile Cart uses two 10” solid rubber tires and two fixed feet. It moves much like a wheelbarrow and works on rougher terrain, such as what you would find at a job site.
Pros:
Ultimate in maneuverability.
Designed to be fit through a standard doorway when the motor is removed.
Cons:
Doesn’t lift optional outfeed table.
Only compatible with the 30” or 36” fence system, not the 52”.
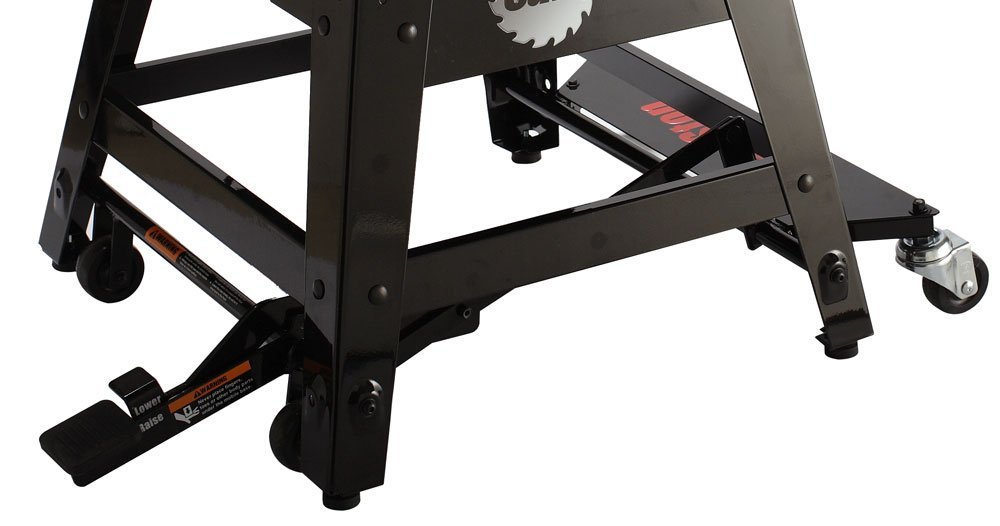
The Integrated Mobile Base is very similar to the CNS mobile base in that it uses two fixed and two swivel casters. It shares the same pros and cons as the CNS Mobile Base as well.
Pros:
Easy to maneuver compared to some other mobile bases.
Four wheels are very stable compared to three-wheel mobile bases by other manufacturers.
Cons:
Assembly can be difficult for some.
Two fixed casters are typical with most mobile bases but not as easy to maneuver as a mobile base with four swivel casters.
Doesn’t lift optional outfeed table.
Weight limits can make certain accessories technically incompatible.
Now we’re getting serious! The Industrial Mobile Base uses four swivel casters which allow you to spin your saw in place. It was designed for the Industrial Saw which weighs almost twice as much as the Professional Saw so it can handle the weight of pretty much any accessory you can throw at it. It requires you to purchase and install the PCS Conversion Kit which modifies the Industrial Mobile Base to work with the slightly smaller PCS. Note: The link above contains both the mobile base and the conversion kit.
Pros:
Extremely easy to finely position your saw anywhere in your shop.
Strong enough to lift the PCS and any accessory attached to it.
Cons:
PCS Conversion Kit requires removal of screws with blue Loc-Tite on them, which can be difficult.
Will cause you to despise all other mobile bases you ever use.
Doesn’t lift optional outfeed table.
Extension Wings
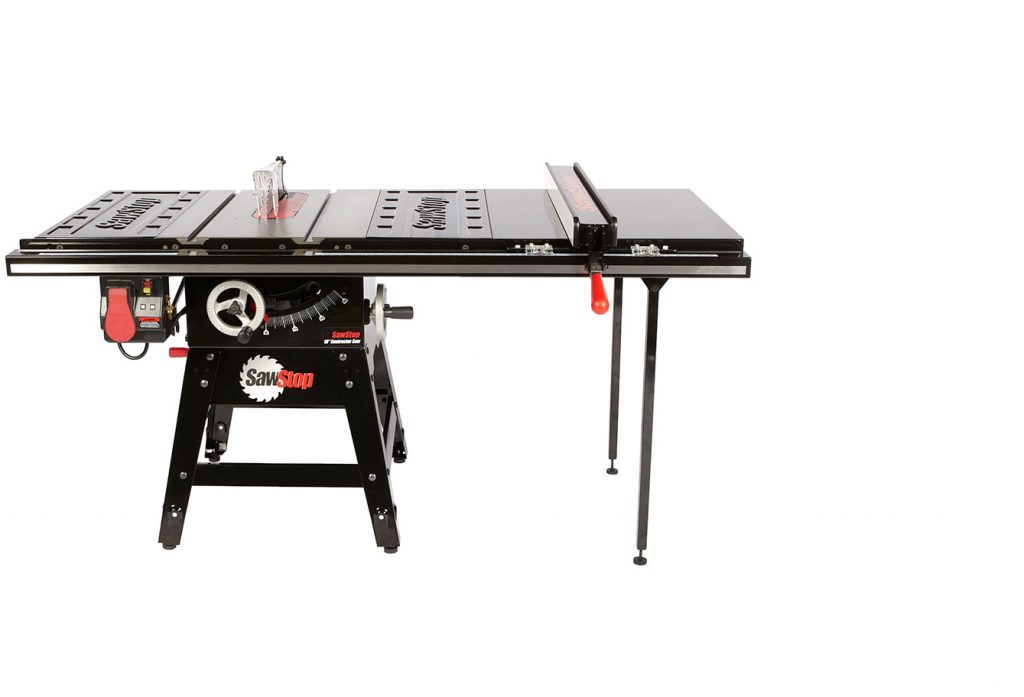
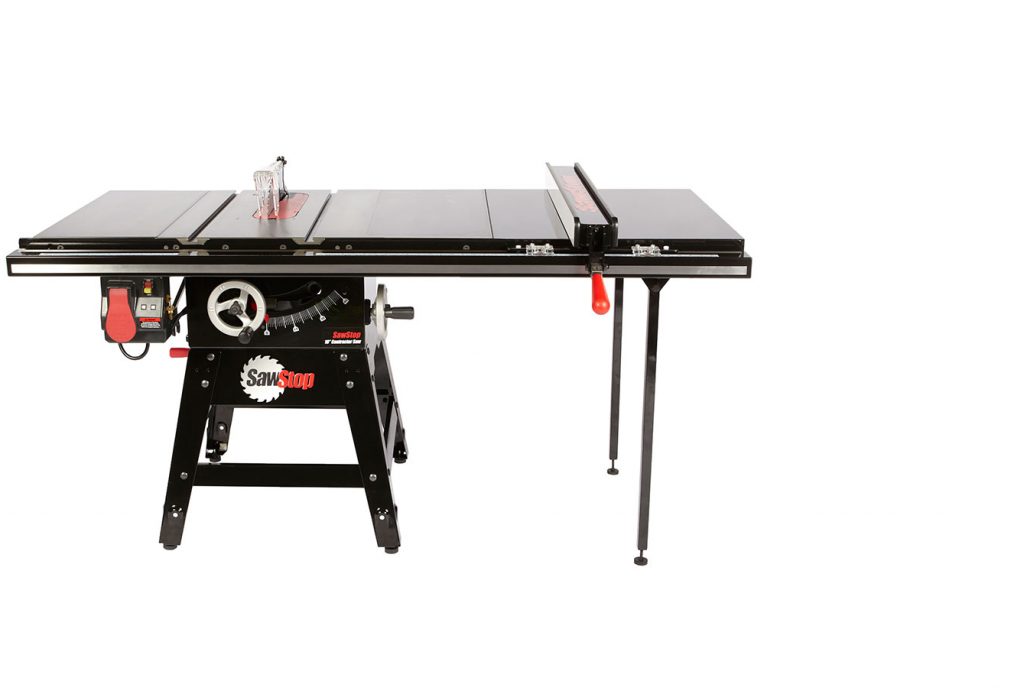
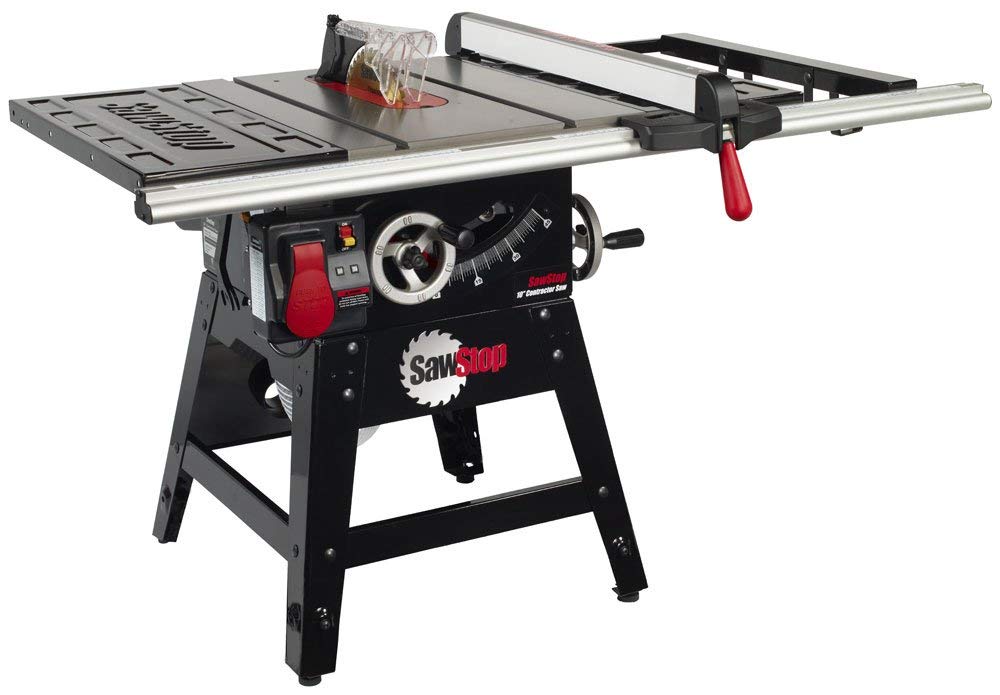
Both the CNS and the PCS have cast-iron main tabletops. The CNS comes stock with a stamped steel 12″ extension wing on each side of the main table. This is because the CNS is designed to be portable and the stamped steel wings weigh quite a bit less than the cast iron wings that come standard with the PCS.
You have the option of adding the cast-iron extension wings to the CNS which increases the weight of the saw, resulting in less vibration.
Fence Options
Both the CNS and the PCS are available in a 30”, 36”, and 52” fence configurations.
The 30” Standard Fence Assembly for the CNS is a lightweight aluminum fence system that secures at both the front and the back of the saw. Because of this, some accessories are not compatible with the 30” fence system.
Pros:
Lightweight, which may be important if using a CNS on a jobsite
The 30” Premium Fence Assembly for the PCS is similar to a Biesemeyer style fence that you find on larger cabinet saws. It secures to the front rail only. The faceplates for the PFA are non-replaceable.
Both the 36” and52”fence systems use a larger, more heavy-duty Biesemeyer style fence. It has replaceable faceplates.
Although the name has “Professional” in it, this system is also completely compatible with the CNS.
Pros:
Extremely sturdy
Allows up to 52″ of rip capacity
Face-plates are replaceable
Cons:
Larger footprint
Miter Gauge
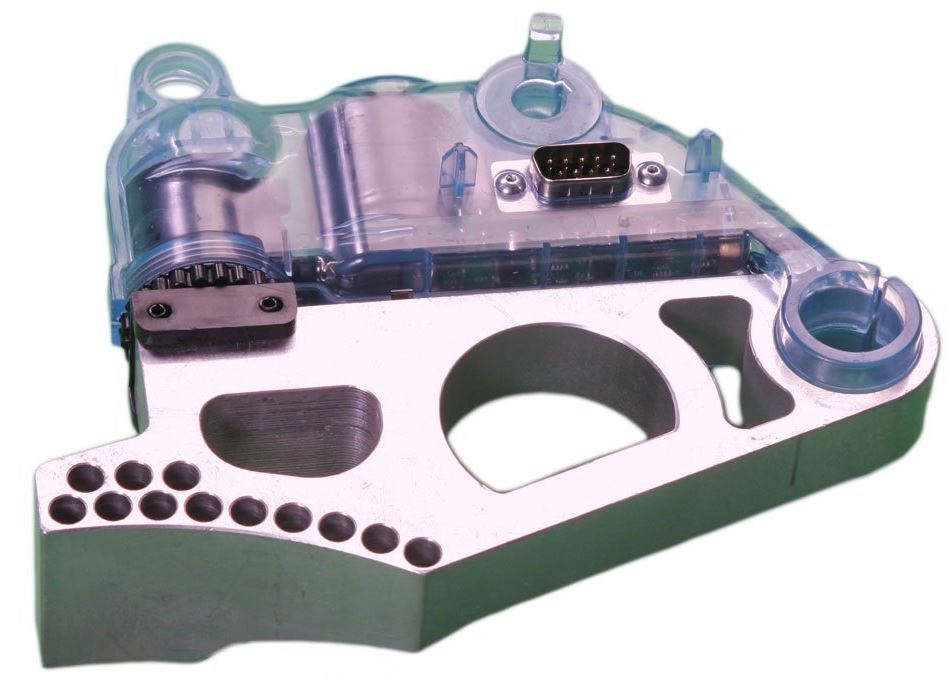
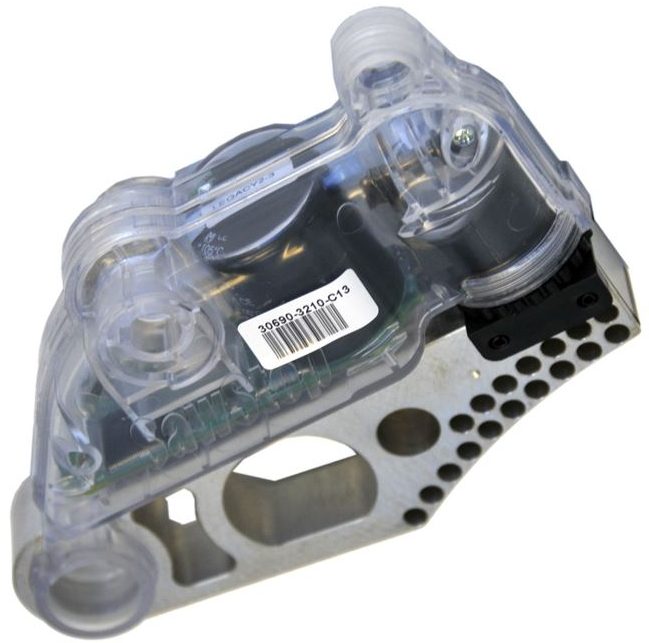
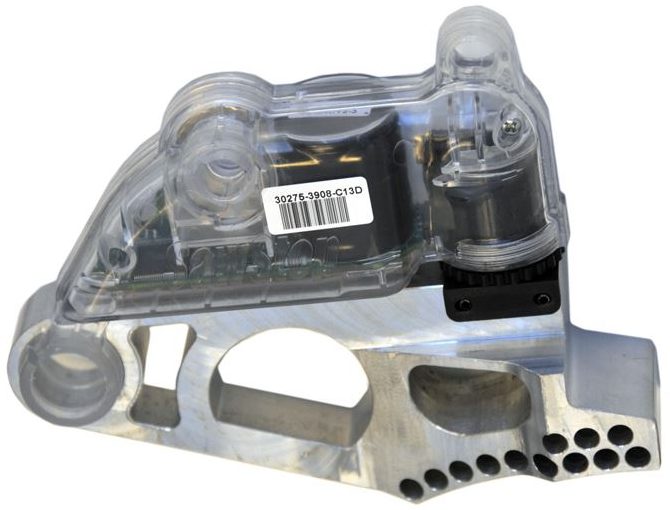
The miter gauge for the Contractor Saw is similar to the one provided with the Professional Saw but there is one minor difference. The miter gauge for the Professional Saw has spring bearings on the side of the miter bar that work to ensure the miter gauge is always held firmly in the slot without any play to it.
The miter gauge for the PCS (above) and the CNS (below). Note the addition of spring bearings on the side of the miter bar for the PCS miter gauge.
Shop Space
The amount of space that each saw takes up can be misleading. While both the CNS and the PCS saws share the same table dimensions, the CNS has a motor that hangs off the back of the saw which adds to the amount of space that it takes up.
A few things to keep in mind: the height of the Contractor Saw is adjustable since it has screw-in feet at the bottom of each leg; the industrial mobile base adds an additional ¼ ” to the height of the saw.
The Contractor Saw is only available with a 1.75 HP motor which can be wired for either 110 Volts A/C (VAC) or 220 VAC. Whether it is wired for 110 or 220 doesn’t affect the horsepower at all. More in this in a little bit…
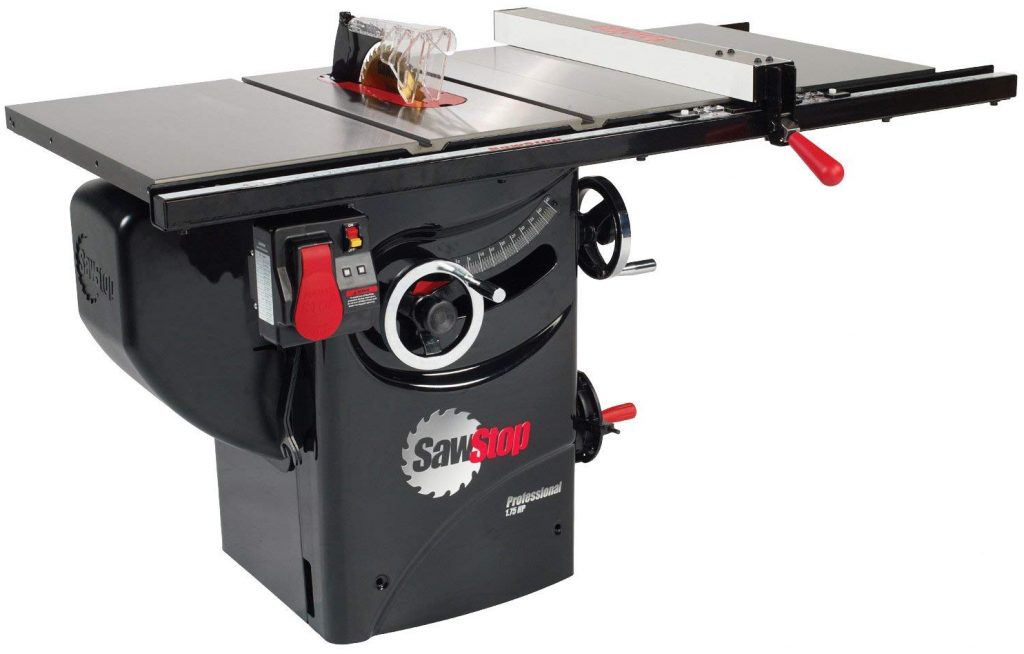
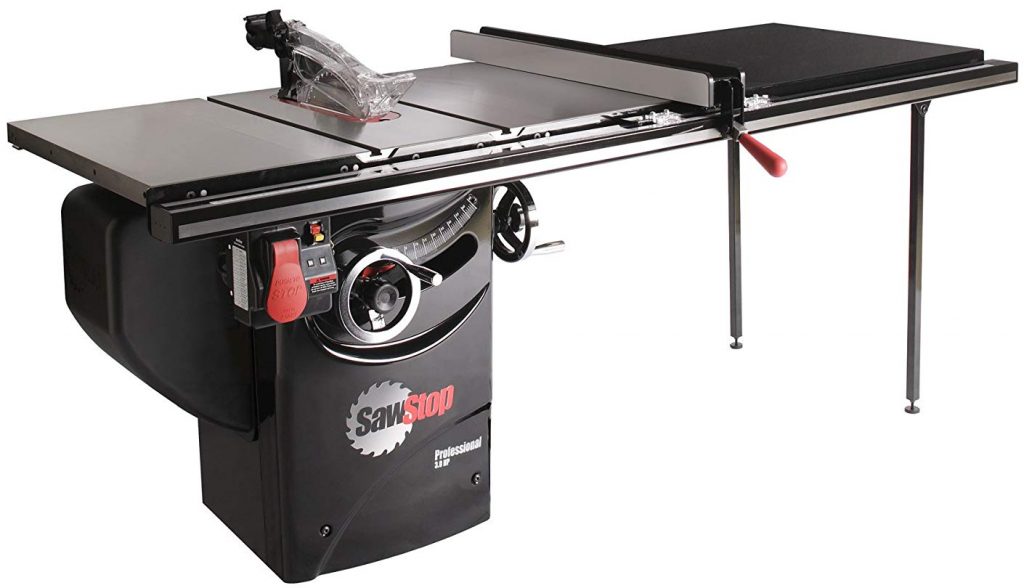
The Professional Saw is available in either 1.75 HP at 110 or 220 VAC, or 3 HP at 220 VAC only.
If you’re going with the Contractor saw then you are pretty much limiting yourself to 1.75 HP, which may not necessarily be a bad thing.
The Professional saw, however, adds the possibility of moving up to 3 HP. This can be done when you initially acquire your saw by purchasing the PCS31230 or it can be done at a later date by purchasing a PCS175 then buying a new motor and contactor box when you decide to do the upgrade. This option is more expensive than just buying the PCS31230.
Is 3 HP necessary? Not necessarily. I’ve used 1.75 HP saws for years without any problems, you just need to know how to work within those limitations. If you’re making cabinets and spend the bulk of your time cutting sheet goods, a 1.75 HP machine should be fine. If you need to cut the occasional hardwood then it helps to switch to a thin blade with fewer teeth, or simply lower your feed rate but that can cause burning on your material.
One trick that I have done in the past is to cut my material just a hair wider than I need it at a slower feed rate. This will cause some burning but won’t over-tax the motor. Then, I move my fence over and cut the material to the final width at a normal feed rate so I’m not removing much material but going fast enough to help minimize any burning.
That being said, it is really hard to bog down a 3 HP motor.
Both the CNS and the PCS175 come wired to 110 VAC but can be upgraded by purchasing an optional 220 VAC contactor box and changing the wiring in the motor junction box.
The contactor boxes for changing to 220 VAC are available here:
One question I get asked a lot is what are the advantages of going from 110 VAC to 220 VAC. The bottom-line is no, you won’t see an increase in power. There are some other advantages, however.
A 1.75 HP motor running on 110 VAC will have an amperage load draw of 13 Amps. This means that under load, the saw will require an average of 13 amps to keep the motor spinning at speed. If you bog down the motor by cutting dense wood, the motor draws more amps to keep spinning at speed. If you are pulling 13 Amps on a 15 Amp circuit then you don’t have much headroom before the breaker is tripped.
A 1.75 HP motor running on 220 VAC will have an amperage load draw of 10 Amps. This causes the motor to run cooler, which is better for the motor in the long-run, but also gives you more headroom before the breaker is tripped. This comes in handy when resawing dense hardwood or anything else that really pushes the motor.
Both 220 contactor boxes come equipped with a Nema 6-15 plug. This means that it is a style 6 plug rated for 15 amps. You should be able to run the saw on a 15 Amp circuit without any problems. Most people run these saws on a 20 Amp breaker.
Dust Collection
A standard airflow requirement for most table saws is 350 CFM in order to provide decent dust collection.
By design, any cabinet saw should have better dust-collection than a contractor saw. Cabinet saws are enclosed so the sawdust that doesn’t make it down the dust chute will still be contained within the body of the saw. Contractor saws, on the other hand, are much more open so loose sawdust will fall to the floor under and around the saw.
CNS-DCP – Dust Collection Panel
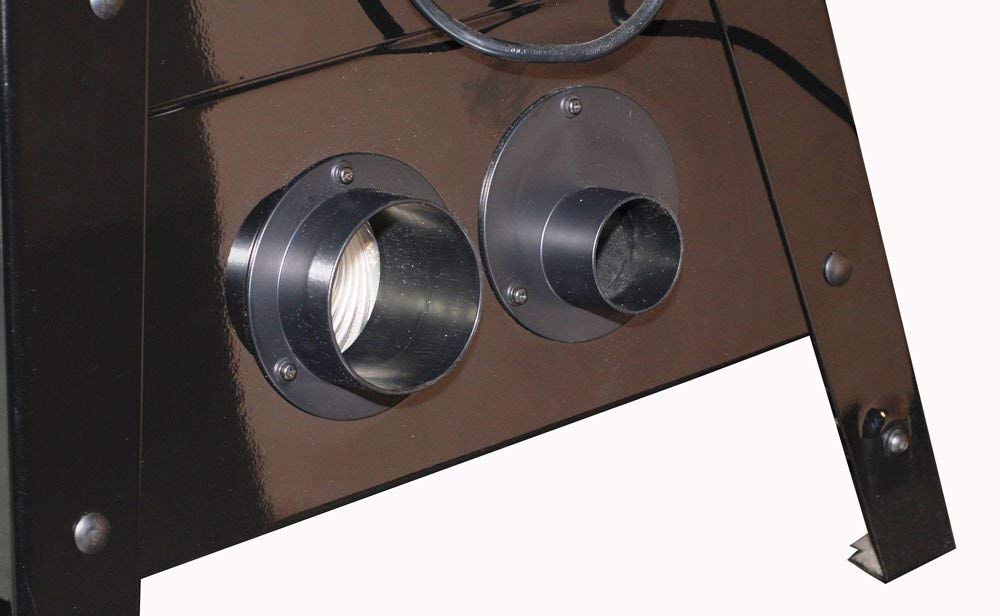
The Contractor Saw has an optional accessory called the Dust Collection Panel (CNS-DCP) which allows you to hook up either a 4” or a 2 ½” hose to the back of the saw, while making the connection point much more accessible. The 2 ½” port enables the use of a Shop-Vac rather than a dust collector. While Shop-Vacs do not generally provide the required CFM, they’re better than nothing.
The advantage of the Micro Blade Guard is that the clear plastic shell can be easily removed which allows you to use a splitter with anti-kickback pawls.
TSG-MG – Micro Blade Guard
TSG-DC – Dust Collecting Blade Guard
Any saw that is 3 HP or more will come with the Dust-Collecting Blade Guard (TSG-DC). Either of the 1.75 HP saws will work with the TSG-DC but it will need to be purchased separately. This brings us to our next subject…
Compatibility
The Contractor Saw and the Professional Saw share a lot of the same characteristics. As such, they share a lot of the same accessories.
While the 30” fence options are different for each saw, the 36” and 52” T-Glide fence system is completely identical for both saws.
The table depth is 27” on both saws, so the cast-iron wings for one saw will technically fit on the other one although they are slightly different in a superficial way.
This also means that the inline router table will technically work on both saws although it isn’t officially supported on the Contractor Saw. More on this in a bit. Let’s address all of the accessories in turn.
First, here’s a checklist of each accessory and it’s compatibility with each saw.
The Contractor Saw Mobile Base allows you to move the Contractor saw around your shop easily but it’s not designed to lift extremely heavy loads. This limits the compatibility with some accessories such as the router table and the sliding crosscut tables.
This mobile base features two fixed and two swivel casters, similar to most mobile bases on the market.
The Contractor Saw Mobile Cart makes the Contractor saw extremely portable. If you team this up with the 30″ SFA fence system and the stock stamped steel wings then the saw is relatively lightweight and easy to maneuver.
It should be noted that the mobile cart is technically not compatible with the 52″ fence system, simply because it is so long that it will stick out over the cart handle.
The Professional Saw Integrated Mobile Base is much like the Contractor Saw Mobile base in that it has two fixed casters and two swivel casters It also has a weight limit that makes some accessories technically incompatible with it since it may not support the weight.
The Industrial Mobile Base is the ultimate in tool portability. It features a hydraulic jack and four swivel casters which allows you to literally spin the saw in place if you need to. Although it technically has a weight limit, I have yet to reach that.*
*I have an ICS (which weighs almost twice as much as the PCS) with an extra cast-iron wing, the TSG-FDC Floating Dust Guard, and the Inline Router Table attached to it and the mobile base lifts the entire thing up without even the slightest hesitation.
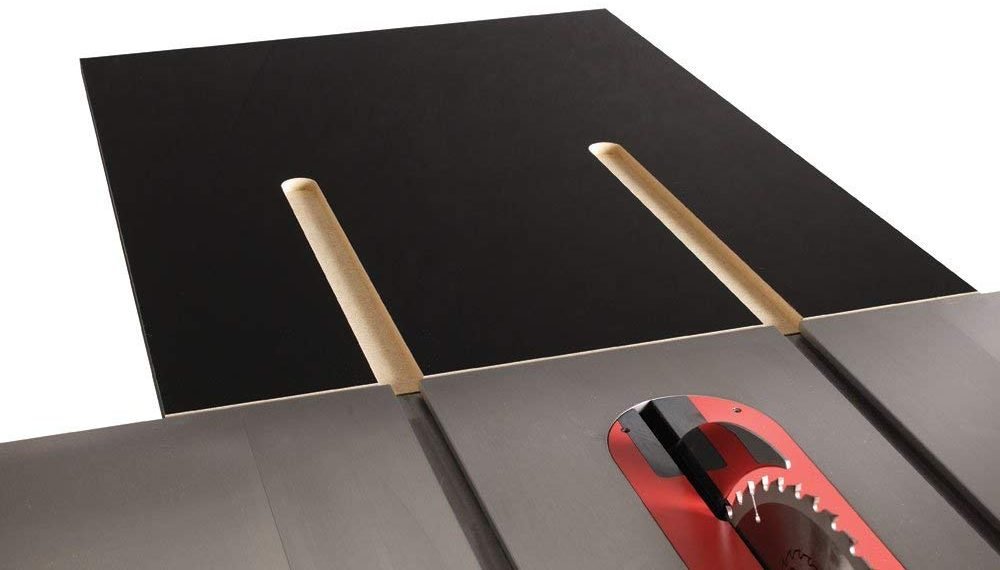
The 30″ Outfeed Table is a quick, easy way of adding outfeed support to your saw. This was designed for the Contractor Saw but is perfectly compatible with the PCS as well.
It should be noted that the 30″ Outfeed Table is not compatible with a mobile base because there isn’t anything to support the legs for the outfeed table. That being said, I am proud to include myself in the large group of people that have jury-rigged and modified it so that it works fine with a mobile base. You just need to get creative.
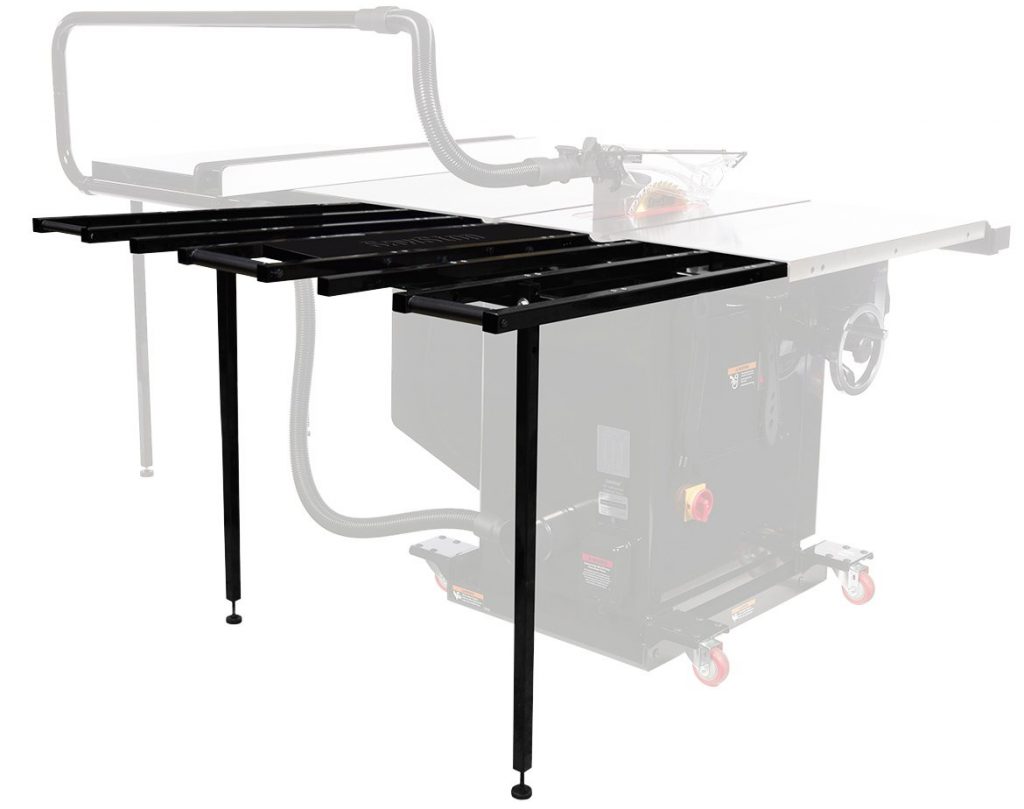
The Folding Outfeed Table provides a large outfeed surface while being portable and compatible with both mobile bases. It also, as the name implies, folds down out of your way when not needed.
The Folding Outfeed Table is not compatible with the CNS for two reasons. 1. The motor will get in the way. 2. The motor will hit the Folding Outfeed Table when the blade is angled past 40-degrees.
Normally you would hook up a dust-collector hose to the underside of the contractor saw. This is fine if you plan on leaving it permanently hook up to the saw but if you are needing to remove it and reattach it to another saw or if you want the option of using a ShopVac with a 2 1/2″ hose then the Dust Collection Panel is a worthwhile upgrade.
This item places both a 4″ and a 2 1/2″ dust port at the rear of the saw rather than underneath.
The TSA-ODC allows you to hook up the dust collecting blade guard (TSG-DC) to your saws existing 4″ dust port. The CNS175 and PCS175 come with the Micro Guard (TSG-MG) which does not have a dust port on it. If you are wanting to install the TSG-DC on either of those saws then you will need to purchase the TSG-DC. Since the PCS31230 comes with the TSG-DC then there isn’t anything else that needs to be added.
Saw Model
Compatible
Technically Incompatible
Incompatible
CNS
X*
PCS
X*
PCS31230
X
*With purchase of TSG-DC. Only compatible with the T-Glide fence system.
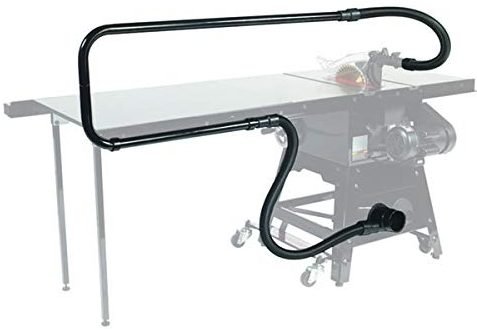
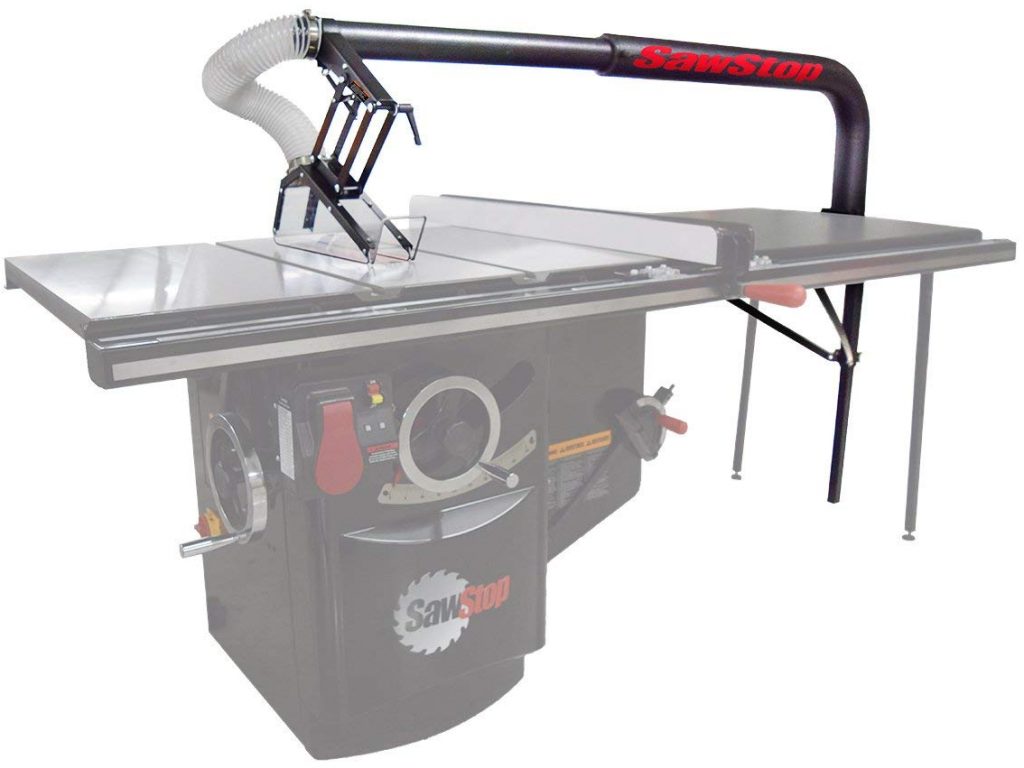
The Floating Dust Guard (TSG-FDC) provides above-the-table dust collection while allowing you to use simply the riving knife or even no blade guard, such as when you are cutting dadoes.
The 4″ port provides slightly improved dust collection over the TSA-ODC while increasing blade visibility. It also allows you to position the guard much closer to the blade so you can make thinner rip cuts while still using the blade guard.
The TSG-FDC requires either the 36″ or 52″ T-Glide Fence System since it attaches to the far right end of the wooden extension table.
Also, for the exact same reason, if attaching the TSG-FDC to a saw with a cast-iron router table attached, the router table will need to be attached to the left rather than the right.
The TSG-FDC is technically not compatible with either the Contractor Saw Mobile Base or the Professional Saw Integrated Mobile Base due to weight limitations. It works fine with the Industrial Mobile Base.
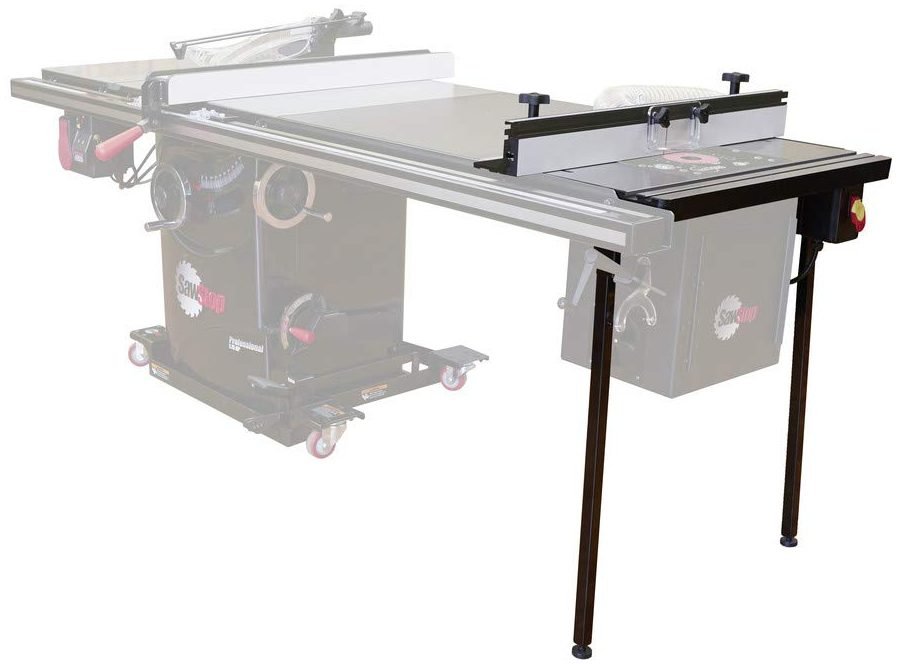
This is an extremely popular addition to your SawStop. The Inline Router Table consists of a cast-iron router table that attaches to either the left cast-iron wing or in place of the wooden extension table at the far right.
I will be writing a detailed article about the different router table configurations and some of the considerations for each.
This addition is not compatible with either the Contractor Saw Mobile Base or the Professional Saw Integrated Mobile Base due to weight limitations. It works fine with the Industrial Mobile Base. It also is not compatible with the stamped steel wings that come stock on the CNS.
If you have a CNS with cast-iron wings and don’t use a mobile base then there is no reason you can’t attach the inline router table to your saw.
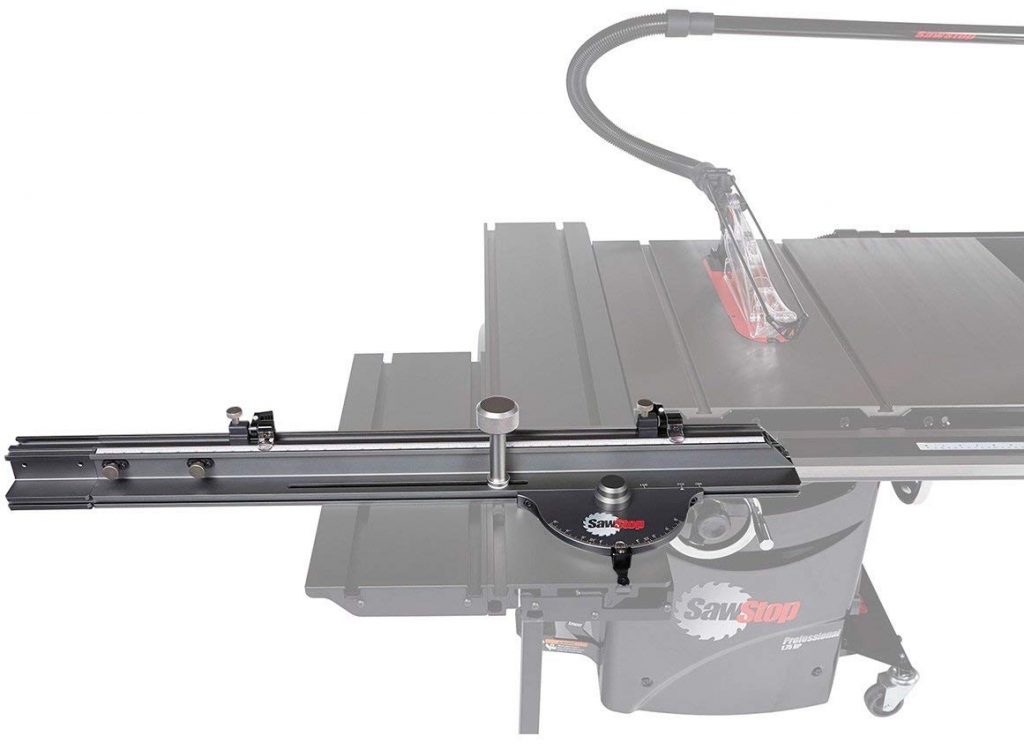
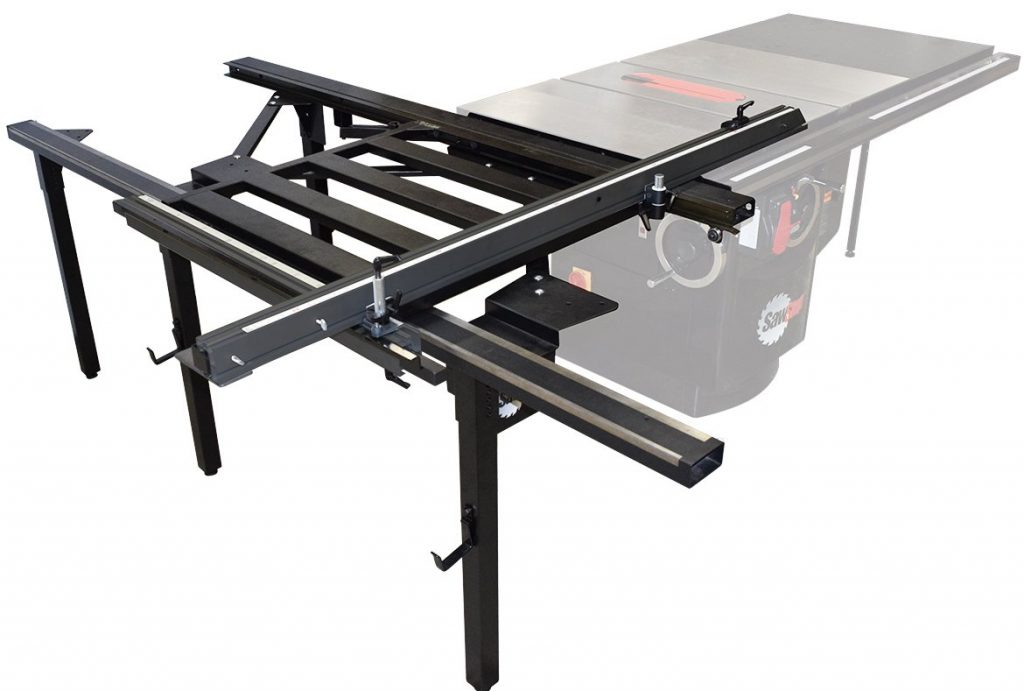
The Sliding Crosscut Table adds the ability to crosscut sheet-goods up to 48″ in width. It mounts either to the left wing or in place of it, which requires cutting down the front and rear rails and the front tube.
I don’t consider this a replacement for a miter gauge or a sled, but, rather, yet another tool in your arsenal.
This addition is not compatible with either the Contractor Saw Mobile Base or the Professional Saw Integrated Mobile Base due to weight limitations. It works fine with the Industrial Mobile Base.
If you need to crosscut even larger sheet goods, the Large Sliding Table (TSA-SA70) has several configuration options which allow you to crosscut up to 70″ in width.
This addition is not compatible with any mobile base.
Saw Model
Compatible
Technically Incompatible
Incompatible
CNS
X
While using a mobile base
PCS
X
While using a mobile base
Conclusion
Whether you choose a Contractor Saw or a Professional Saw, I’m confident you will happy with your purchase. Hopefully what I have assembled for you here has helped you make a decision on which saw is right for you.
I accept that it’s impossible to cover all considerations in this article. Still, that’s my goal. As such, if you have any other questions that I did not address, please leave them in the comments below and I will update this article.
The first one is just a test video showing the turning of a wooden bowl. I’m taking my time with it so I can try different things and see what works and what doesn’t. I’m currently in the editing phase on this one.
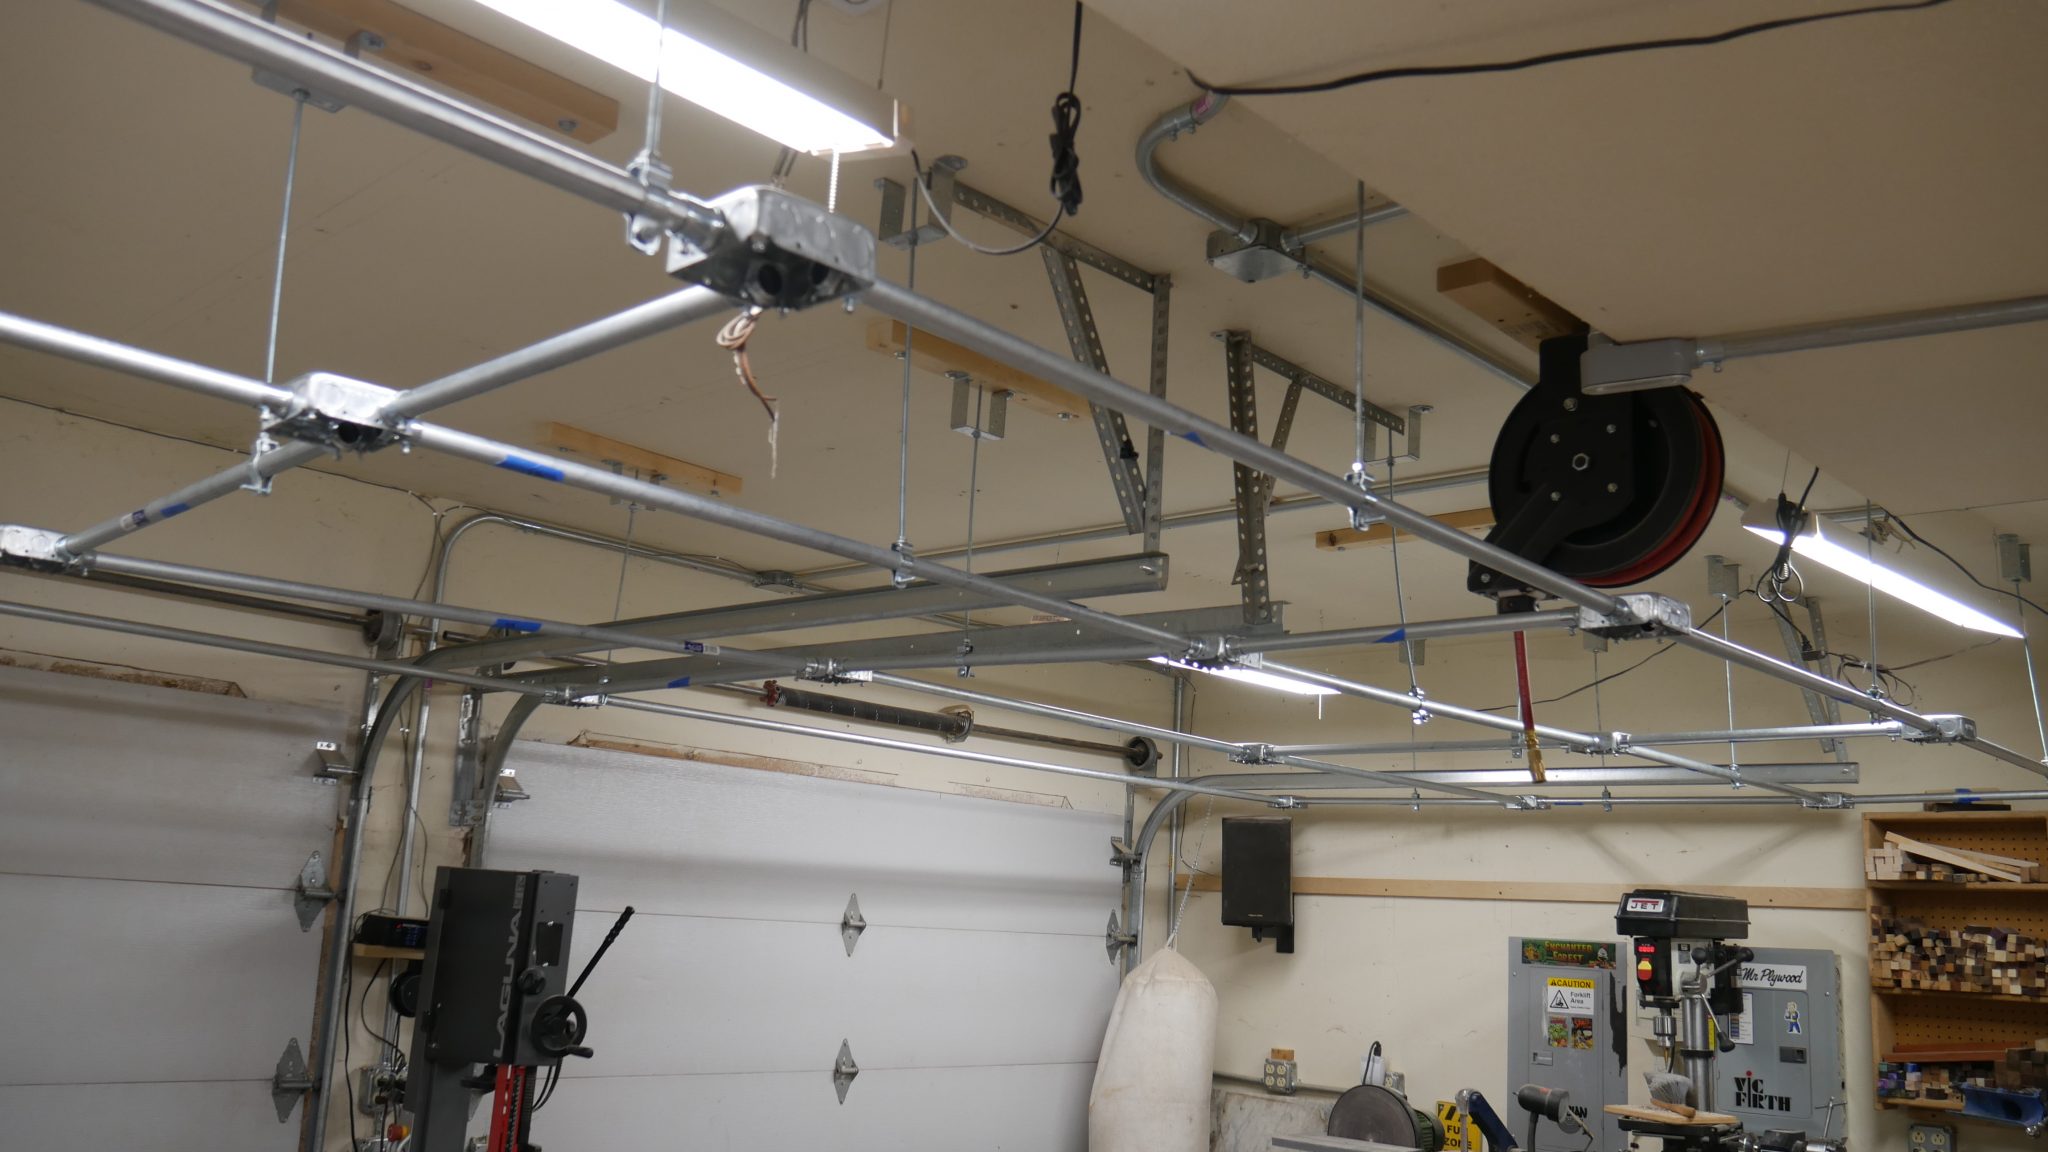
The second is on the construction of a light grid (see below). I’m still in the filming stages of this.
The third is going to show the construction of a musical instrument of some sort. I’m still in the early planning stages of this one and the details will probably change.
Building a Light Grid
Since I’m making videos in my shop I decided to build a light grid. I’m making it out of electrical conduit and junction boxes and I’m putting in electrical outlets at some of the junction boxes. I’m making a video of the construction of it as well.
Upcoming SawStop Articles
I’m working on a series of articles that are focused on choosing the right SawStop for your application. I will be covering some of the more common questions I hear such as the difference between the Professional and the Industrial saws and the benefits of 3 HP over 5 HP. I’m hoping to have these articles done soon in order to aid in Christmas tool shopping.
This is a list of helpful documentation and links to the cheapest places online for various SawStop consumables.
I will be regularly updating and adding to this list with the cheapest prices available online. I will always take the shipping cost into consideration.
If you have a suggestion for a link to add to this or if you find a cheaper place to buy something online, please leave it in the comments below.
Communities
SawStop Users’ Group
I started the SawStop Users’ Group so SawStop owners or prospective owners would have a place to go with their questions without having to resort to other communities like SawMillCreek and LumberJocks, where half the answers to their questions would be met with comments such as “That’s why I use a Delta/Powermatic.” while the other half may be well-intentioned yet not necessarily pointing them in the right direction.
If you are using thin-kerf blades and are experiencing the wood binding on you when you use a riving knife, check out this article because a fix may be cheaper than you think.
If you have rust forming on your cast-iron table top, or don’t, and want to keep it that way, check out this article. This works on all cast-iron tools, and is especially useful with jointers since it will make the table surface very slick.
I get asked about this more frequently than you would think. Some people want to have an all-cast-iron table top. I didn’t do all cast-iron but I did decide to show what is involved in attaching an extra cast iron wing between the existing wing and the wooden extension table.
Here I discuss how I converted my wooden extension table into a router table. This is helpful if you aren’t ready or interested in installing a cast-iron router table.
The following two brake cartridges are only for any saw that takes the clear brake cartridges. If your saw was made after 2008 then it doesn’t take these brakes.
The following two zero-clearance inserts are only for any saw that has a cast-iron tabletop. This just means that it won’t work on the JobSite saw (JSS).
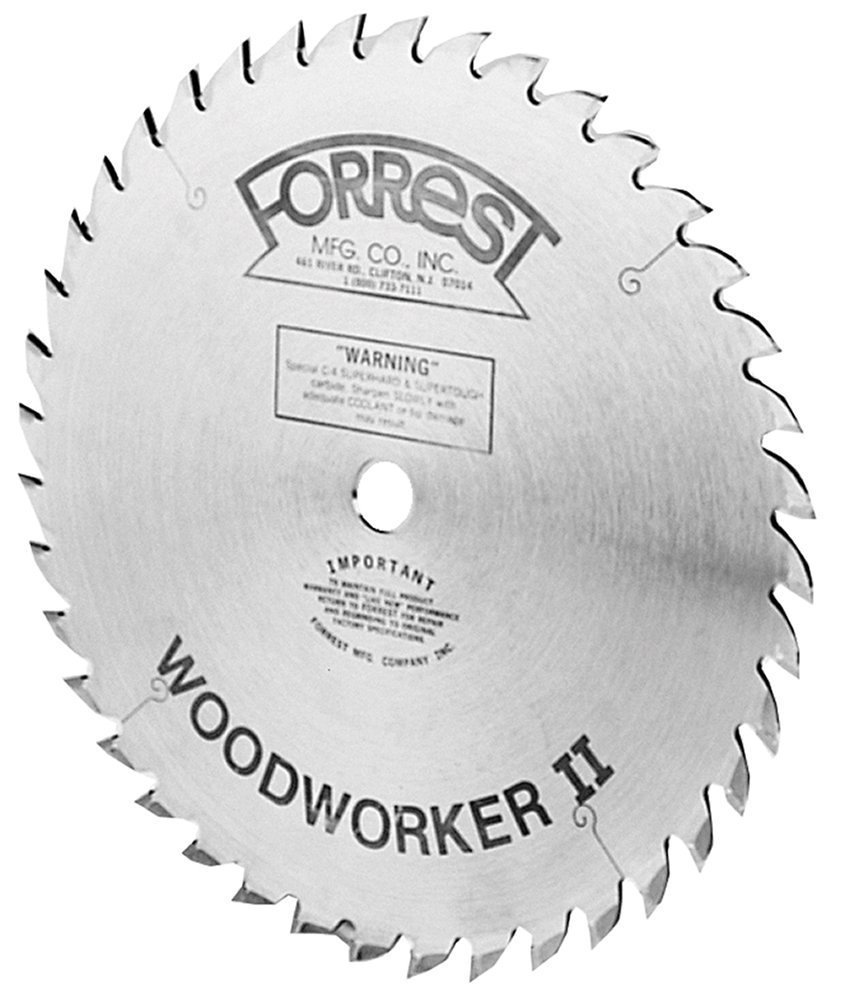
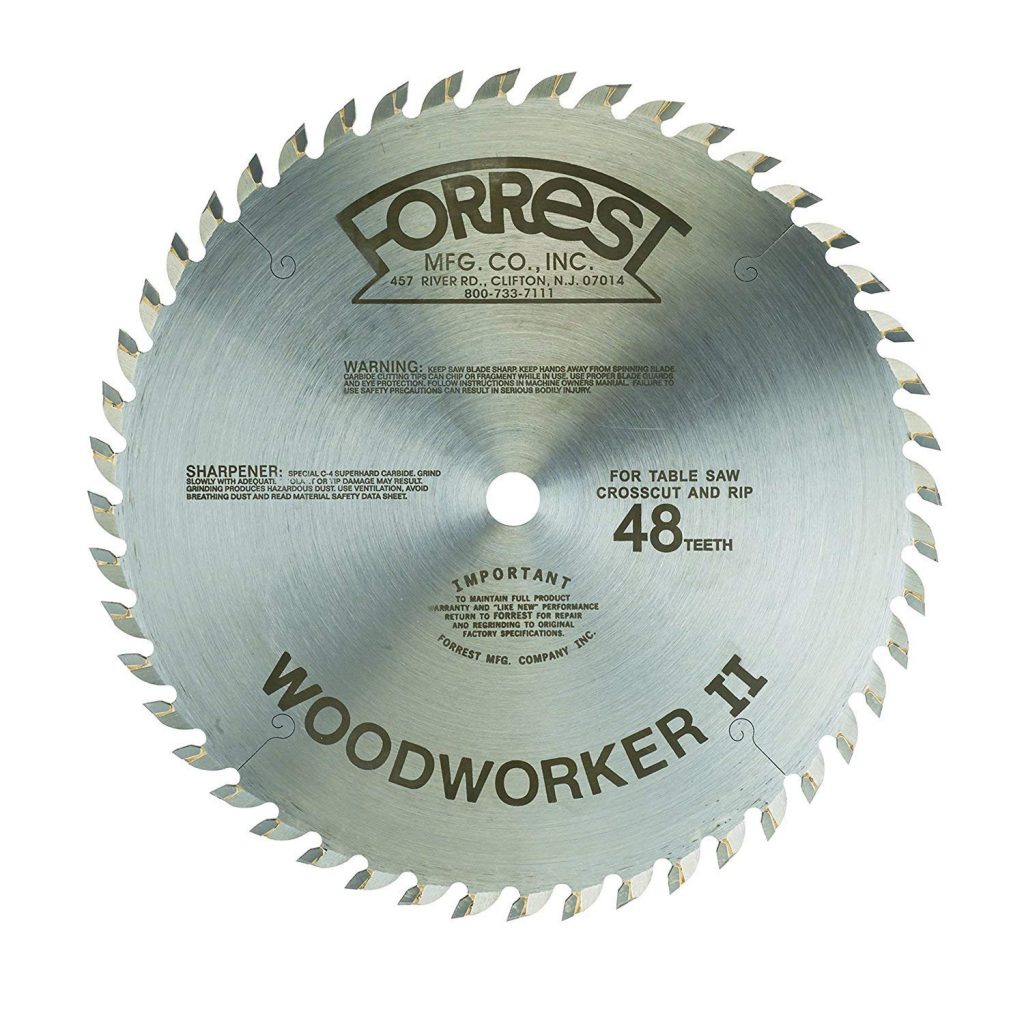
The Titanium blades are a big step up in quality. I compare them favorably with the Forrest Woodworker II, although your mileage may vary. They have large carbides so the blade can be sharpened multiple times and the cuts I have gotten with them has been glue-ready every time.
This is the go-to standard blade for most high-end woodworking. You really can’t go wrong with these blades and they should last an insanely long time.
Freud is probably the most common blade manufacturer that I deal with. My opinion of them is that you are generally getting a better blade than you are paying for when you buy a Freud. I do, however, recommend staying away from the Diablo line by Freud. I also recommend not using a Freud blade that has anti-kickback shoulders.
A common question I get is whether or not the red coating on Freud blades will affect the safety mechanism on a SawStop saw. Red coated Freud blades work just fine on a SawStop.
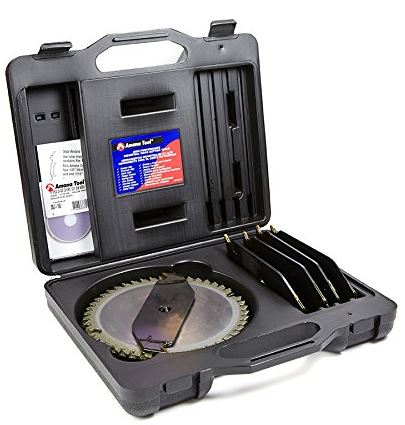
I like to think of Amana as the Subaru of blades, in that I don’t use them but I keep hearing of people who swear by them and won’t use anything else. I’ve held them a few times and I agree that they seem like very nicely made, well-balance blades.
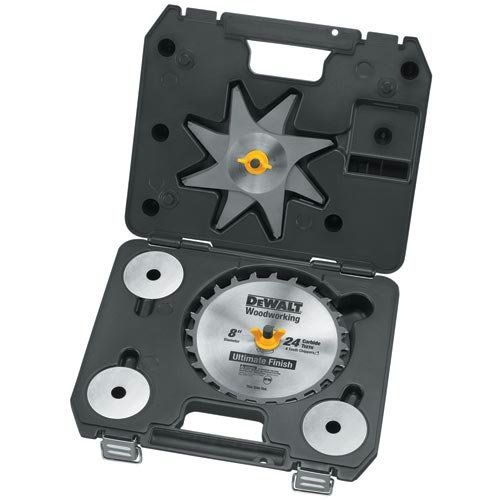
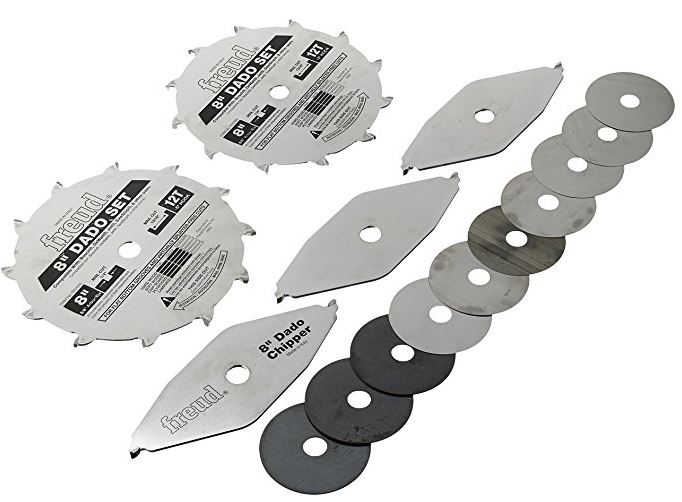
The following dado stacks are all compatible with SawStop table saws, in that they are all ~8″ in diameter, have wing or plus-style chippers, and don’t have depth-limiting (anti-kickback) shoulders. My personal recommendation is the DeWalt DW7670, which is surprising since I’m not a fan of DeWalt’s 10″ blades.
A newcomer to the game, Sawstop released their own dado stack that will work well on their saws.
It is an unusual configuration in that it comes with a 1/4″ chipper which allows the dado stack to be wider than the 13/16″ that SawStop recommends.
While one of the more expensive dado stacks on this list, it definitely is a quality set. I got to test them extensively and I was quite impressed. Not enough for me to sell my old DeWalt dado stack and run out and but this, but if I was in the market for a new stack and didn’t mind paying ~$300 for one, I would definitely consider this one.
The DeWalt DW7670 is probably the best value in dado stacks. I very strongly suspect that they’re just re-branded Forrest Dado Kings. The cut-quality is phenomenal and they’re usually around 1/3 the price of the Forrest Dado King.
Side-note: once I switched to SawStop Titanium ten-inch blades and the DeWalt DW7670 dado stack, I have never needed to adjust the gap between the blade and brake. I have it set to the maximum clearance and it’s still close enough to work.
Important note: DeWalt has recently changed this dado stack and it now has a diameter of 8 1/8″. It should still work with a CNS, PCS, or ICS, but it’ll be a bit tight. I definitely wouldn’t recommend this to anyone with a JSS or JSS Pro.
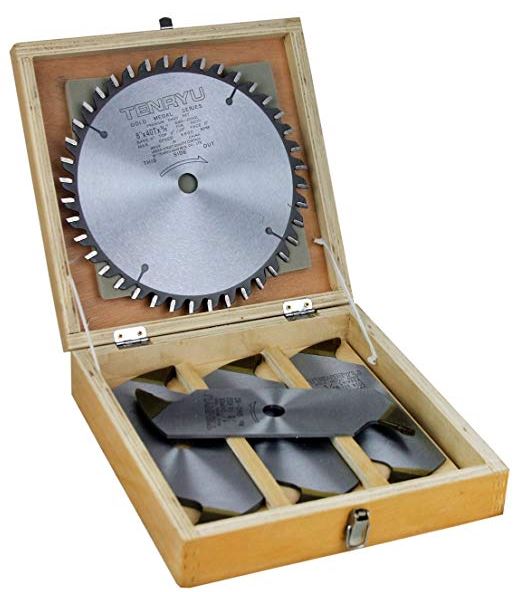
Ridge Carbide is one of the better blade manufacturers.
Their 8″ Dado Master meets the requirements for use on a SawStop without concern. Also, the cut quality tends to be great with all Ridge Carbide blades.
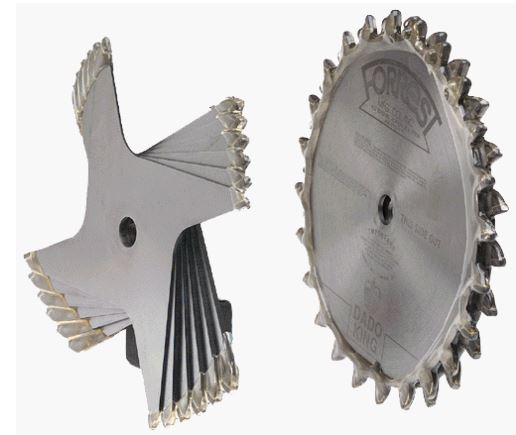
This is the Rolls Royce of dado stacks. At around $300 each, they’re a bit spendy for most home users, but if you make money with your woodworking and you do a good amount of dadoes then it’s a worthwhile investment.
This is the recommended lubricant for the gears in a SawStop. Don’t be tempted to use a dry-lube as they are not made for heavy machinery. White lithium grease is a little better than dry-lube, but not by much.
Although not recommended for lubricating the gears of a heavy tool, it will work if you don’t have any wheel bearing grease but it will need to be reapplied every few days.
Definitely not recommended for lubricating the gears of your saw. However, it is handy when lubricating the fine threads and chains found in router lifts and other smaller tools.
Accessories
Hold-Downs
Featherboards do a good job holding the material against the fence but a better alternative may be using hold-downs. These are configured so they not only hold the material against the fence but also flat against the table.
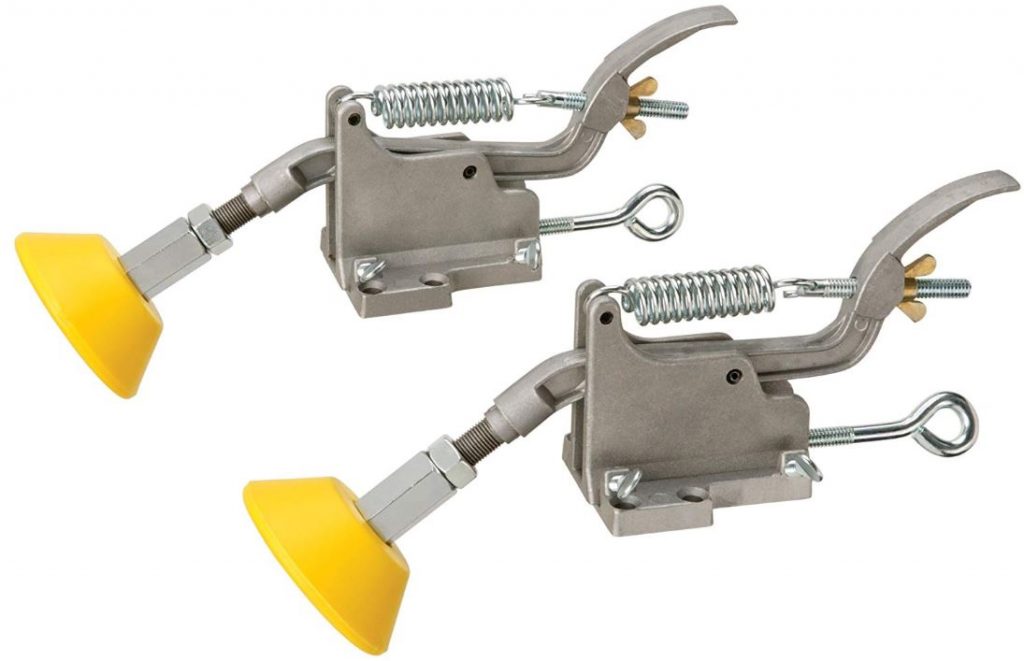
Board Buddies
Board Buddies are my preferred hold-down. They’ve been around for a long time and they work great when cutting sheet goods. They are a little bulky and may not be appropriate for every cut but they cost a lot less than some of the alternatives.
They are available in three different styles and the only real difference is which direction the wheels spin. The yellow version turns in a clockwise direction, and is the most common. This is what you would want to put on a table saw when the fence is to the right of the blade. The red version turns counter-clockwise and the green version turns freely in both directions.
Jessem makes their own hold-downs that are very popular. They’re also a lot more expensive, costing almost three times what the complete Board Buddies system costs. They do appear to be quality products, but the law of diminished returns keeps me from upgrading to these. They look better than the Board Buddies, but not three-times better.
Conclusion
There you have it. If you think that I missed something or if you found these parts cheaper elsewhere, please leave a comment below.
A Note About Affiliate Links
Some of the product links on this page are affiliate links. Any income earned through these links is donated to my fundraiser, which you can read more about at the following page:
The subject of brake spacing on a SawStop table saw seems to be somewhat confusing to people, no matter how long they have been using the saw. I’m hoping to clear up some of the mystery once and for all.
What exactly is brake spacing?
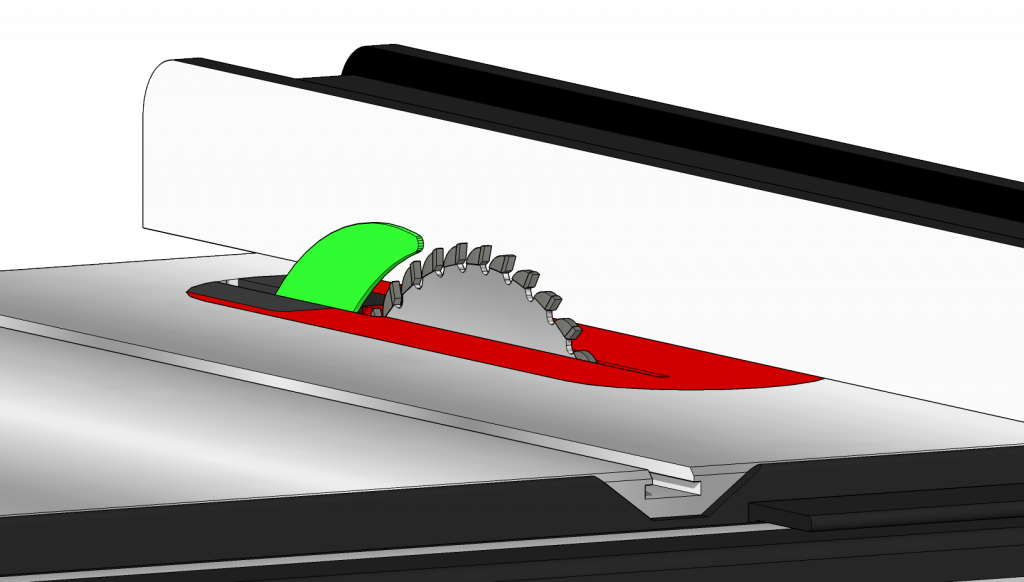
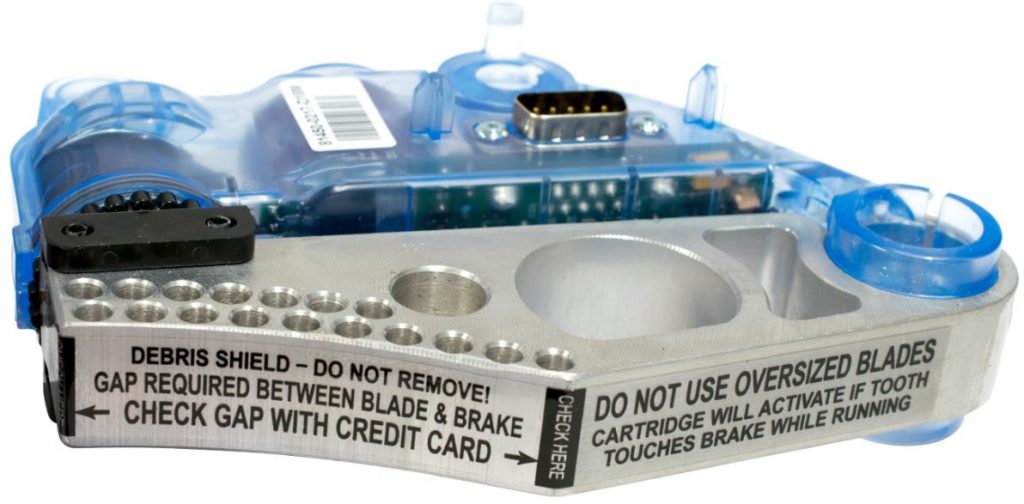
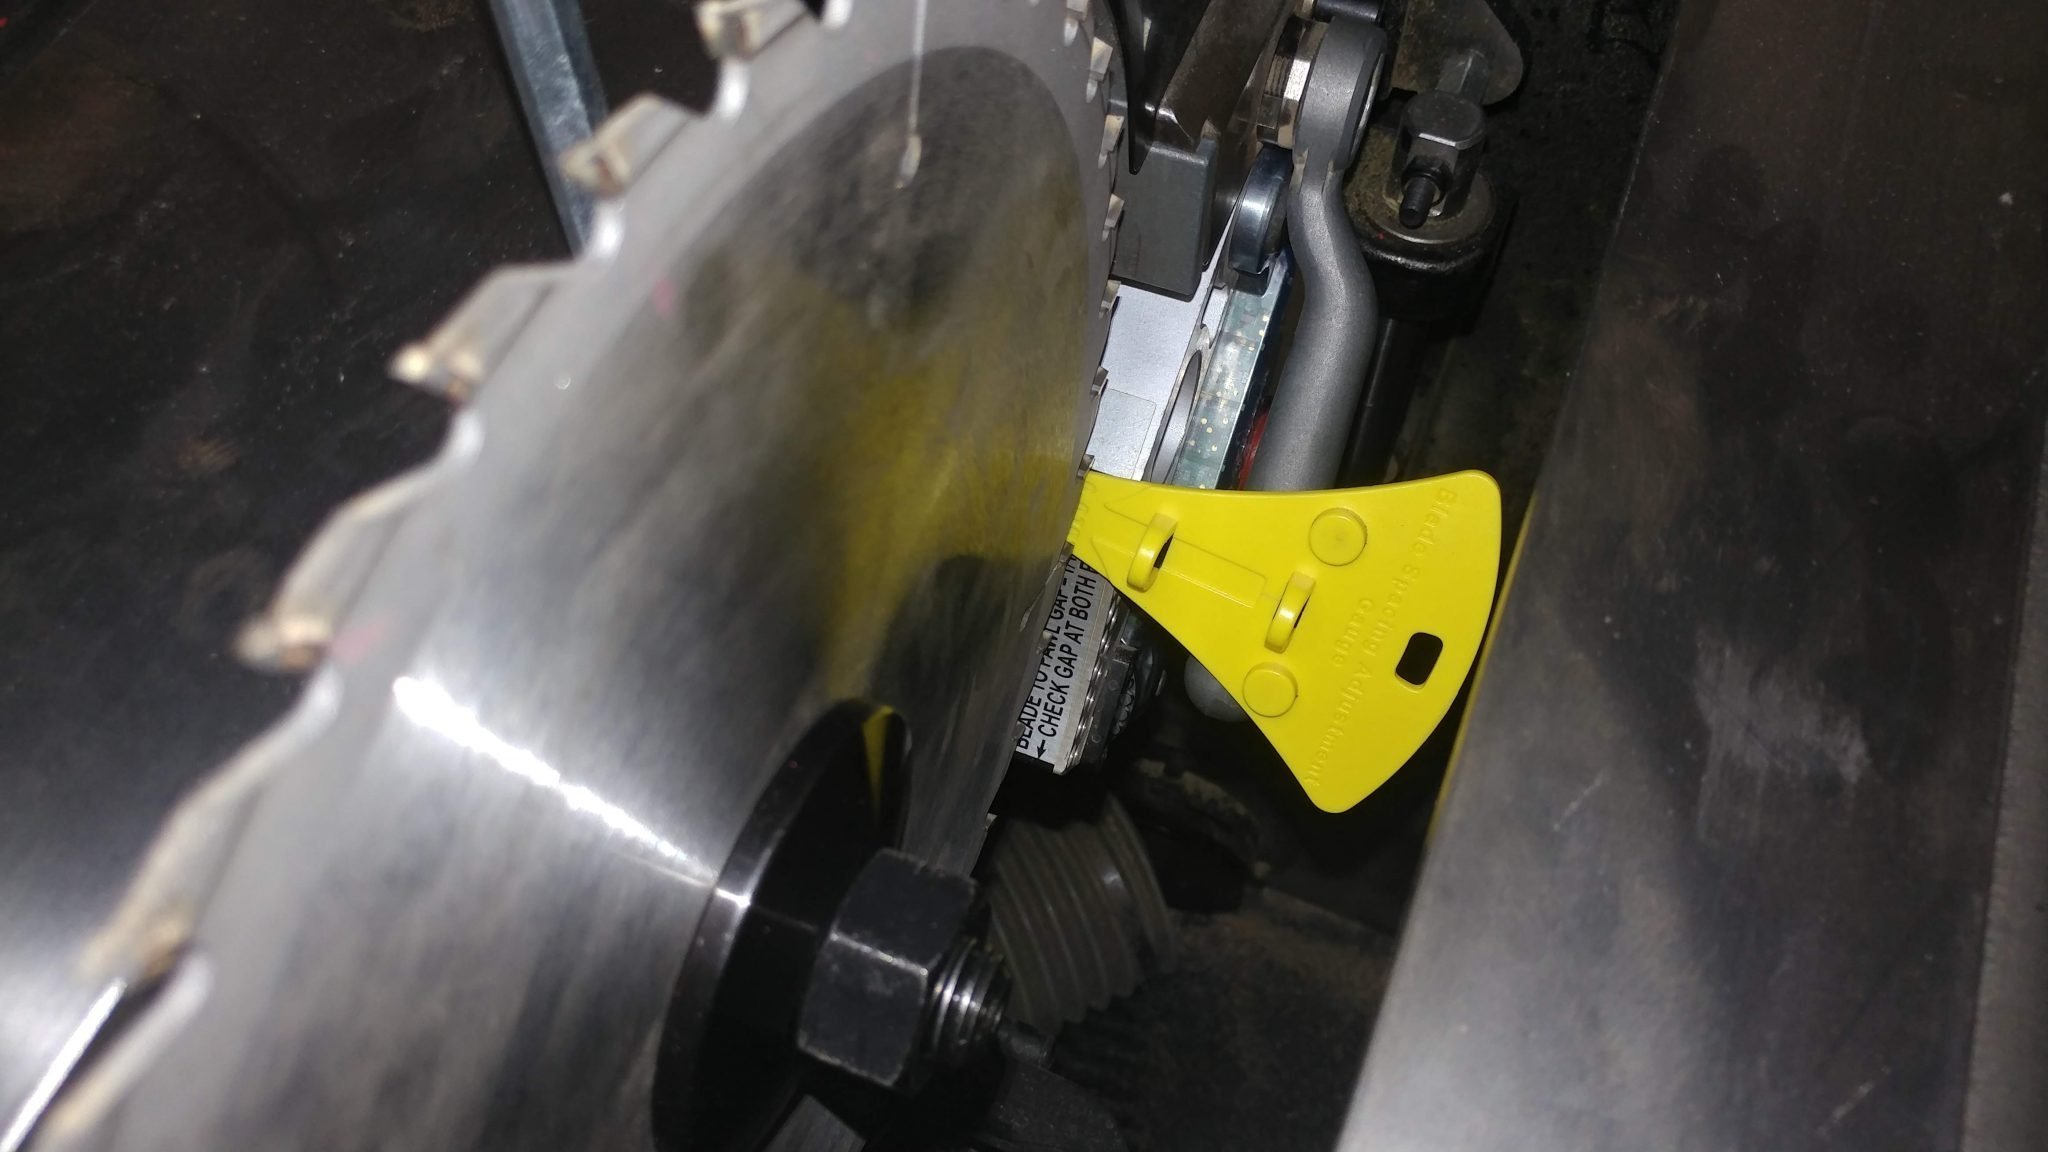
Brake spacing is literally the space between the brake cartridge and the blade as shown below.
Why is it important?
The saw blade has 5 volts of electrical current flowing through the blade and the brake is sending out a radio signal to monitor the level of that current. If something conductive, such as a finger, touches the blade it will absorb some of the current and like a sponge in a glass of water, the current level will drop.
The brake needs to be close enough to the blade in at least one location in order for it to successfully monitor the electrical current flowing through the blade. You’ll notice that the aluminum brake pawl is curved to follow the circumference of the blade. It’s very rare that this curve will follow the shape of the blade perfectly.
What happens if the brake is too far from the blade?
If the gap between the blade and brake is too great, the brake will not be able to see the electrical current flowing through the blade. This results in an error message consisting of a solid red light and a slow (about once per second) flashing green light. You will be unable to start the saw until you clear the error message by bringing the brake closer to the blade.
What happens if the brake is too close to the blade?
This is what you really want to avoid. If the brake is too close to the blade then you run the risk of a high tooth on the blade making contact with the aluminum brake pawl and activating the brake immediately at paddle pull.
How do I adjust the spacing?
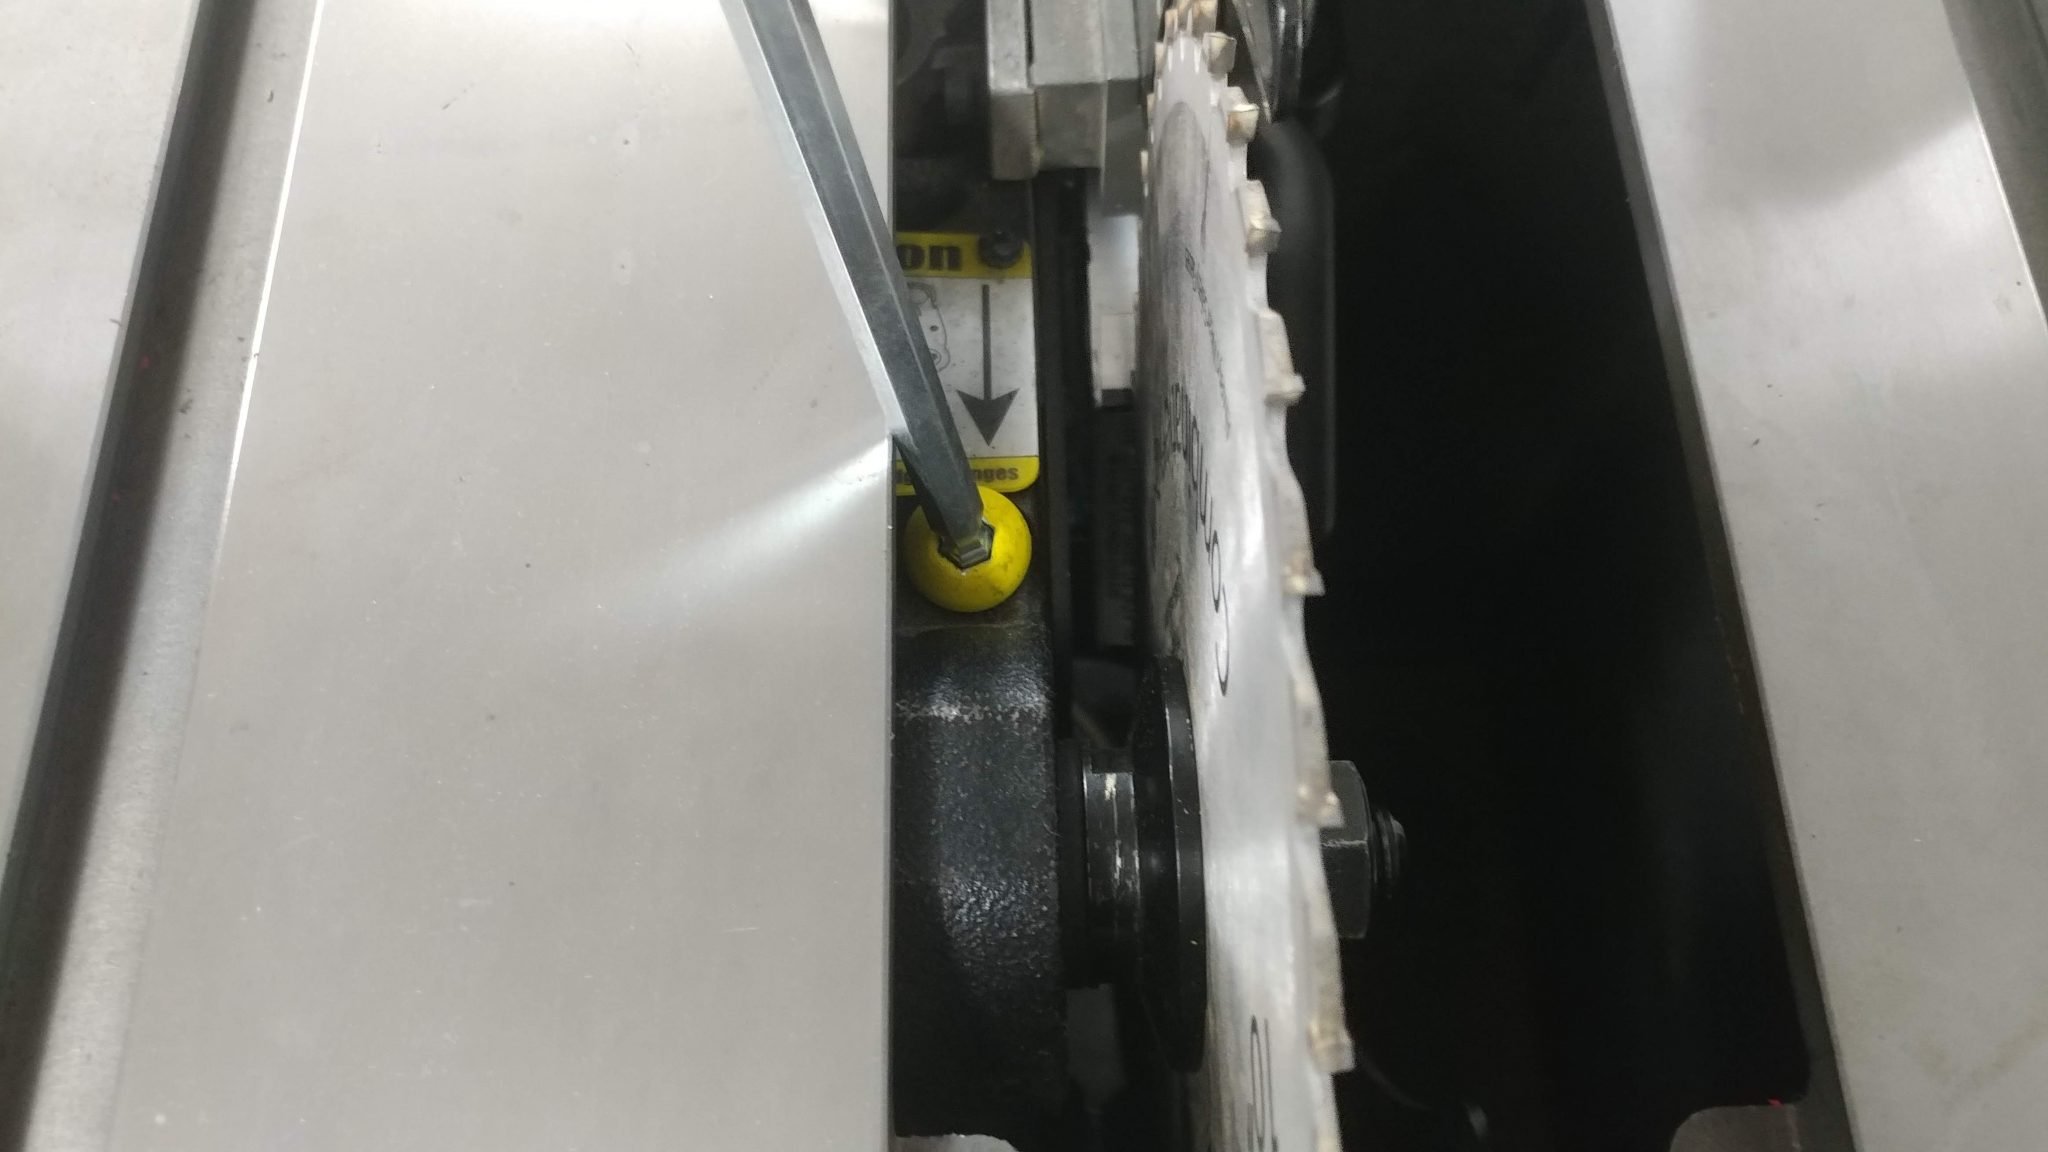
The brake spacing is adjusted with an 8mm allen bolt to the left of the blade. It should be bright yellow and hard to miss.
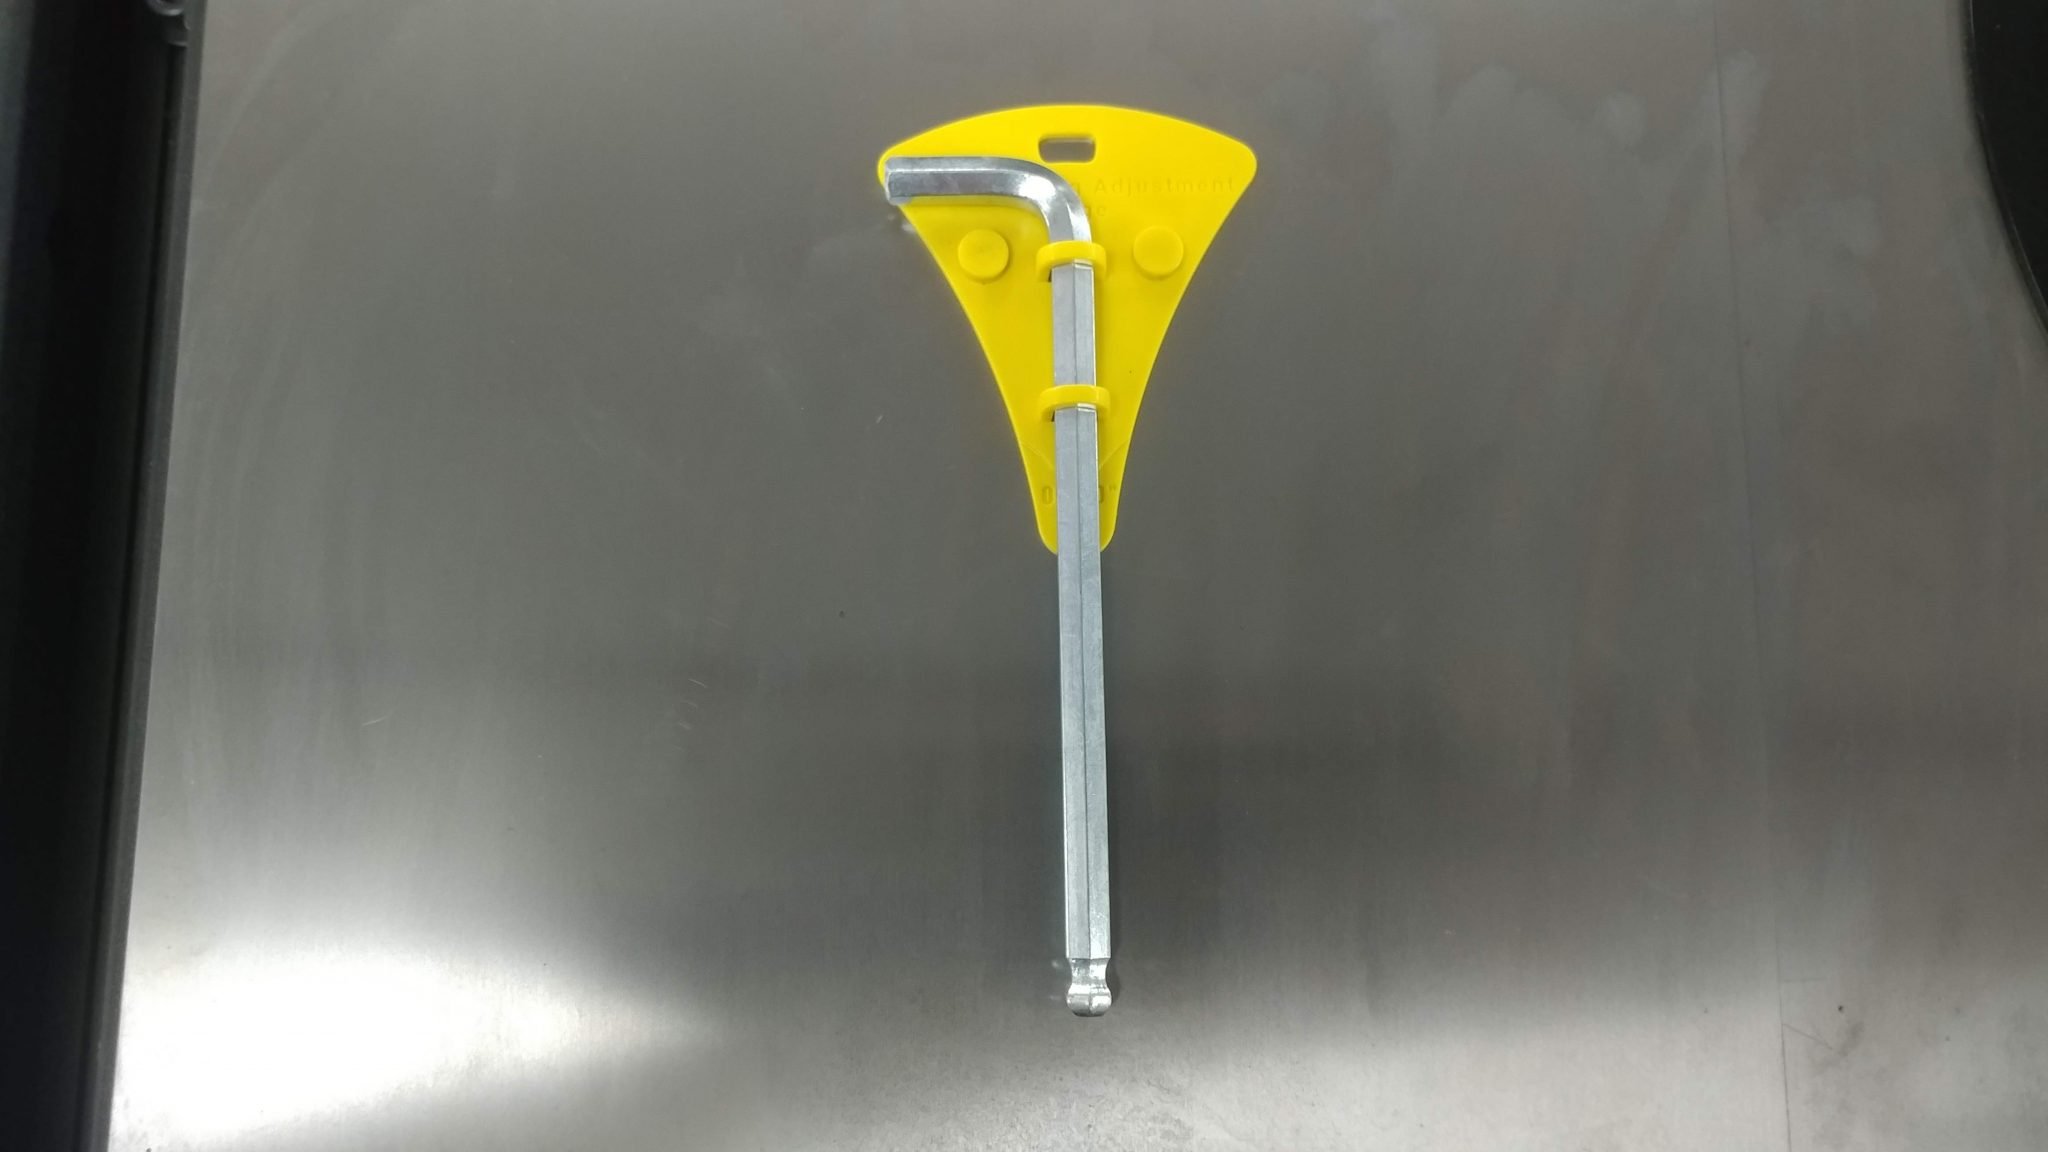
You use a yellow feeler gauge that is provided with your saw to check the gap spacing. If you can’t find yours, look on the side of your saw. It has magnets on the back so most people just stick it to the side of the saw.
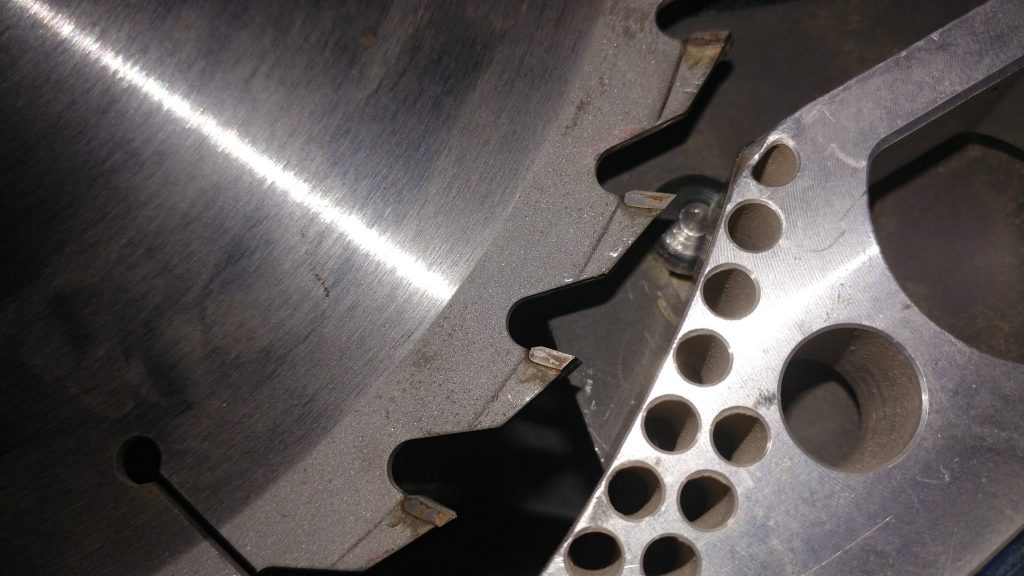
The gauge is .070″ thick and should be inserted between the blade and brake at the point where they are closest. This will most likely be at the top of the curved aluminum.
You should be able to rotate the blade and have the teeth just barely touch the yellow gauge.
If you have misplaced your yellow gauge, you can use a US nickel or even the brass bypass keys that should be on the right side of your switchbox.
Any tips?
The gap doesn’t need to be exact. There is a window that it needs to be within for the system to work. You can have the gap one of three ways: perfect; too big; or too small. If you can’t have it perfect, err on the side of it being too big. If the gap is too big then the worst that will happen is you’ll get the error message. If it’s too close, you might inadvertently activate the brake at paddle pull.
After some trial and error I happened to find the perfect combination of blades where if I set the gap to its biggest the blade is still close enough to the brake to work yet never too close. As a result, I haven’t adjusted or even checked the brake to blade spacing in over two and a half years. If you’re curious, these are the blades I alternate between:
If you are getting the solid red and slow green error message and you can’t clear it no matter how close you bring the brake, there may be something interfering with the signal.
If you have changed the height of the riving knife or blade guard on your saw then the clamp may be too low and interfering with the blade signal. Try installing the riving knife to see if the error goes away. Obviously, if you are trying to make dadoes with an 8″ blade then you can’t make the cut with the riving knife installed, but this is just a troubleshooting step. If the error goes away then we found the problem. You need to raise your riving knife clamp up a little or put a piece of cardboard in the clamp to hold it shut rather than hang loose.
Did I miss anything?
I hope I covered all of the important info related to brake to blade spacing. If I missed something or you have any questions, please leave a comment below and I’ll address it either with a response in the comments or by updating this article.
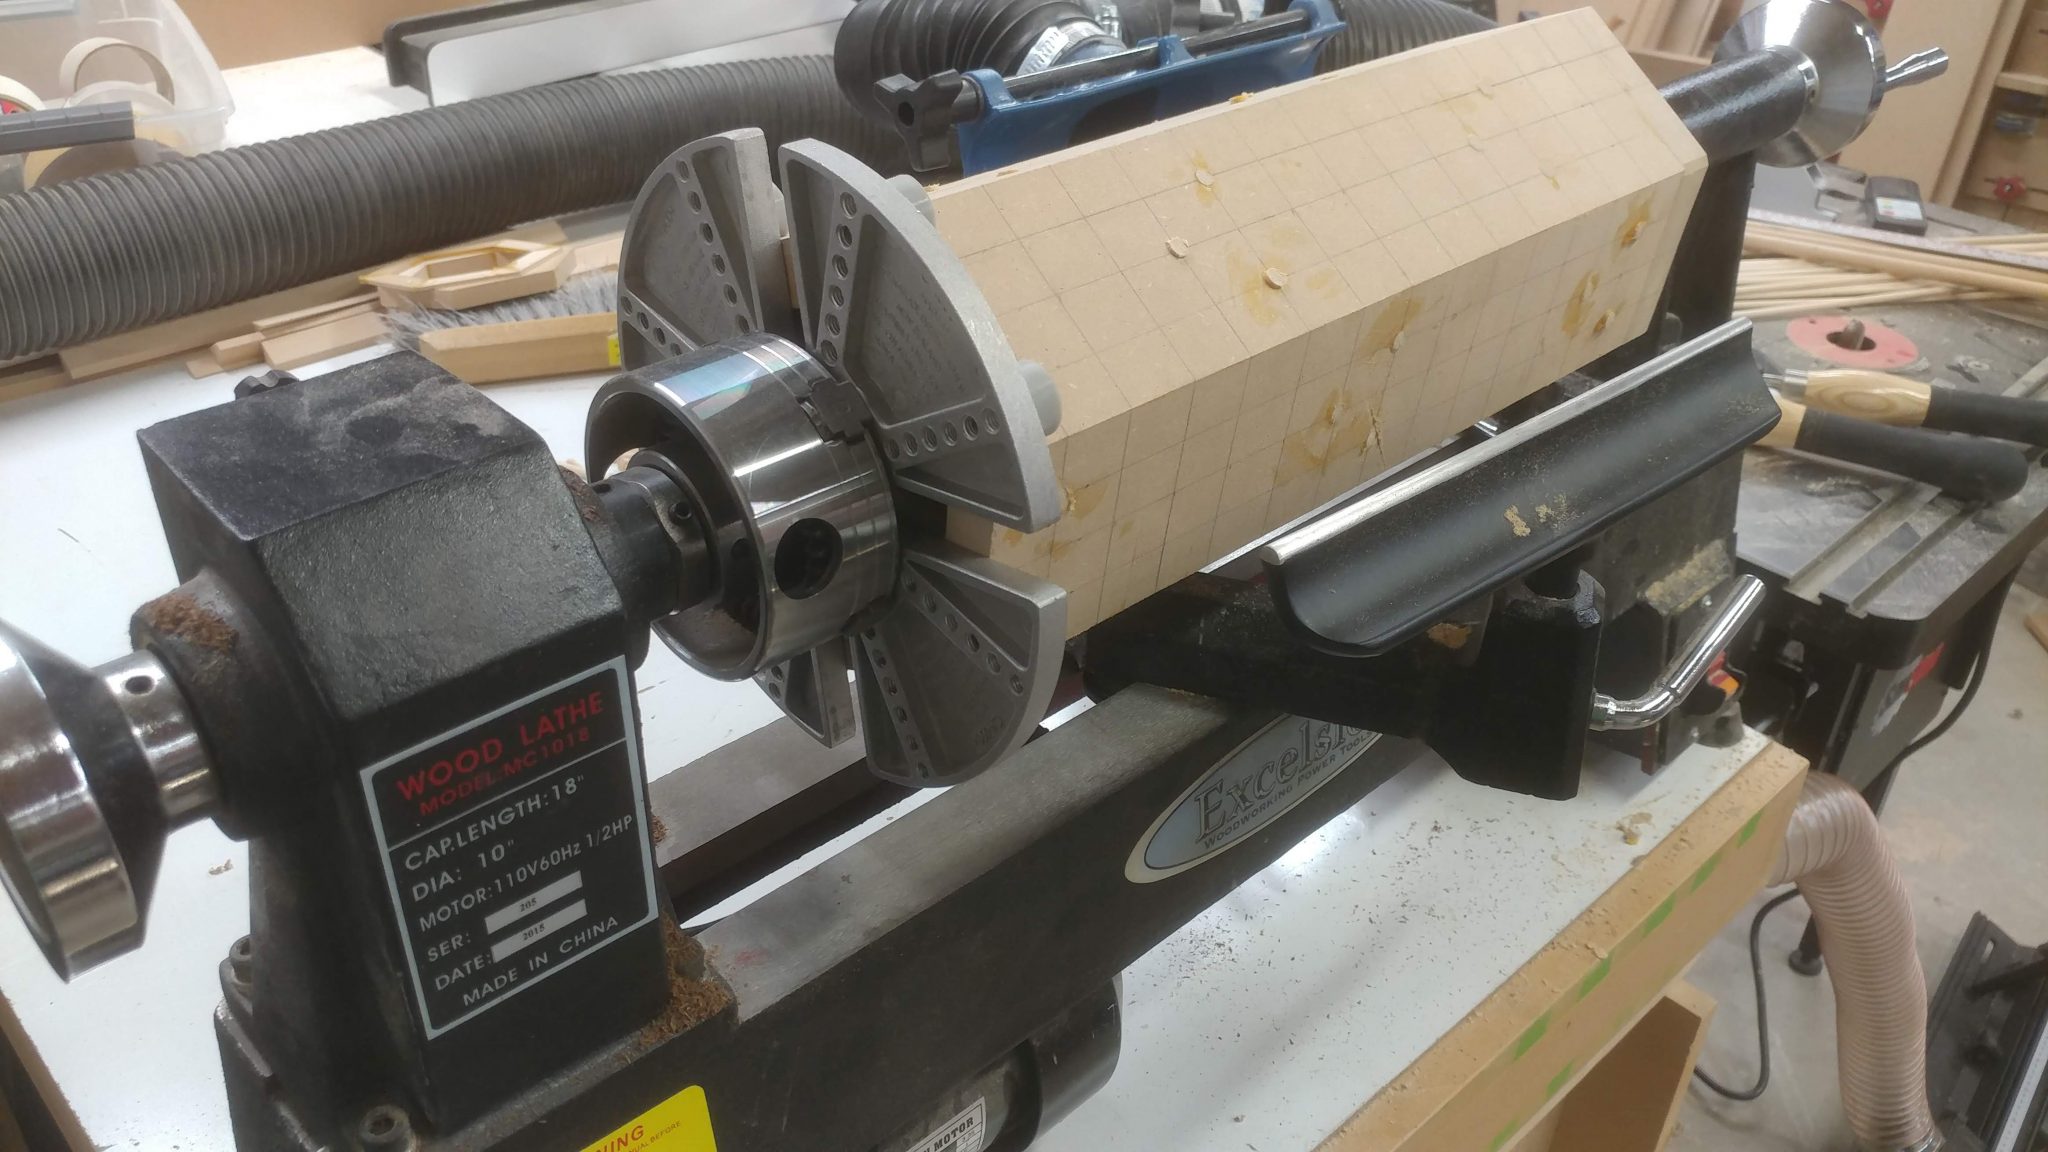
I’ve wanted to try my hand at making a rainstick for some time. Not that I really enjoy playing with them but it seems like a fun project, especially with the amount of experimentation you can do. Like most of my projects, I start with a prototype. Like a fool, I forgot how horrible it is to turn MDF on a lathe.
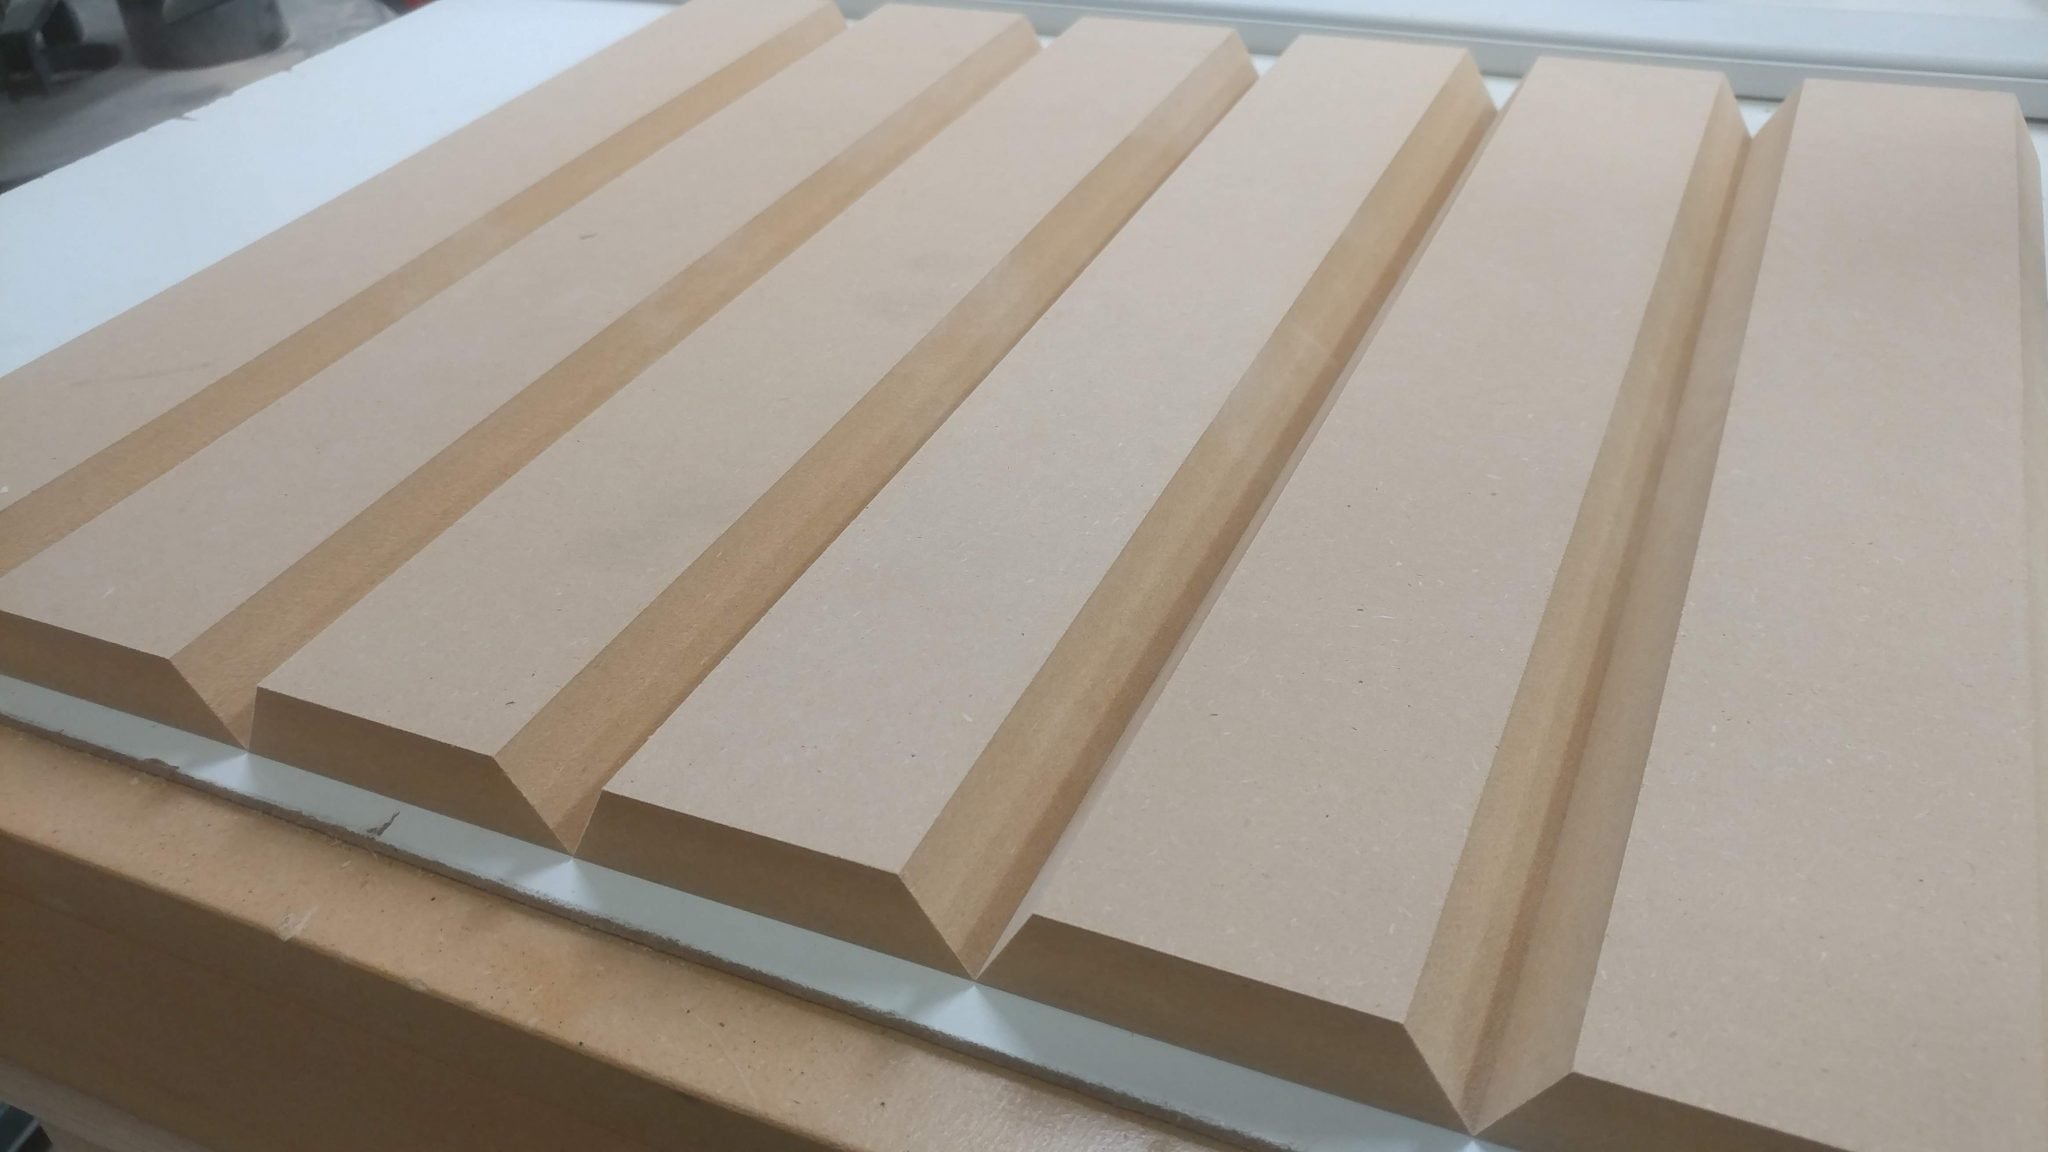
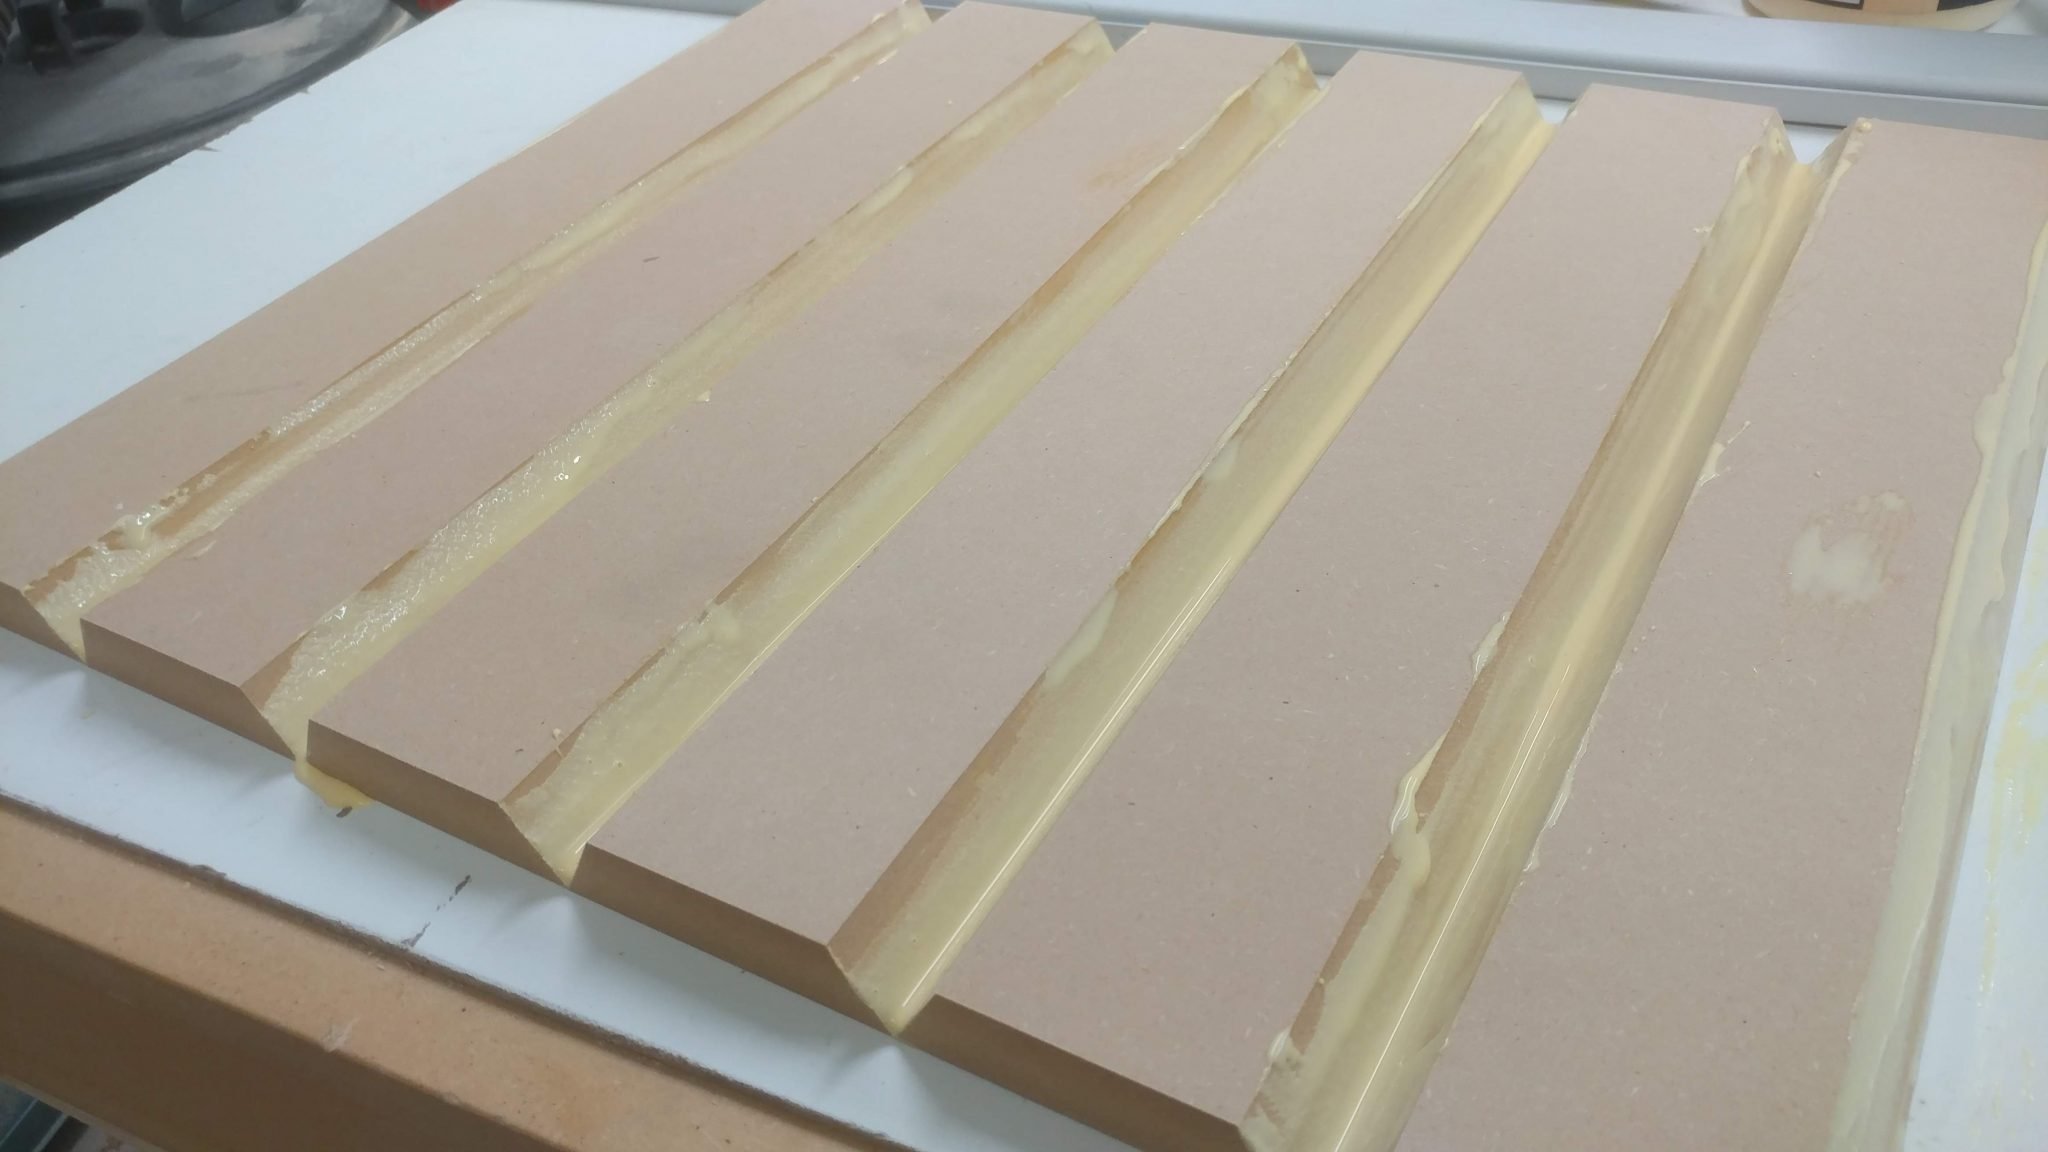
I started by cutting staves on my table saw. I used the Stave Calculator to calculate the dimensions and angles for each stave. Since it is only six stave, the calculations are pretty simple but I always like to double-check my calculations.
I applied glue between each of the staves. One thing I didn’t get a picture of is how I laid each stave next to each other and applied strips of tape to what is now the underside of the staves so the whole thing can be rolled up into a tube.
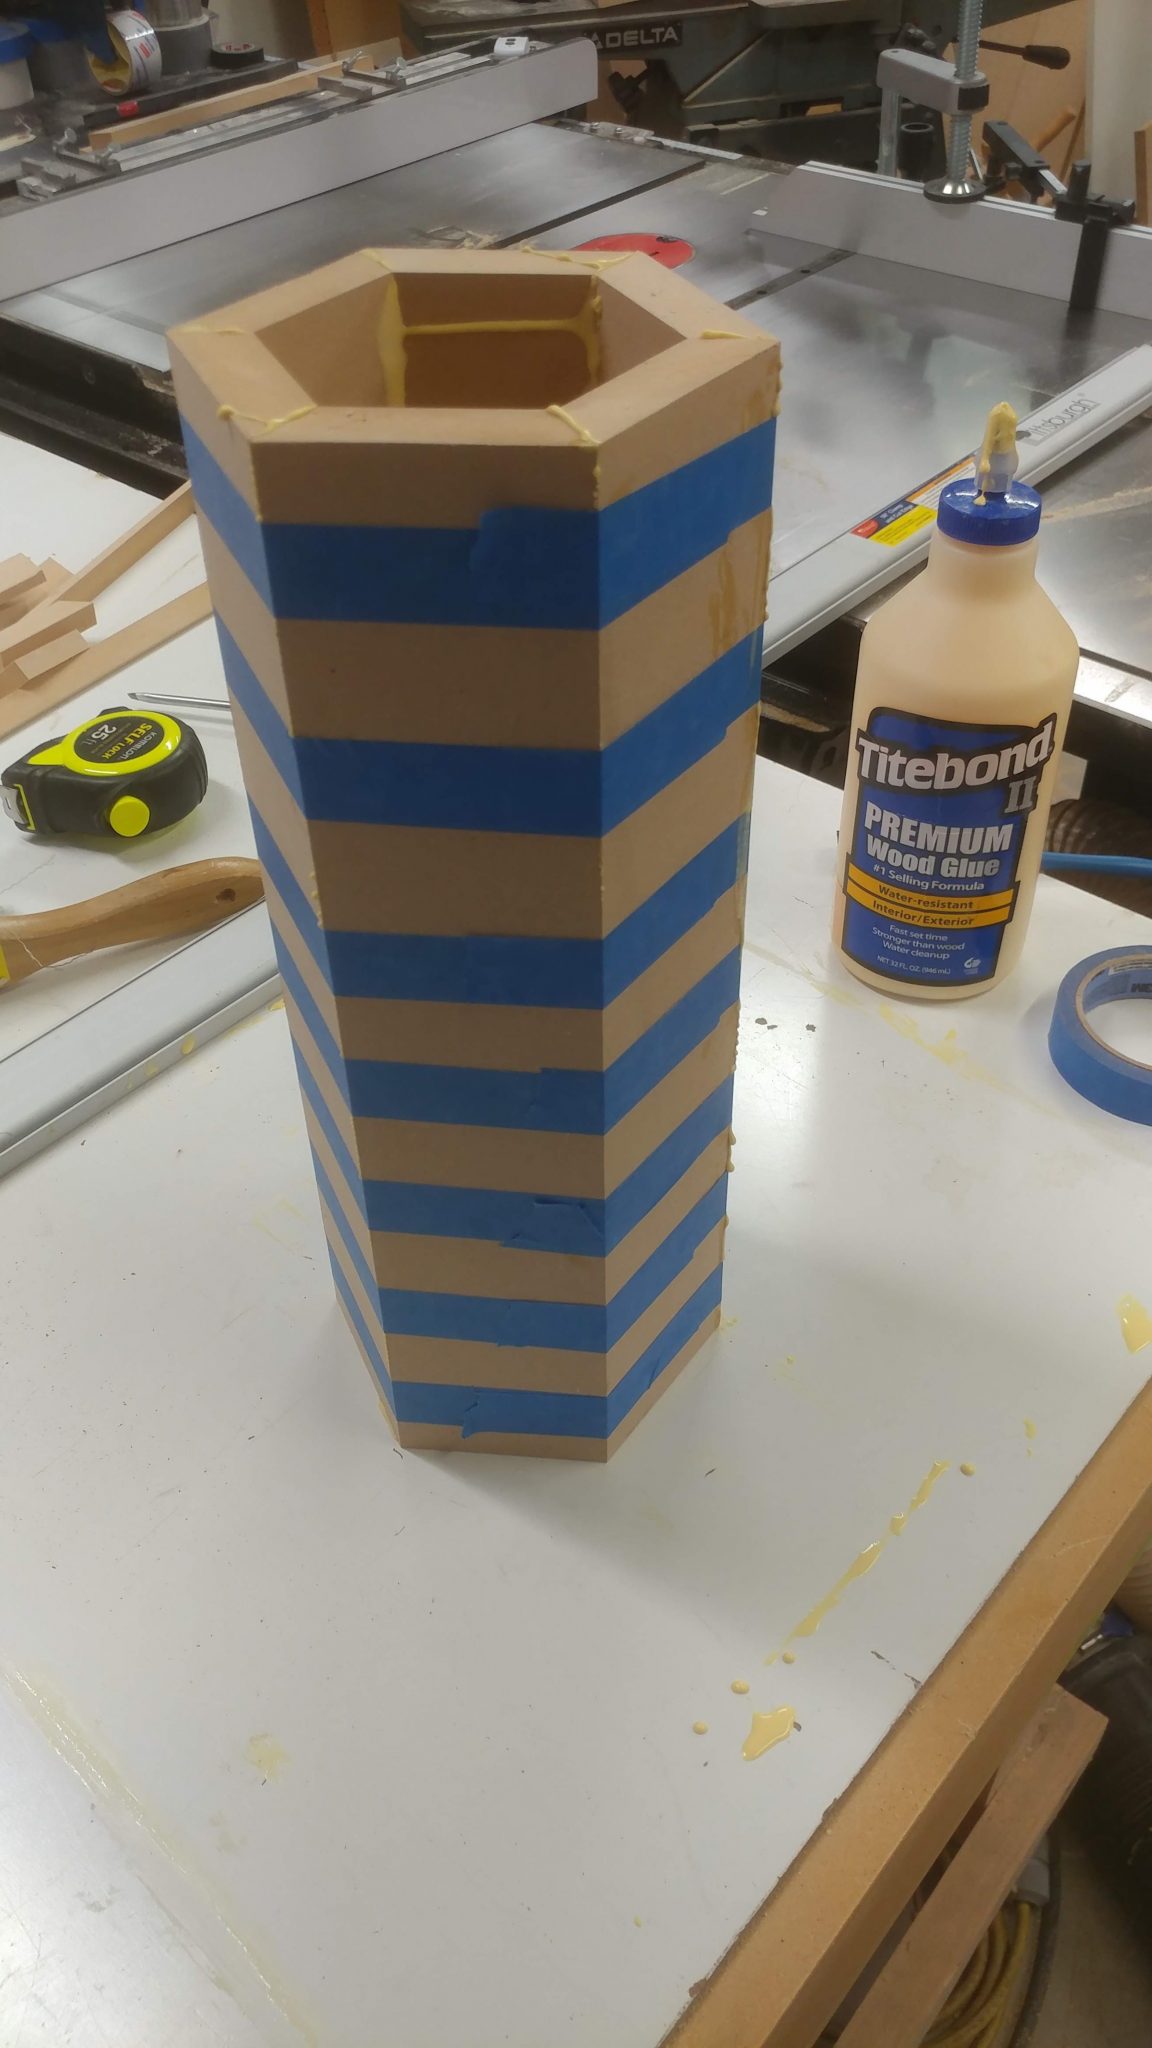
After applying the glue, I rolled it up and added more tape to act as a clamp.
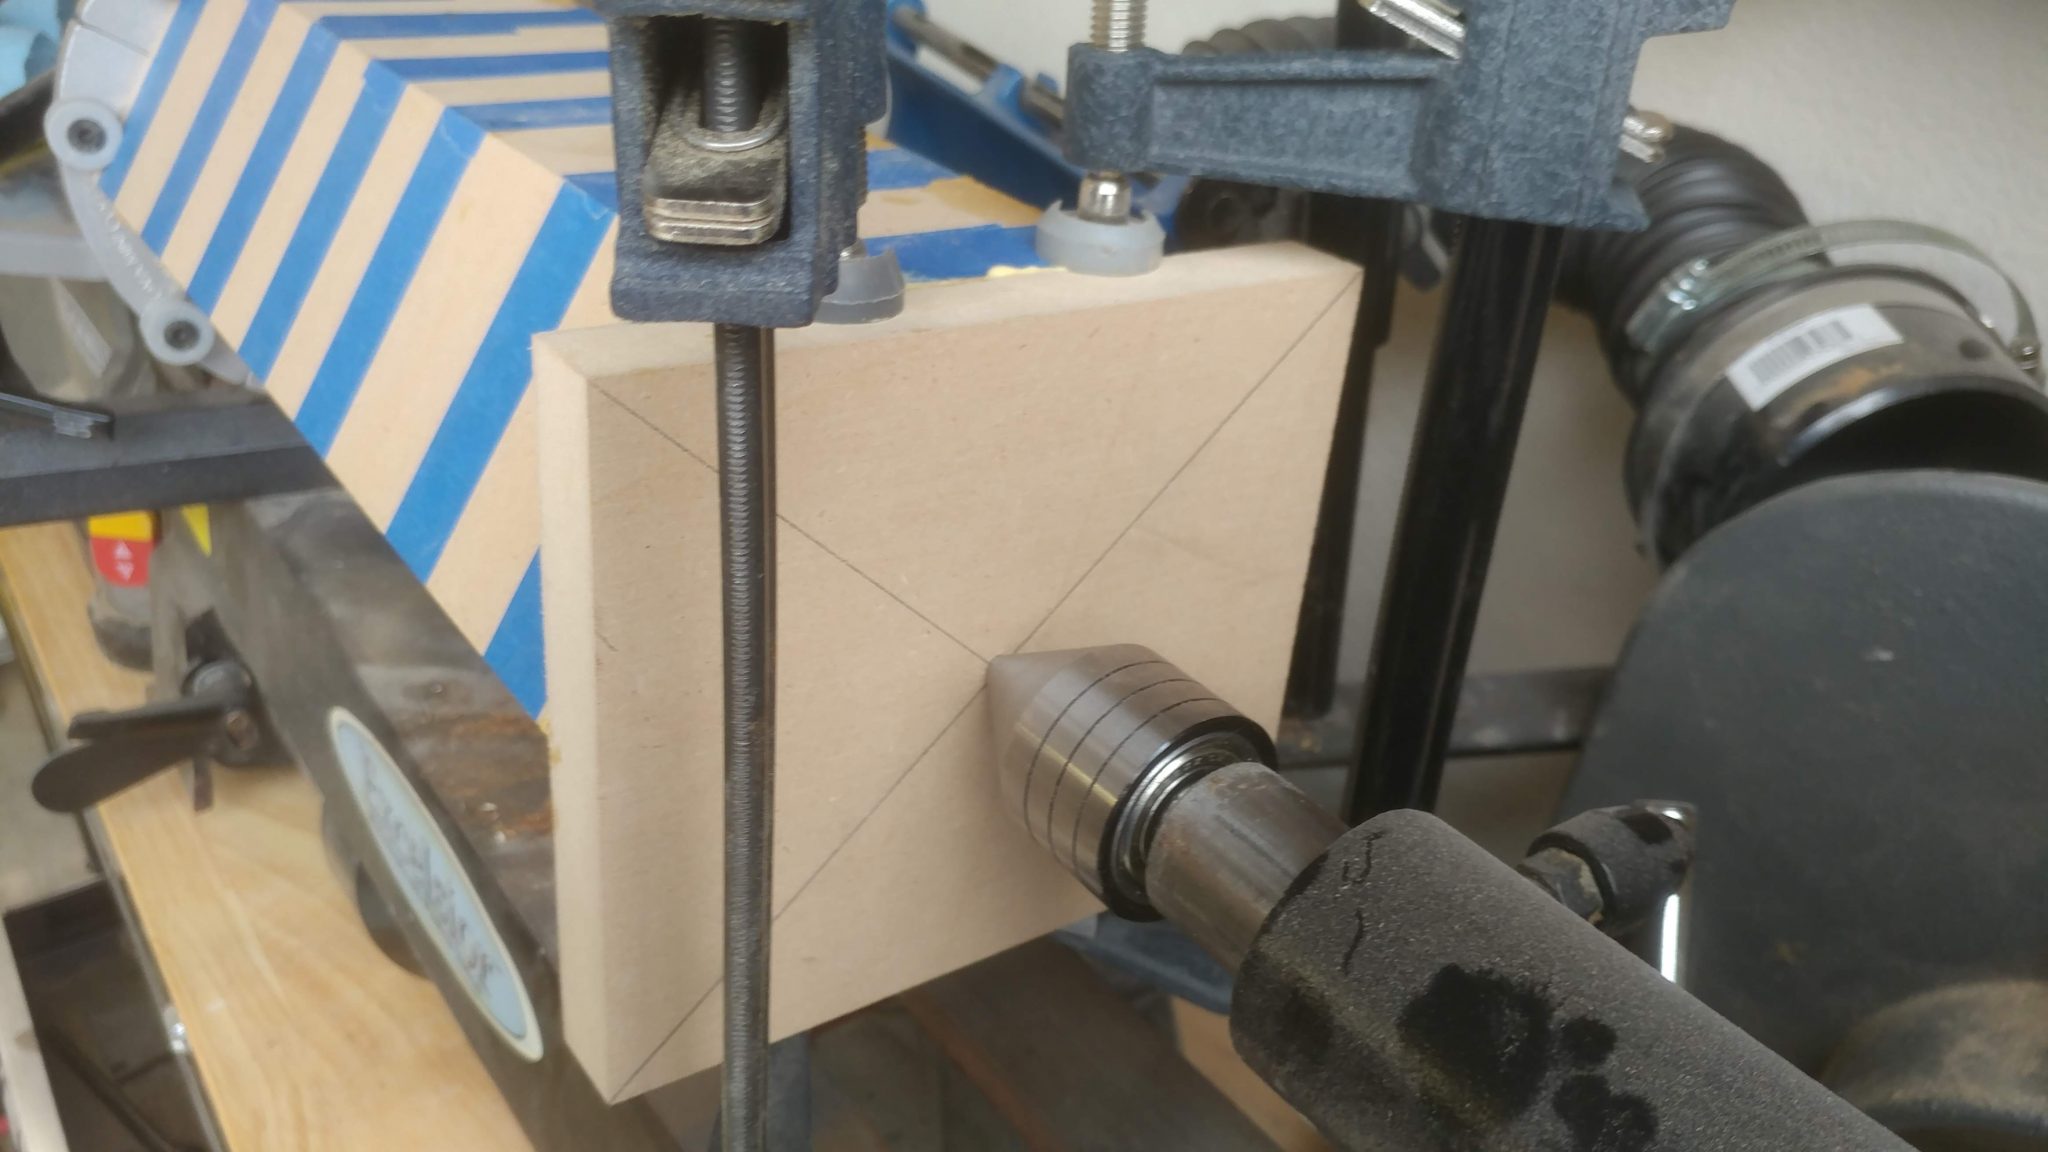
I cut a piece to act as an endcap and glued it to one end of the tube, using the lathe to clamp it together while the glue dries.
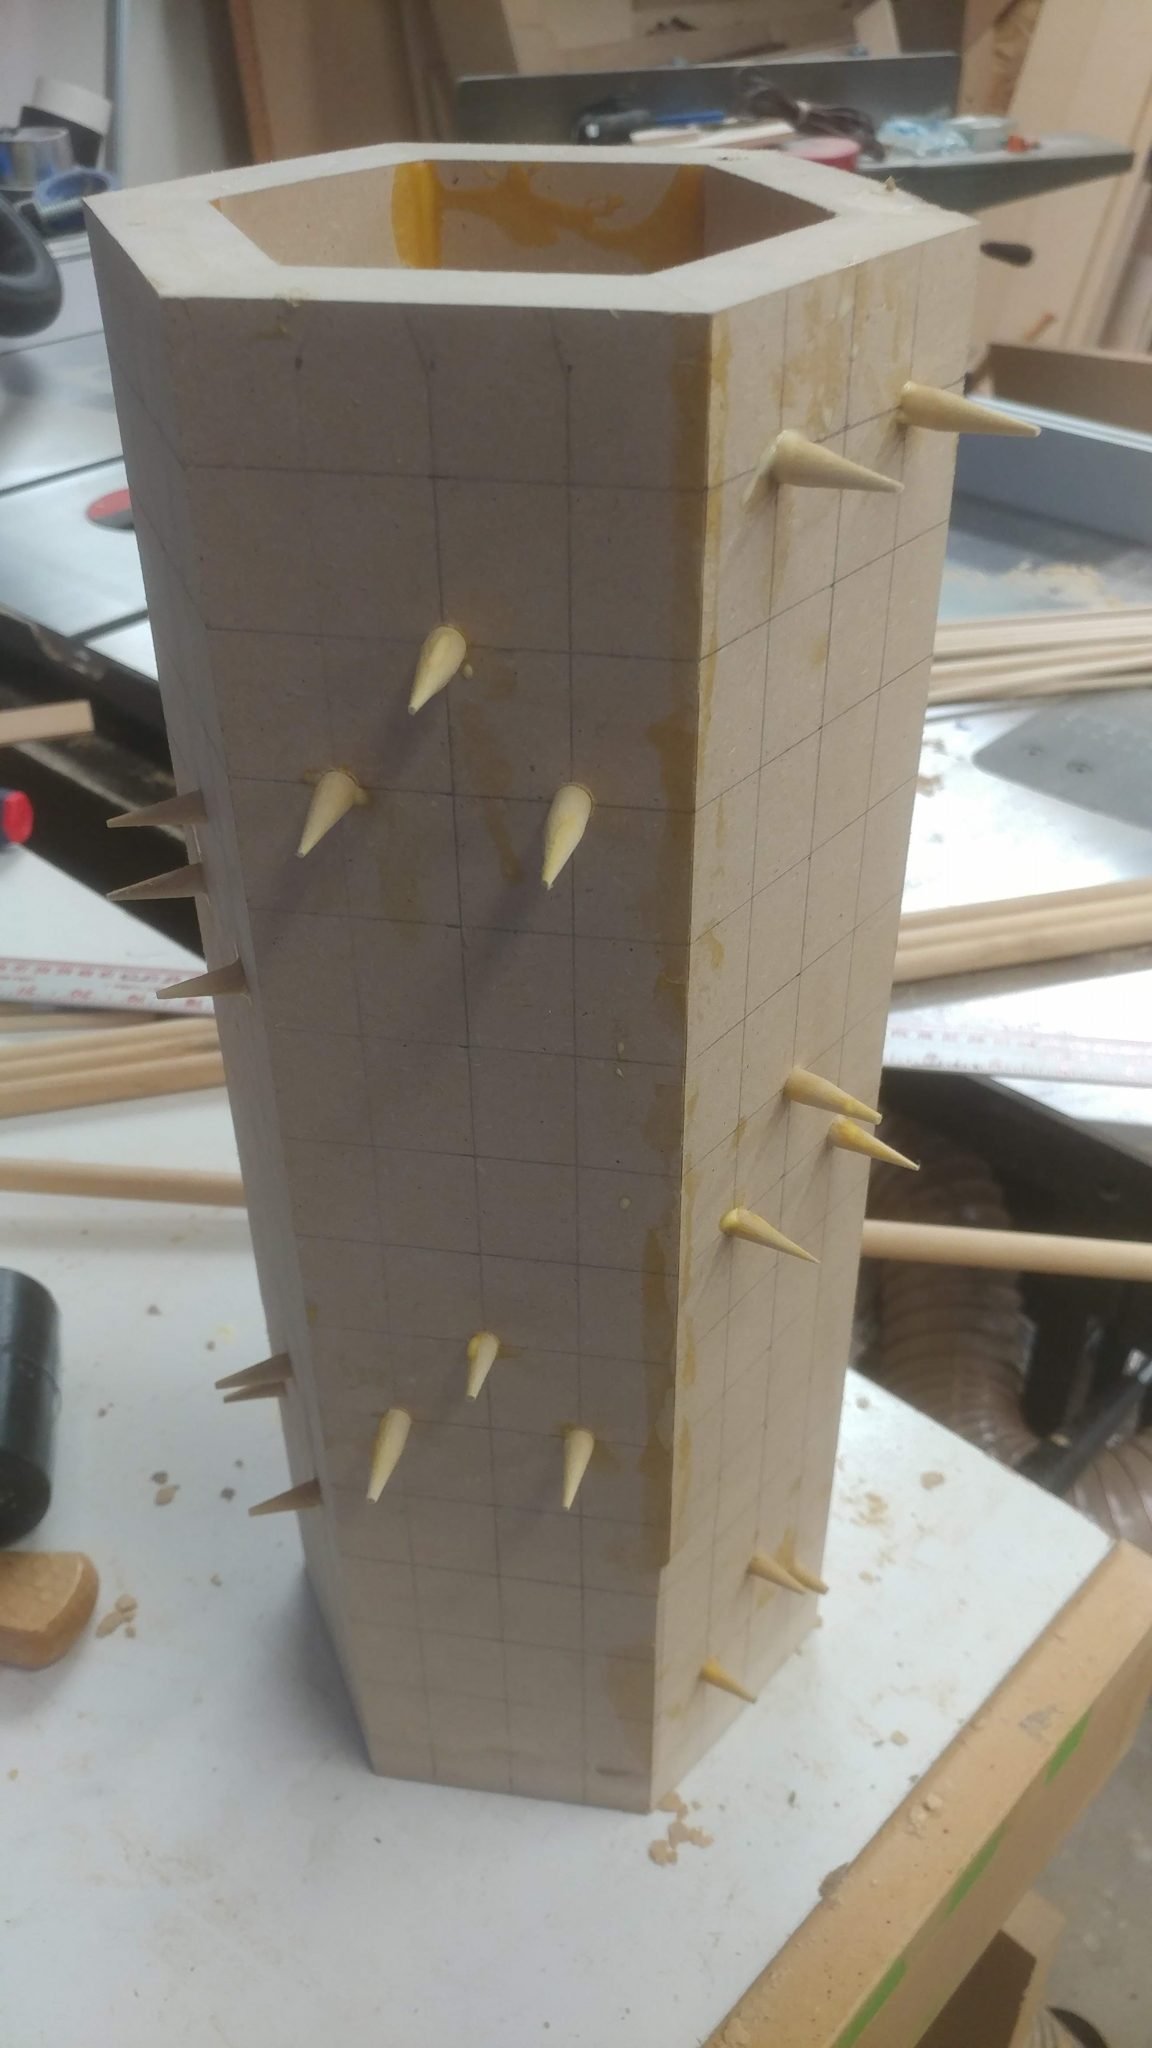
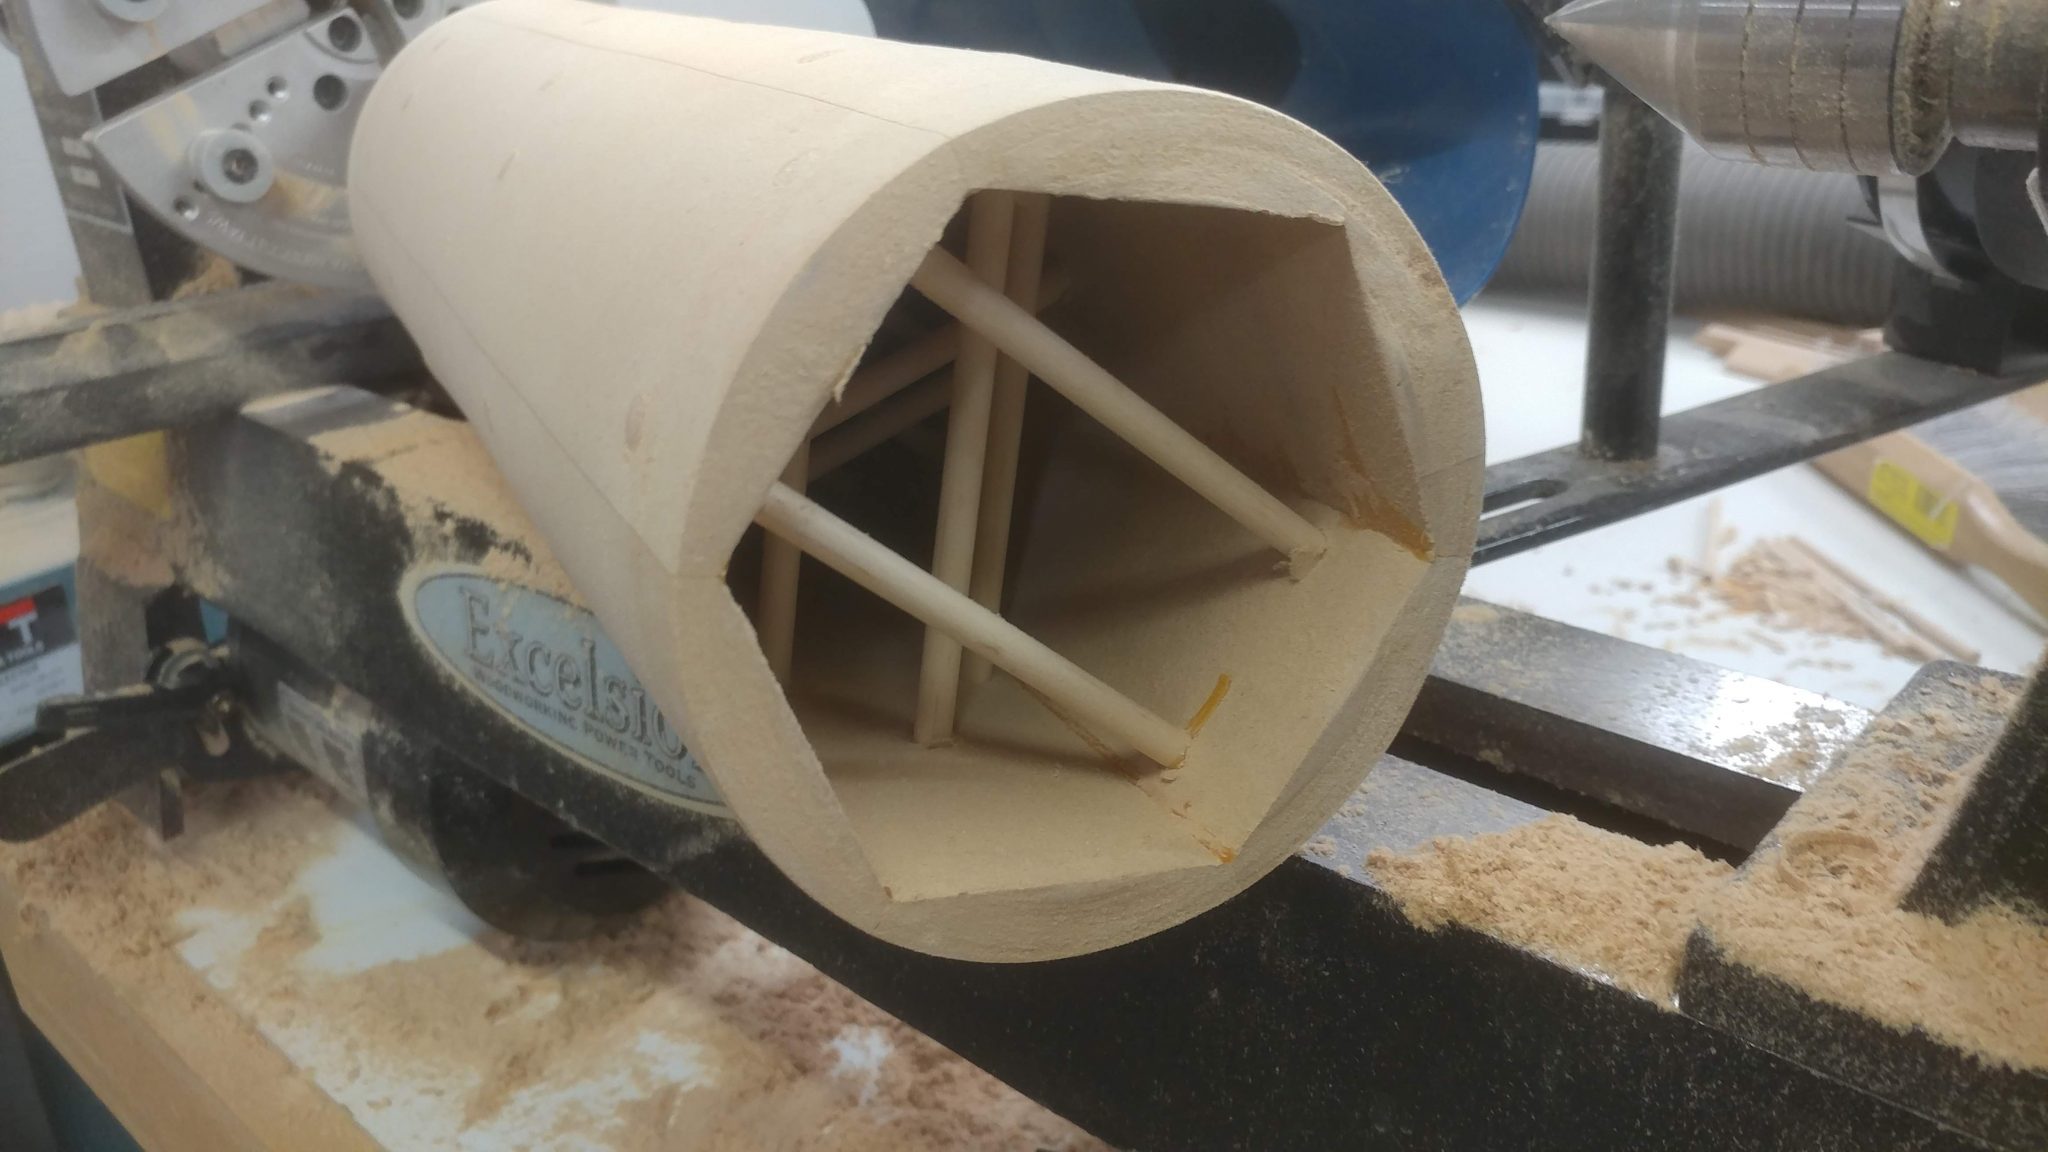
After it was all dry, I drew a grid on each stave and drilled holes through one side, then at corresponding locations on the opposite side. I then took some 1/4″ birch dowels and sharpened one end with a pencil sharpener so I could guide it through one hole and into the opposite one without having to deal with the alignment of the two holes being slightly off. These dowels were glued in place. It looks pretty deadly at this point.
Here’s an internal view. You can see that there is a lot of glue in there. This is fine because it just adds more bumps for the rainstick filler to bounce off of.
I trimmed off the spikes and put the prototype on the lathe.
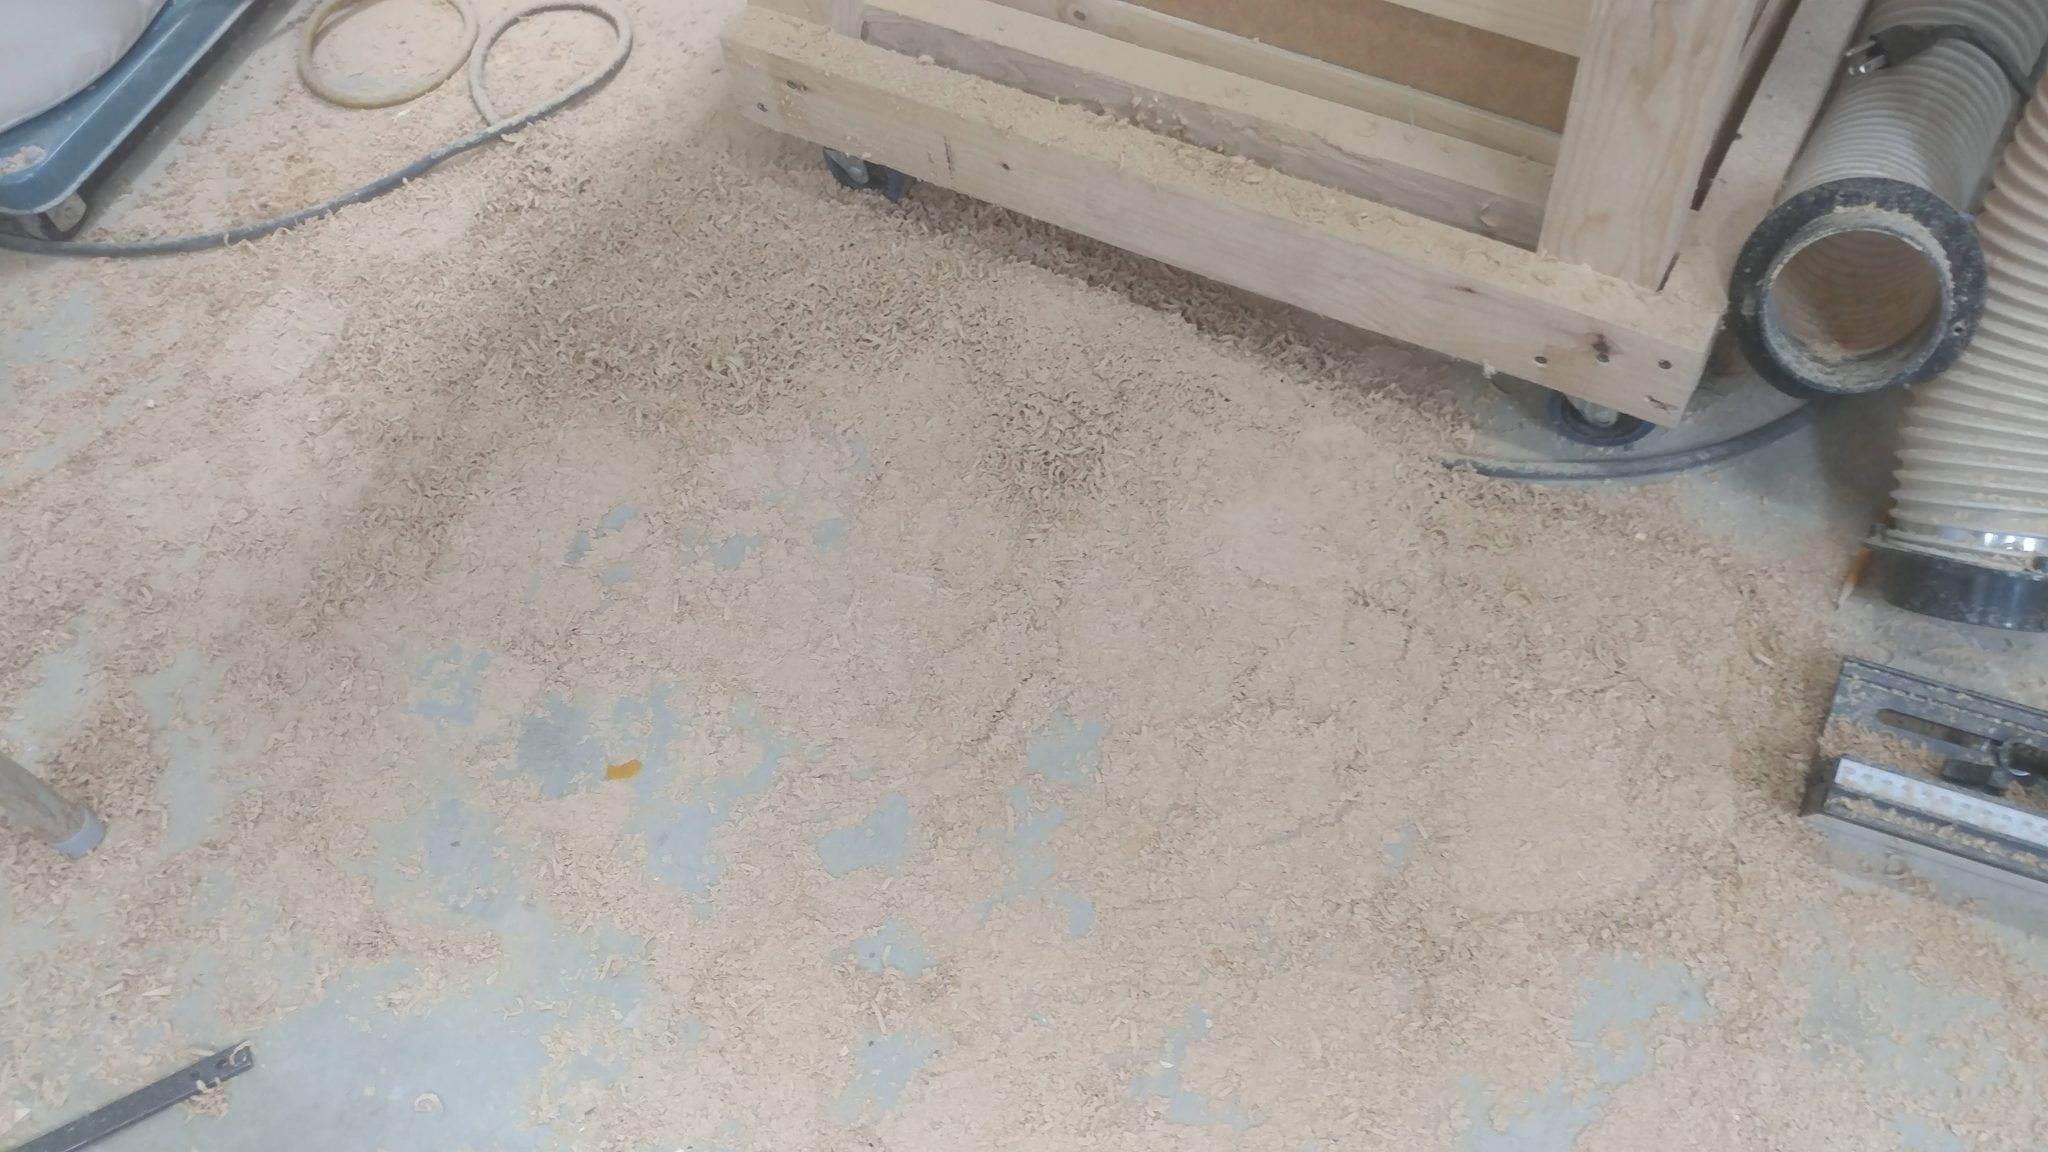
After a lot of turning, I got it it so the thinnest parts of the walls were about 3/16″ thick. Since this is just MDF, I don’t really want to go much thinner.
As you can see, I made quite a mess.
I left one end open so I could experiment with different fillers. I tried unpopped popcorn and rice. I also want to try sand and B-B’s,
I’m ready to make my first real rainstick. I’ve decided on a few things.
The diameter is too big. I’m going to aim for about an inch narrower.
I’m also going to aim for thinner walls if I can make it work.
The dowels need to be thinner as well and more frequent.
Rice is a great filler but I need to add a lot more.
I’ll do a detailed write-up and possibly a build video when I make a real rainstick.
Any ideas?
Have you ever made or even just played a rainstick? If so, do you have any ideas of different construction techniques or materials that would make this more interesting?
Feel free to share your thoughts in the comments section below.
If I use your idea, I’ll be sure to credit you. I might even feel the urge to send out a free rainstick to whomever gives the most interesting idea. The idea needs to actually work, however. Filling the rainstick with gummy bears is definitely interesting but lacks certain acoustic characteristics that I am looking for.
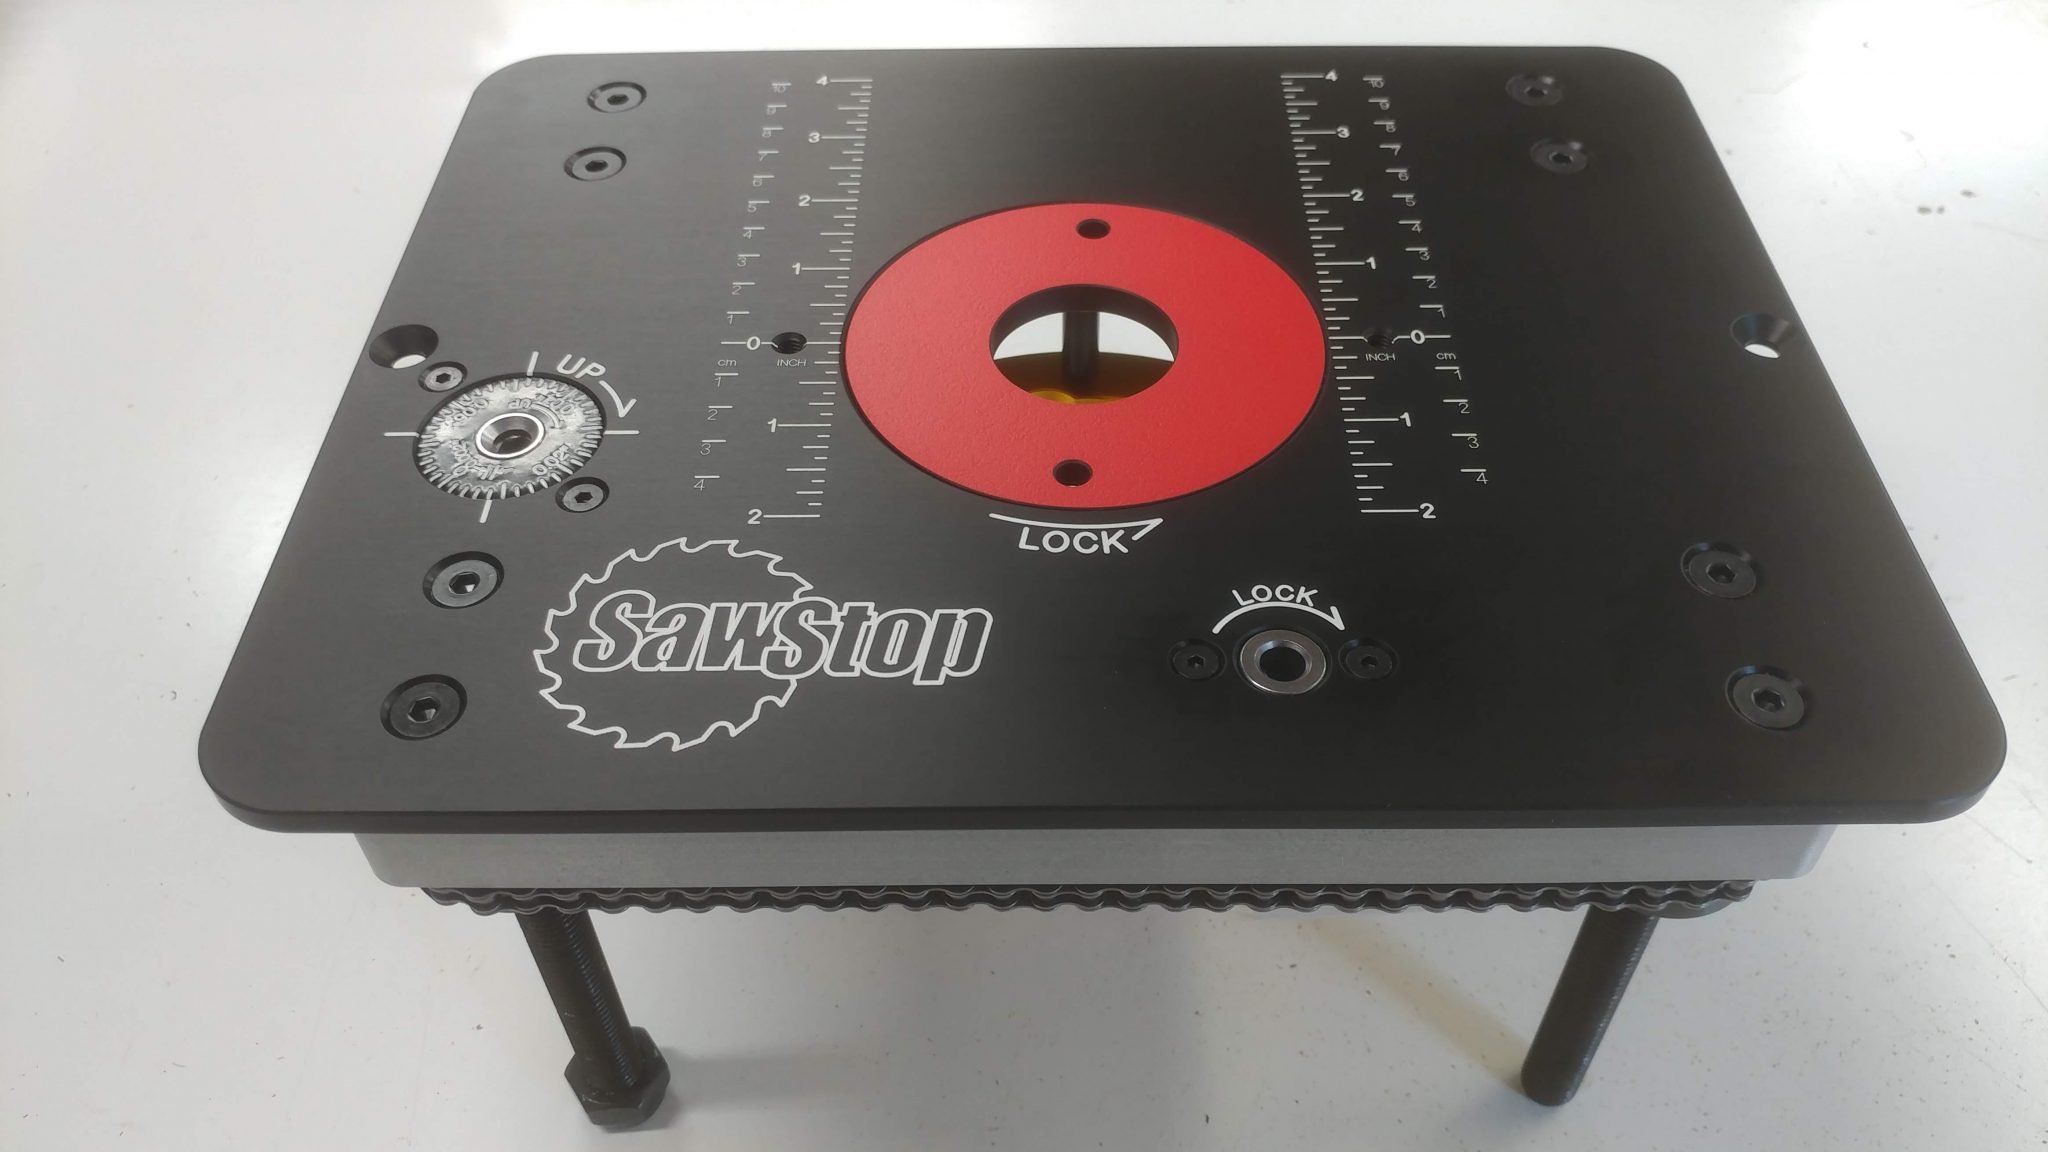
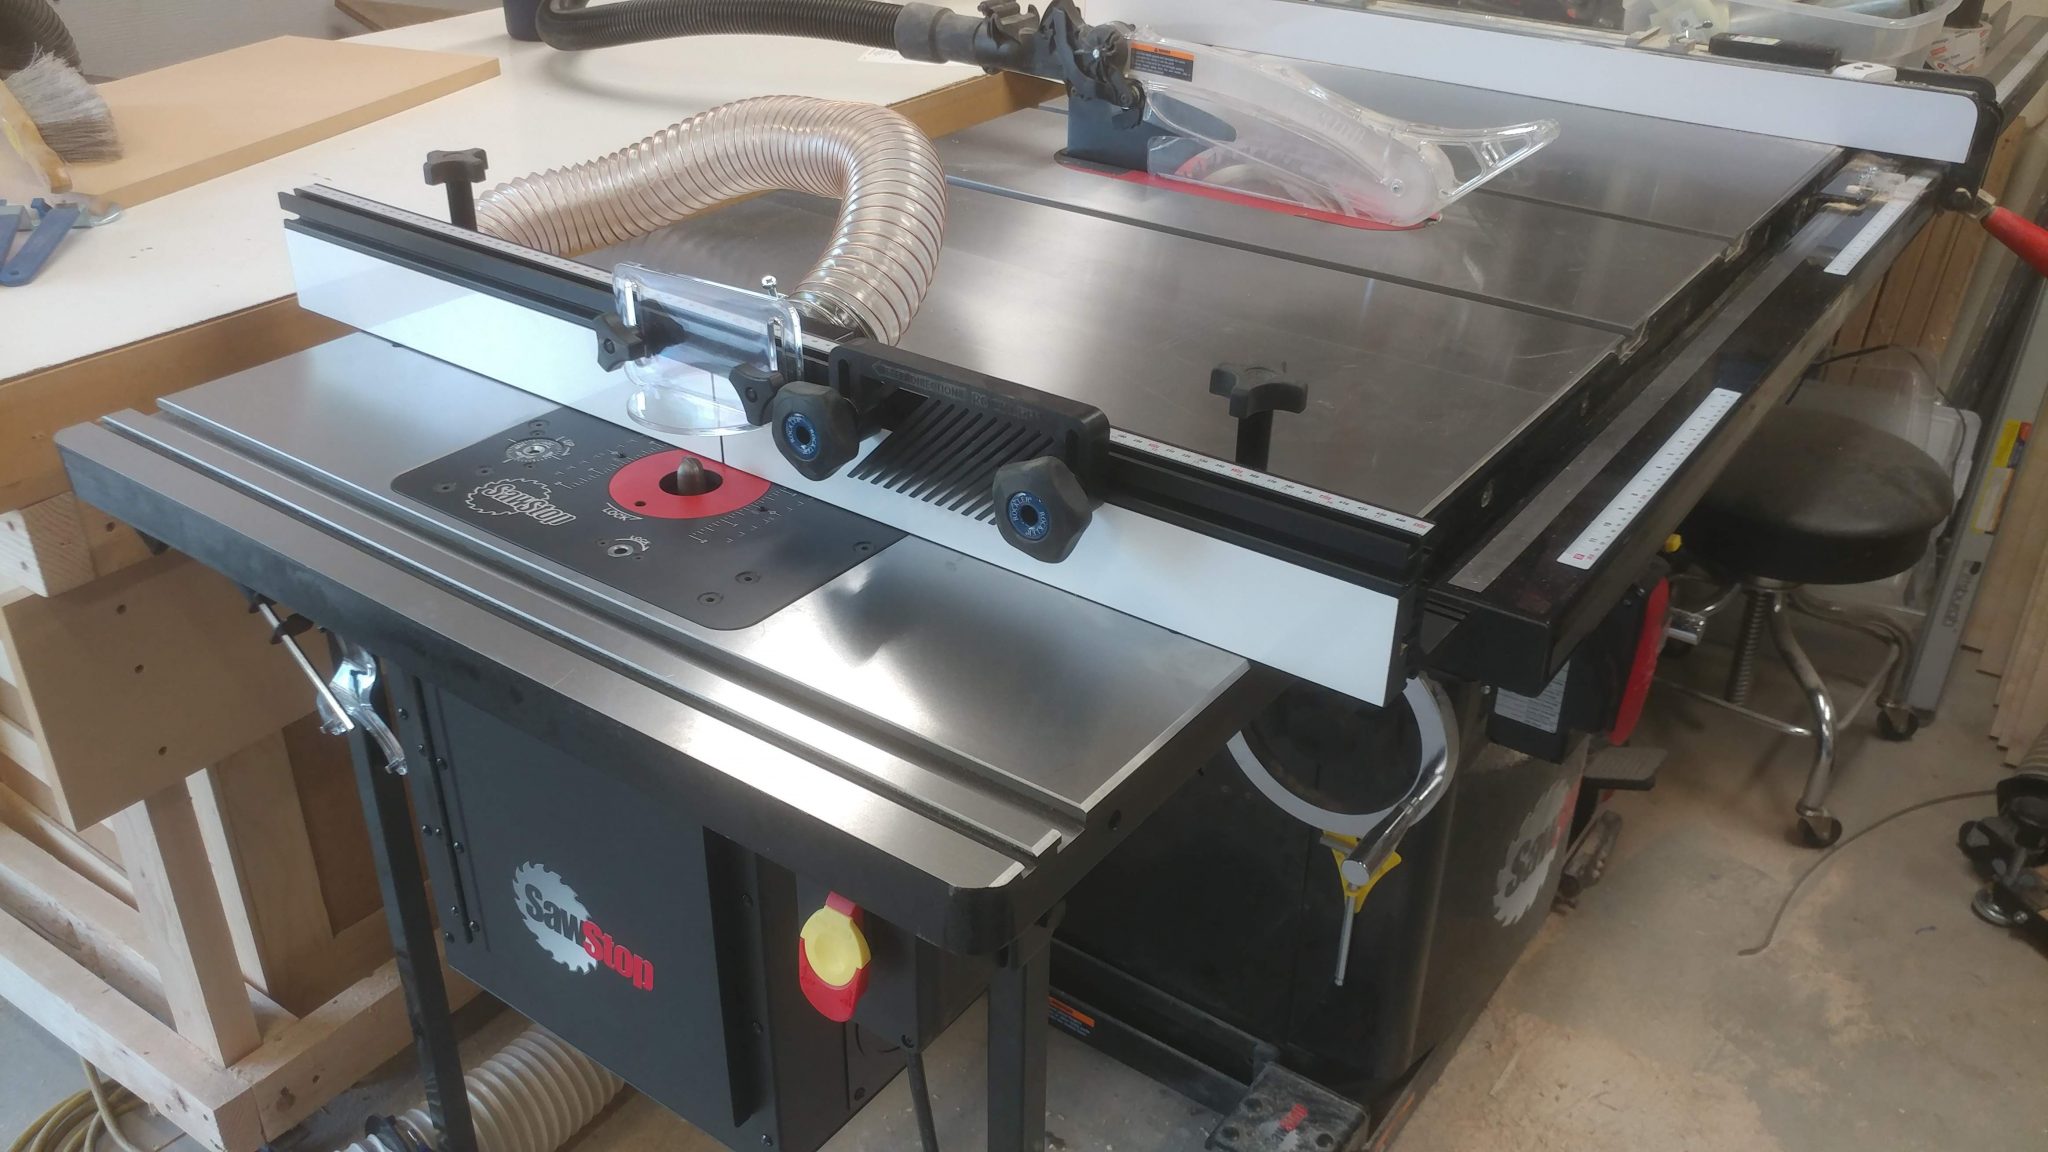
I managed to get my hands on a SawStop router lift and downdraft dust collection box. This finishes up my SawStop Router Table
I’m putting together a detailed write-up on the assembly of each of the components as well as some of the tests I ran on it afterward. My initial impressions are good. I’m particularly happy with the dust collection capabilities.
Surprise Present from a Customer
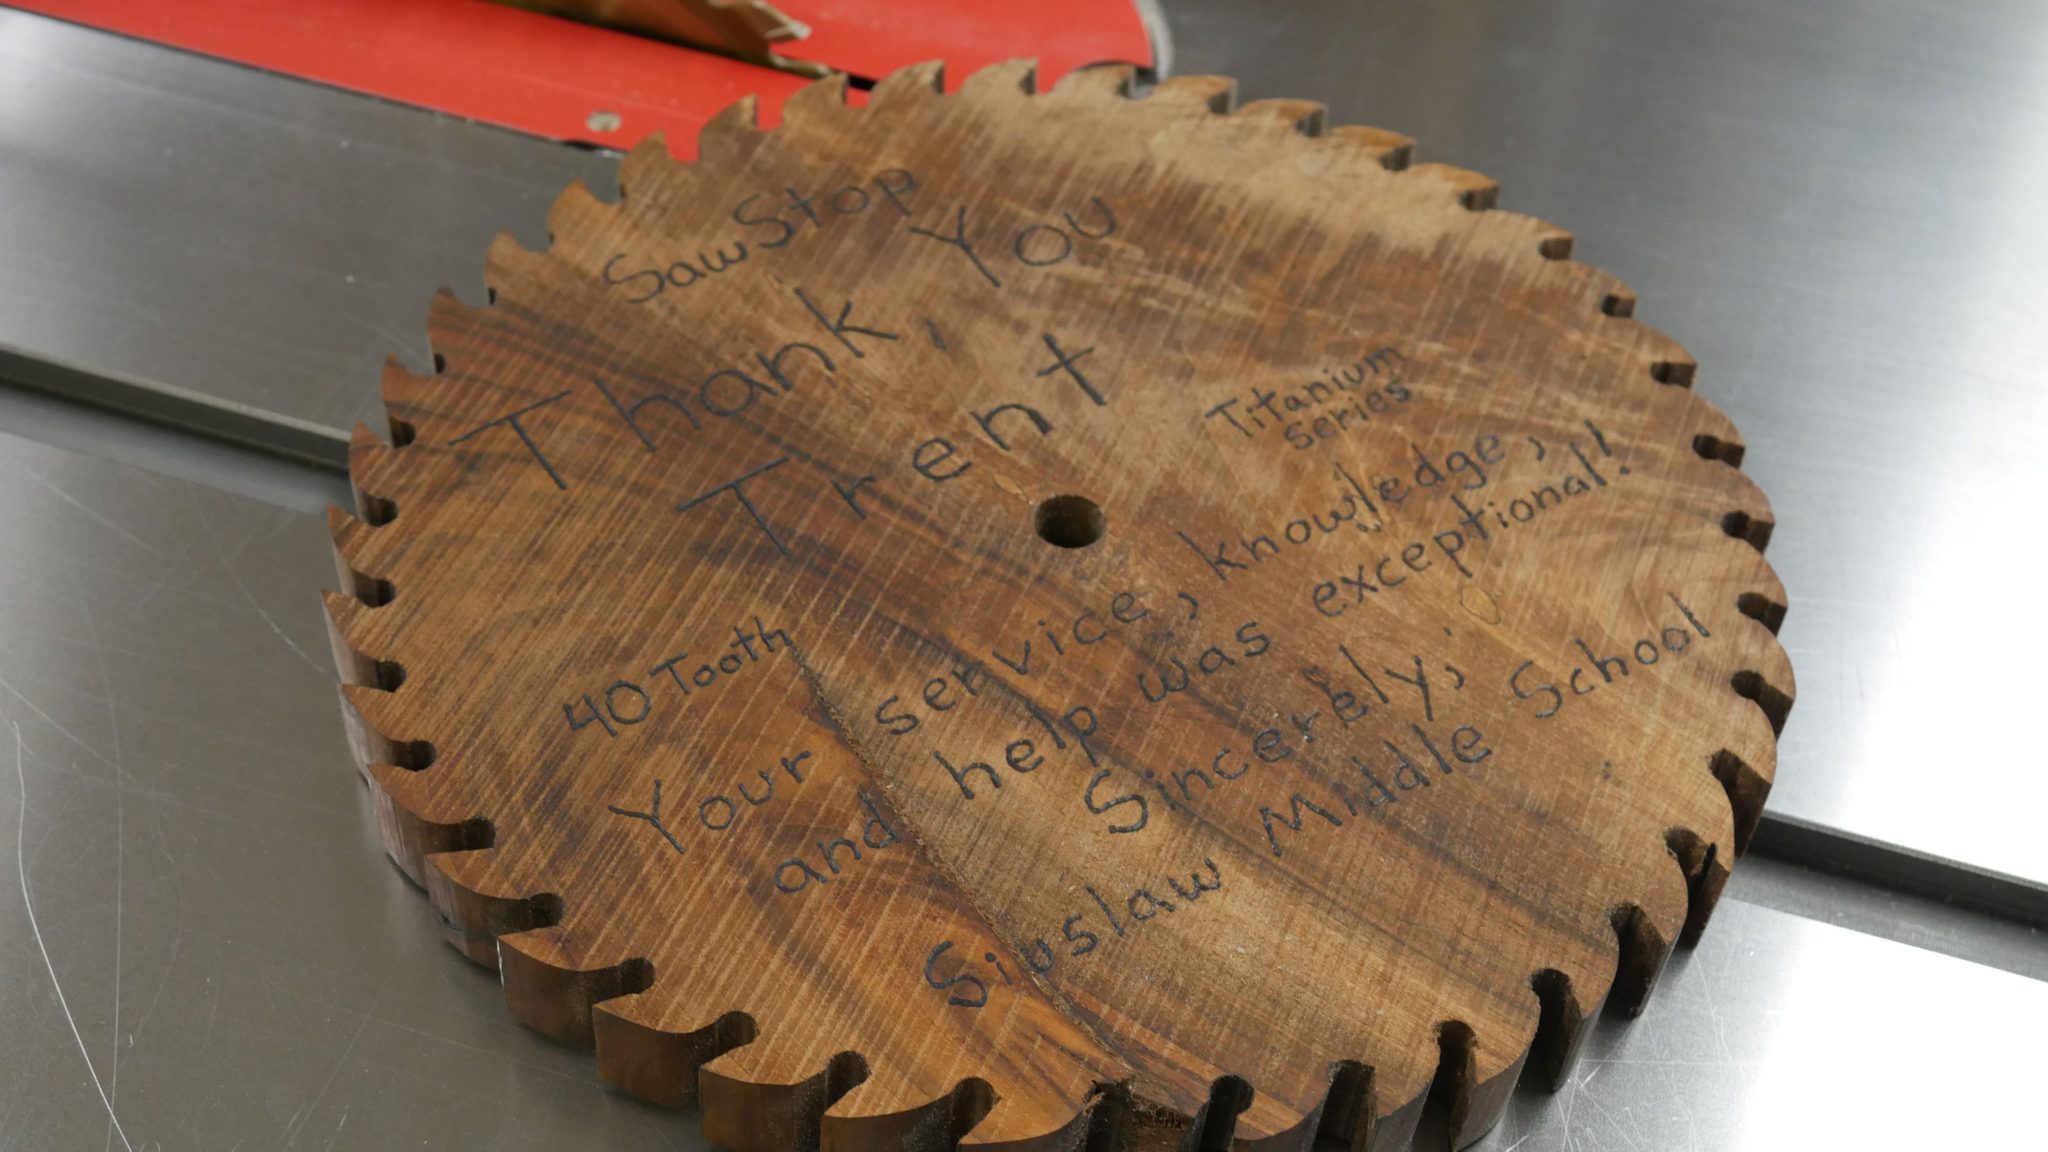
In mid-April, I got a call from Siuslaw Middle Schoolin Florence, Oregon. They needed assistance with their blade guard. I’ll spare you the boring details but the end result is that their problem was solved. All in a day’s work. No big deal.
Fast forward a few weeks later and something cool arrived for me in the mail. As you can see in the picture above, it is a saw blade. Not just any saw blade, mind you, this one was hand made for me by the awesome students in the Community Wood program at Siuslaw Middle School. The blade is made from English Walnut and finished in Linseed Oil. This is now my prized possession and hangs proudly on my cubicle wall. I get lots of people stopping by to look at it. I’ve gotten things from customers before but this is my new favorite.
The Community Wood Class is a woodworking class with a focus on community service. They do woodworking projects for people in the school district and even in the general community. According to their teacher Tod Graham, “We also like to do simple acts of kindness involving wood.” I think it’s safe to say that this counts as an act of kindness.
The craftsmanship on this blade is great. I could never produce something of this quality when I was in middle school. I really want to see some more of their work. I’m particularly impressed that they actually cut out all 40 teeth and each of the teeth looks great. Being able to focus on a mundane task and perform it at a consistent quality level, as is evident on this blade, is very impressive. These kids are good at what they do and their community is lucky to have them.
I’ll explain why this is so important to me…
We take customer service very seriously at SawStop, where I work. We have a reputation in the industry for handling customers better than the competition. I love this company but if they ever change their approach then I would probably leave (not that they’re planning on changing). I made sure to show this blade to my superiors as a nice reminder that we are doing the right thing and we should continue to do so. We don’t get bonuses or even praise for taking a certain number of calls or keeping the calls under a specific time-limit. Our job is to take care of the customer. Period.
Where else can you call for free support for, say, a 10-year old used saw that you bought at an auction, not have to go through an annoying call-tree, and get someone who not only speaks English but who also uses a table saw regularly and can talk shop with you? I love my job. My coworkers feel the same. This may sound cheesy but my passion is helping people achieve their goals.
It makes me feel good to know that there are people like the students in the Community Wood Class out there, and that I can help them do what they need to do in order to have a positive impact on their community.
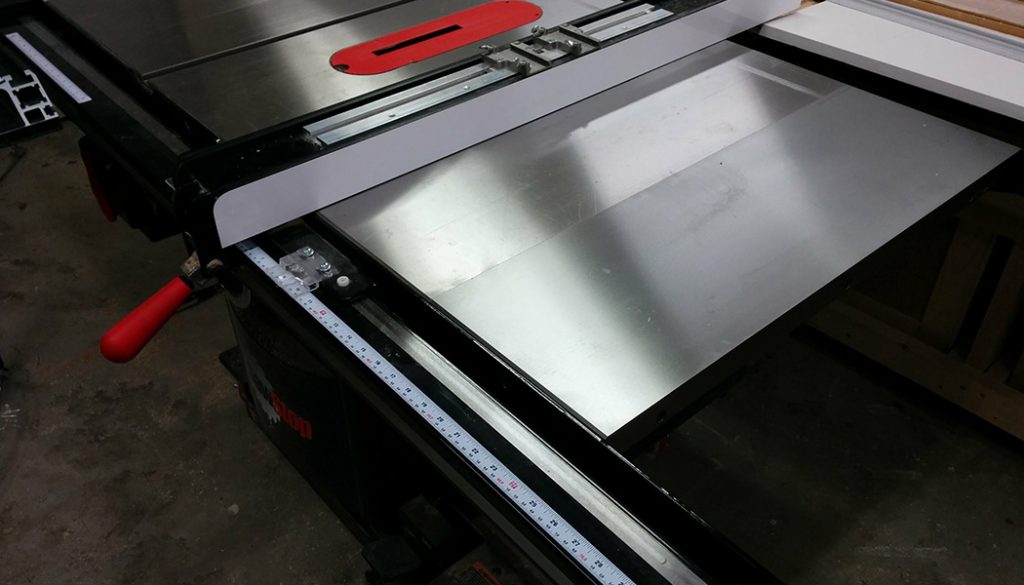
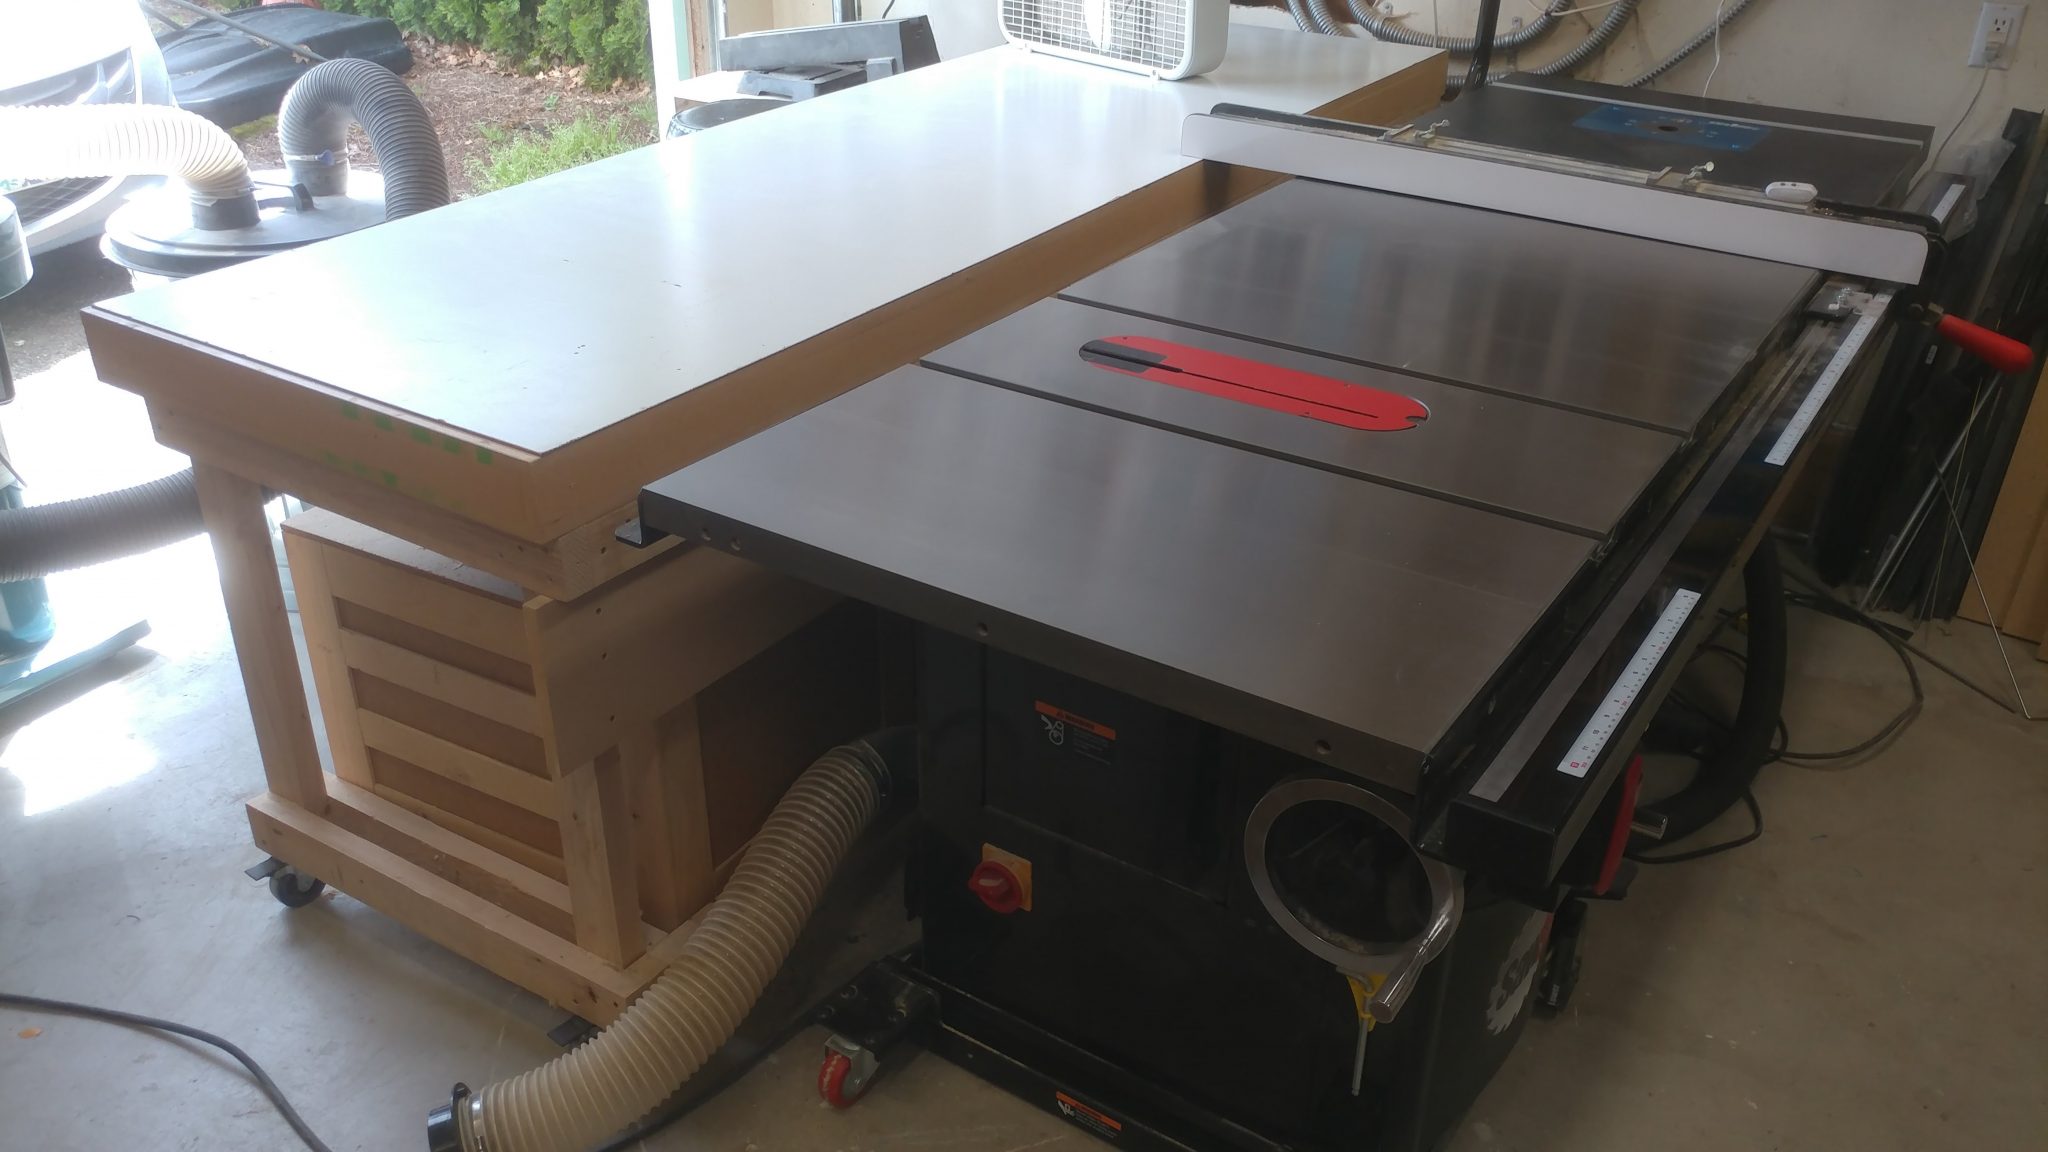
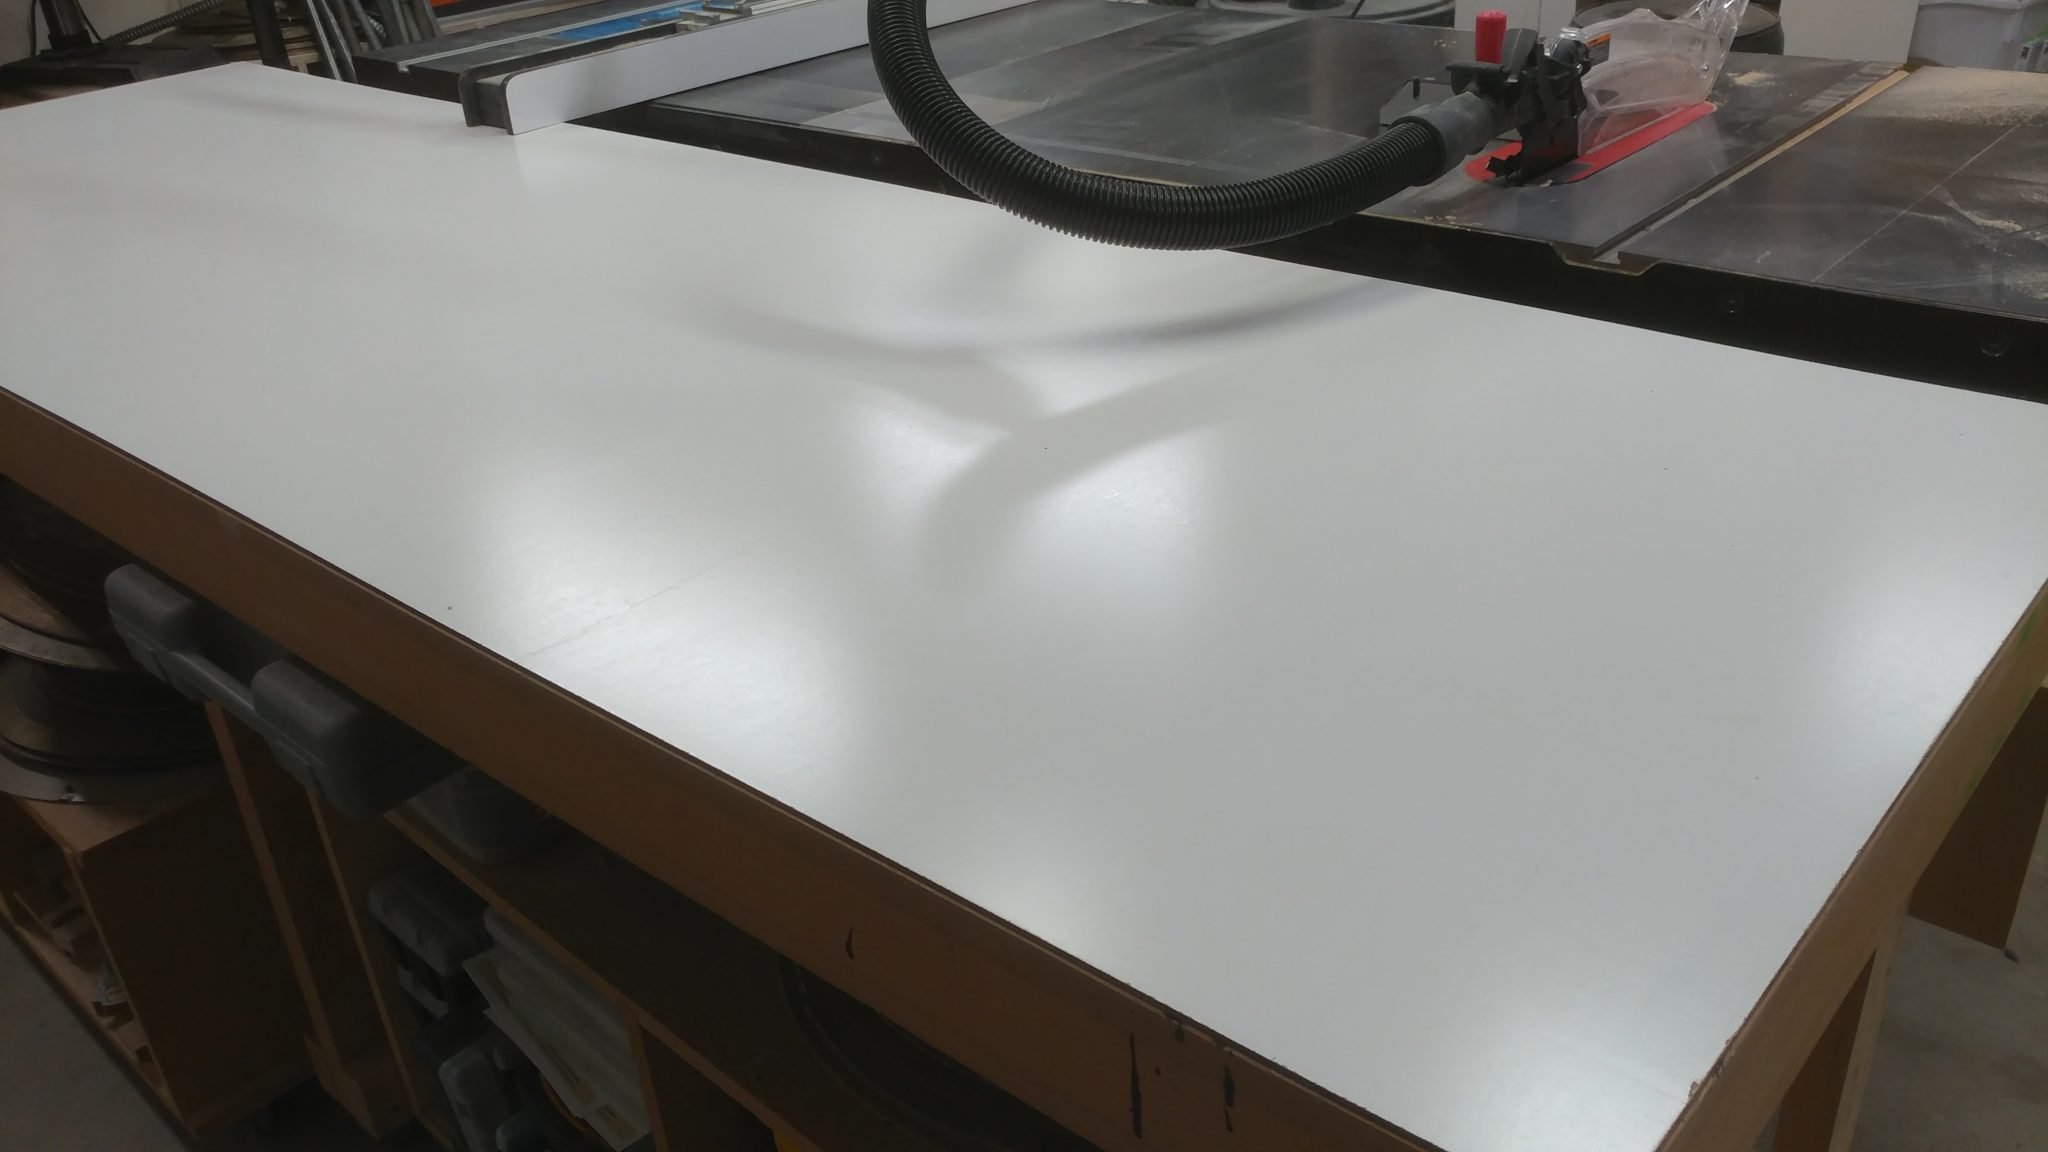
There have been some major changes in my shop. Unfortunately, I haven’t been able to actually build anything but that should change soon. The picture above shows my table saw and outfeed table. I took this photo because I knew that this was the cleanest my shop would be for quite a while.
New Cast-Iron Router Table
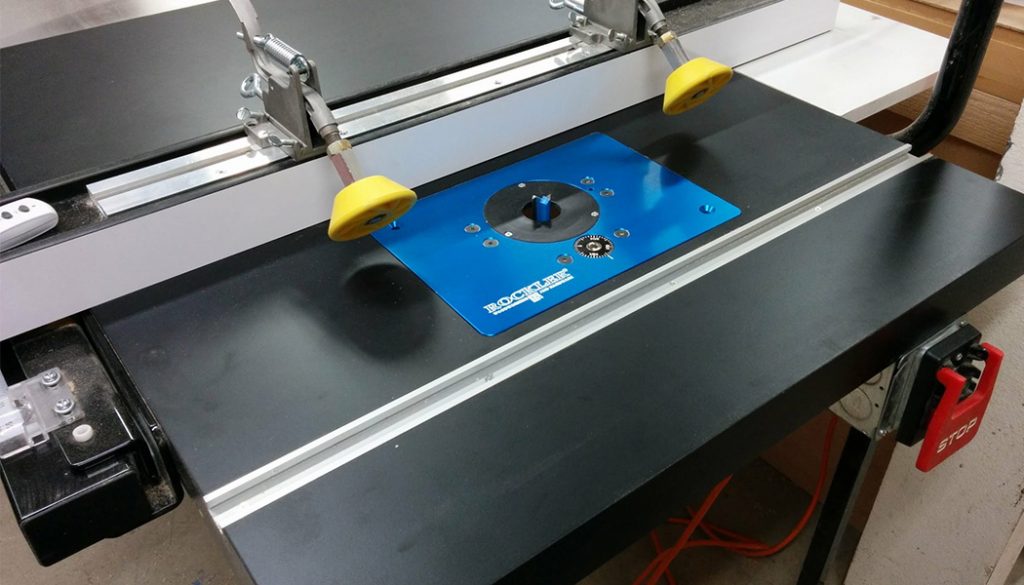
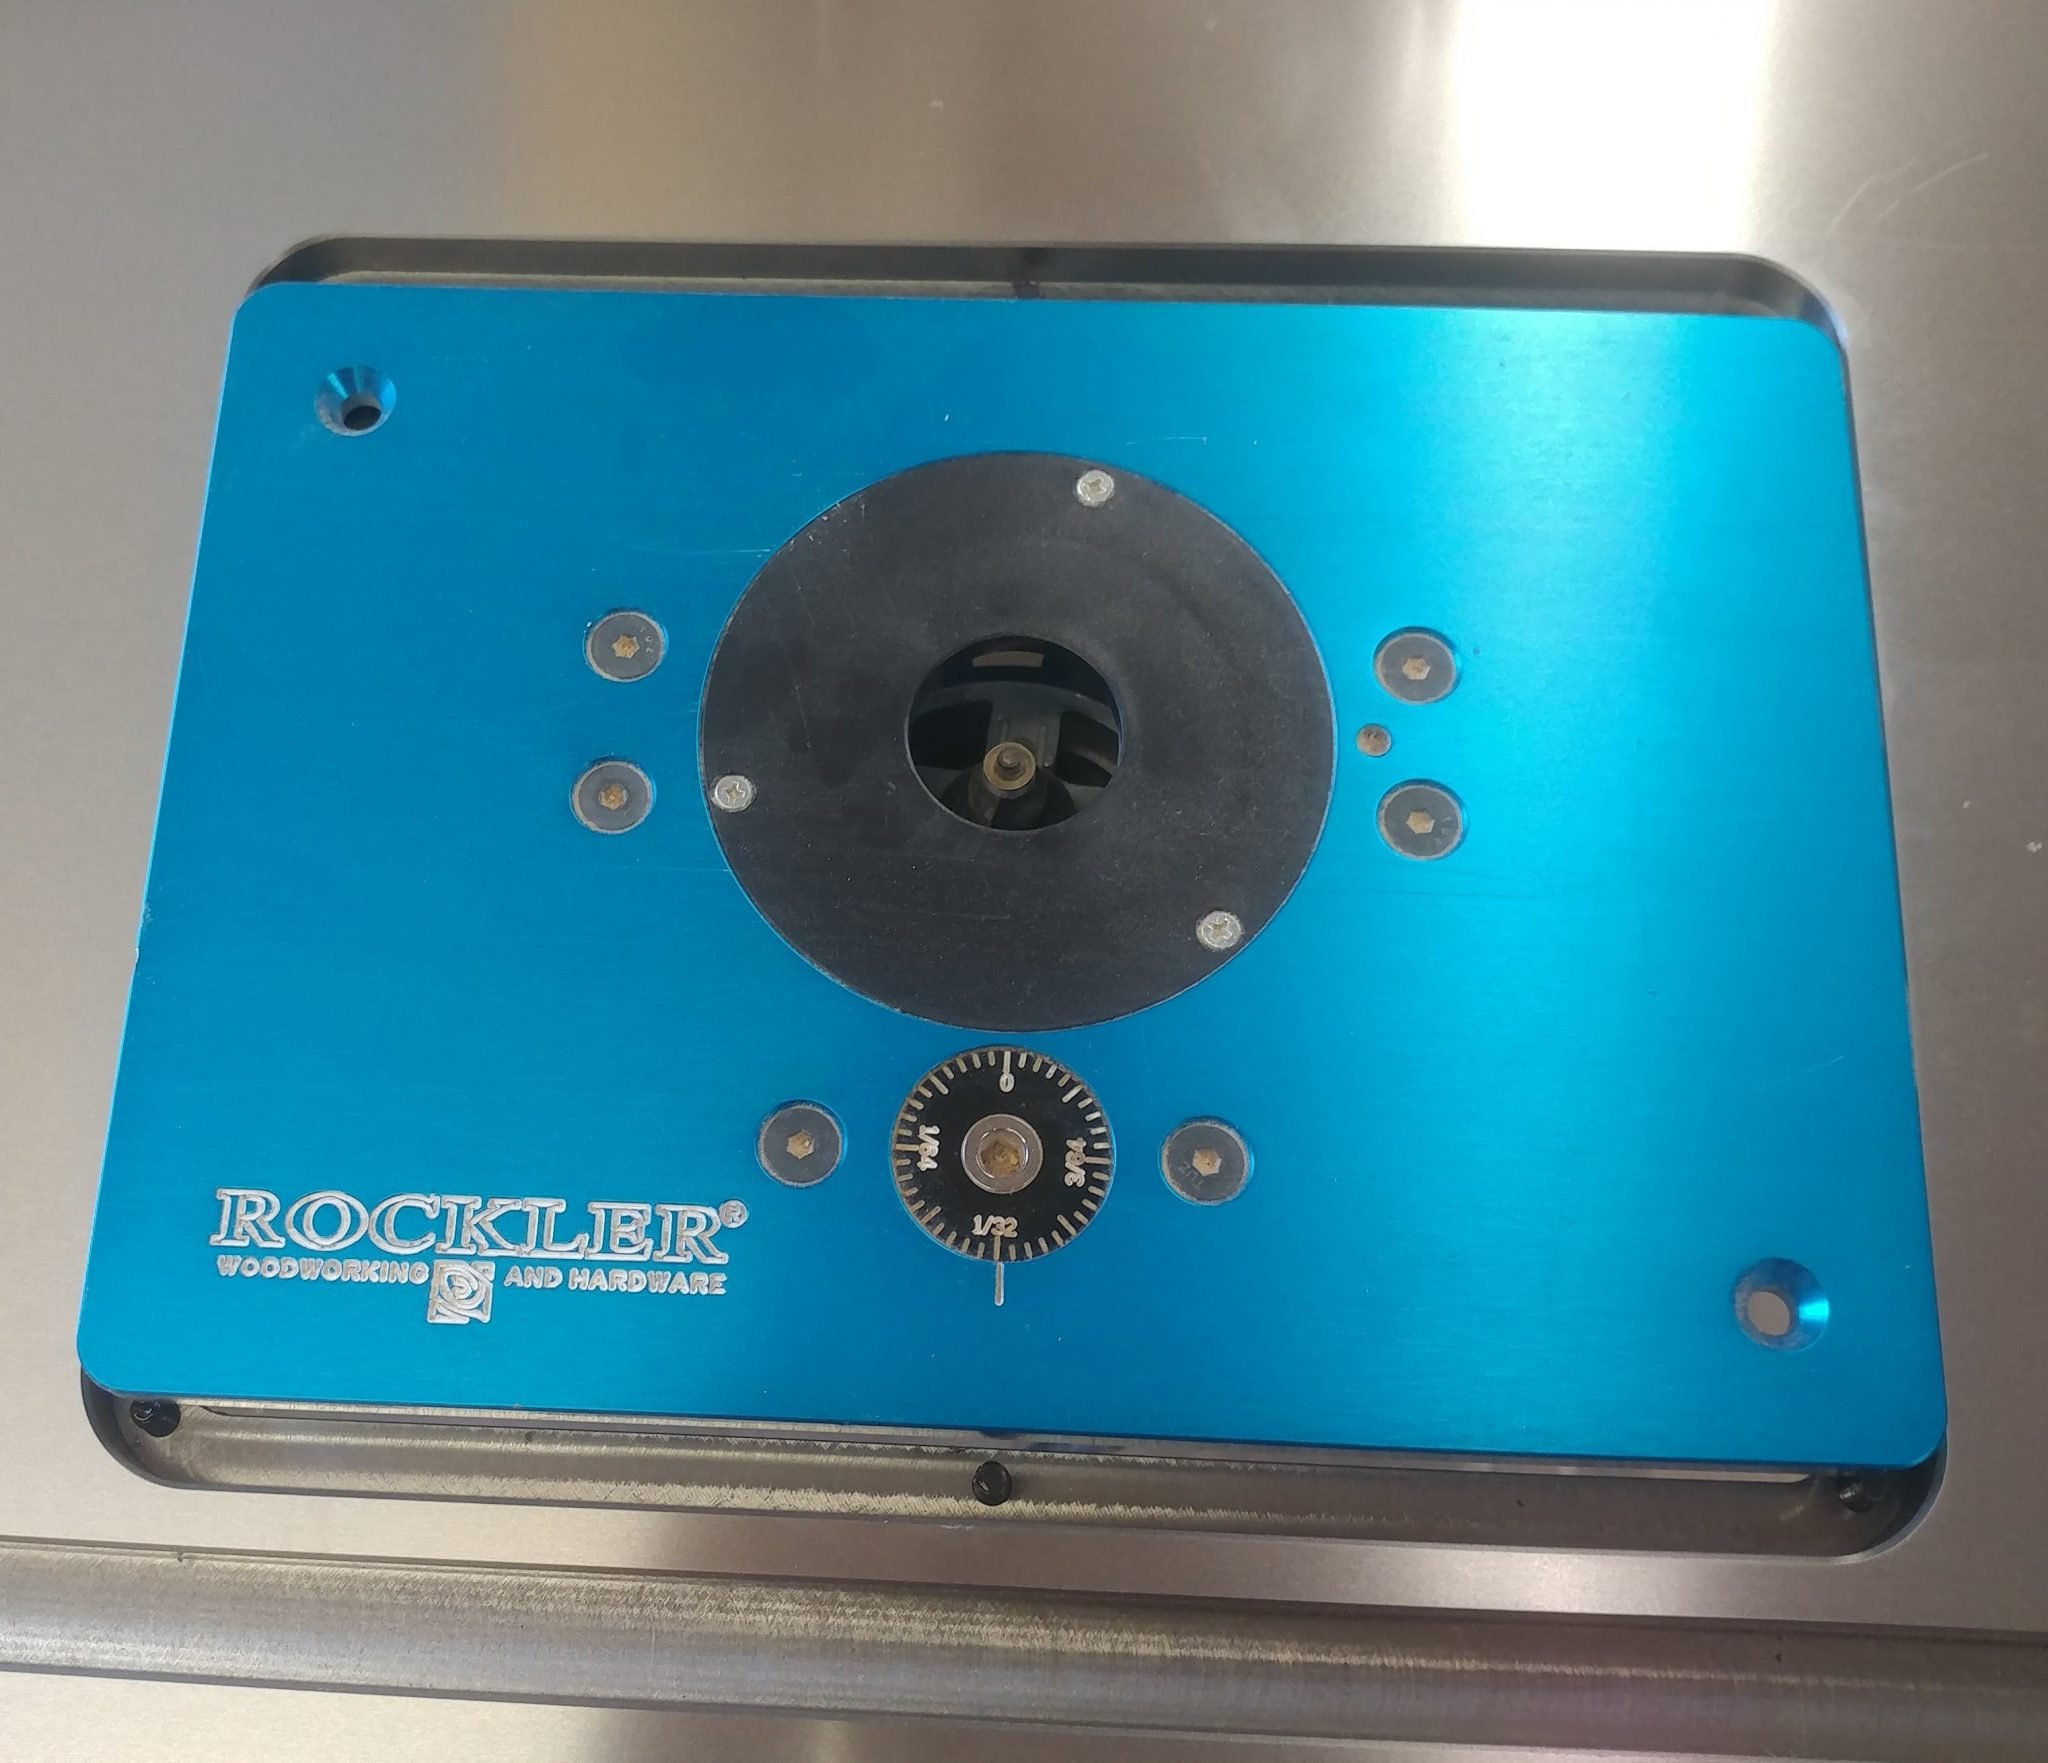
I finally gave in and upgraded to a cast-iron router table attachment for my table saw.
I bought the ICS Inline Router Table from SawStop. I bought it without the router lift and the dust enclosure for a few reasons. One is financial; we just put a new roof on our house. The other is that I wanted to see if my existing router lift would fit in it and if so, how tight of a fit was it. In the area of router lift/insert dimensions, there doesn’t appear to be any “official” standard. As you can see, my lift doesn’t fit. It’s totally the lifts fault. Time to get a new one. Fortunately, I already found a good home for my old lift and even the router table I built.
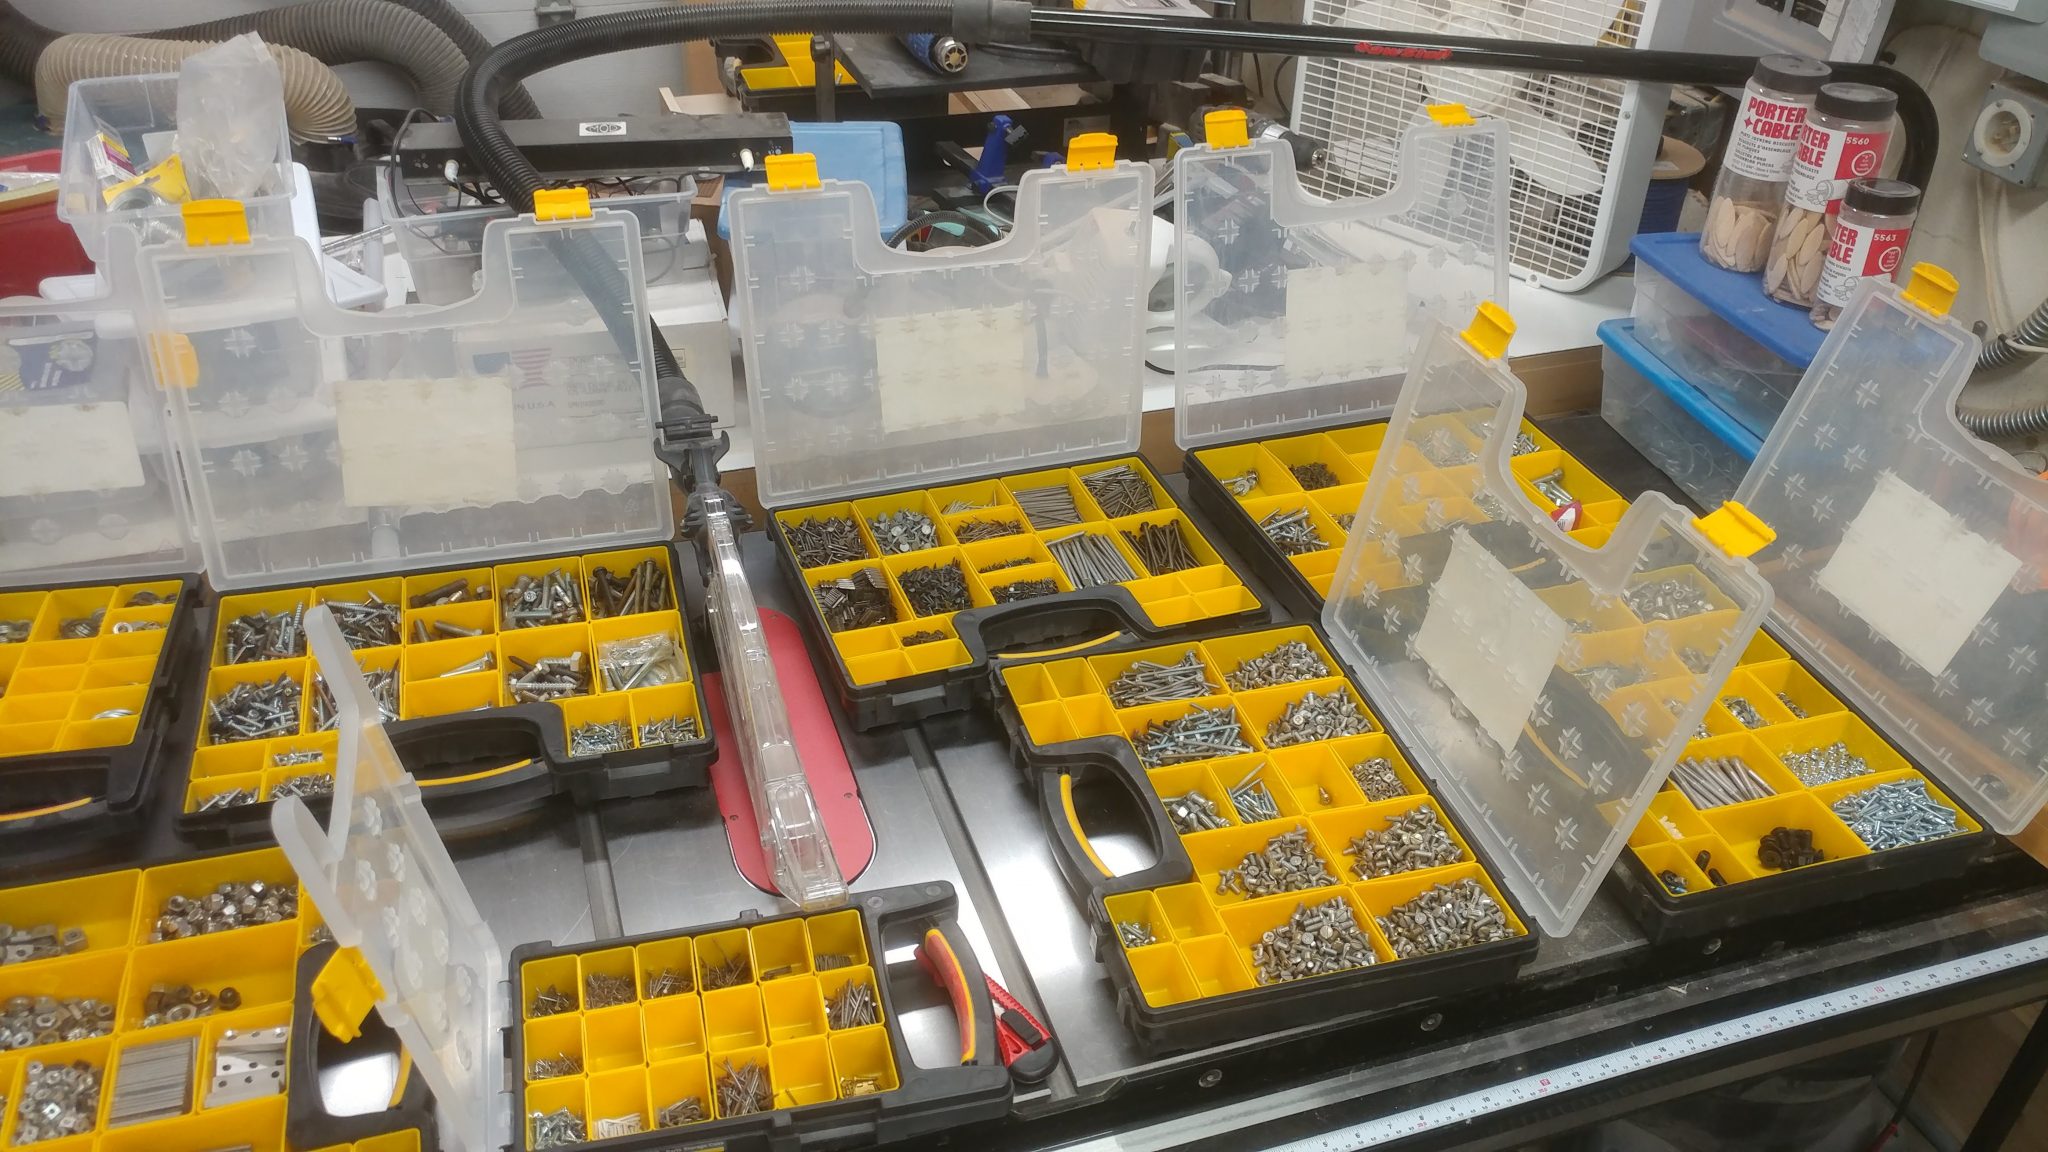
Cleaning Out my Coffee Cans of Hardware
I spent the past week going through all of the coffee cans of hardware that I have been accumulating over the past few years and sorting them out. What you see here is how it looked about halfway through the process.
This is all part of a new phase in my shop. I’m going through everything and getting rid of things that I don’t or won’t use. I’m actually considering getting rid of my jointer since I only use it once or twice a year and it takes up a ton of space. I haven’t decided yet.
I dismantled my electronics workbench. This consisted of a torsion box top that sat above my jointer and was my attempt at utilizing the space of my jointer into something more usable. As it turns out, it was just another horizontal surface that gathered junk. I’m hoping that limiting myself in this way will make for a tidier shop.
I feel like I’m at a turning point. I’m going to focus my woodworking into the areas that interest me rather than trying to cover a bit of all of it. I plan on doing a mental inventory of what tools I do and don’t use in my shop. I have access to other tools at work so I may just decide to get rid of some of them that I don’t use that often, such as my jointer, scroll saw, and maybe even my metal lathe.
How about you?
Do you think it’s better to have as many tools as possible or to limit yourself to just your areas of interest? Let me know by leaving a comment below.
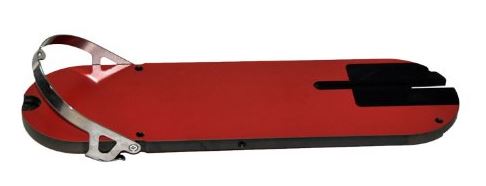
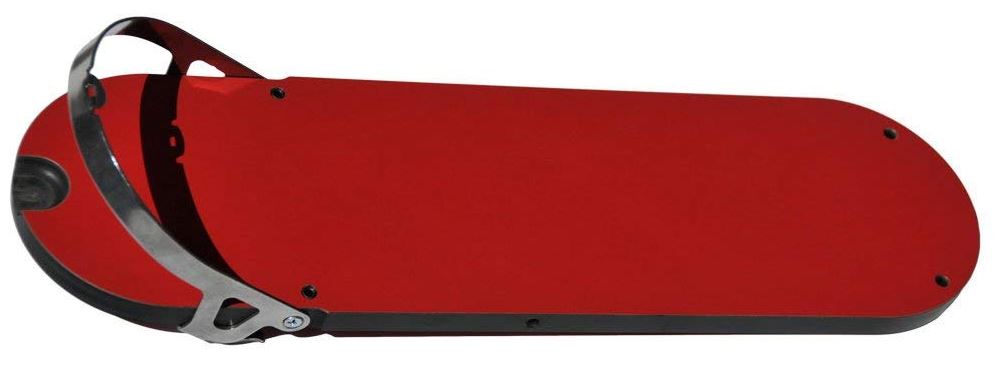
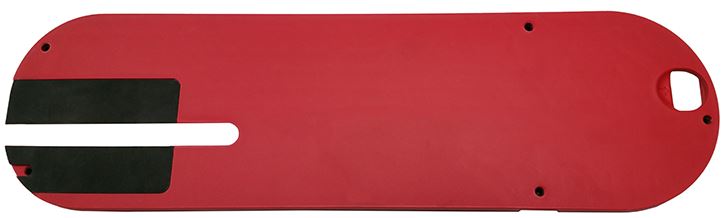
Almost a year ago I decided to try a new work surface for my outfeed/assembly table. I wrote about this here. After using and abusing it for almost a year, my official opinion is that I don’t really care for it much. I found the texture to be problematic in that it retained glue and stain. I also set my chop saw on it and it was bombarded with hot metal shavings which would melt into it and turn it into a big sheet of sandpaper. Let me be clear; this isn’t a fault of the material. All this shows is that it isn’t well suited for something that it wasn’t designed to handle. Makes sense.
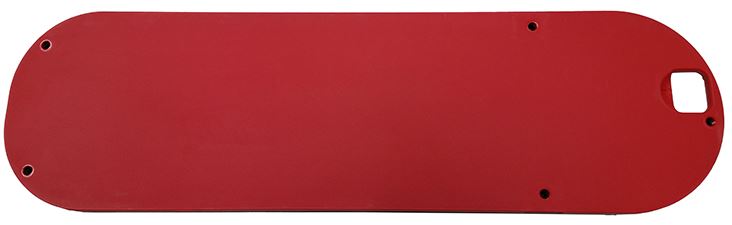
In the end, I decided to go back to my old standby: white hardboard.
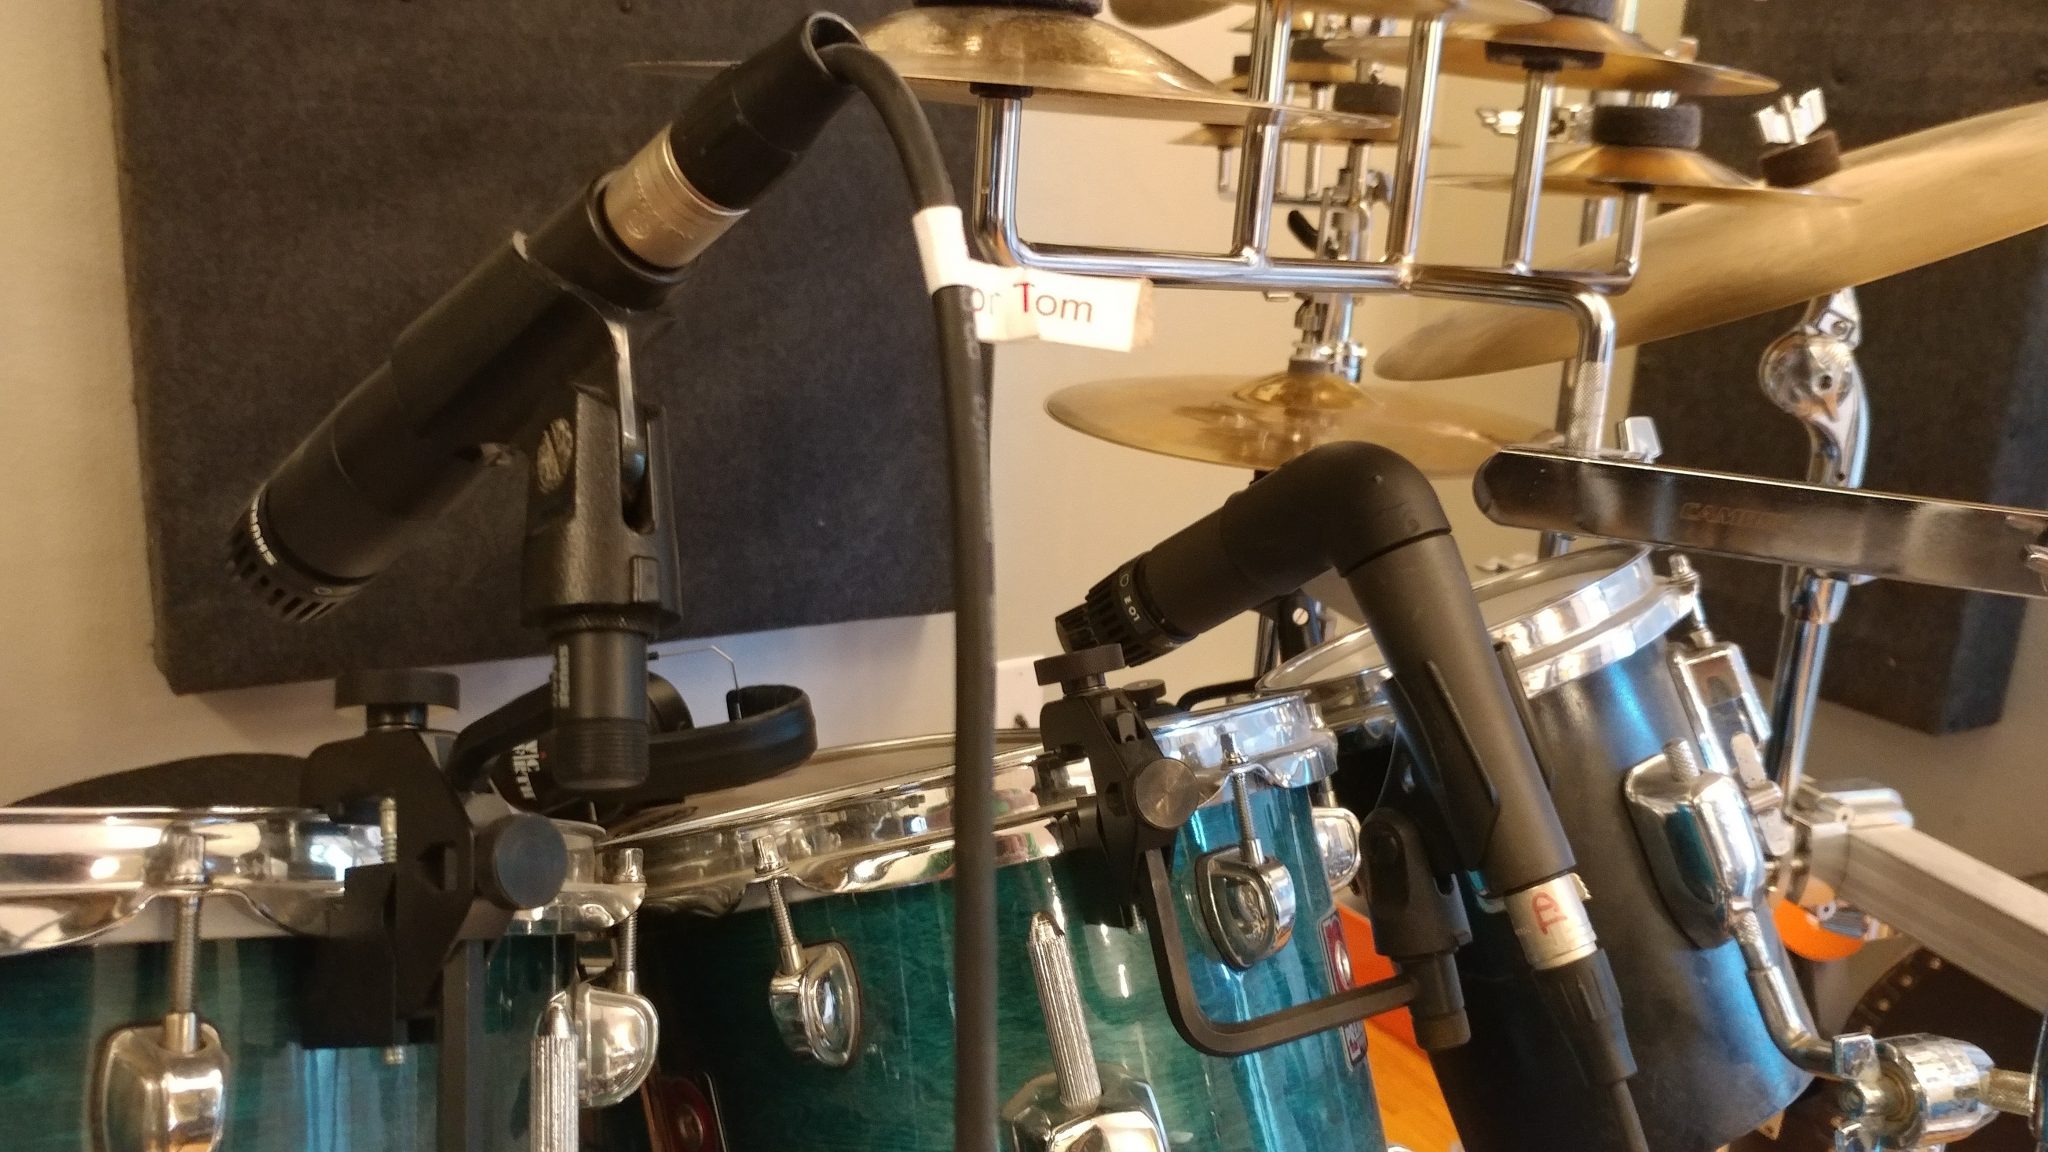
Recording Woes
It is proving more problematic to get time to record lately. In the meantime, I will be using that opportunity to perform and write-up the Shure SM57 right-angle-mod and also the MXL 603 capacitor mod which makes a $100 condenser mic sound like a $500 condenser mic (your mileage may vary).
My Amazing Wife
My wife doesn’t like to show off her work so I am doing it for her. This is a felted Cthulhu that she made as a Christmas present for her brother. I’d love for her to start a blog because she does some really amazing work. If you’d like to see more, let me know and I’ll pass it along.
Other work…
There are a few other things in the works that I can’t speak of yet but I’ll post an update when they’re secured.