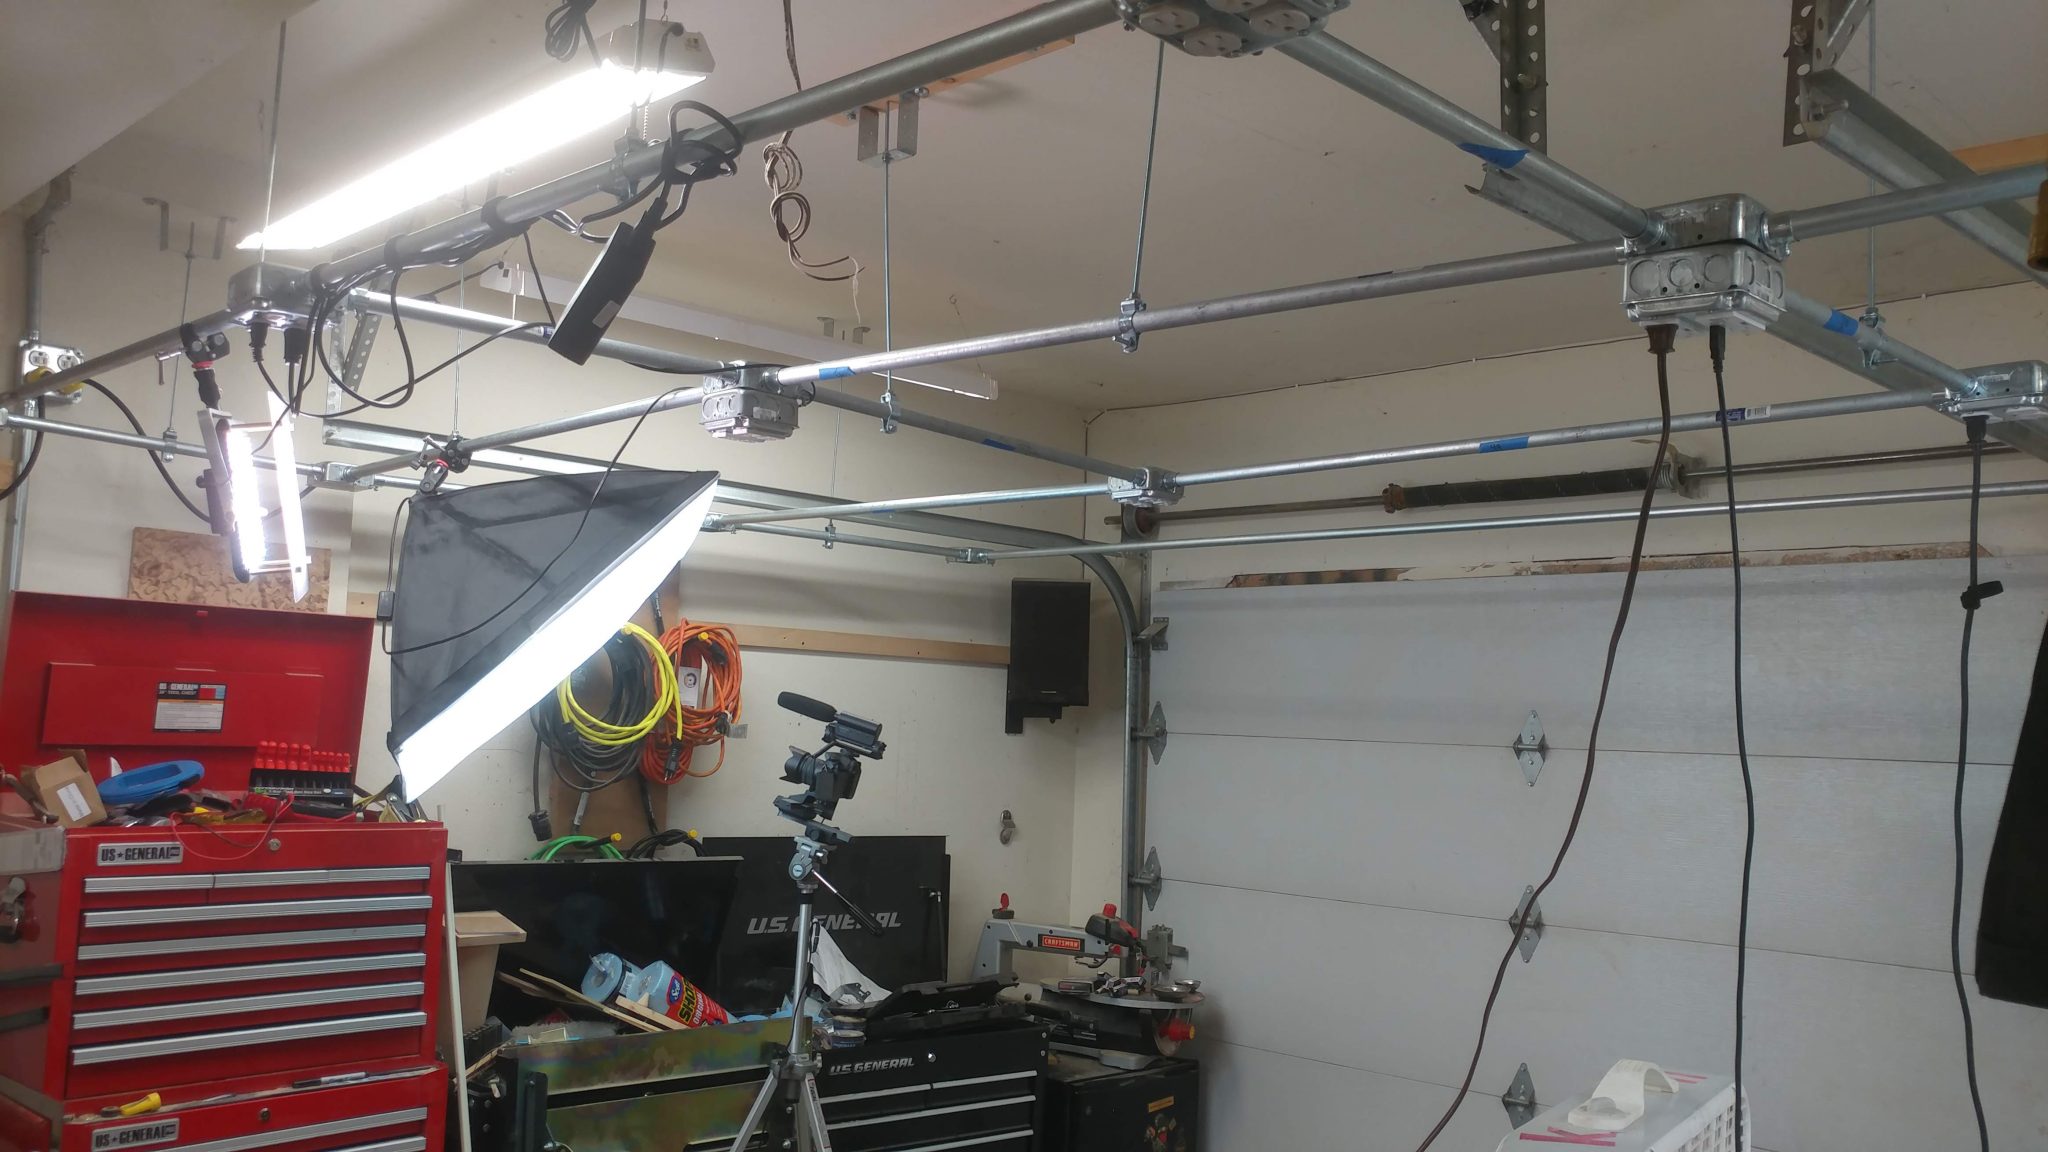
My hatred for tripods has driven me to build a light grid for my shop.
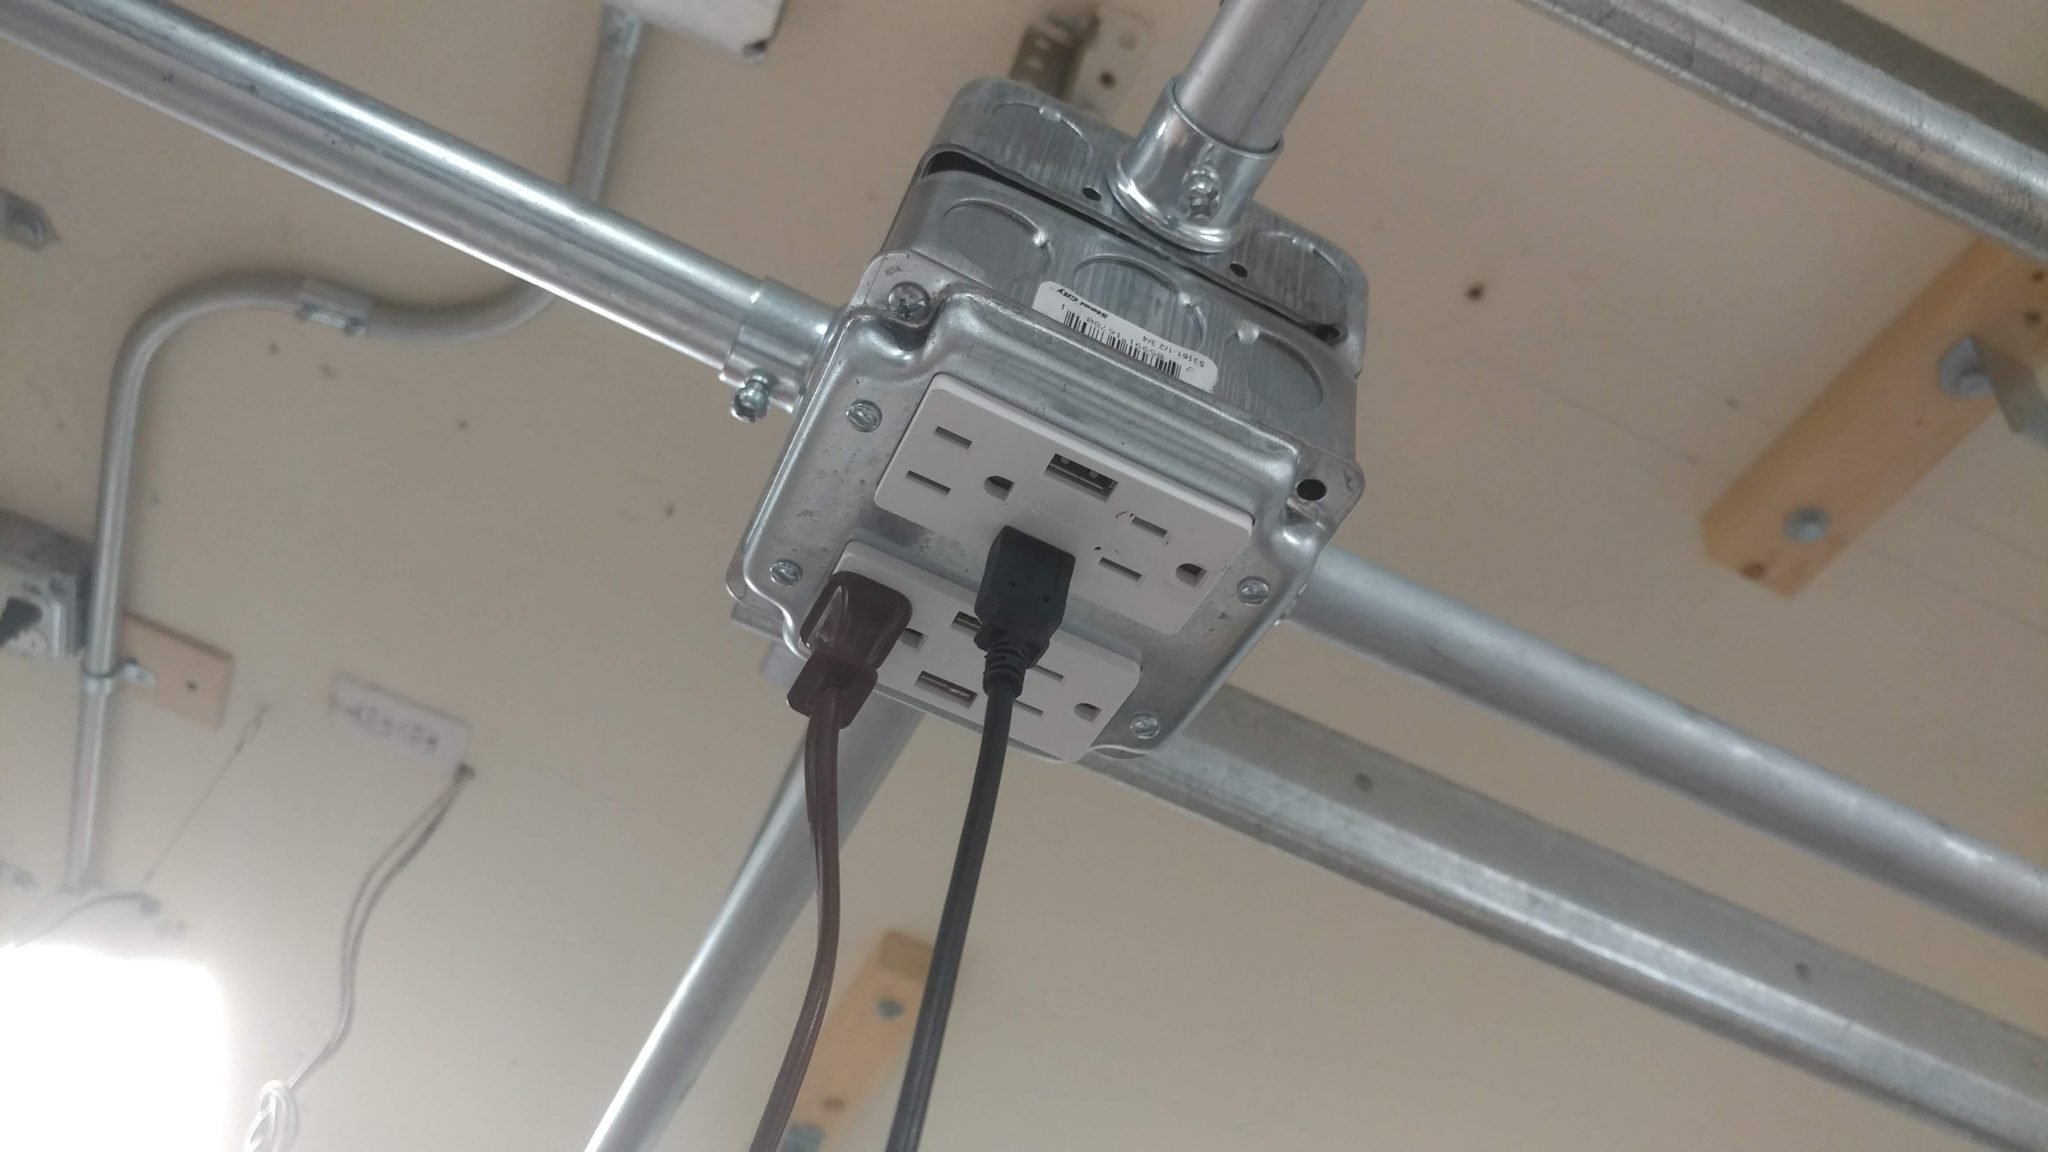
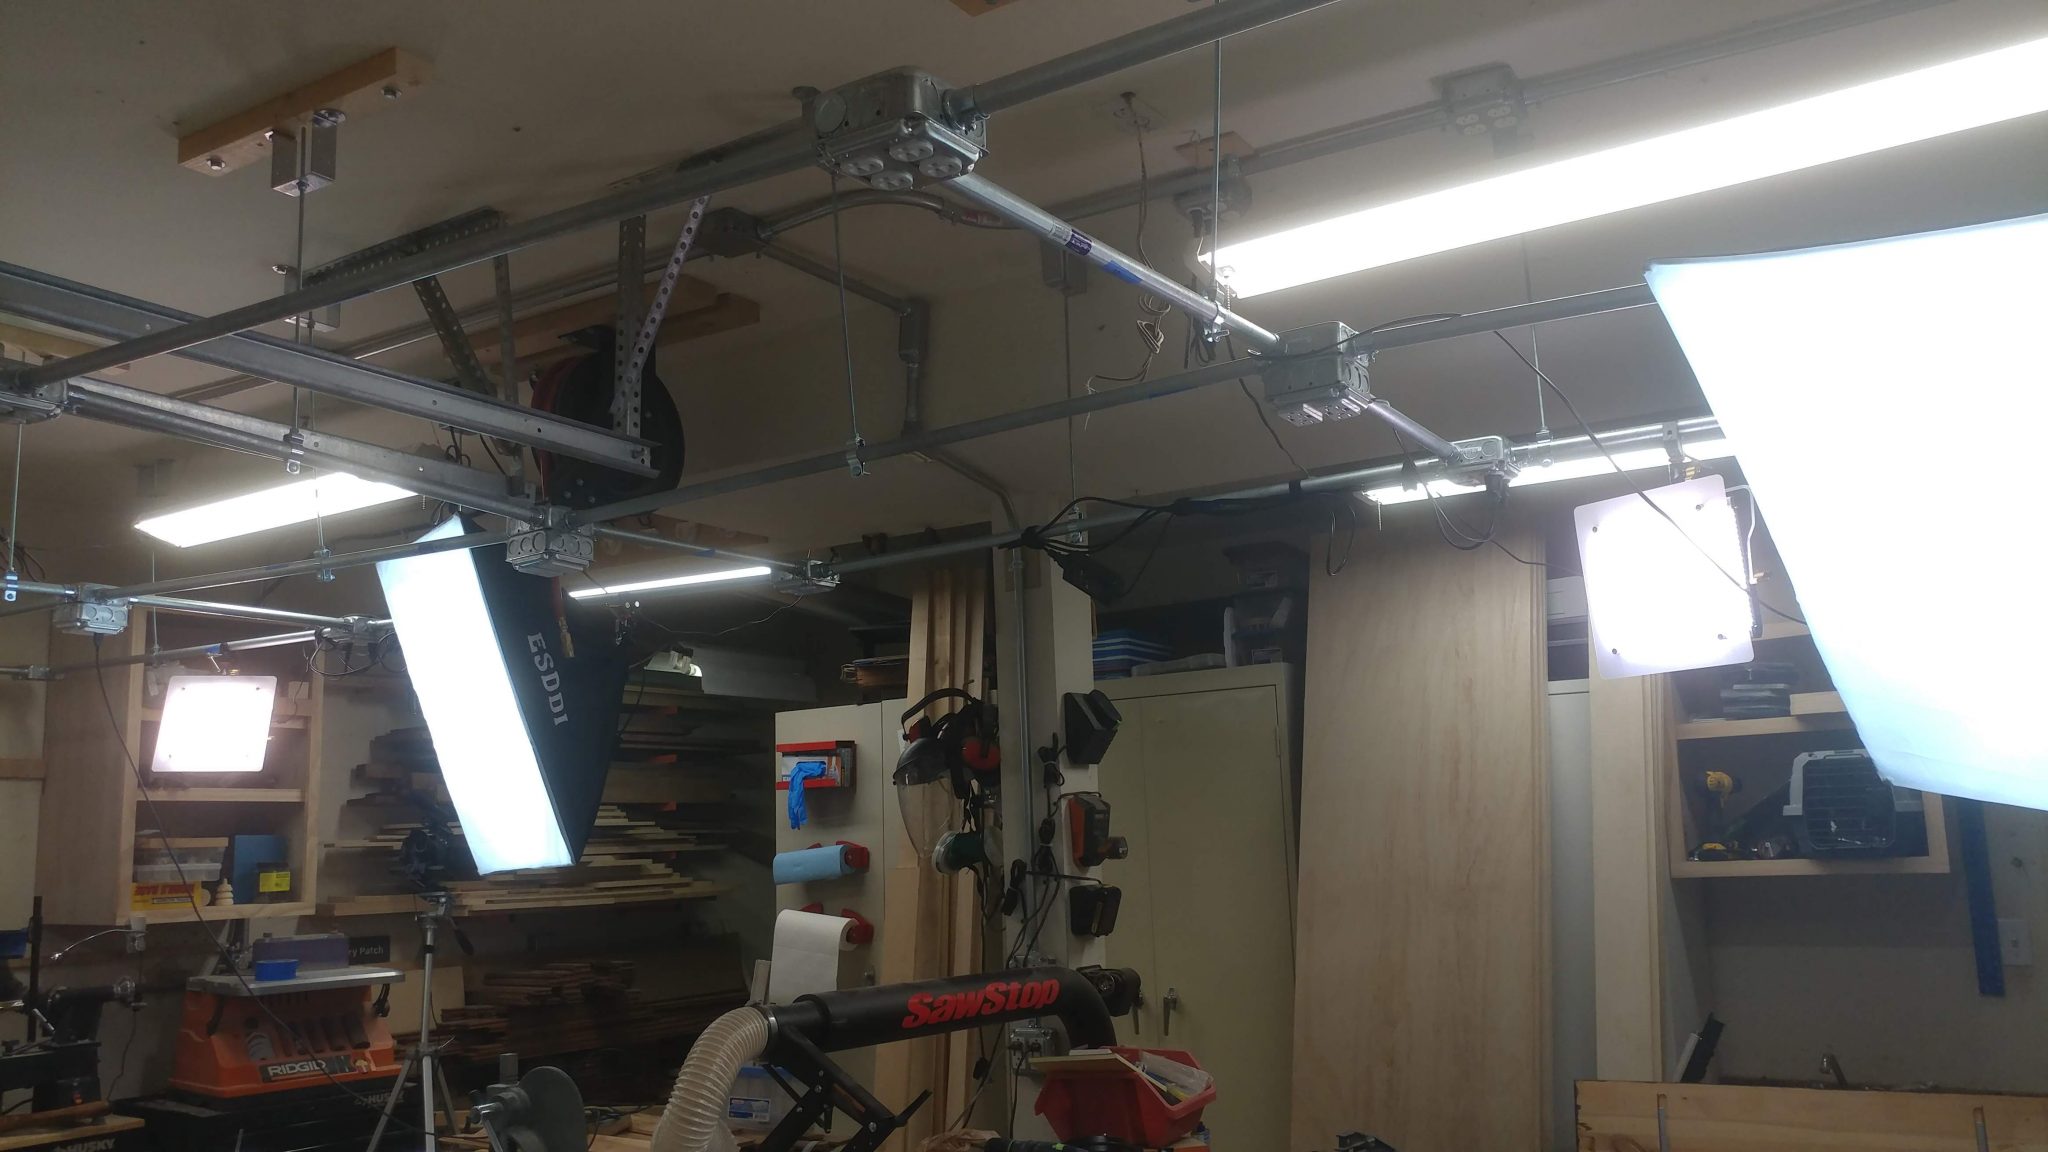
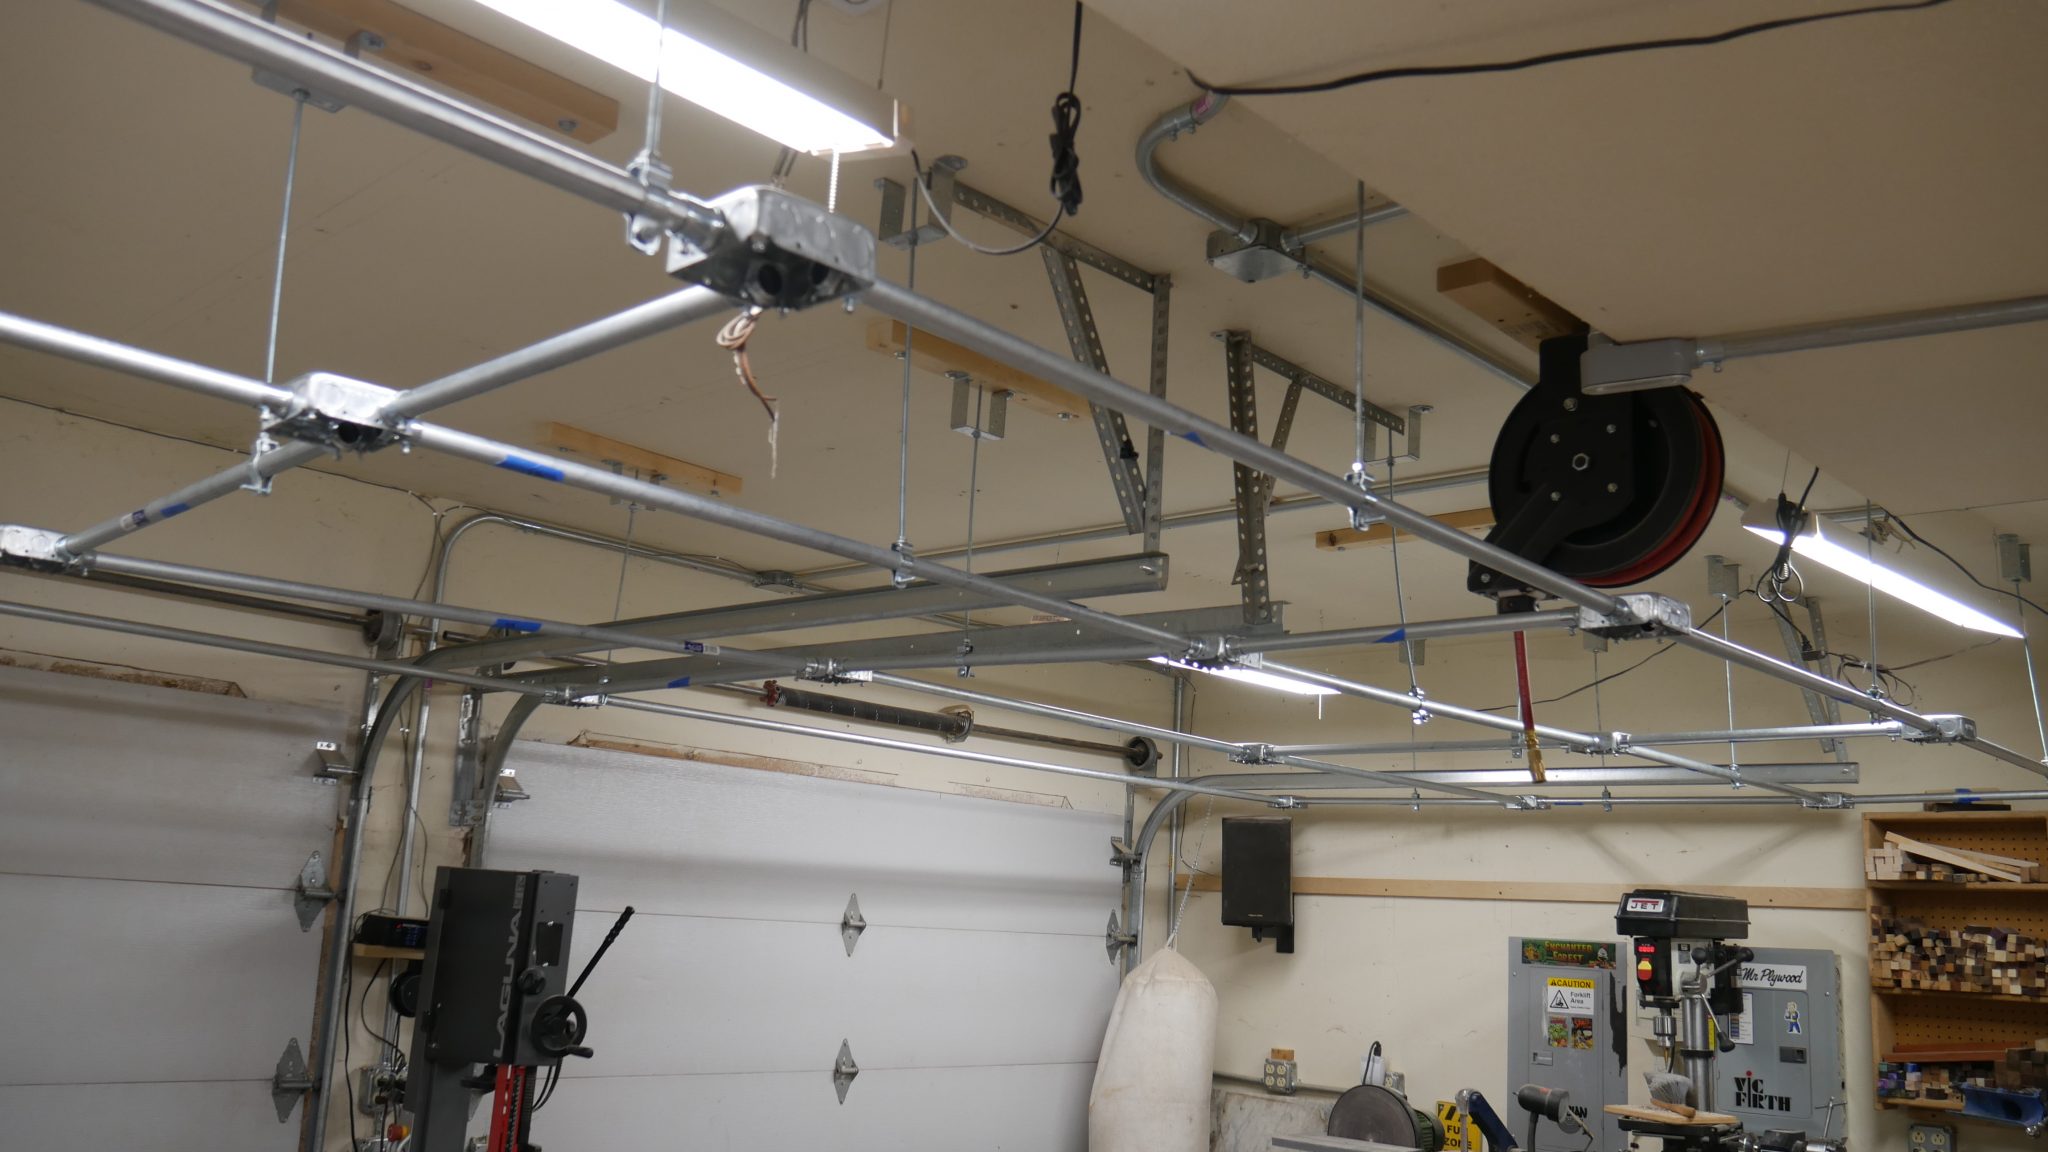
The light grid was built from 3/4″ metal conduit and electrical junction boxes. I added outlets to nine of the junction boxes, three of them with USB connections.
I still have a little tweaking to do. Some of the vertical threaded rods are hanging at an angle so they need to be re positioned. I’m also going to add some support to the sides of the grid so it doesn’t rock at all.
This grid will allow me to mount lights as well as microphones and cameras and more-easily position them wherever I need them. I also have six of the nine outlets controlled with a light switch allowing for easy switching of all the lights on or off.
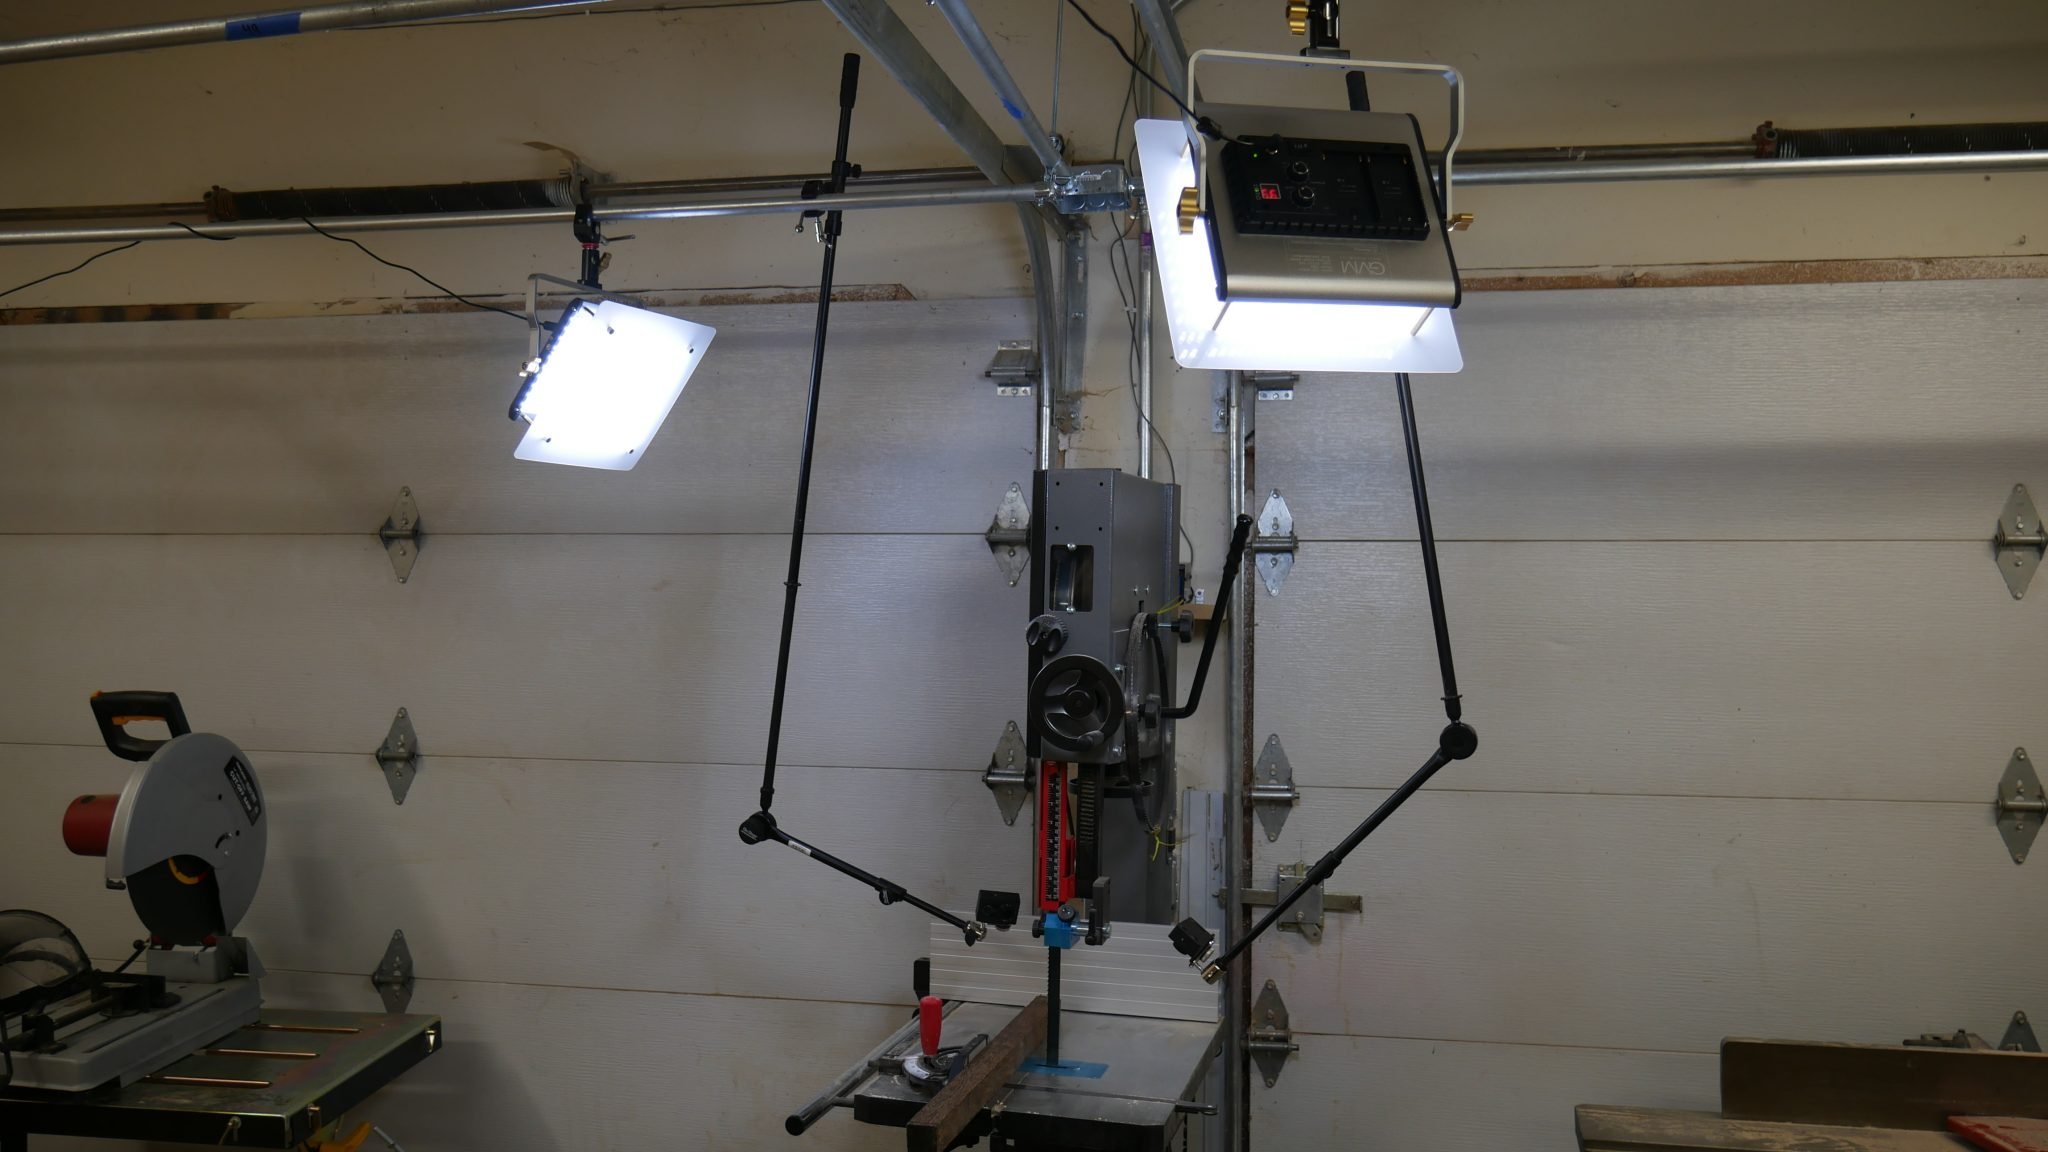
I created a quick mock-up of how the lights and cameras might be attached. In this photo I’ve got two LED lights aimed at the bandsaw, and two action cameras (similar to a GoPro) mounted on telescoping microphone stands. This allows me to get the cameras right in there next to the blade while not causing me to modify the way I work in the slightest because of some bulky tripod legs.
I’m working on a video documenting how and why I created the light grid. I’ll also be adding components to it as well, such as a jib for positioning a camera and some tracks for panning the camera around.
The first one is just a test video showing the turning of a wooden bowl. I’m taking my time with it so I can try different things and see what works and what doesn’t. I’m currently in the editing phase on this one.
The second is on the construction of a light grid (see below). I’m still in the filming stages of this.
The third is going to show the construction of a musical instrument of some sort. I’m still in the early planning stages of this one and the details will probably change.
Building a Light Grid
Since I’m making videos in my shop I decided to build a light grid. I’m making it out of electrical conduit and junction boxes and I’m putting in electrical outlets at some of the junction boxes. I’m making a video of the construction of it as well.
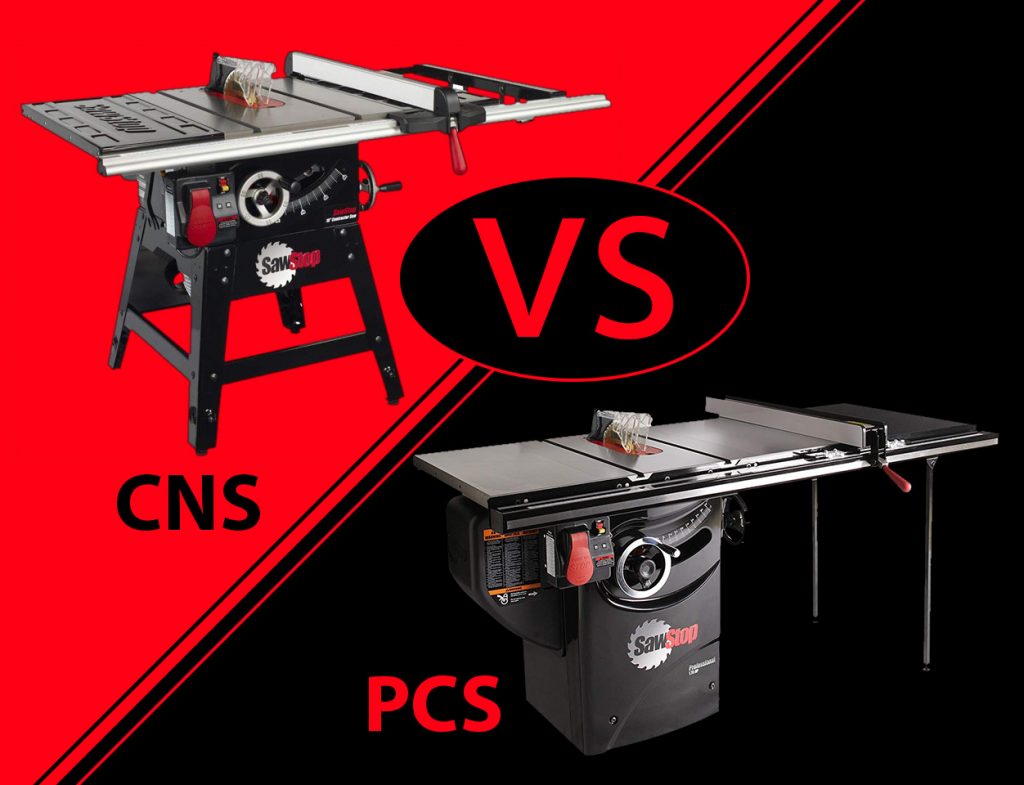
Upcoming SawStop Articles
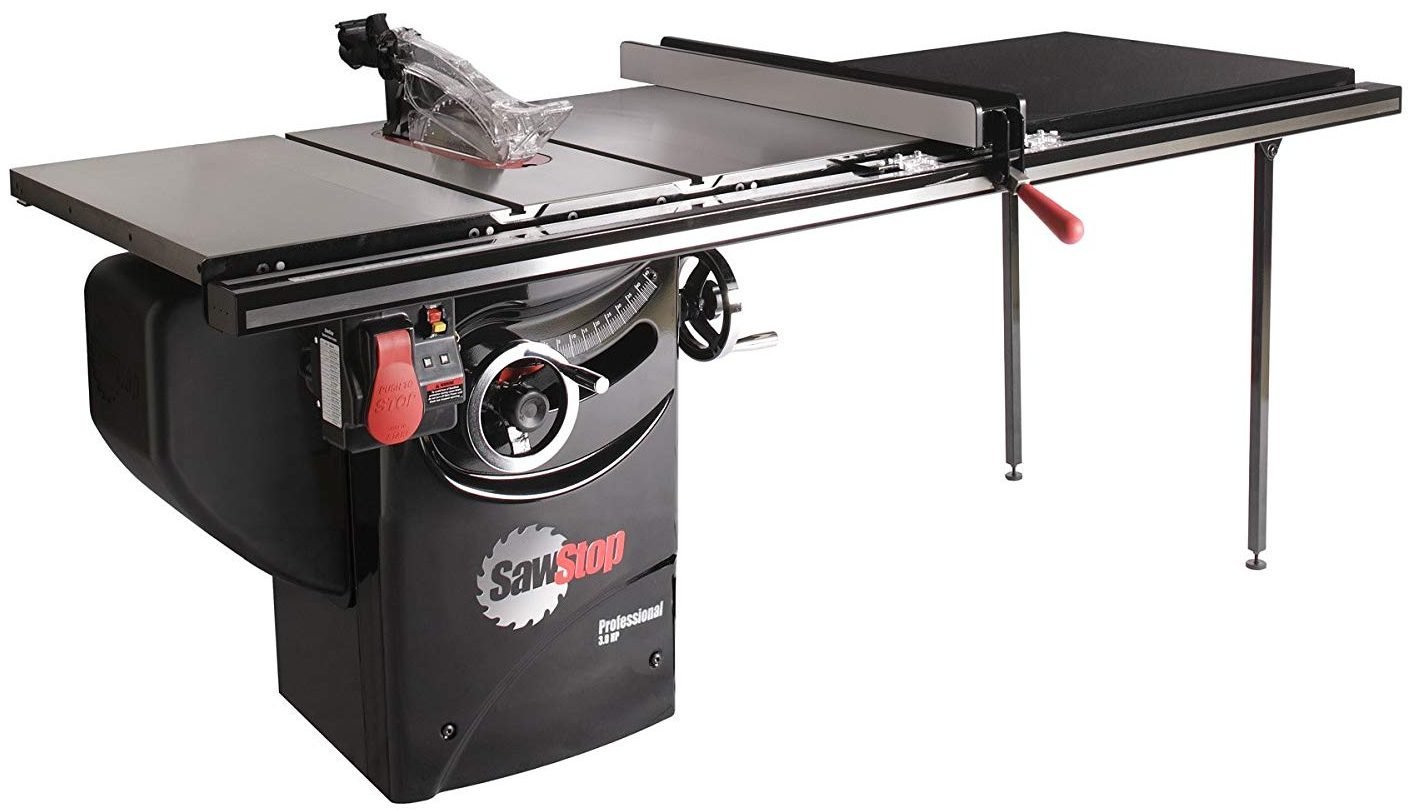
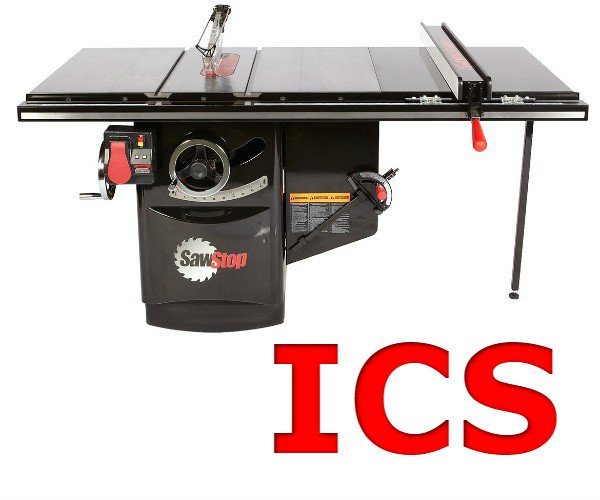
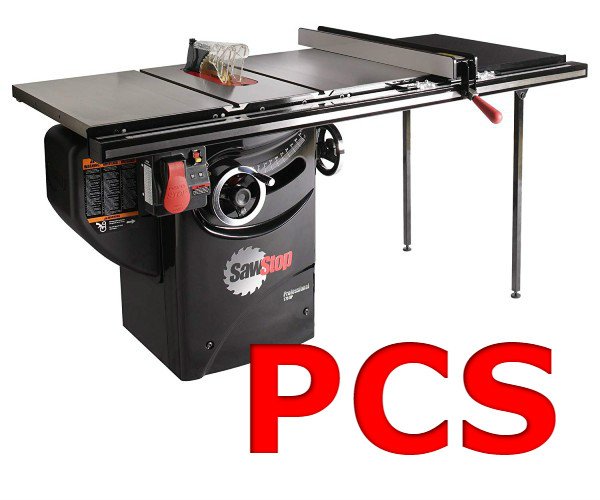
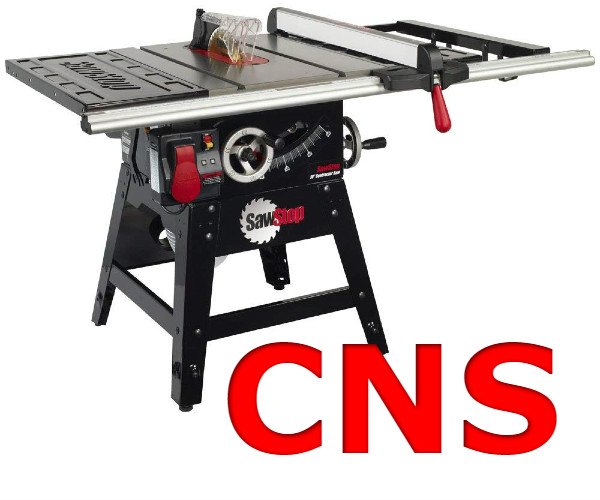
I’m working on a series of articles that are focused on choosing the right SawStop for your application. I will be covering some of the more common questions I hear such as the difference between the Professional and the Industrial saws and the benefits of 3 HP over 5 HP. I’m hoping to have these articles done soon in order to aid in Christmas tool shopping.
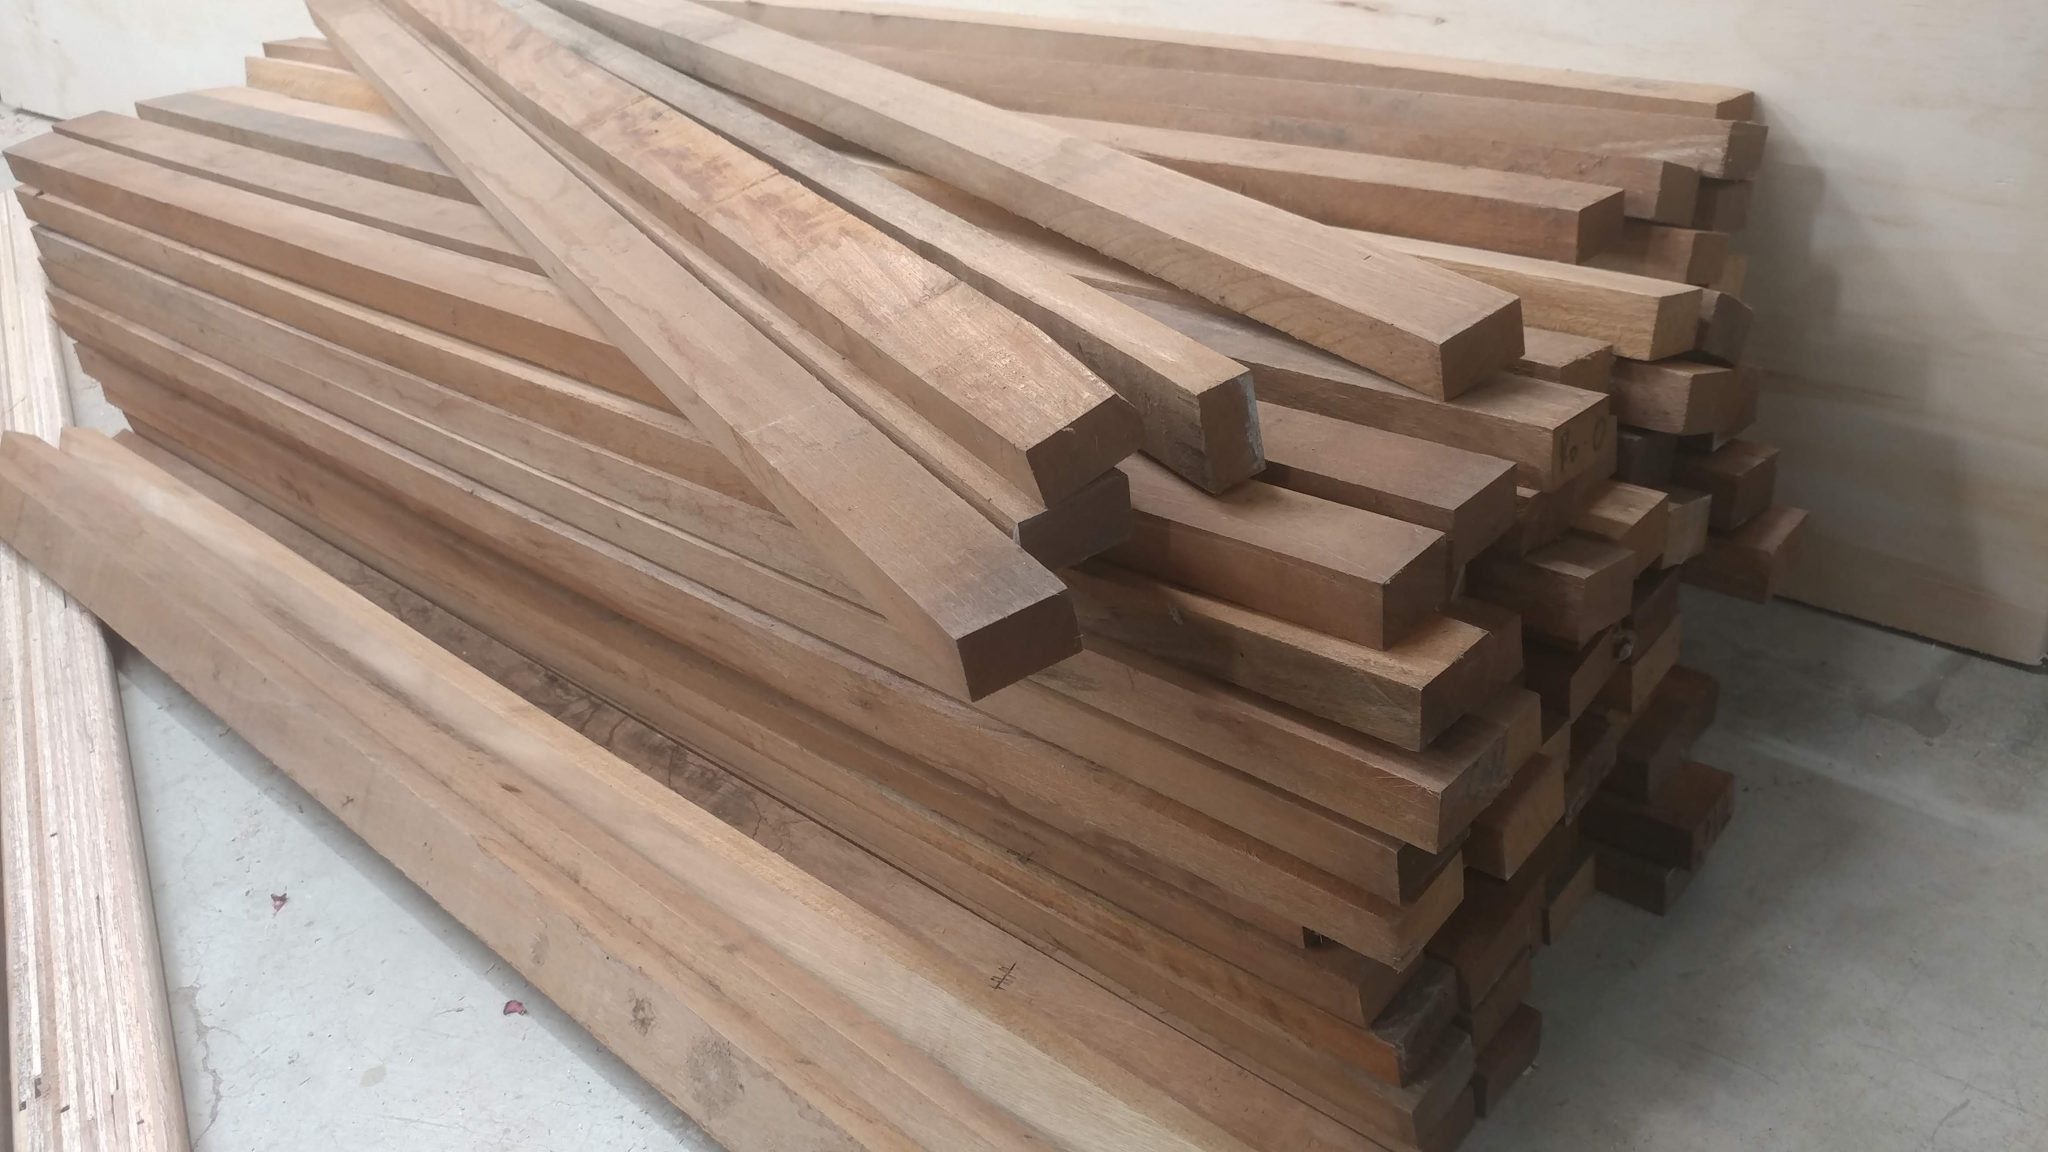
I found someone on Facebook Marketplace who sells Keruing strips to use as drying stickers, or spacers. I’ve never used Keruing before but the price was right so I’m going to give it a shot.
One thing I noticed is that I got a sliver from one of the Keruing sticks and it got really infected quickly and started to swell up. I don’t think this is the type of wood that you have to be careful with in regards to allergens so I’m not too worried but still, it was surprising.
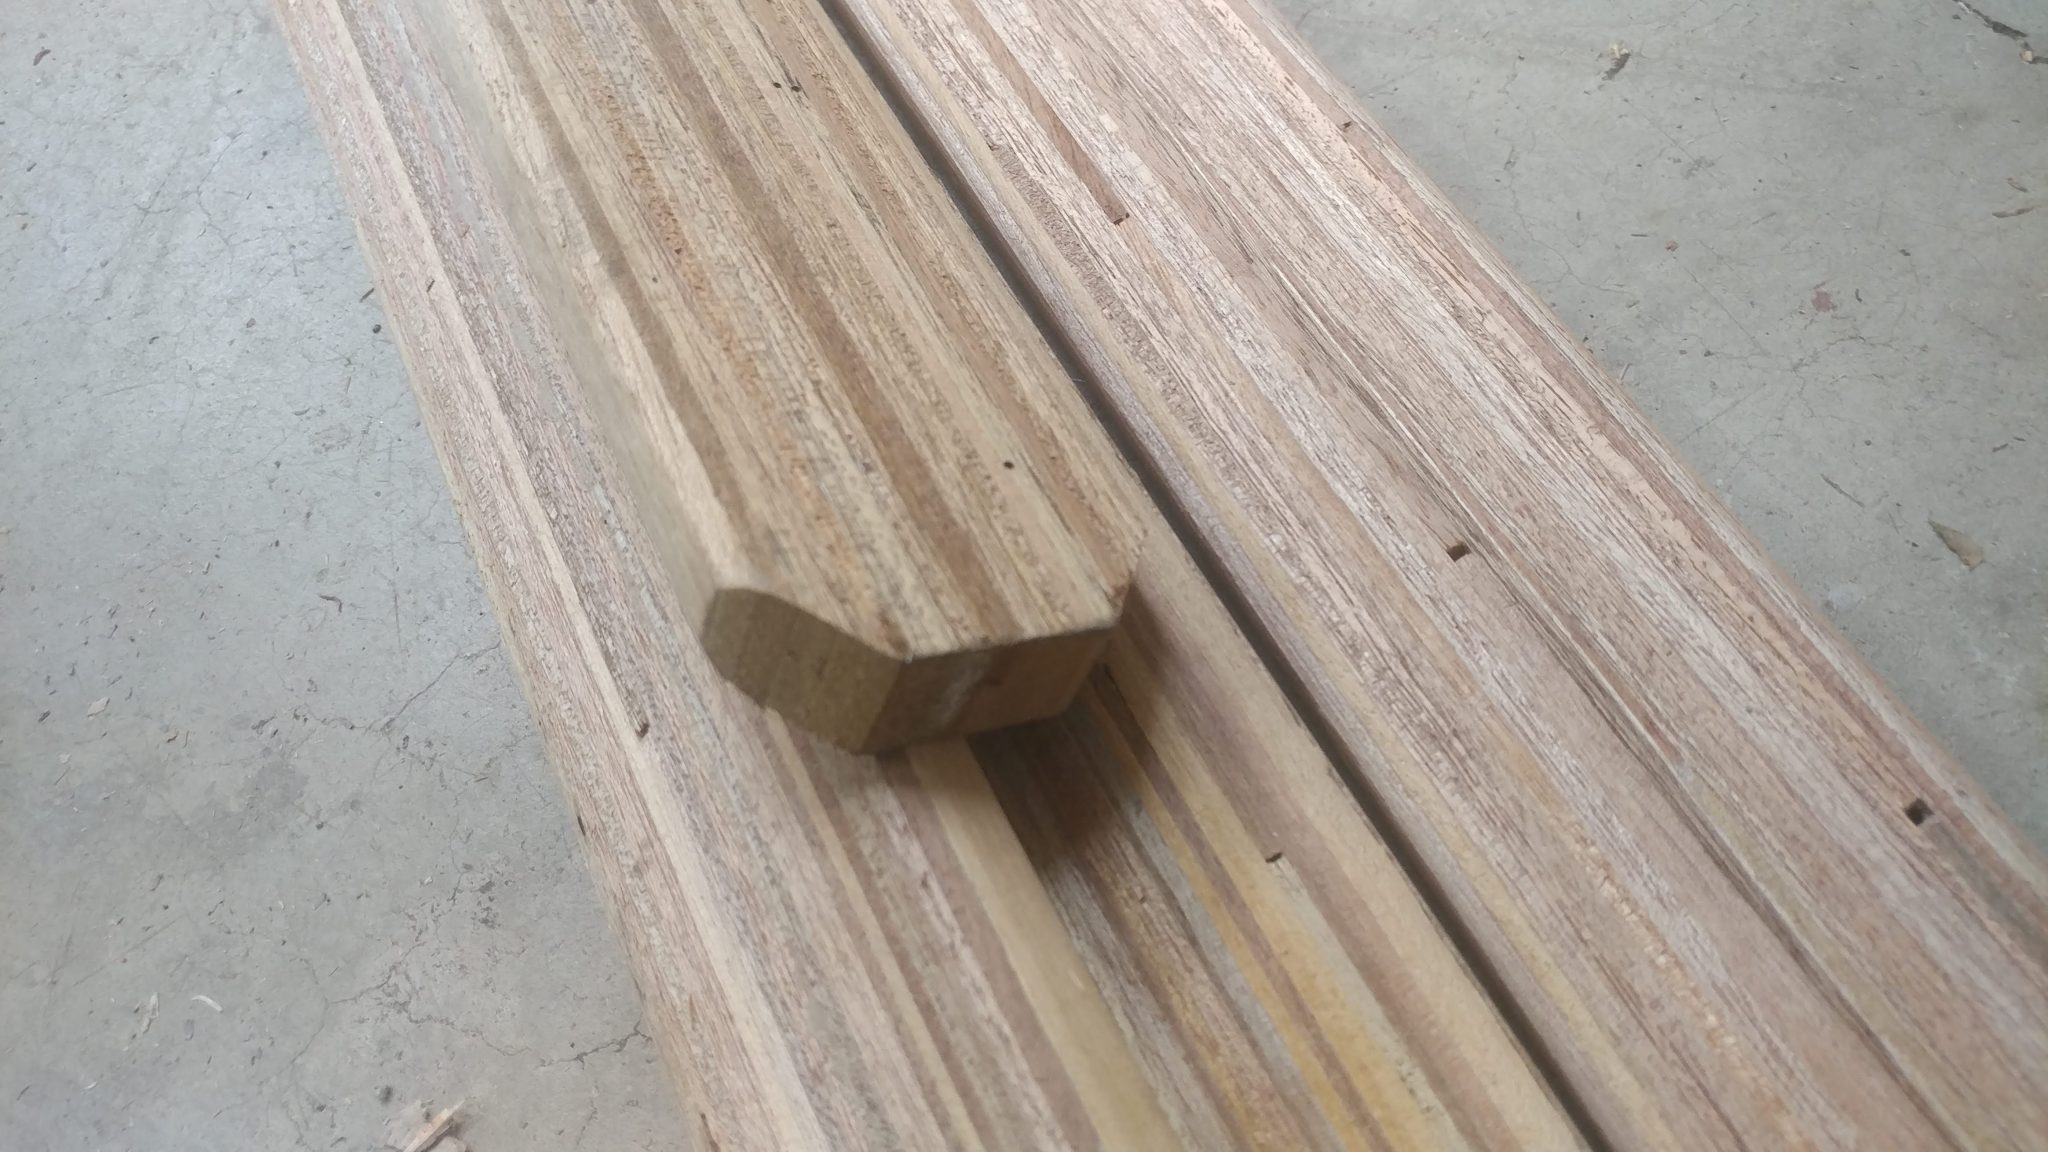
She also has some eight-foot sticks of laminated Keruing that I decided to try messing with. I don’t know what I’ll do with them, especially since they seem way too light for how big they are. I figured I would get a few and see what they’re like.
I Started Shooting My First Woodworking YouTube Video
I finally started to make a woodworking video. This isn’t one that I’m going to share (most-likely). It’s more just an exploratory video so I can see what all is involved and hopefully iron out the kinks before I start making real videos.
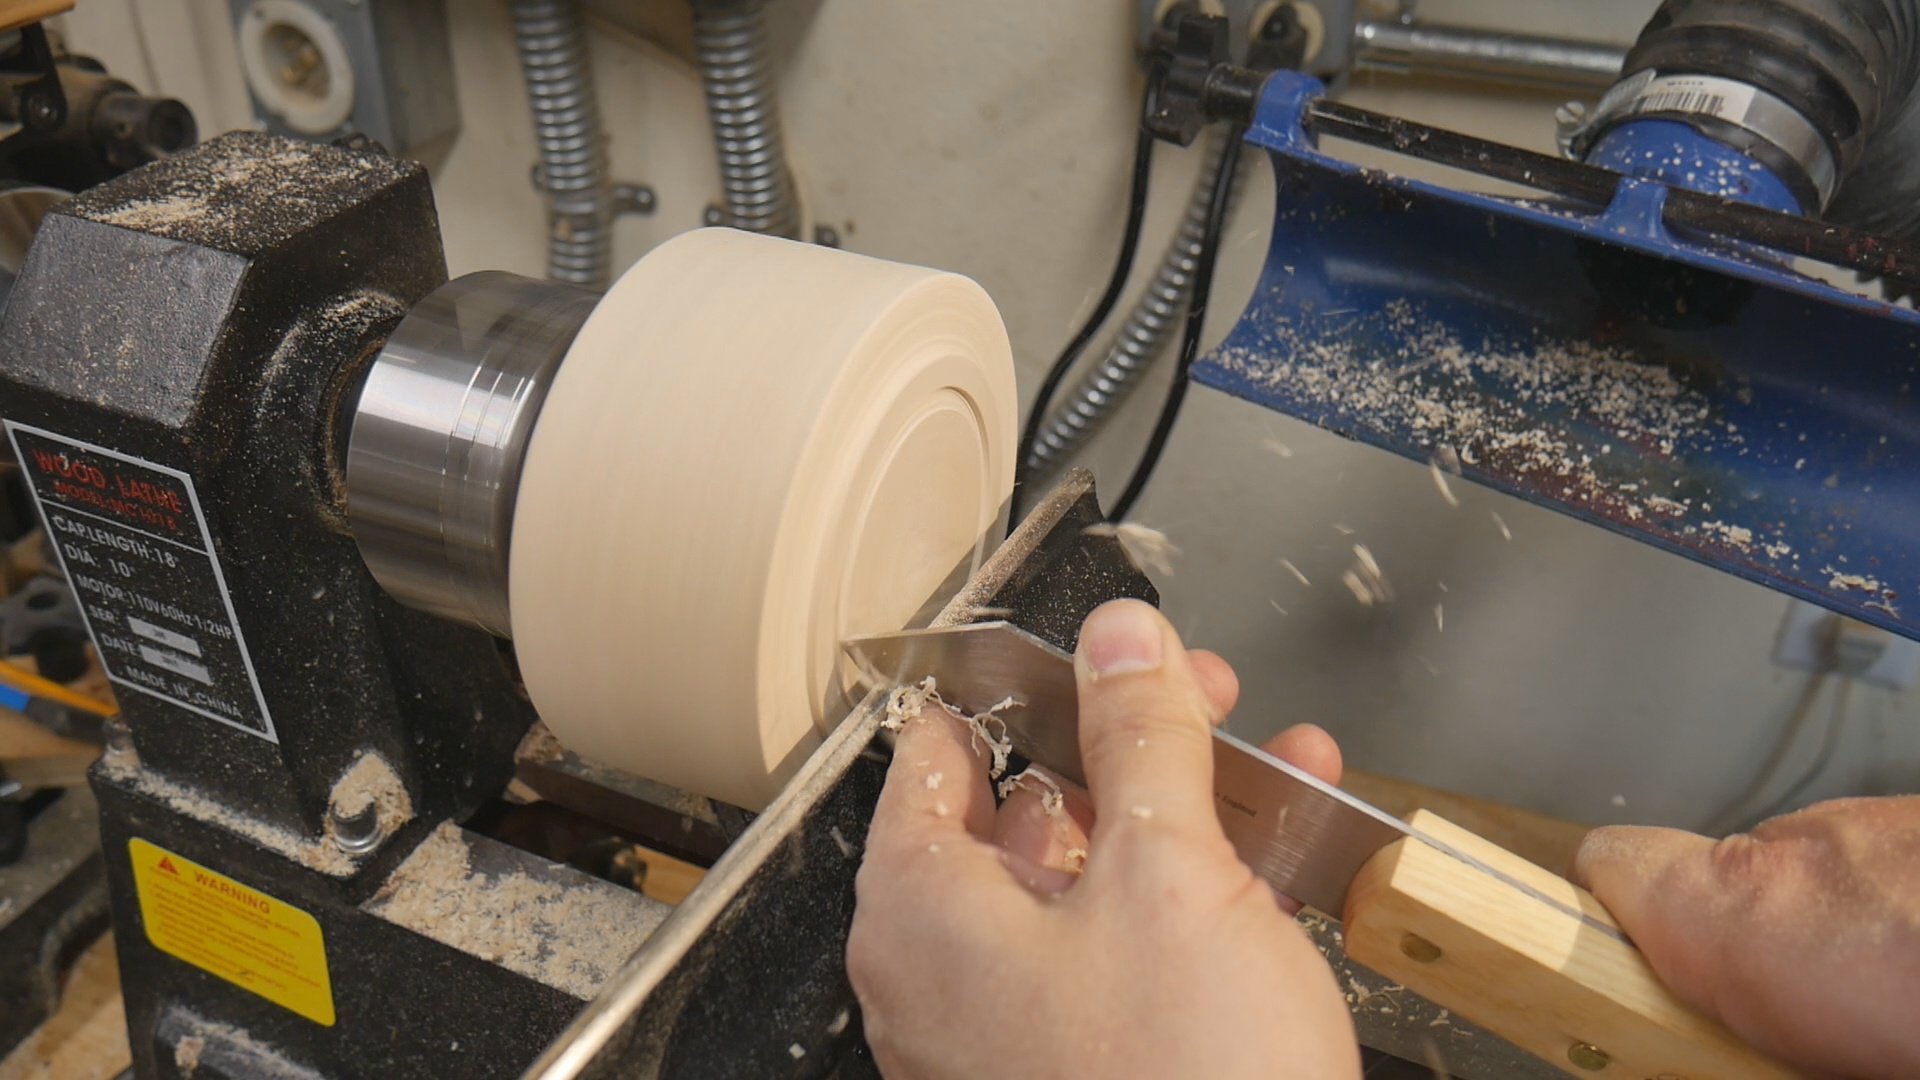
The video chronicles the creation of a bowl from start to finish.
This is a still from the video. The video is now over 25 minutes and I’m not even done. I’m going to try to edit that down to about 5 – 8 minutes then add music and narration, graphics, titles, and whatever else is needed. Again, this is just a test video but I might make it public when it’s complete.
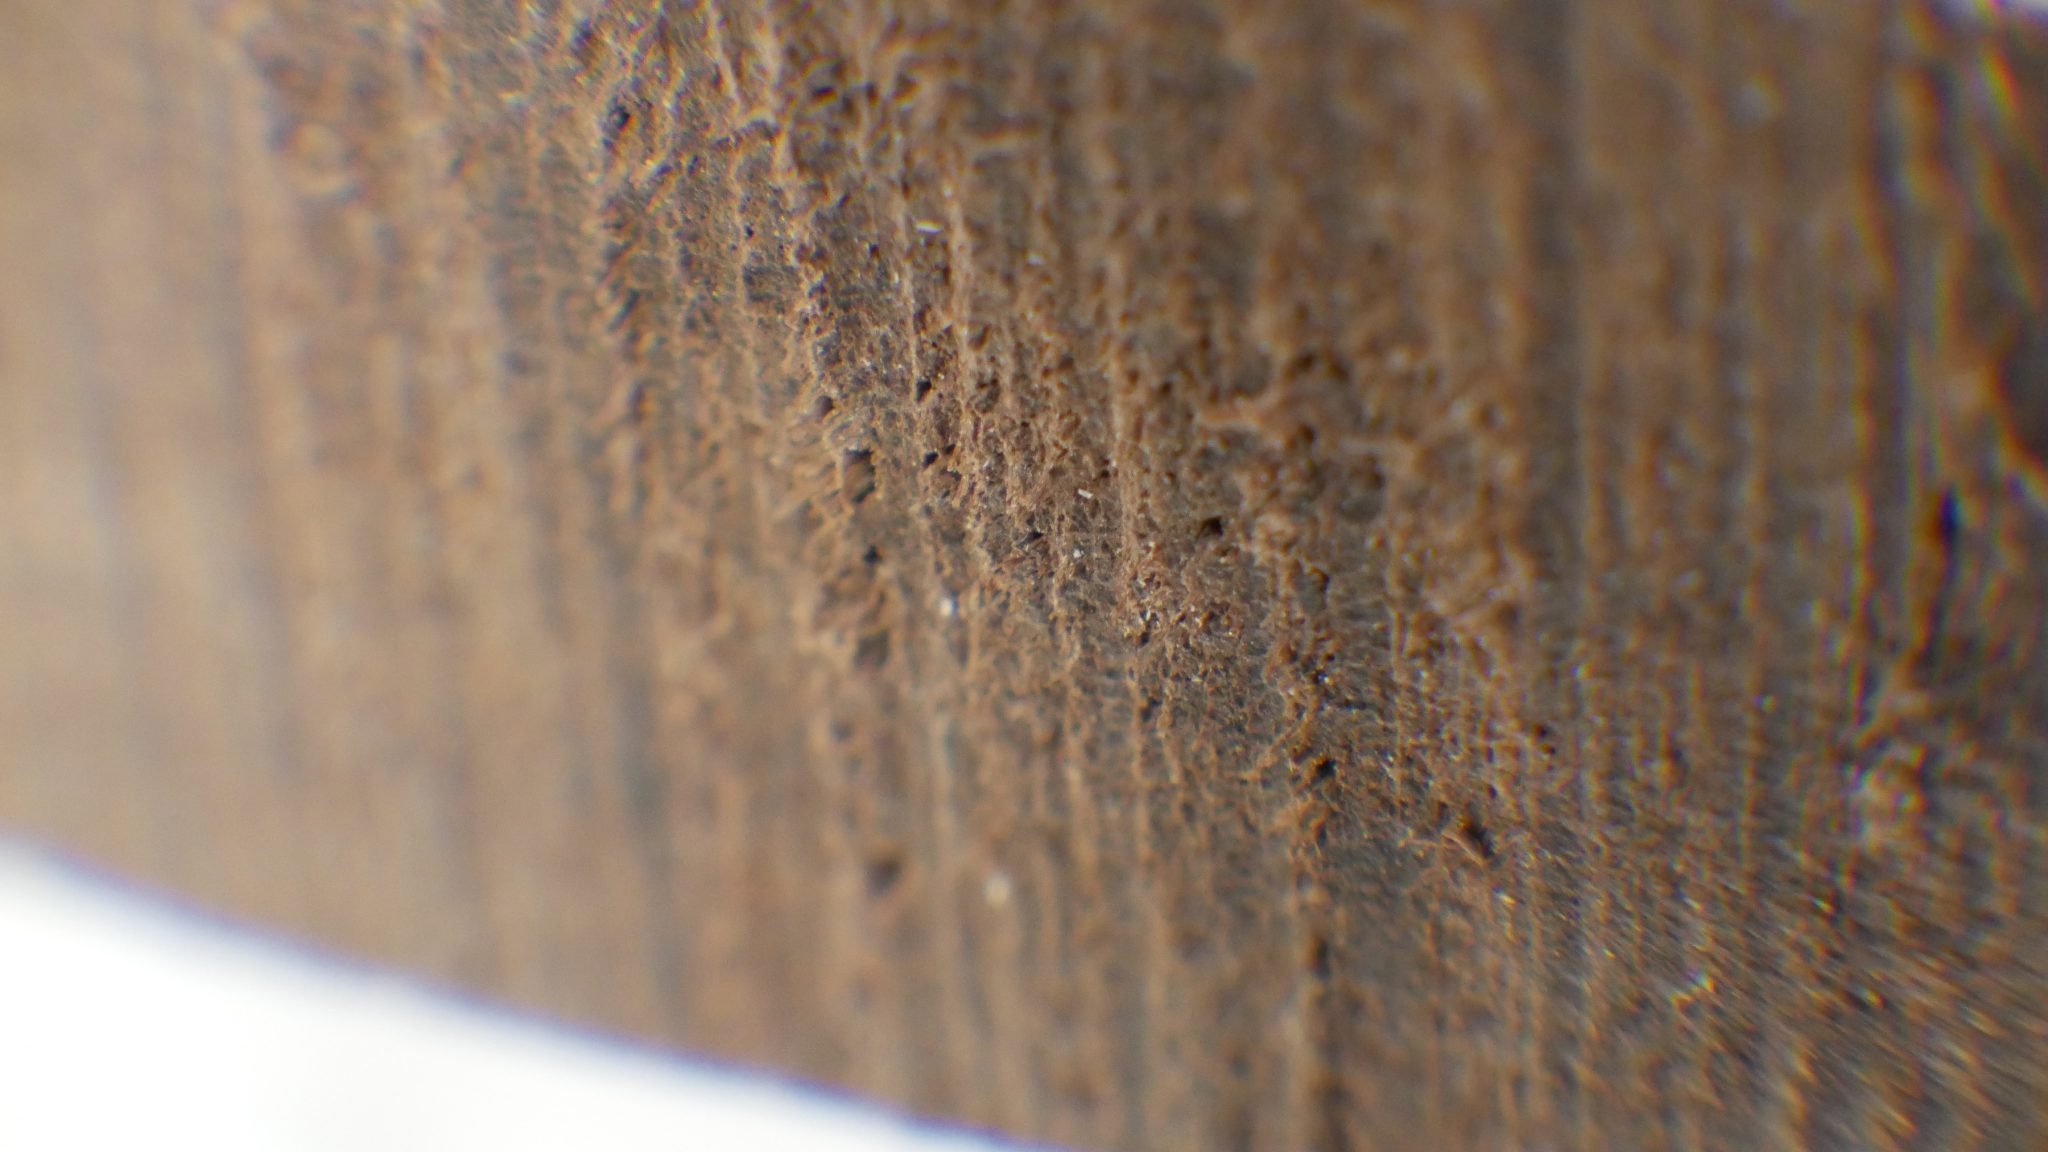
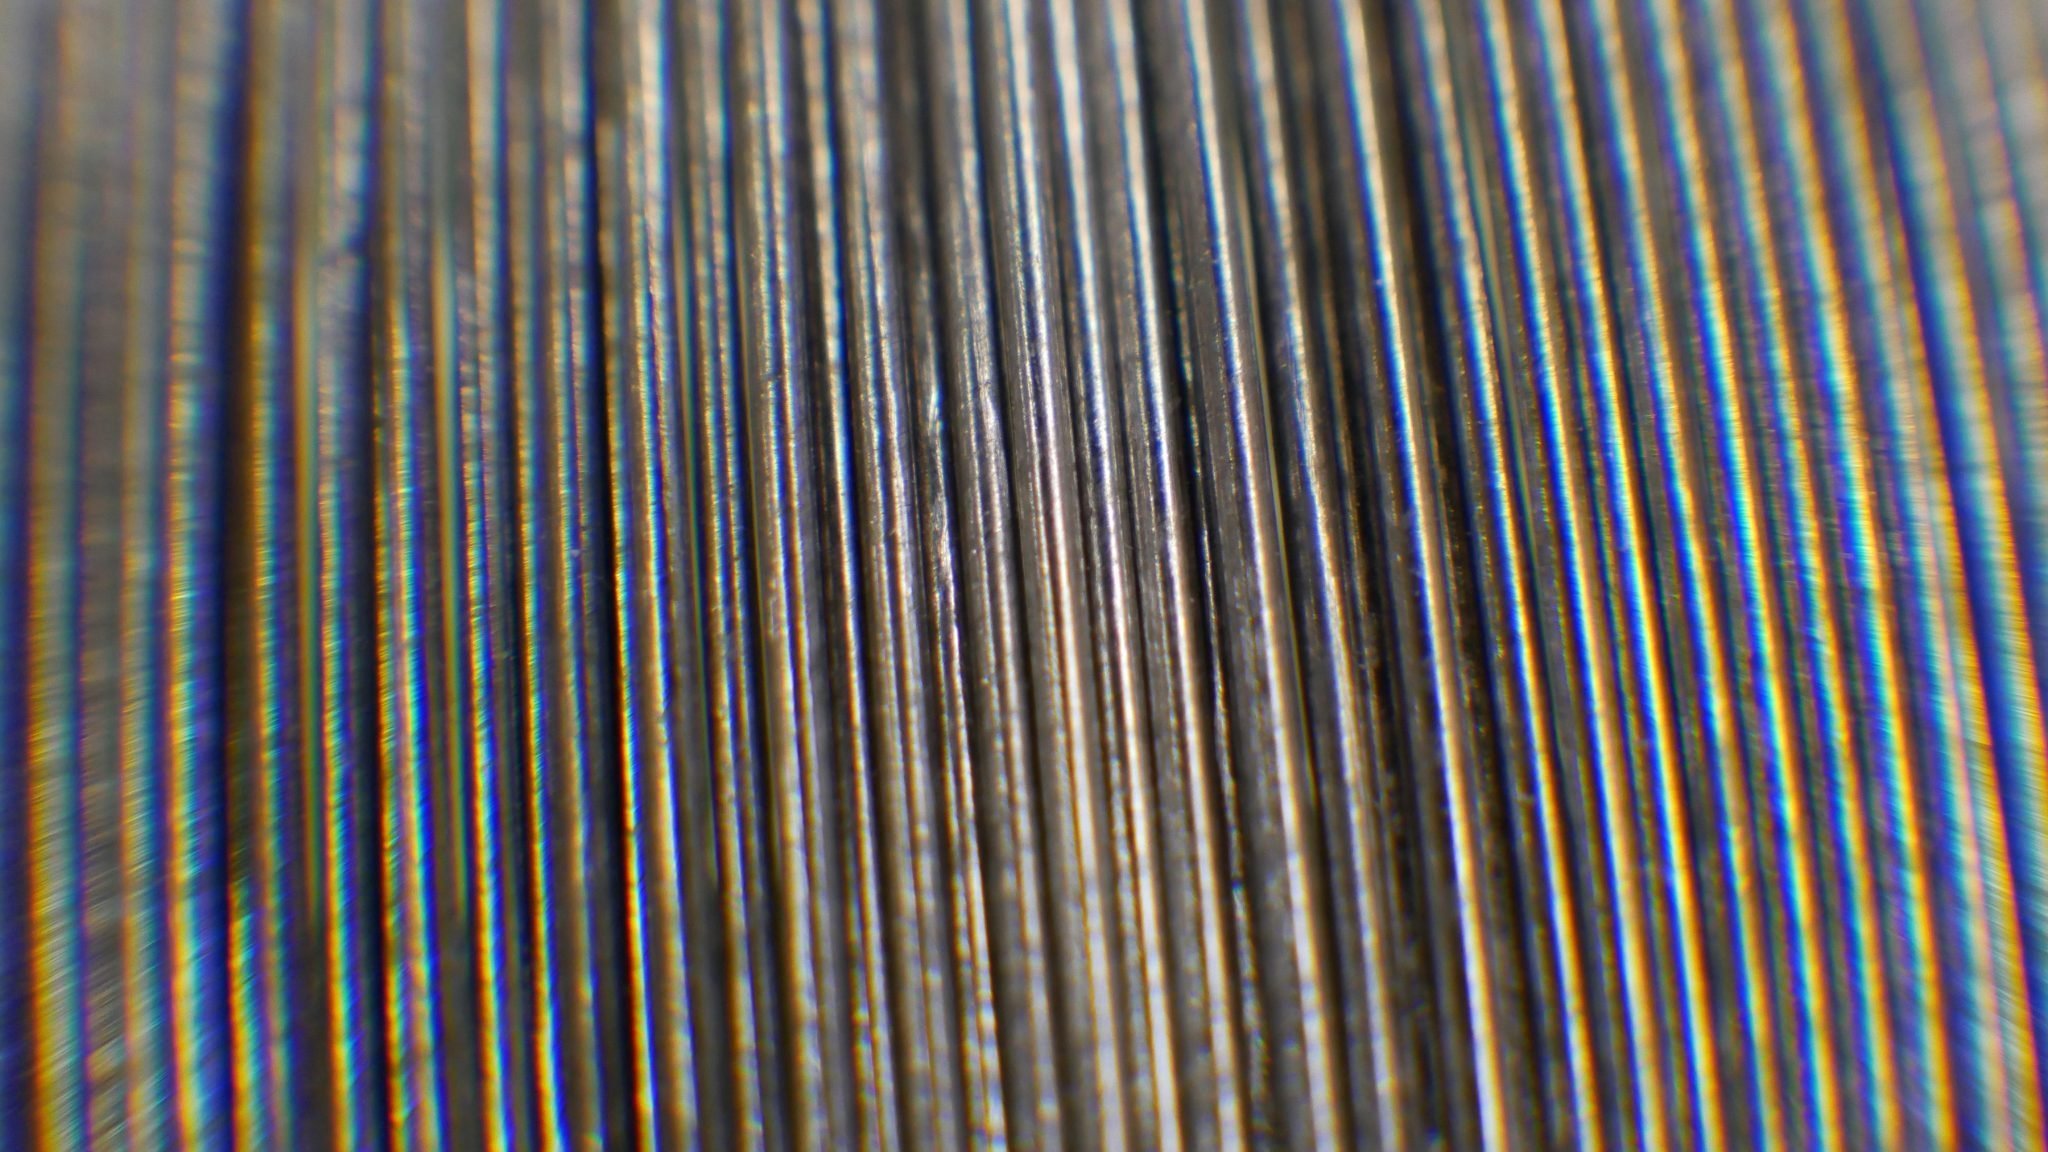
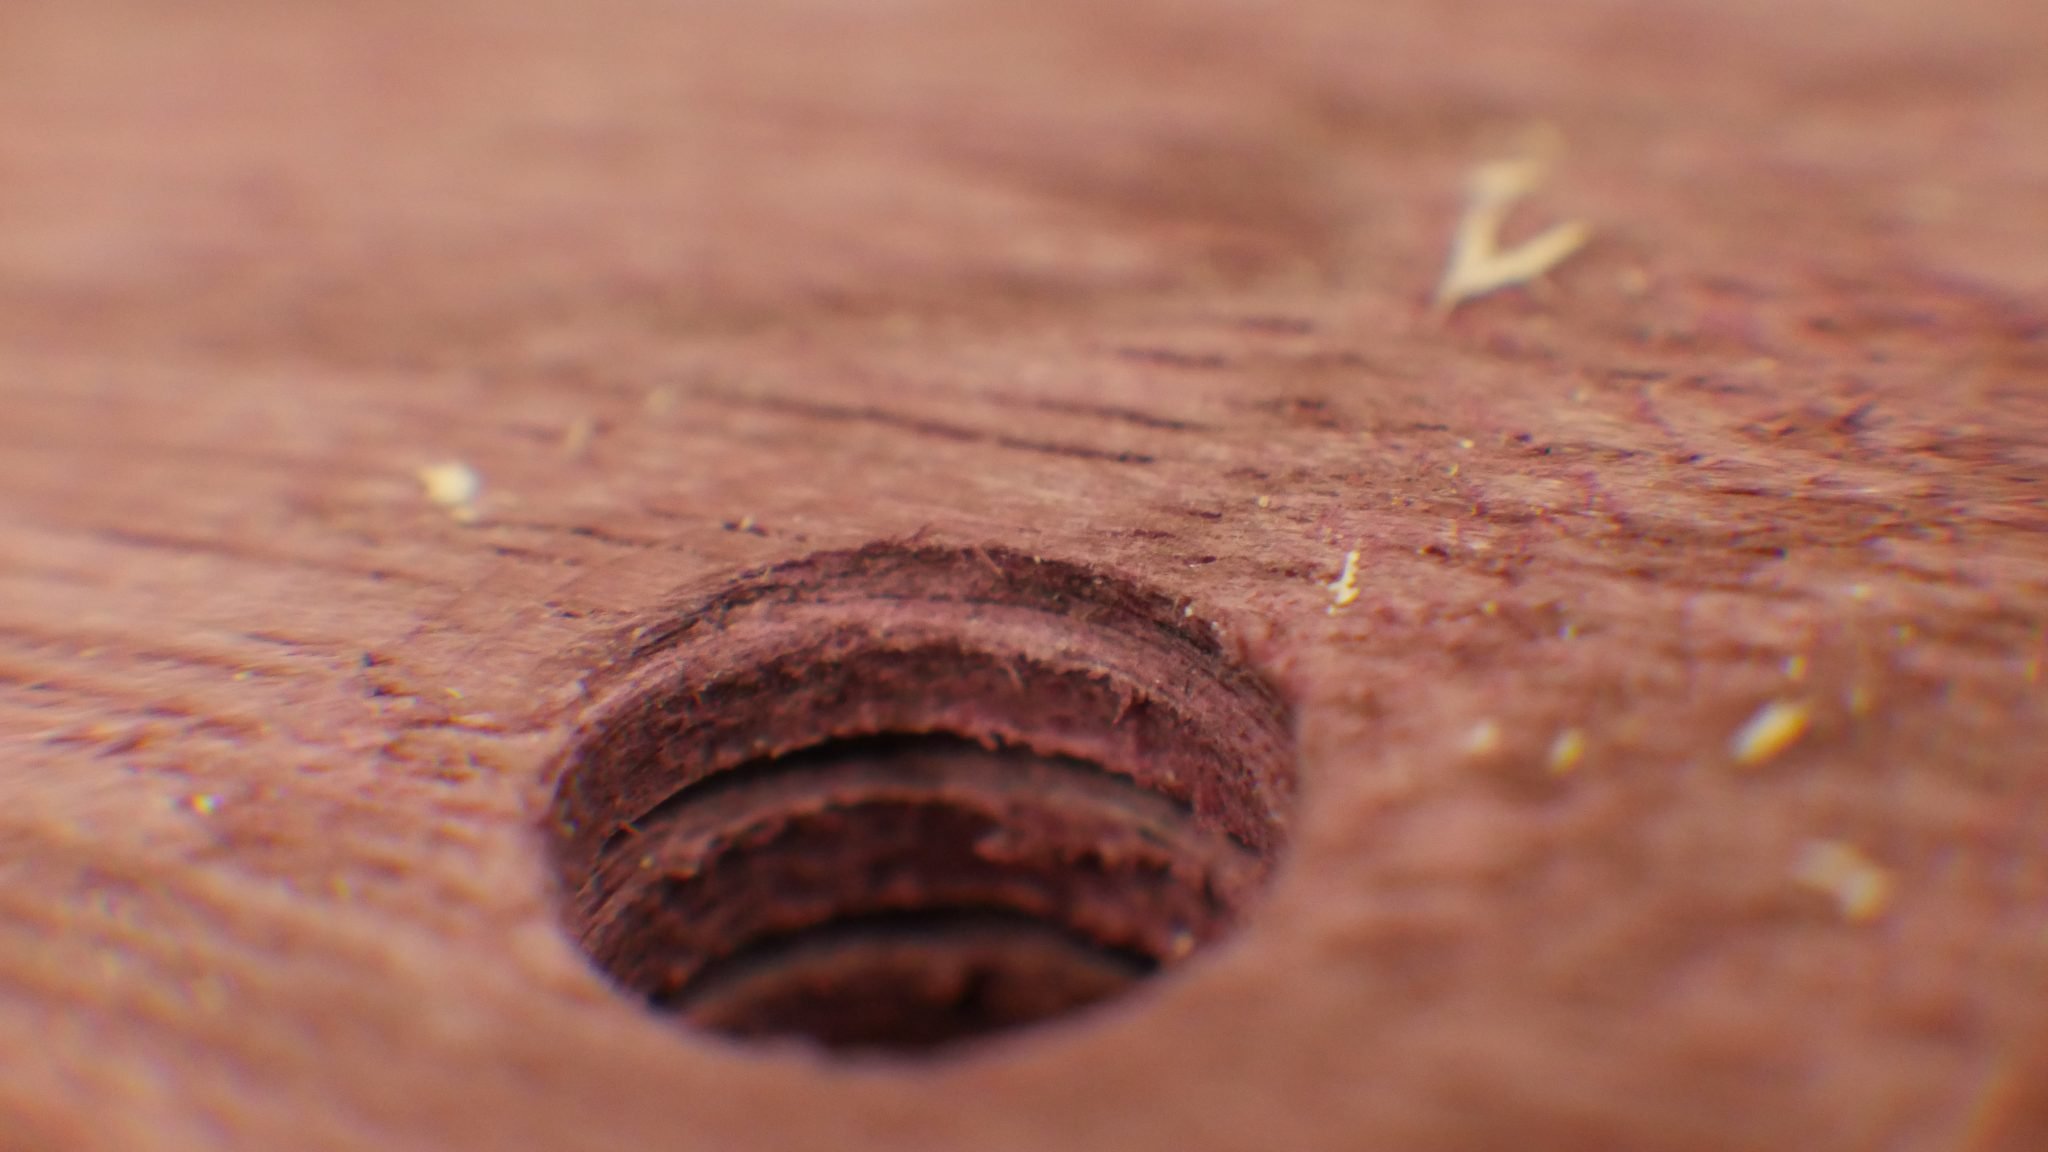
Macro Photography
My daughter Maisie and I were playing around with macro-photography last night. I’m not that good at it yet but it was fun to try to take photos of her cat Cheeto.
Mexican Ebony Contour Gauge Threaded Hole in Purpleheart0000 Steel WoolSuede Welding Glove Sabian HHX China Kang CymbalCheeto’s Side Cheeto’s Eye
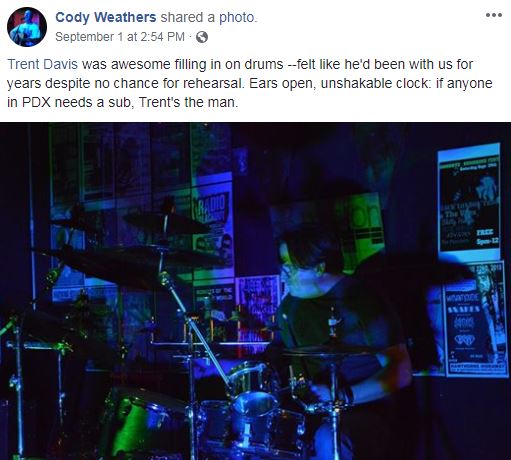
I felt that the show went well. I didn’t have time to do a rehearsal and I wasn’t that familiar with the songs but we got through them without any major problems. Cody is the singer/songwriter and usually plays drums. The guitarist was unable to perform so Cody asked me to fill in on drums so he could switch to guitar.
The music is sort of a Dave Matthews meets Ella Fitzgerald in that it is slightly funky rock with scat vocals mixed in. It’s a lot of fun to play.
I’ve included recordings for seven of the eight songs we played below. Keep in mind that I was very unfamiliar with the songs so be gentle in your criticisms.
At First SightMad About YouDeepCatnip PuppyThin Dead Man’s Blues
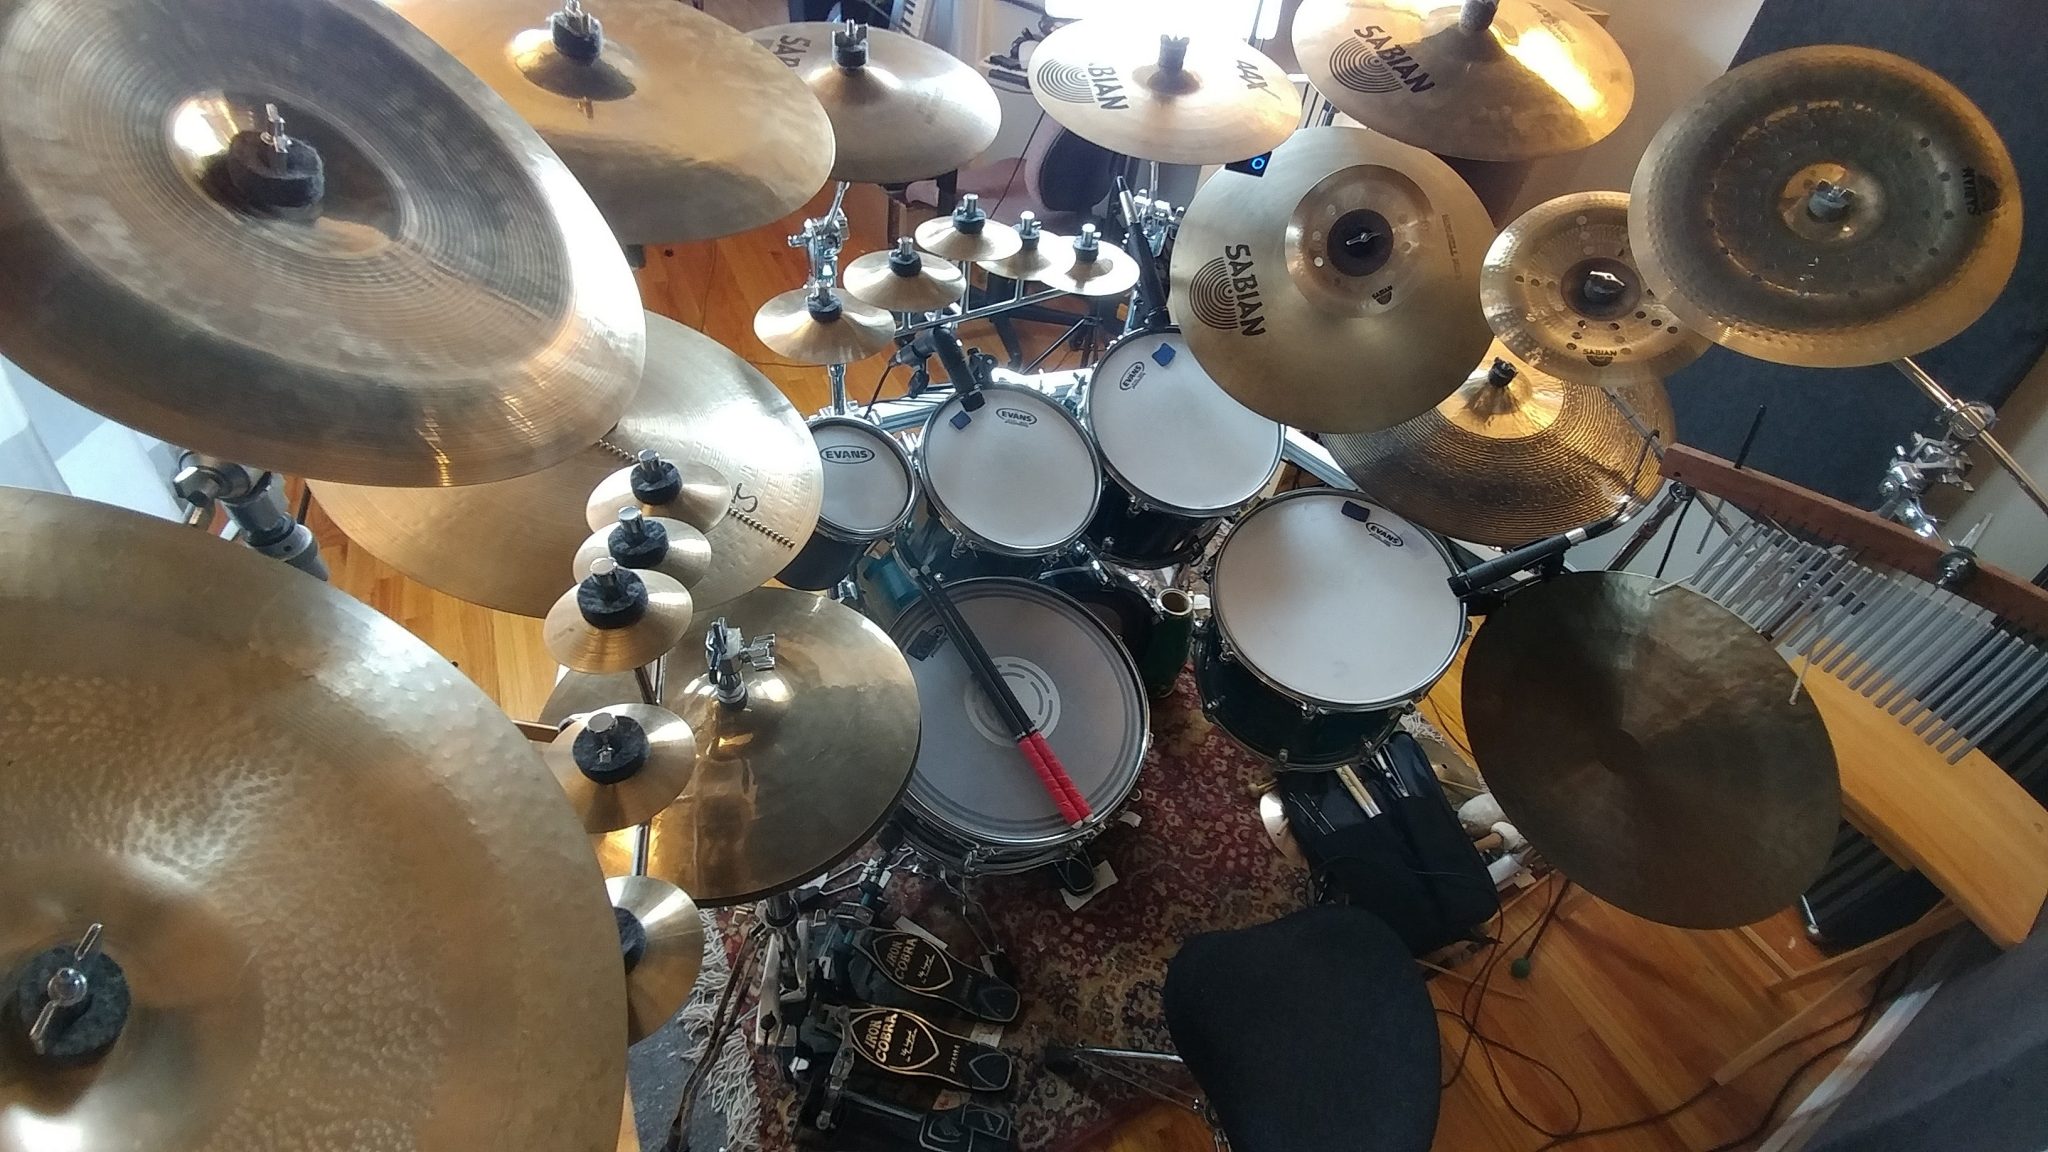
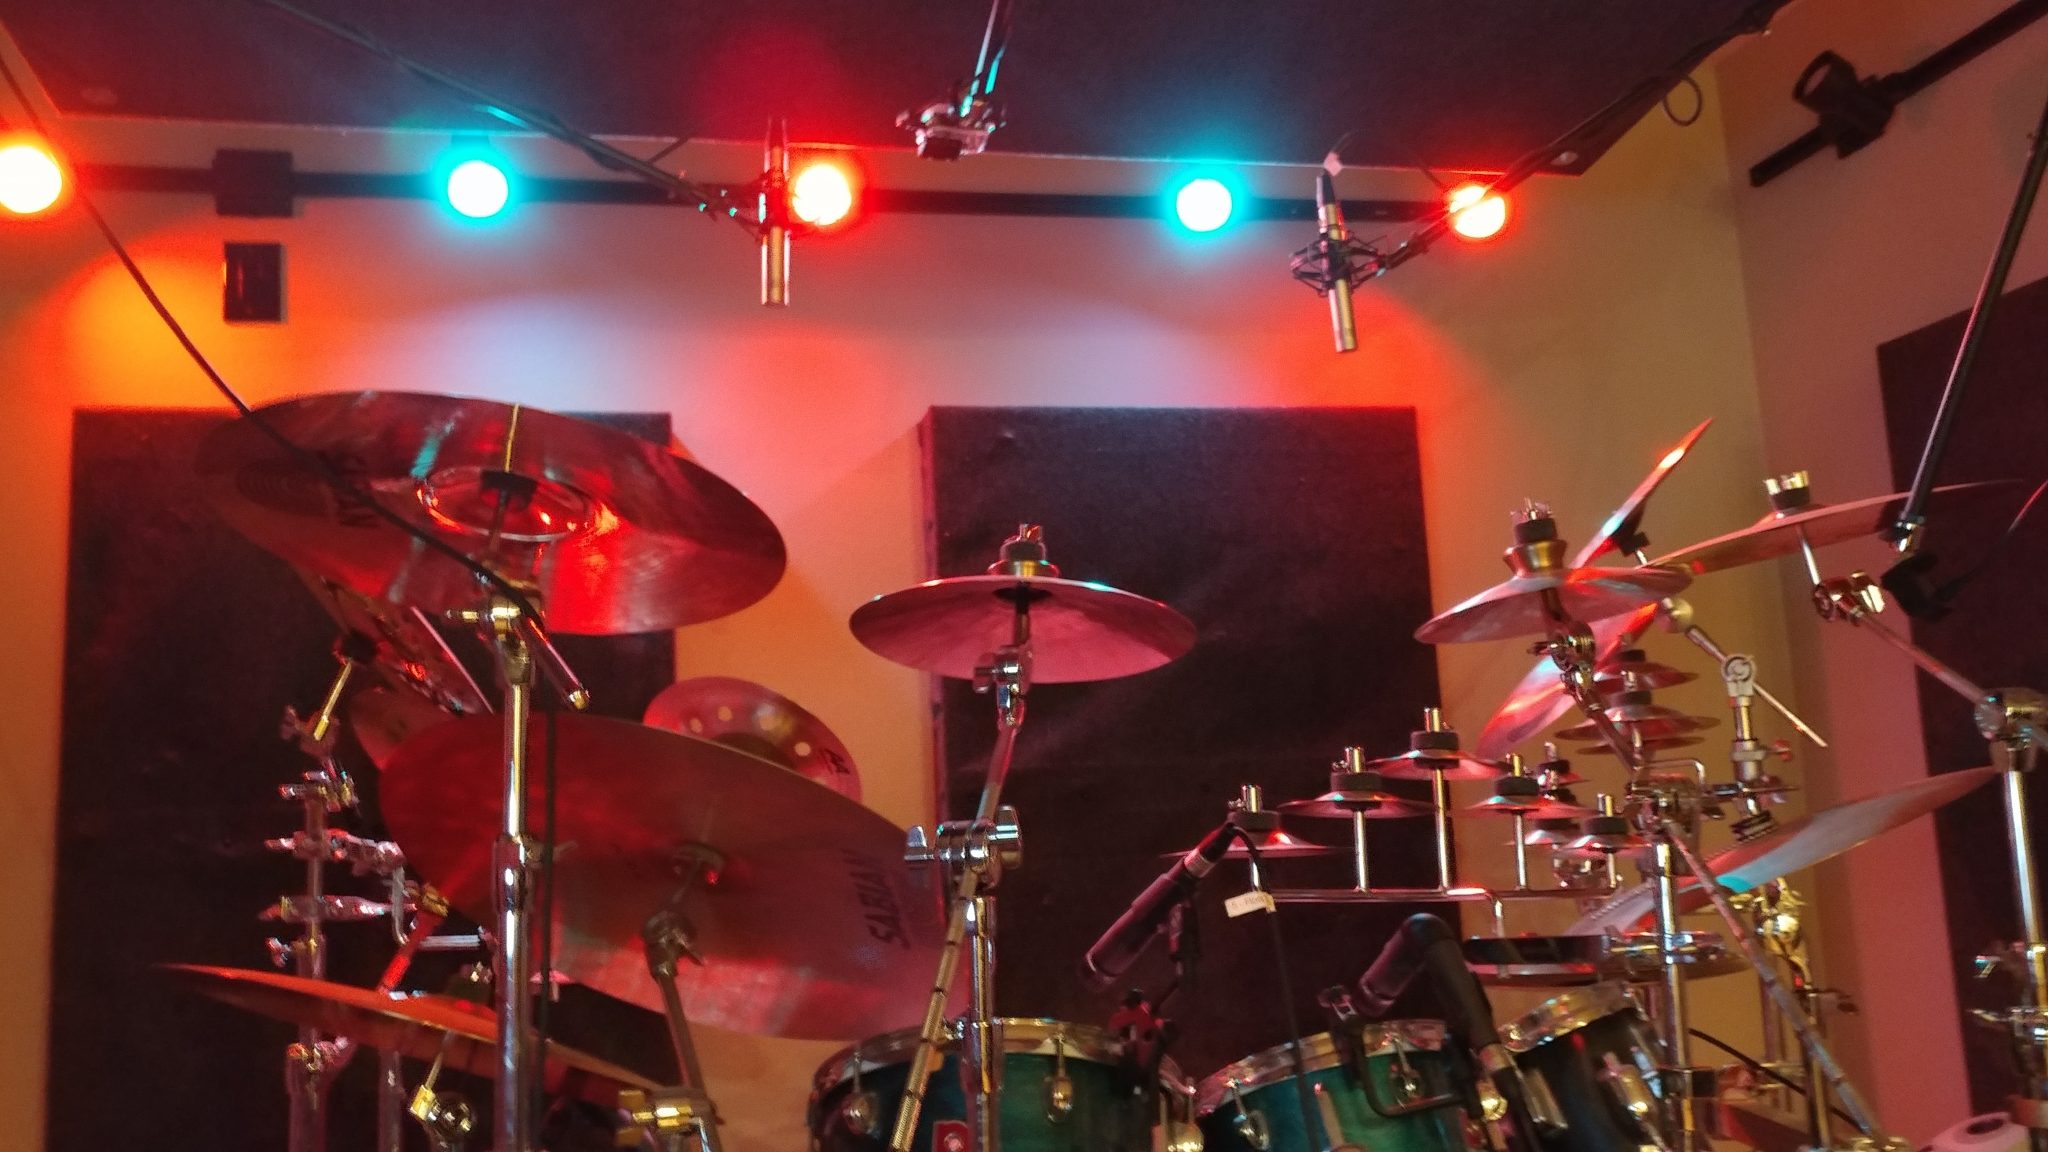
For those that are interested, here is a list of the gear I used during this show:
Drums (Premier XPK)
14″ X 20″ Kick
5-1/2″ X 14 Wood Snare
14″ X 14″ Floor Tom
4 X 6″ Tama Mini-Timbale
Cymbals
13″ Sabian AAX Studio Hats
16″ Sabian AAX Studio Crash
12″ Sabian Glennie’s Garbage
10″ Custom Wuhan China Crash
12″ Custom Wuhan China Crash
21″ Sabian AA Raw Bell Dry Ride
22″ Sabian Omni
13 different custom chime cymbals
The two custom Wuhan china crashes and the 13 custom chime cymbals are all ones that I made myself by modifying cracked cymbals. You can see my process for modifying them in the article on Cutting Down a Pair of Wuhans. This isn’t the exact cymbals that I used for this show but it shows my process for making custom cymbals. You can hear them in the recordings since I play them quite a bit. The Wuhans have a very trashy hiss-like sound and the chimes are … well … chimey.
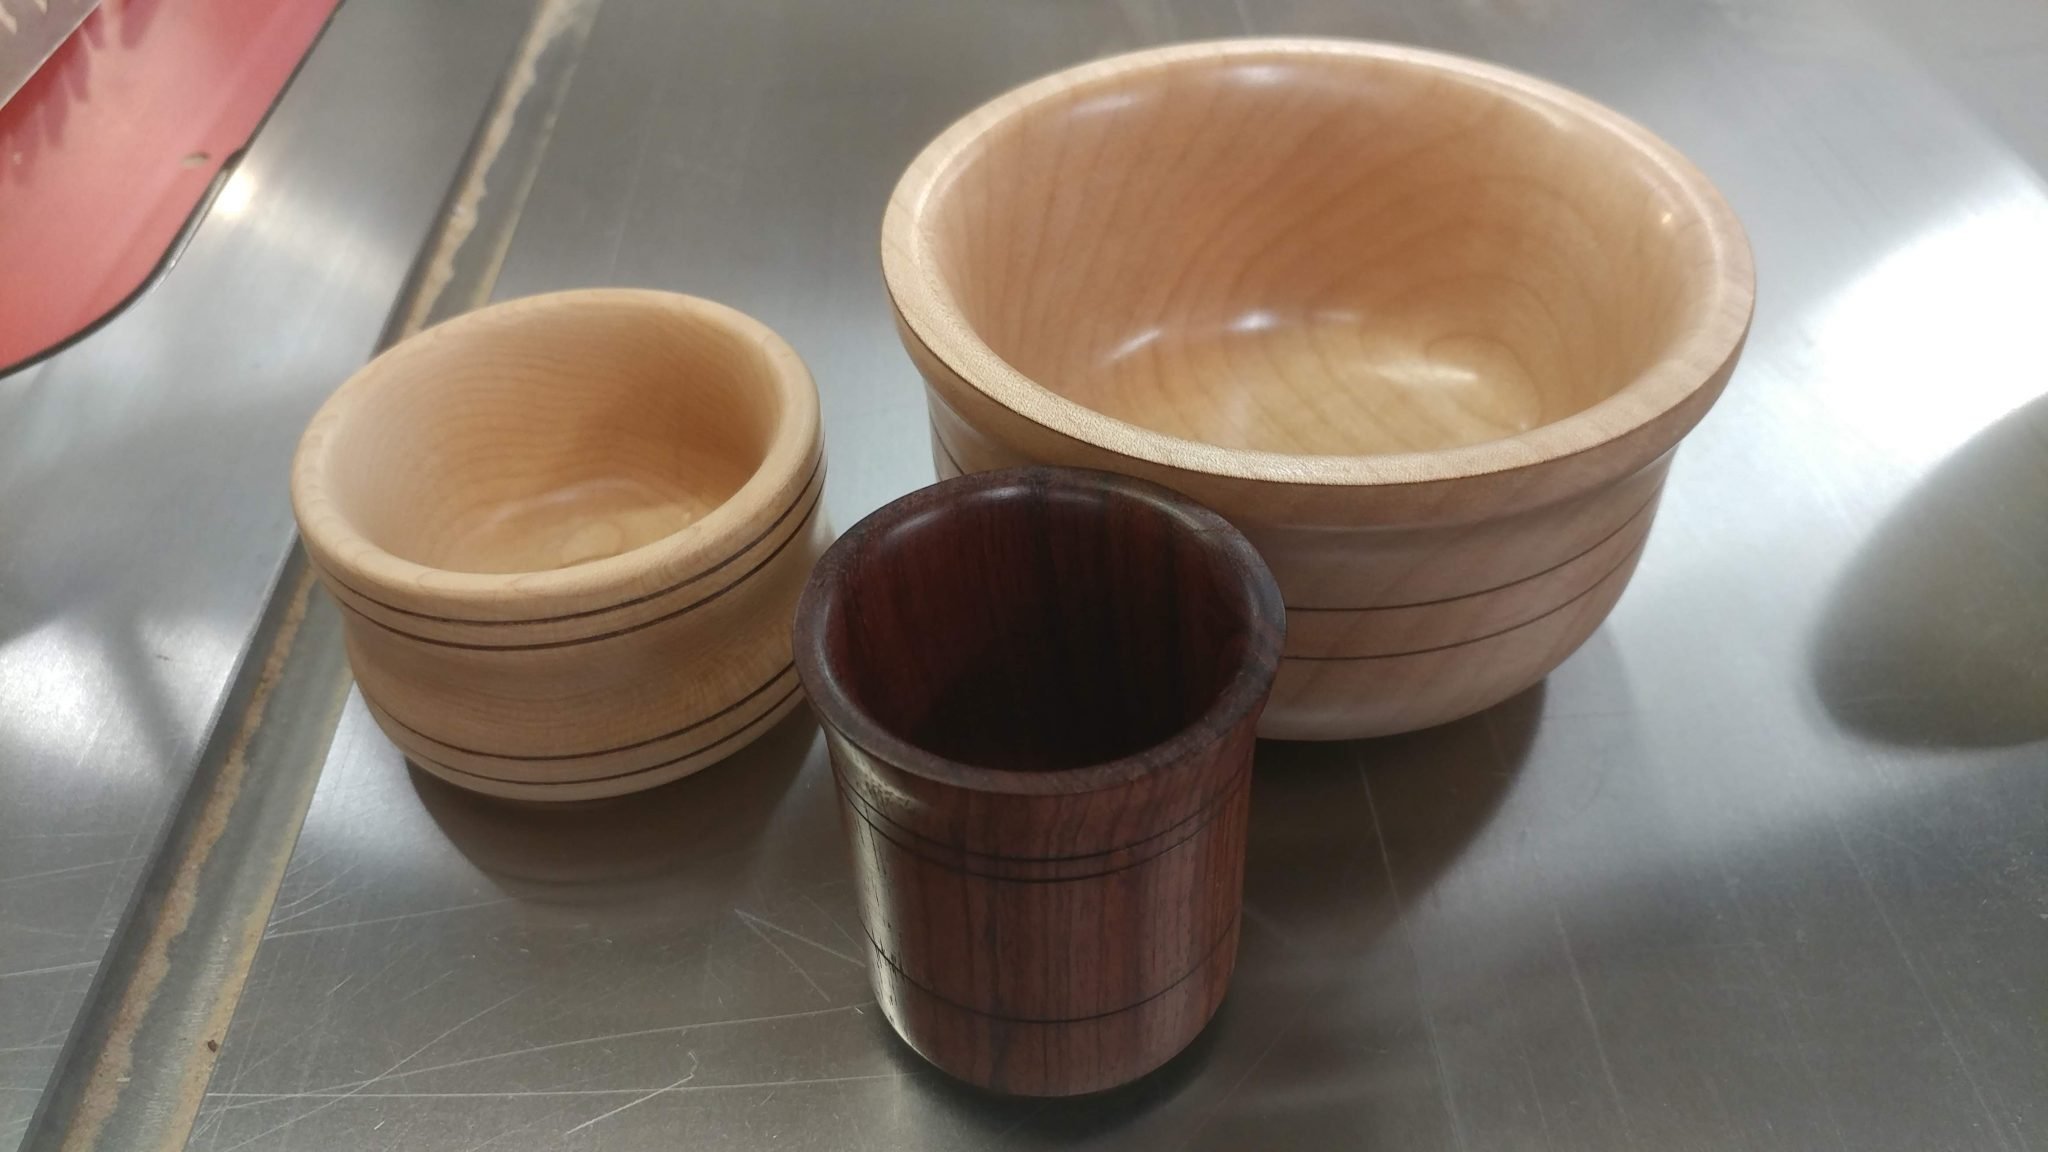
Finally Turned a Few Bowls
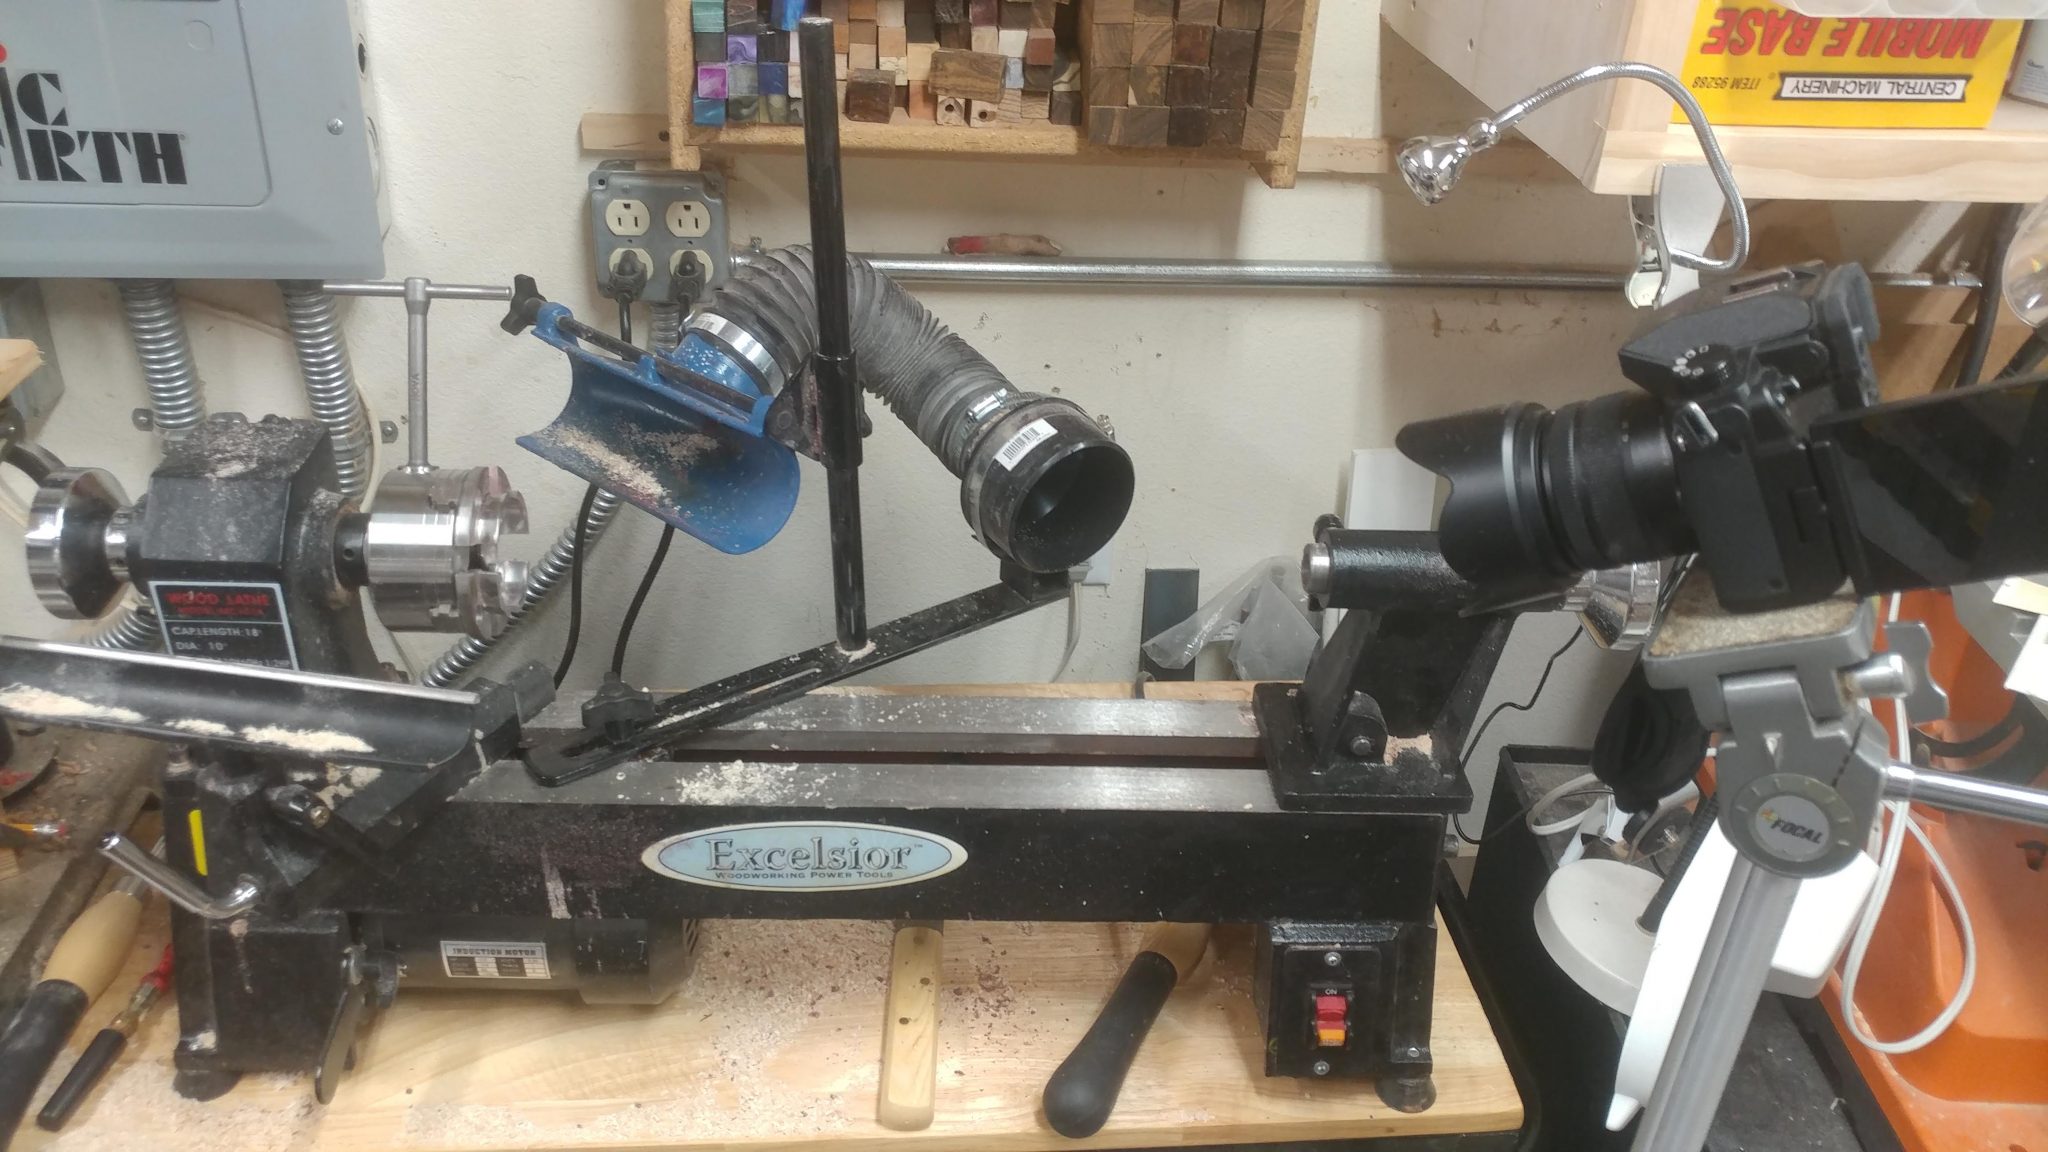
I’ve had a lathe for years but never had an interest in turning vessels (cups, bowls, vases, etc…). I finally decided to give it a try this past weekend and I have to say that I’m hooked. I don’t really have the right tools to pull this off easily but I’m getting the hang of it anyhow.
In the process I got to be familiar with Howard’s Beeswax & Orange Oilfinish. I was introduced to this through the videos of Carl Jacobson. If you haven’t checked out his videos then I very highly recommend you do. He is one of the nicest, coolest guys you’ll ever meet and his woodturning is amazing.
I had previously used Hut Crystal Coat with generally positive results. I think I’m more satisfied with the finish of the Howard’s since it has a more silky feel to it.
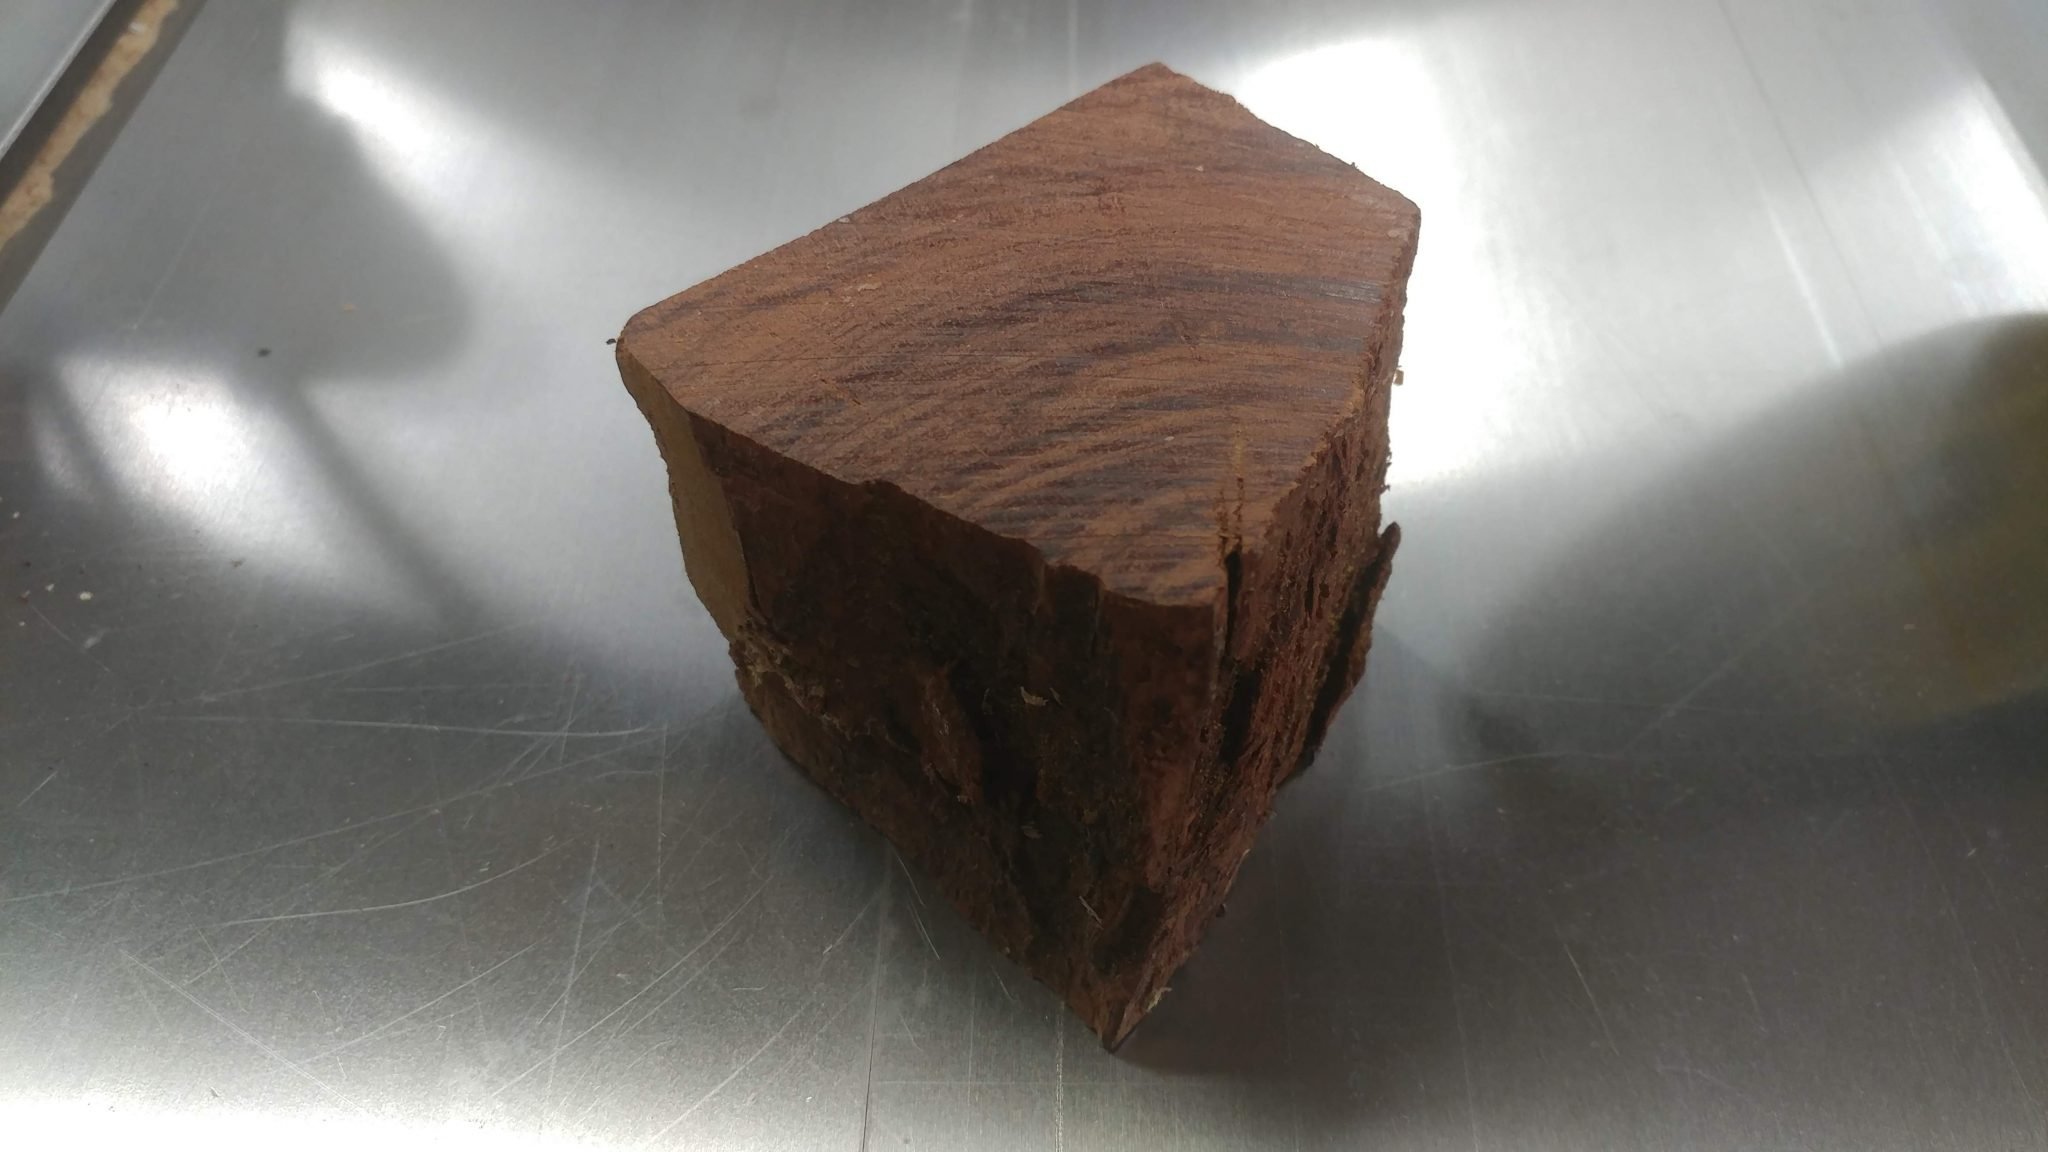
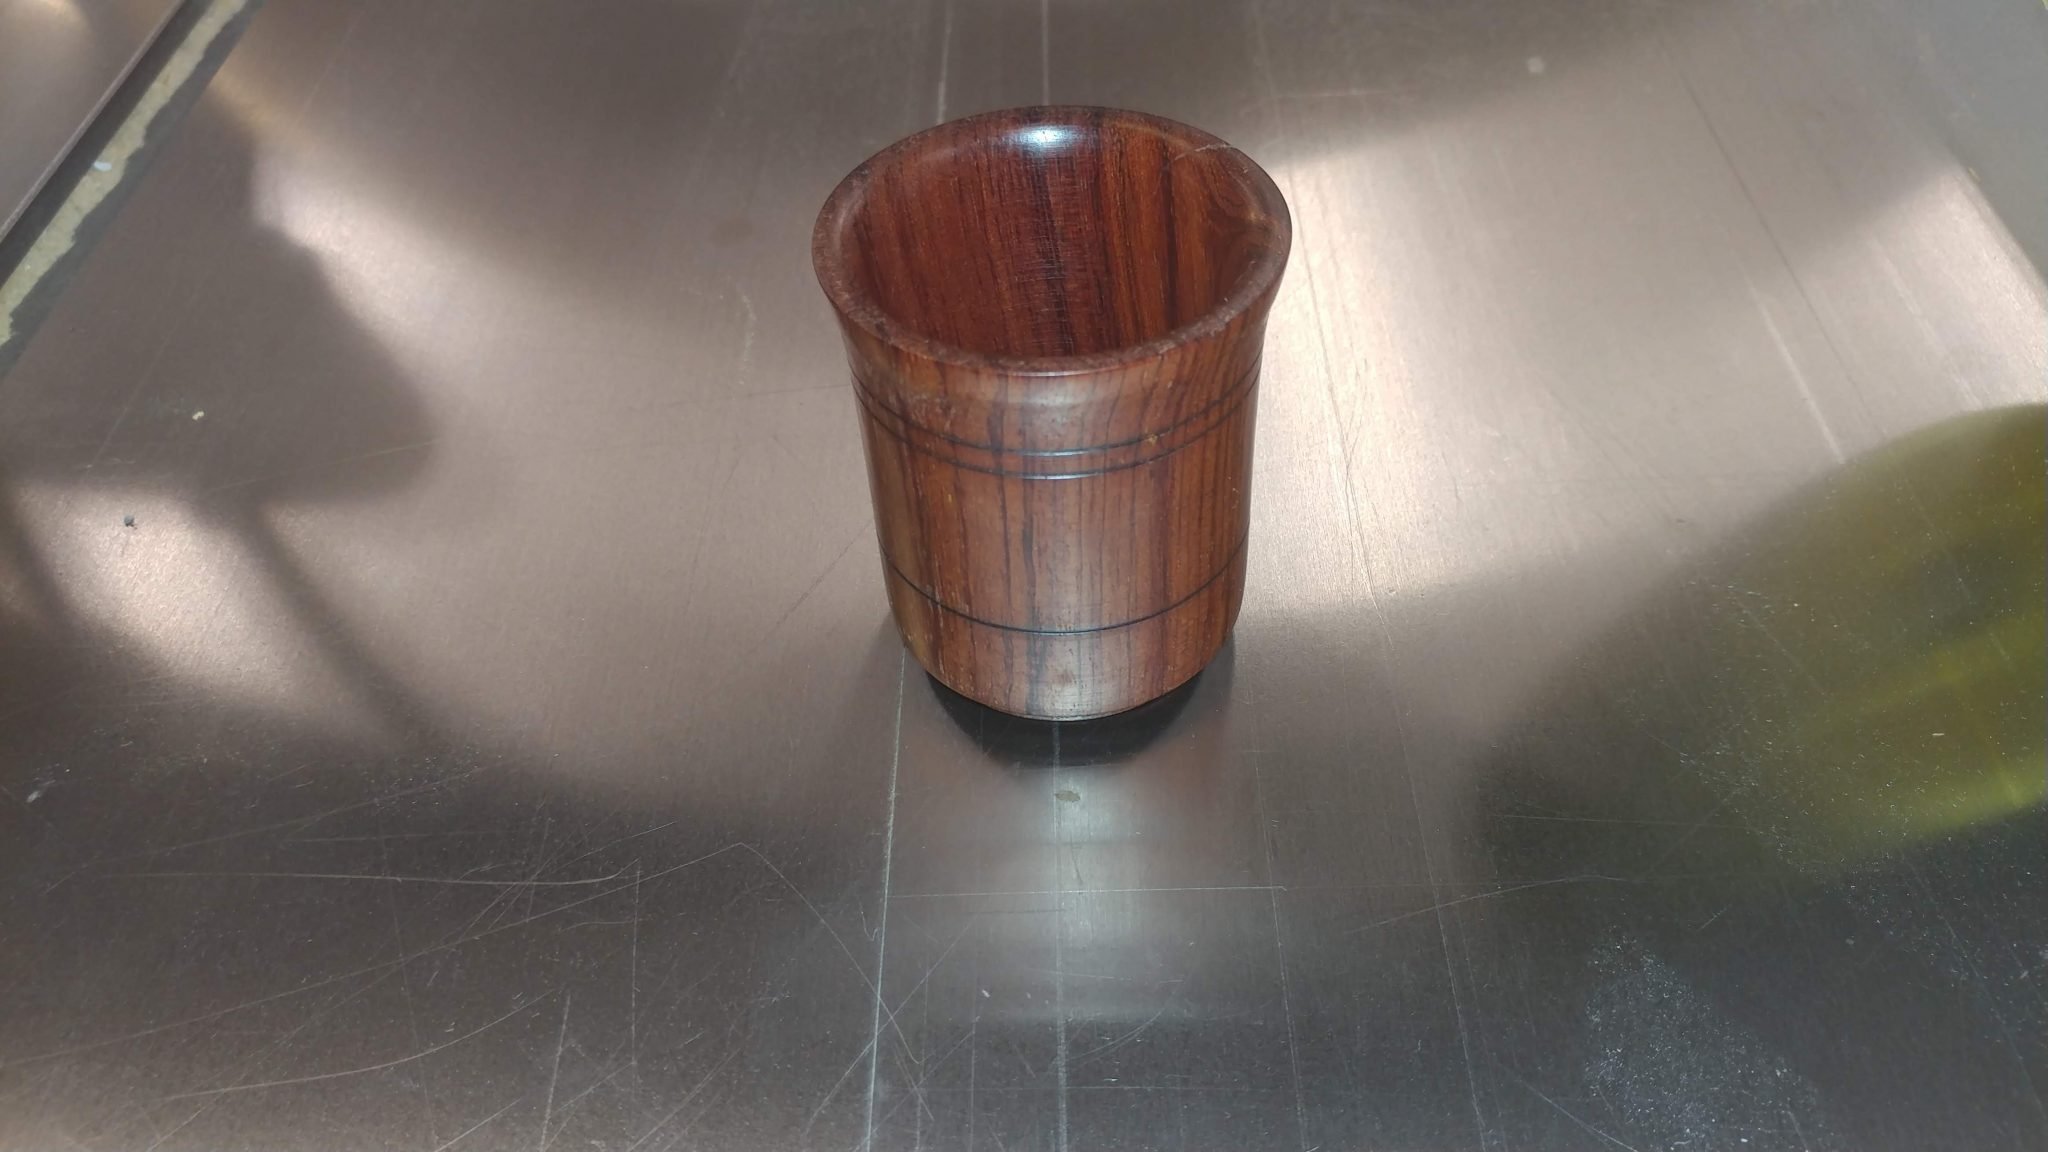
From this……to this.
It’s kind of difficult to tell but the piece pictured here is pretty small. I went digging through my box of turning stock and found a piece of (what I believe is) bubinga. It was pretty small, too small to use the Nova chuck to hold it. I got to use my cole jaws which could just barely hold it securely. I like the way it turned out.
A lot has been happening. So much so that I haven’t even had time to write up a new update.
New Web Host
I successfully made the switch to a new web host and (several small hichups aside) it went smoothly. I’m really happy with the speed increase that I’m seeing on this new web host. Hopefully that speed continues.
Recording Studio Changes
Up til now my recording/rehearsal space has been in our back room. This is not ideal since I can’t record anything without forcing the rest of my family to leave the house. Also, it’s hard to focus on my projects with the T.V. playing in the next room. It has been nice having rehearsals there, however, since we have more room.
I’ve decided to change things up a bit. My 19-year-old daughter is in a bedroom upstairs. My wife and I want to put new floors in that room since it’s just nasty old carpet now. We’re also having problems with my two daughters arguing at all hours of the night. I’m going to put up a semi-permanent wall in the music room, dividing it from the rest of the house. This will be my daughters room until she eventually moves out. We’ll replace the floors and fix up my daughters existing room and that will be my new music room.
At least , that’s the plan.
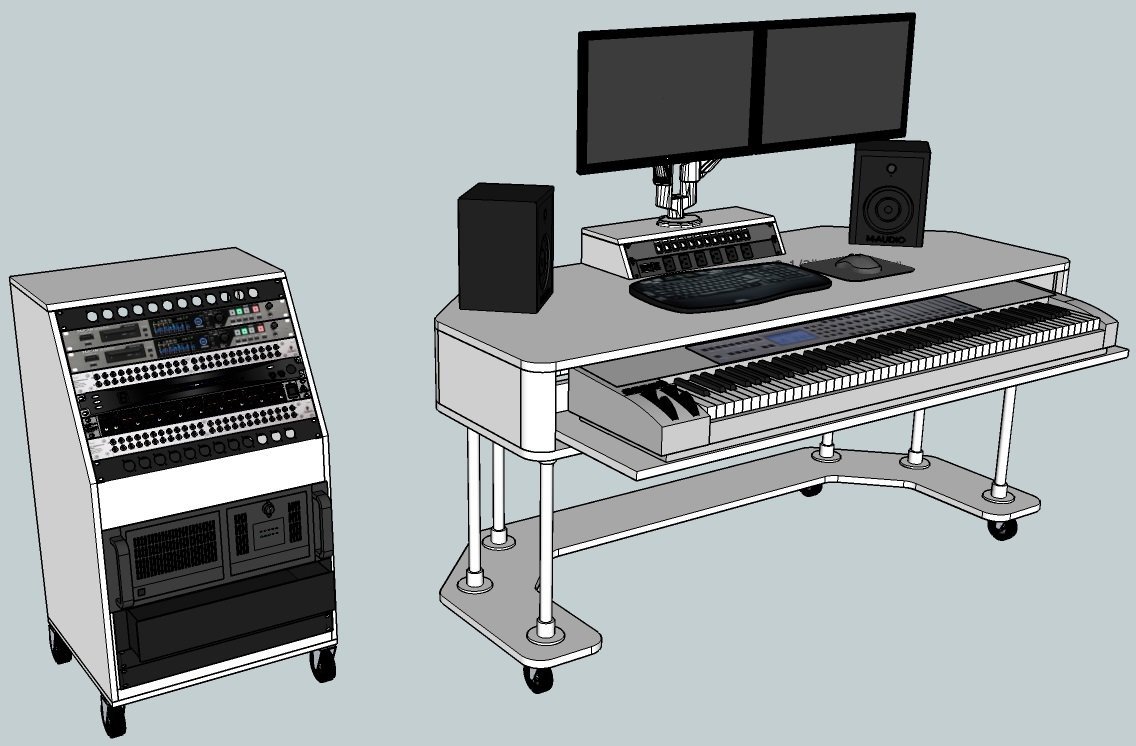
New Studio Desk
I like my recording studio desk, but I don’t love it. It’s too bulky to fit in my new recording space so I’m going to design one that takes up less space. I’m torn between wanting something that I can wheel up to the drum set and something big enough to house my 88-key midi controller.
I think I’m leaning towards making it two different pieces; one being a roll around cart with all the rackmount gear, including the PC, and the other being the desktop / midi controller stand. The two will be connected with a cable snake with a couple USB 3.0 cables, a couple HDMI cables, and two XLR cables for the speakers.
Shop Changes
There have been lots of changes in my shop and there will be lots more to come.
I’ve decided to focus. In particular, I’m trying not to cover everything in my shop but instead I’m going to just focus on the tools that I use for what I like to do, which is make musical instruments. I’ve decided to get rid of some tools. I have a lot of tools that I barely ever use and they would have better lives in other shops.
I’ve upgraded my band saw to a Laguna 14 BX 2.5 HP. I really like the increased power but I’m actually a little disappointed at the build quality. I know that Laguna is highly rated but I’m not overly impressed. Still, it’s a huge improvement over my old Craftsman. This could very well be the last band saw that I ever buy.
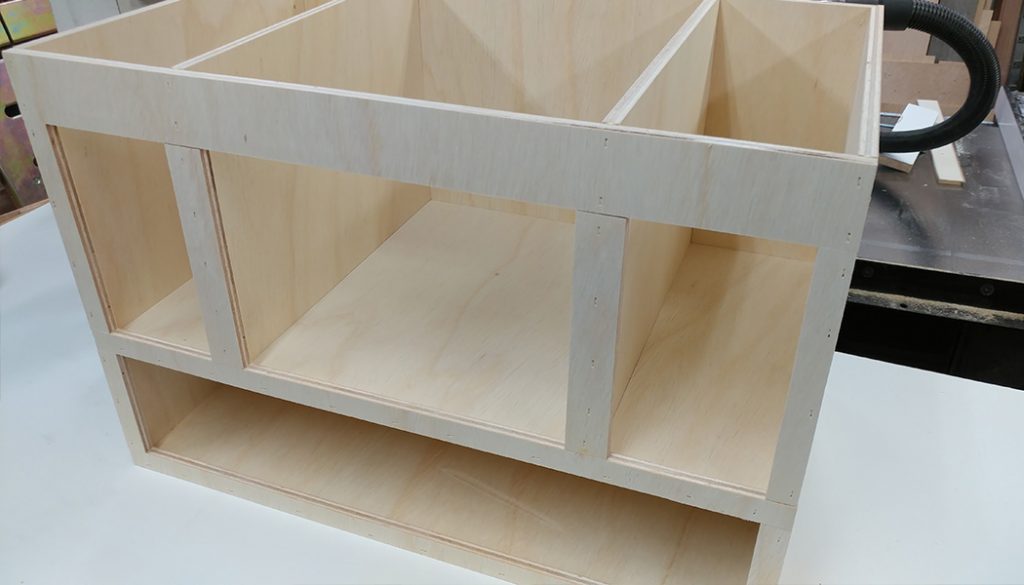
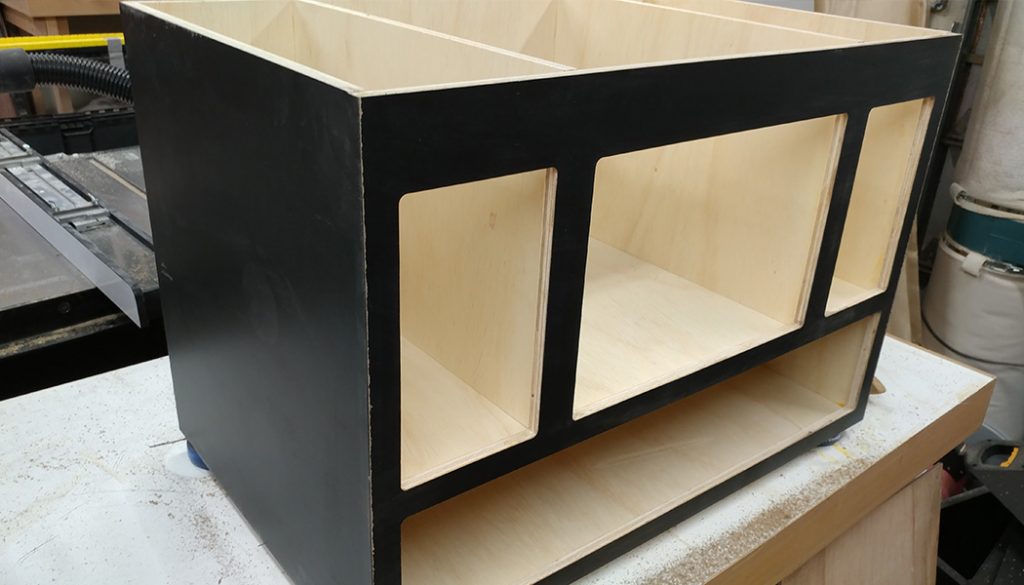
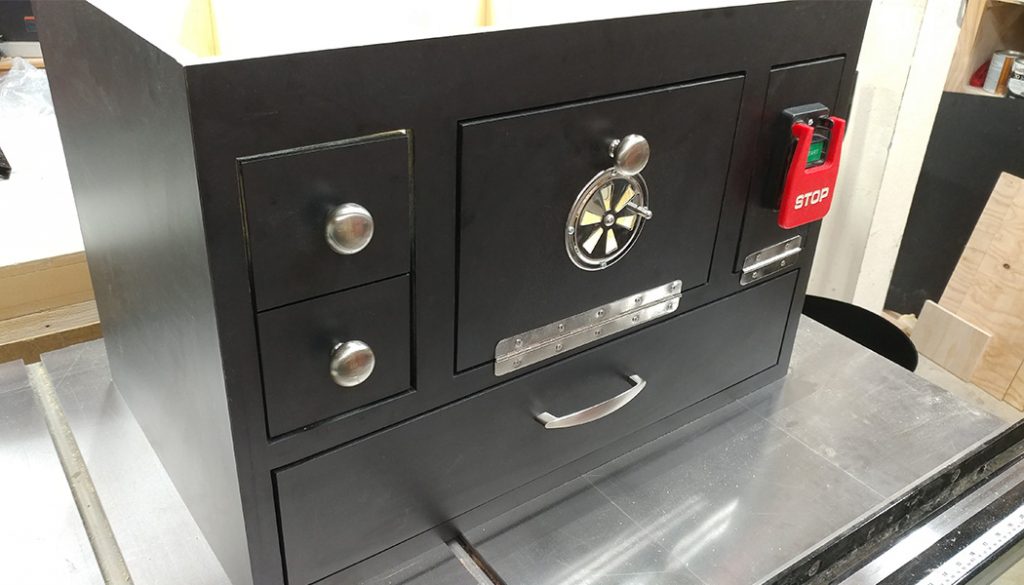
I have been making the change from wall-mounted cabinets to rolling tool carts. This may seem counter intuitive but I like having all the drawers. I’ve enter a new phase of tool organization and I really like it.
Upcoming YouTube Videos
I’m finally giving in and making some YouTube videos. This is something that has been requested of me for several years now and I’ve resisted since I’ve never felt like I had anything new to contribute. After meeting with some YouTubers, I’ve realized that it is a great community to be a part of and that I do indeed have something to contribute. If nothing else, I can provide my perspective on things that have been already covered by others.
Gig with Cody Weathers and The Men Your Mama Warned You About
I’ll be filling in the drum chair with Cody Weathers tomorrow night, August 31st 2018, at the Hawthorne Hideway from11:15 to Midnight. Click here for more information.
In Conclusion…
That’s all for now. Actually it isn’t but I don’t want to bore you with the details.
After 12+ years at ImHosted.com I moved my site to a managed server. ImHosted has usually been pretty good but I’ve been having server overload issues more and more frequently as of late and I finally decided to change web hosts.
I’m now with CloudWays.com and so far I am really impressed. The site is a lot faster and I’m paying the same amount. The only downside is that they don’t do POP3 e-mail accounts. Unfortunately, I didn’t realize this until after I had migrated my site. This means that I now have to go through all my old e-mails and log into my various accounts and point them to my gmail account. No big deal, just tedious.
This isn’t a major news announcement but I’m letting you know just in case some images or pages aren’t loading. I’ve already found some articles with missing images and I’m working on updating them.
This is a list of helpful documentation and links to the cheapest places online for various SawStop consumables.
I will be regularly updating and adding to this list with the cheapest prices available online. I will always take the shipping cost into consideration.
If you have a suggestion for a link to add to this or if you find a cheaper place to buy something online, please leave it in the comments below.
Communities
SawStop Users’ Group
I started the SawStop Users’ Group so SawStop owners or prospective owners would have a place to go with their questions without having to resort to other communities like SawMillCreek and LumberJocks, where half the answers to their questions would be met with comments such as “That’s why I use a Delta/Powermatic.” while the other half may be well-intentioned yet not necessarily pointing them in the right direction.
If you are using thin-kerf blades and are experiencing the wood binding on you when you use a riving knife, check out this article because a fix may be cheaper than you think.
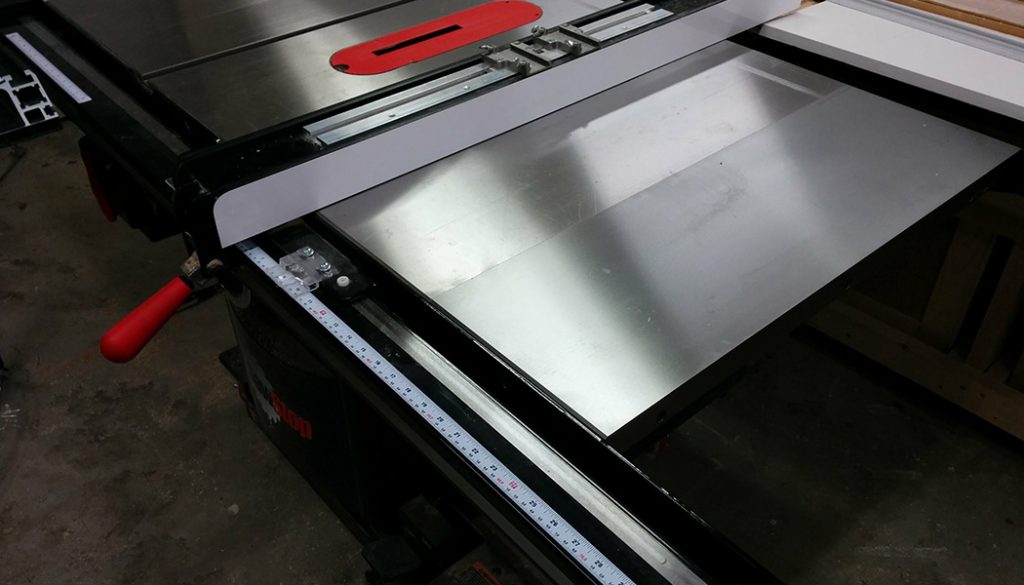
If you have rust forming on your cast-iron table top, or don’t, and want to keep it that way, check out this article. This works on all cast-iron tools, and is especially useful with jointers since it will make the table surface very slick.
I get asked about this more frequently than you would think. Some people want to have an all-cast-iron table top. I didn’t do all cast-iron but I did decide to show what is involved in attaching an extra cast iron wing between the existing wing and the wooden extension table.
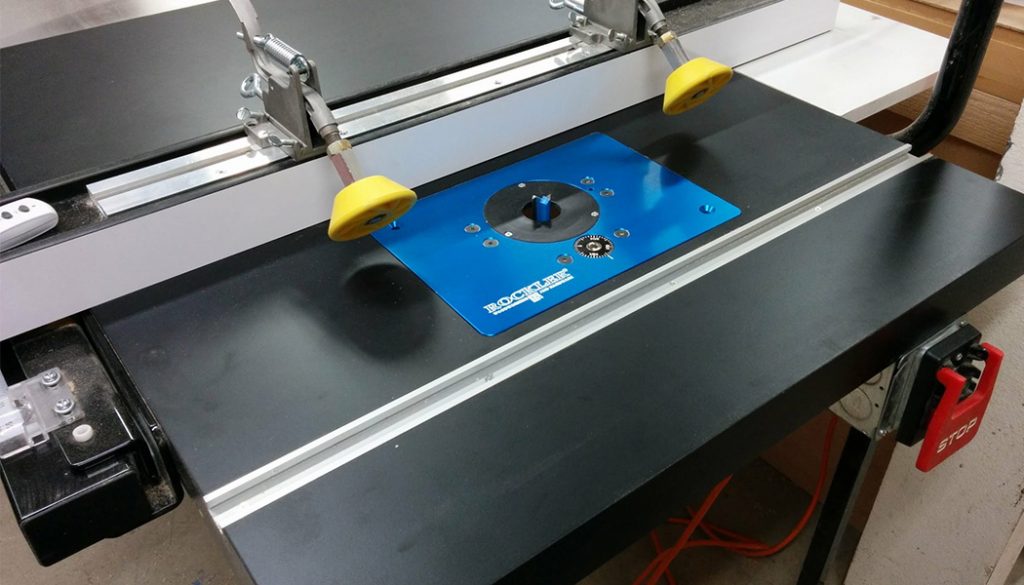
Here I discuss how I converted my wooden extension table into a router table. This is helpful if you aren’t ready or interested in installing a cast-iron router table.
The following two brake cartridges are only for any saw that takes the clear brake cartridges. If your saw was made after 2008 then it doesn’t take these brakes.
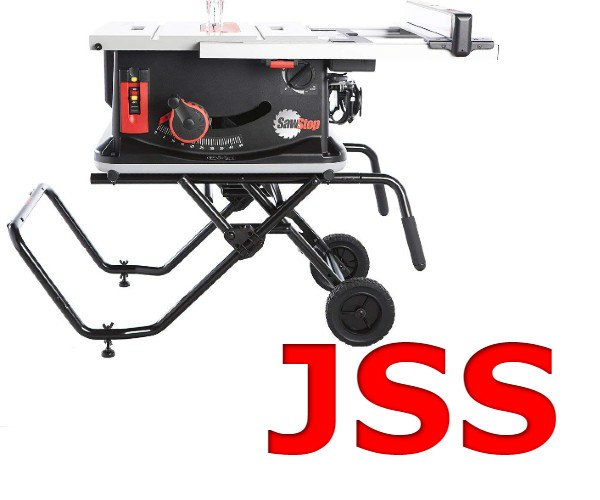
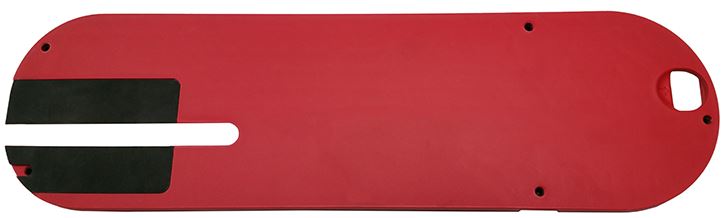
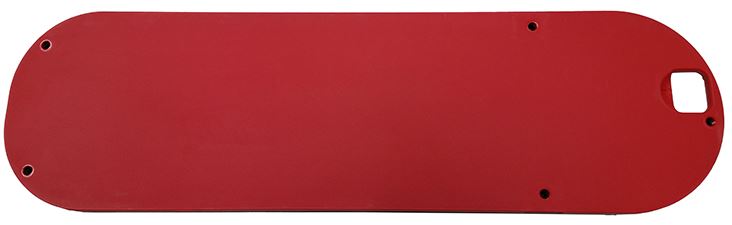
The following two zero-clearance inserts are only for any saw that has a cast-iron tabletop. This just means that it won’t work on the JobSite saw (JSS).
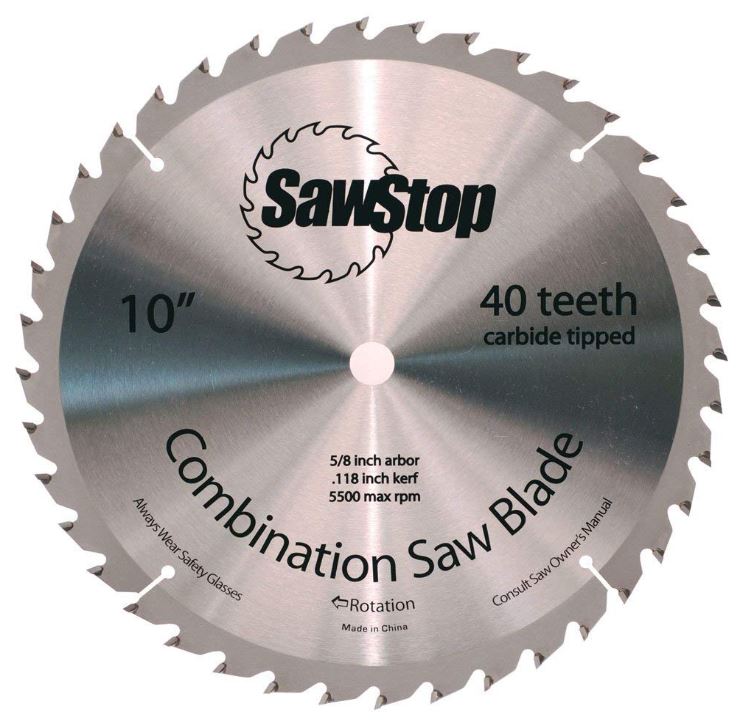
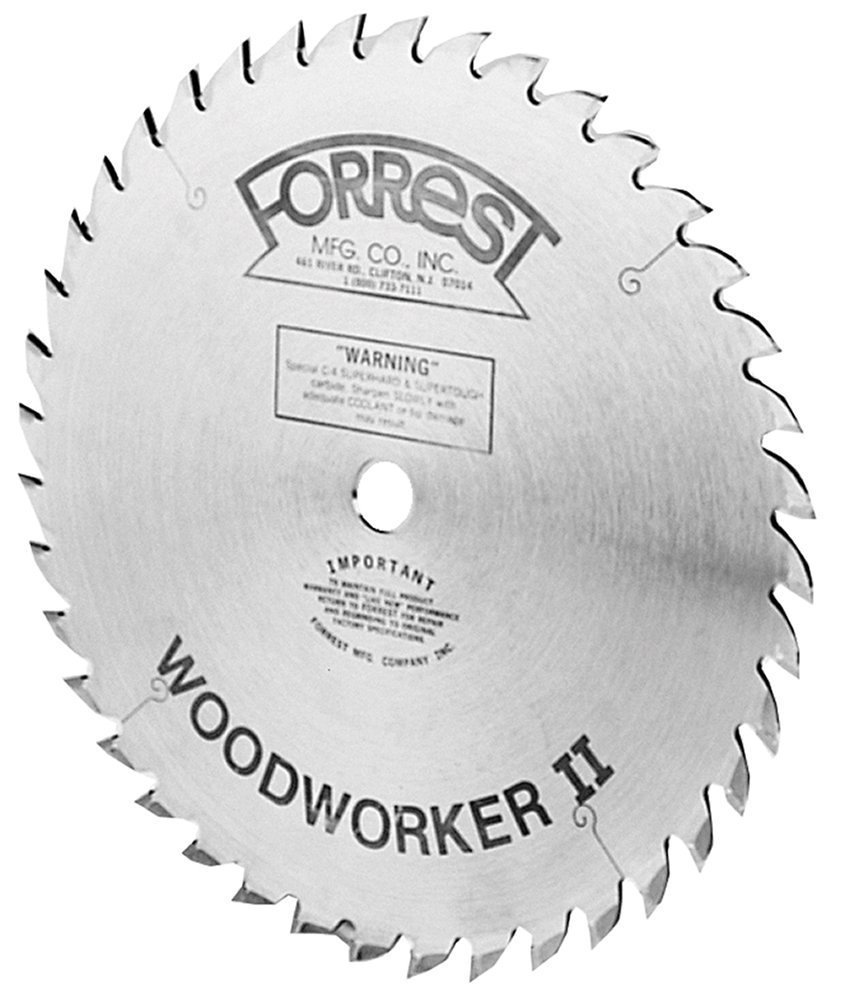
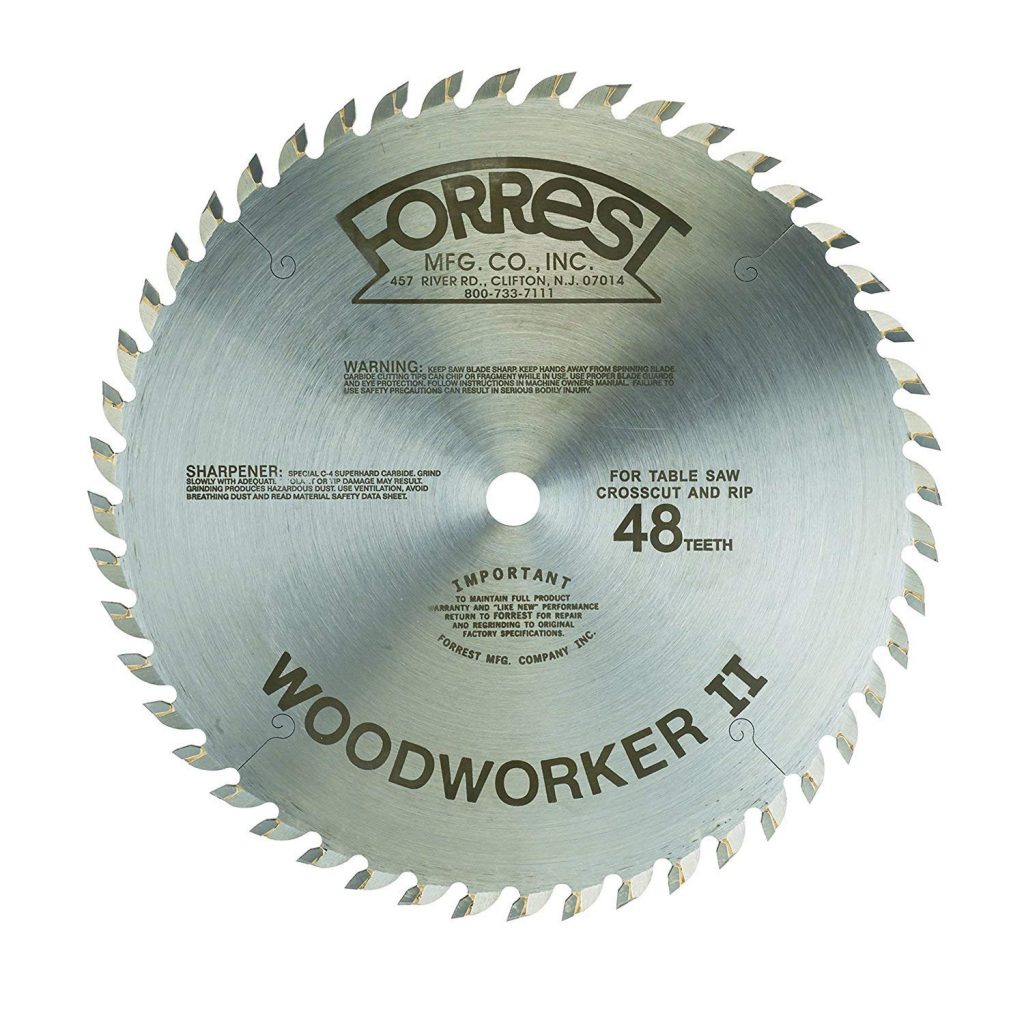
The Titanium blades are a big step up in quality. I compare them favorably with the Forrest Woodworker II, although your mileage may vary. They have large carbides so the blade can be sharpened multiple times and the cuts I have gotten with them has been glue-ready every time.
This is the go-to standard blade for most high-end woodworking. You really can’t go wrong with these blades and they should last an insanely long time.
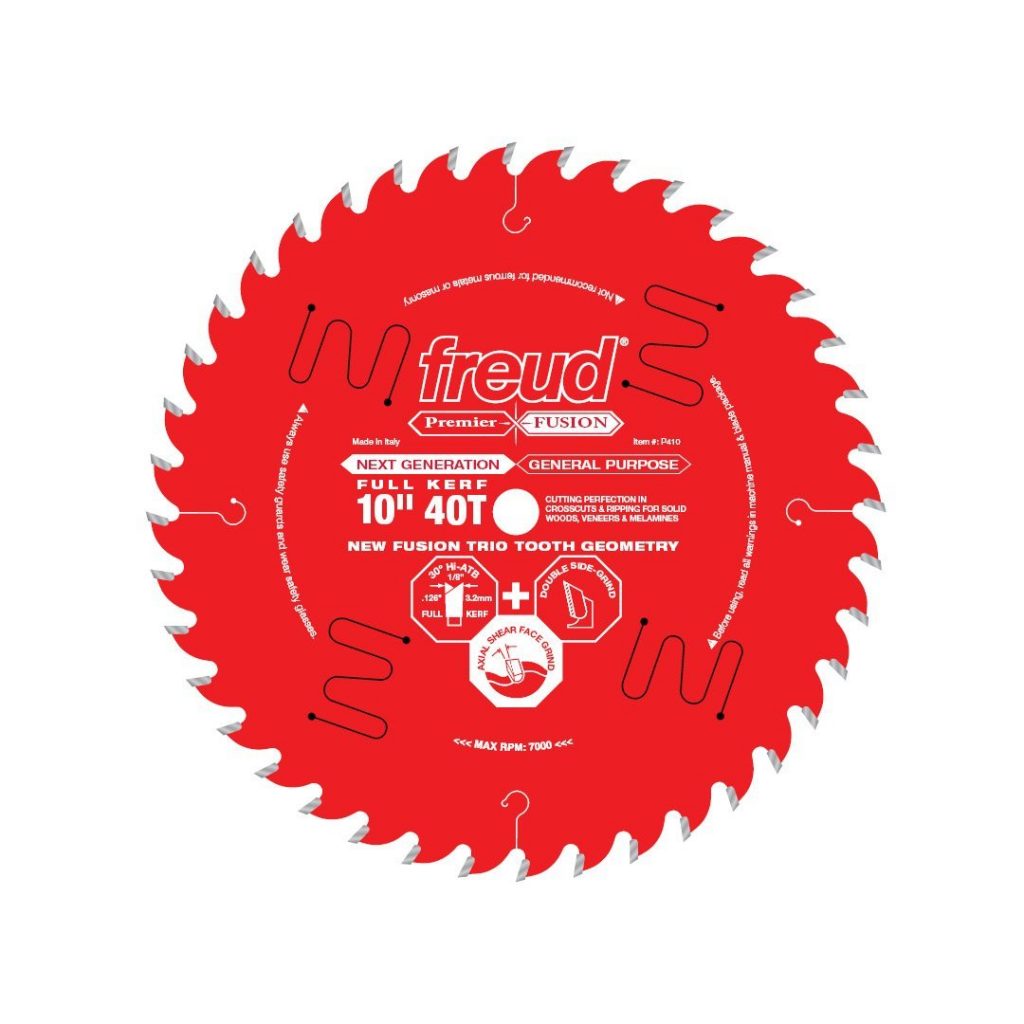
Freud is probably the most common blade manufacturer that I deal with. My opinion of them is that you are generally getting a better blade than you are paying for when you buy a Freud. I do, however, recommend staying away from the Diablo line by Freud. I also recommend not using a Freud blade that has anti-kickback shoulders.
A common question I get is whether or not the red coating on Freud blades will affect the safety mechanism on a SawStop saw. Red coated Freud blades work just fine on a SawStop.
I like to think of Amana as the Subaru of blades, in that I don’t use them but I keep hearing of people who swear by them and won’t use anything else. I’ve held them a few times and I agree that they seem like very nicely made, well-balance blades.
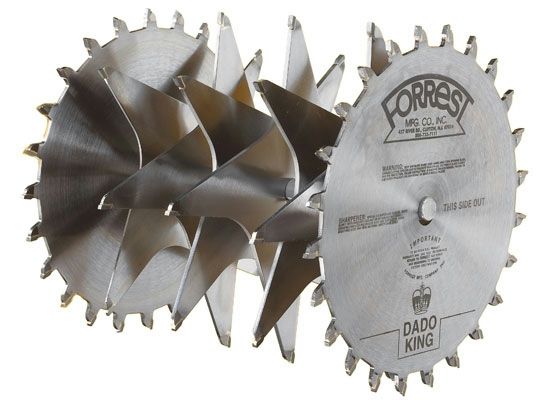
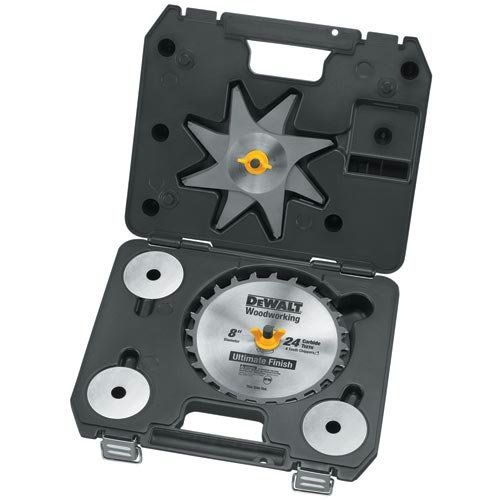
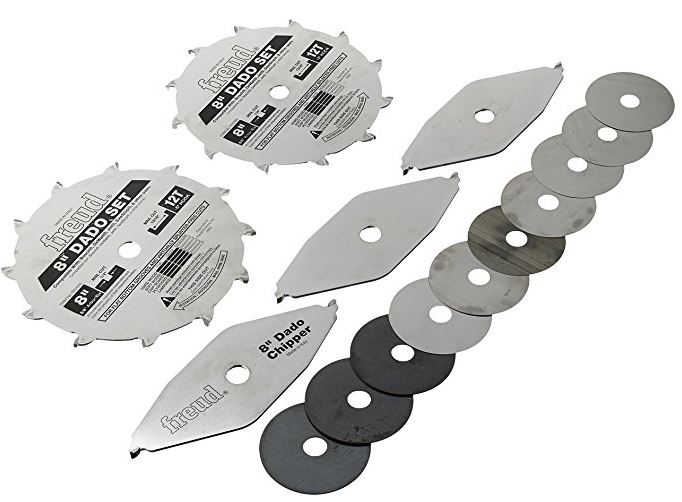
The following dado stacks are all compatible with SawStop table saws, in that they are all ~8″ in diameter, have wing or plus-style chippers, and don’t have depth-limiting (anti-kickback) shoulders. My personal recommendation is the DeWalt DW7670, which is surprising since I’m not a fan of DeWalt’s 10″ blades.
A newcomer to the game, Sawstop released their own dado stack that will work well on their saws.
It is an unusual configuration in that it comes with a 1/4″ chipper which allows the dado stack to be wider than the 13/16″ that SawStop recommends.
While one of the more expensive dado stacks on this list, it definitely is a quality set. I got to test them extensively and I was quite impressed. Not enough for me to sell my old DeWalt dado stack and run out and but this, but if I was in the market for a new stack and didn’t mind paying ~$300 for one, I would definitely consider this one.
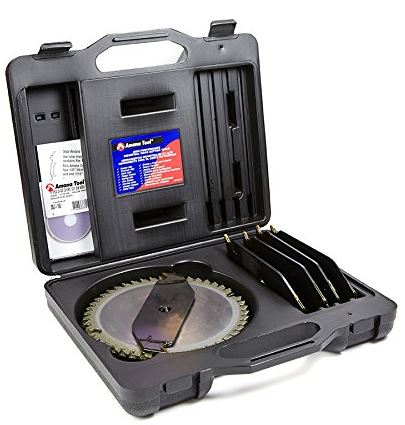
The DeWalt DW7670 is probably the best value in dado stacks. I very strongly suspect that they’re just re-branded Forrest Dado Kings. The cut-quality is phenomenal and they’re usually around 1/3 the price of the Forrest Dado King.
Side-note: once I switched to SawStop Titanium ten-inch blades and the DeWalt DW7670 dado stack, I have never needed to adjust the gap between the blade and brake. I have it set to the maximum clearance and it’s still close enough to work.
Important note: DeWalt has recently changed this dado stack and it now has a diameter of 8 1/8″. It should still work with a CNS, PCS, or ICS, but it’ll be a bit tight. I definitely wouldn’t recommend this to anyone with a JSS or JSS Pro.
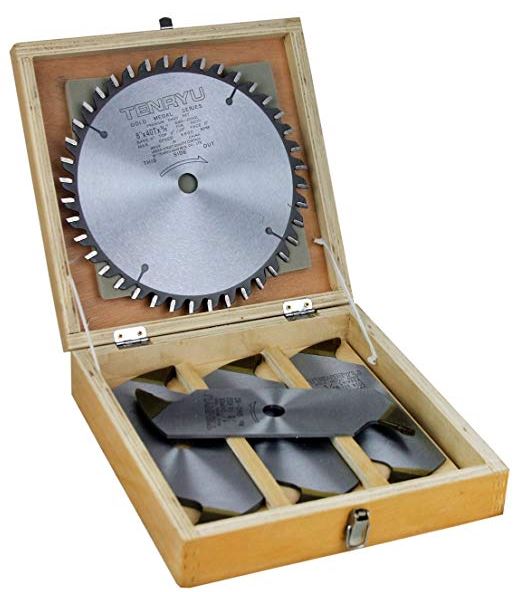
Ridge Carbide is one of the better blade manufacturers.
Their 8″ Dado Master meets the requirements for use on a SawStop without concern. Also, the cut quality tends to be great with all Ridge Carbide blades.
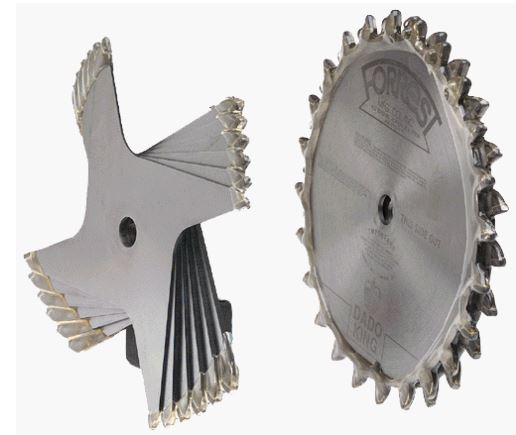
This is the Rolls Royce of dado stacks. At around $300 each, they’re a bit spendy for most home users, but if you make money with your woodworking and you do a good amount of dadoes then it’s a worthwhile investment.
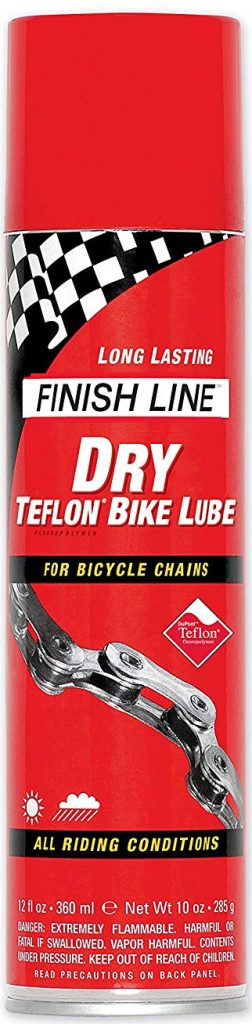
This is the recommended lubricant for the gears in a SawStop. Don’t be tempted to use a dry-lube as they are not made for heavy machinery. White lithium grease is a little better than dry-lube, but not by much.
Although not recommended for lubricating the gears of a heavy tool, it will work if you don’t have any wheel bearing grease but it will need to be reapplied every few days.
Definitely not recommended for lubricating the gears of your saw. However, it is handy when lubricating the fine threads and chains found in router lifts and other smaller tools.
Accessories
Hold-Downs
Featherboards do a good job holding the material against the fence but a better alternative may be using hold-downs. These are configured so they not only hold the material against the fence but also flat against the table.
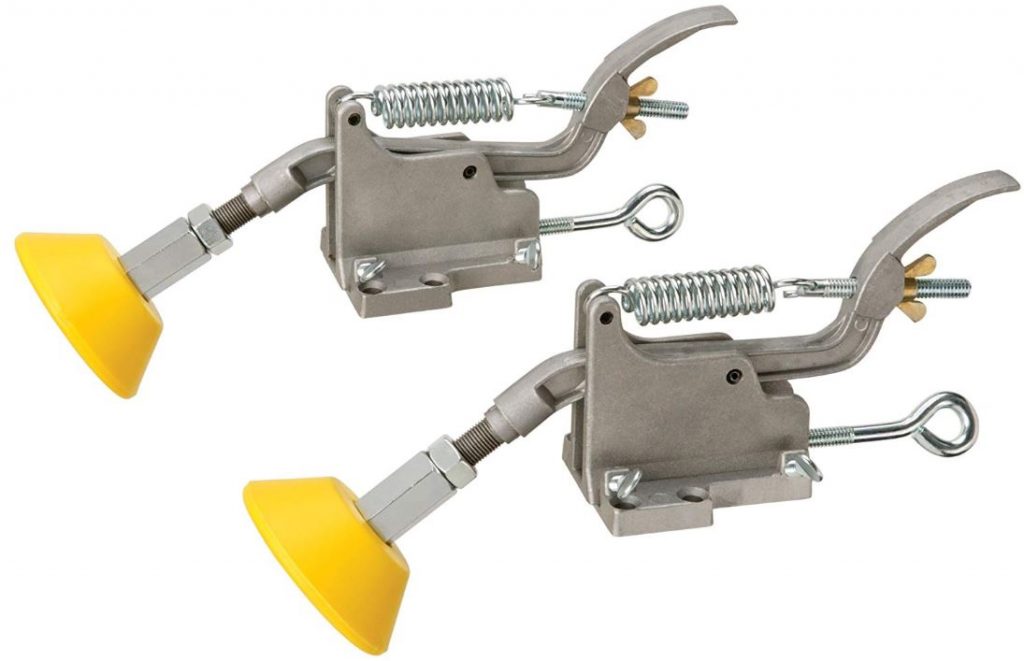
Board Buddies
Board Buddies are my preferred hold-down. They’ve been around for a long time and they work great when cutting sheet goods. They are a little bulky and may not be appropriate for every cut but they cost a lot less than some of the alternatives.
They are available in three different styles and the only real difference is which direction the wheels spin. The yellow version turns in a clockwise direction, and is the most common. This is what you would want to put on a table saw when the fence is to the right of the blade. The red version turns counter-clockwise and the green version turns freely in both directions.
Jessem makes their own hold-downs that are very popular. They’re also a lot more expensive, costing almost three times what the complete Board Buddies system costs. They do appear to be quality products, but the law of diminished returns keeps me from upgrading to these. They look better than the Board Buddies, but not three-times better.
Conclusion
There you have it. If you think that I missed something or if you found these parts cheaper elsewhere, please leave a comment below.
A Note About Affiliate Links
Some of the product links on this page are affiliate links. Any income earned through these links is donated to my fundraiser, which you can read more about at the following page:
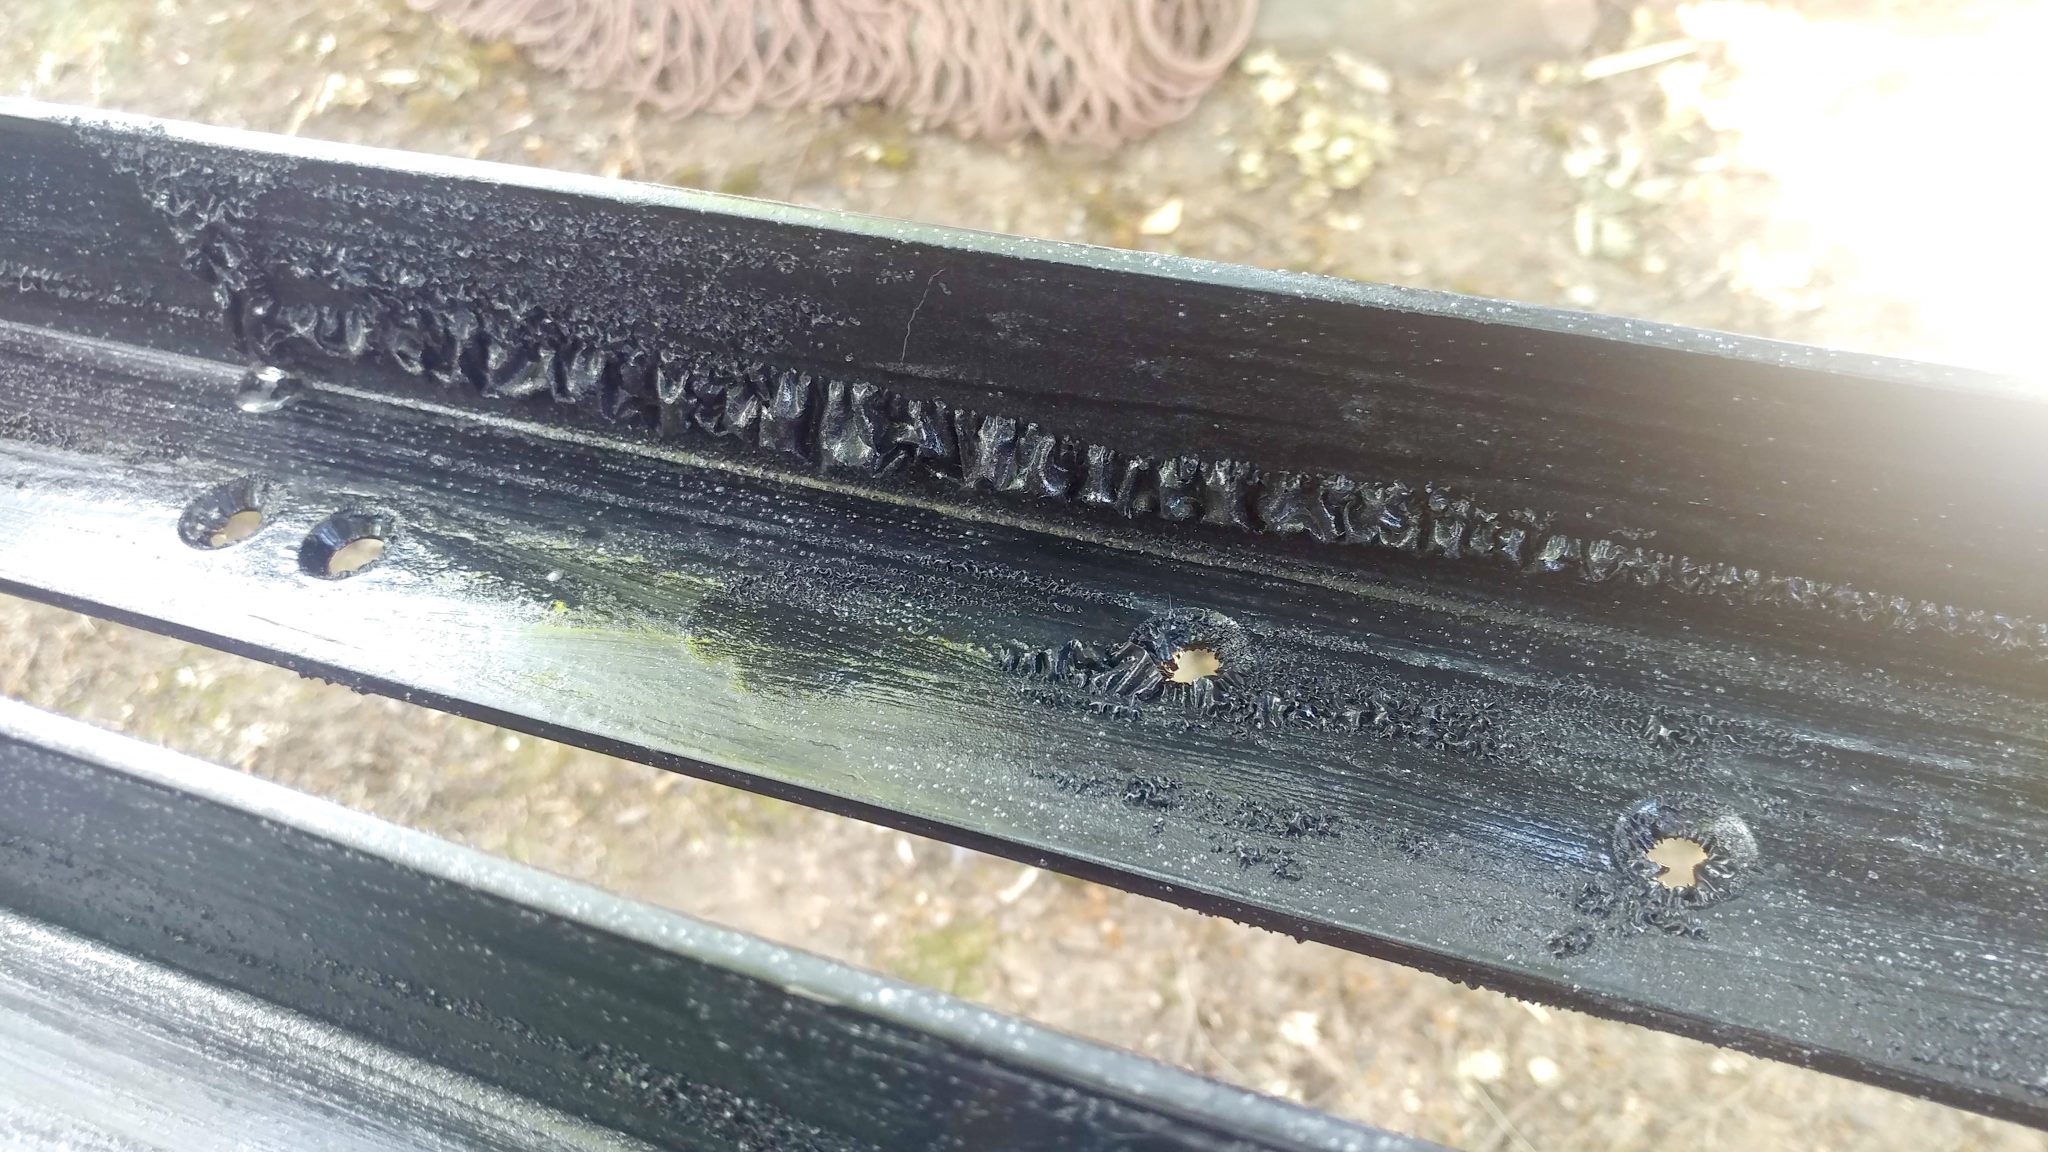
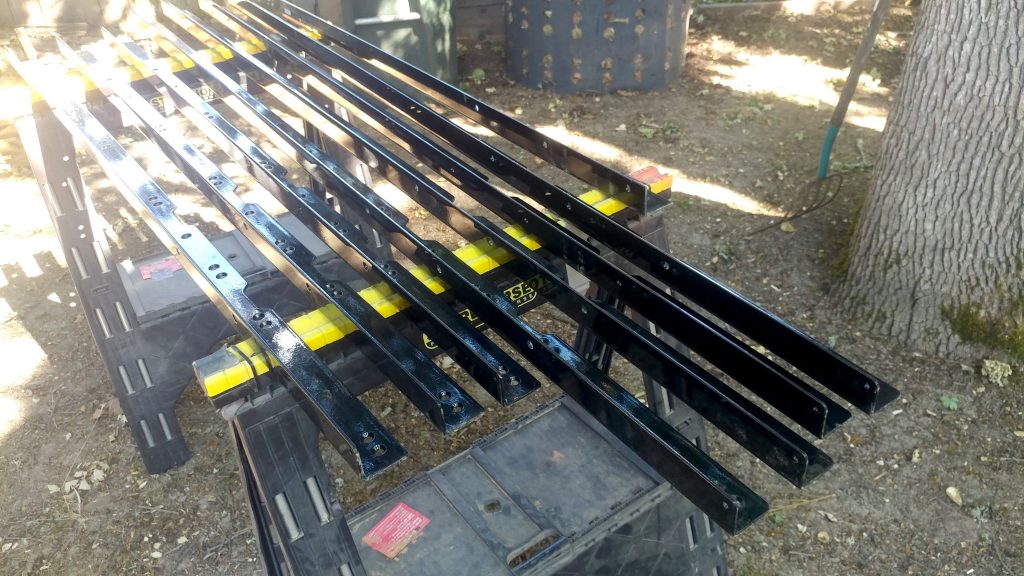
One of the perks of working where I do is the metal dumpster. I try to regularly swing by and see what we are throwing out each week and lately I have found a lot of the heavy-duty angle-iron we use for fence rails. They have holes drilled in them and have a powder-coating which isn’t a big deal to me.
I’m starting a new project which is going to be a somewhat industrial looking coffee table. If this works out well, I’ll make a few other matching tables to go with it. I’m going to use this angle-iron to build the body of it and the top will be walnut planking. The first thing I need to do is trip off the powder-coating.
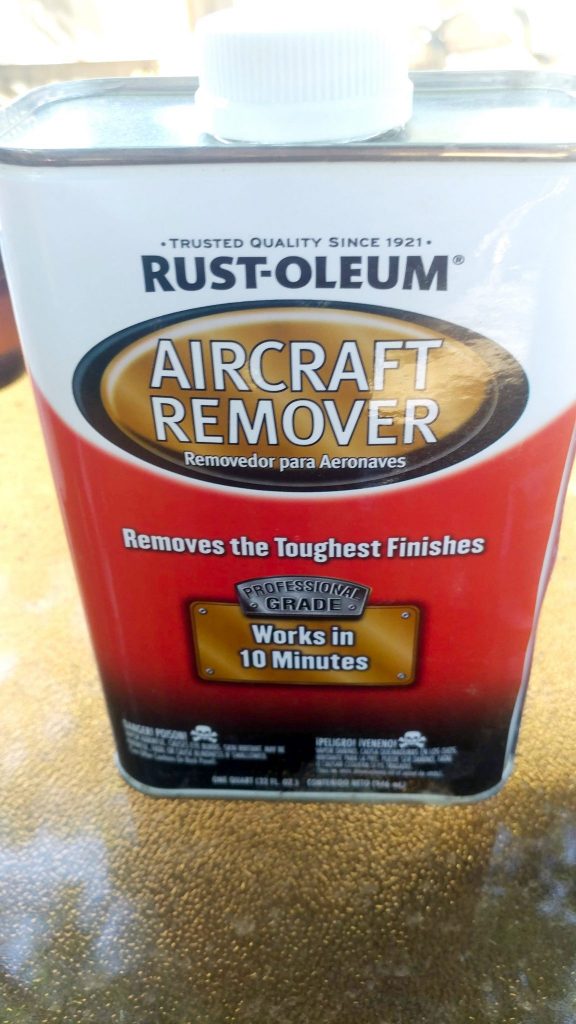
There are several ways to remove powder-coating but I decided to try a chemical remover this time. Specifically, I used Rust-oleum Aircraft Remover. This is some pretty potent stuff.
After about 10 minutes it started to dissolve the powder-coating so I could scrape it off.
It didn’t remove all of it so I had to take a wire wheel to it but I eventually got it all cleaned off.
I’ll be posting an article detailing the entire process. Maybe I’ll even do a how-to video.
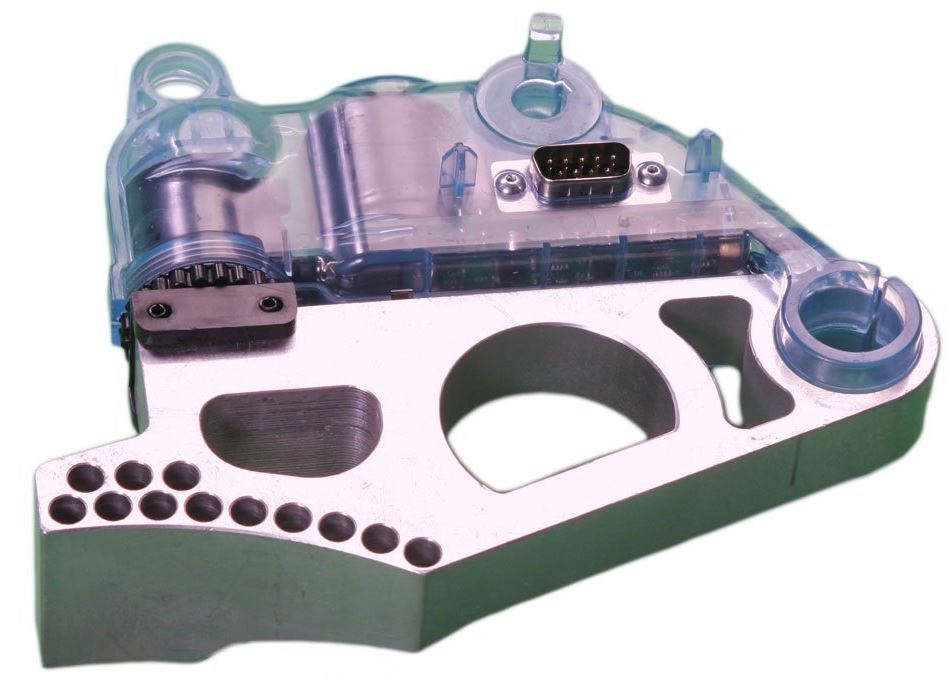
The subject of brake spacing on a SawStop table saw seems to be somewhat confusing to people, no matter how long they have been using the saw. I’m hoping to clear up some of the mystery once and for all.
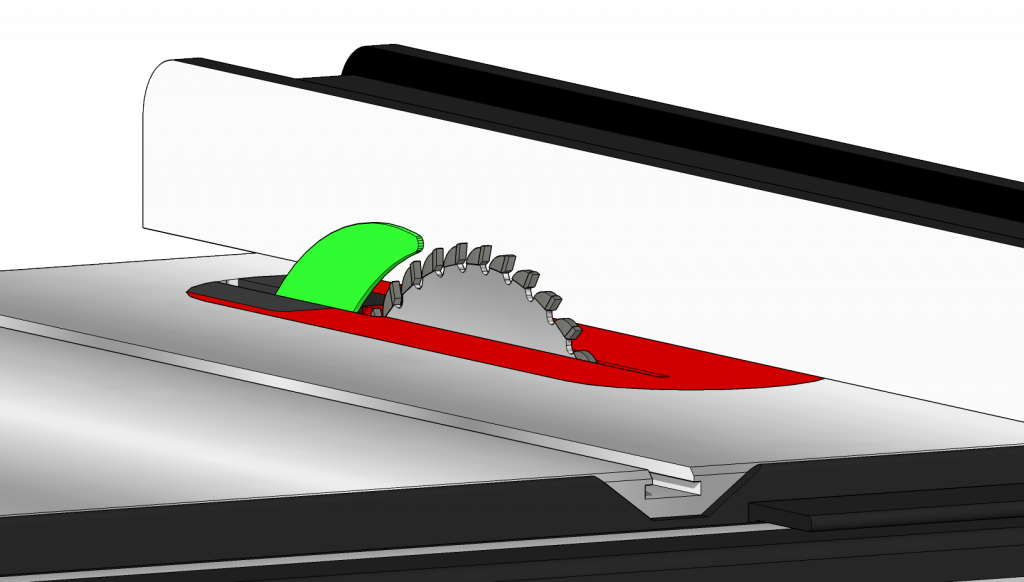
What exactly is brake spacing?
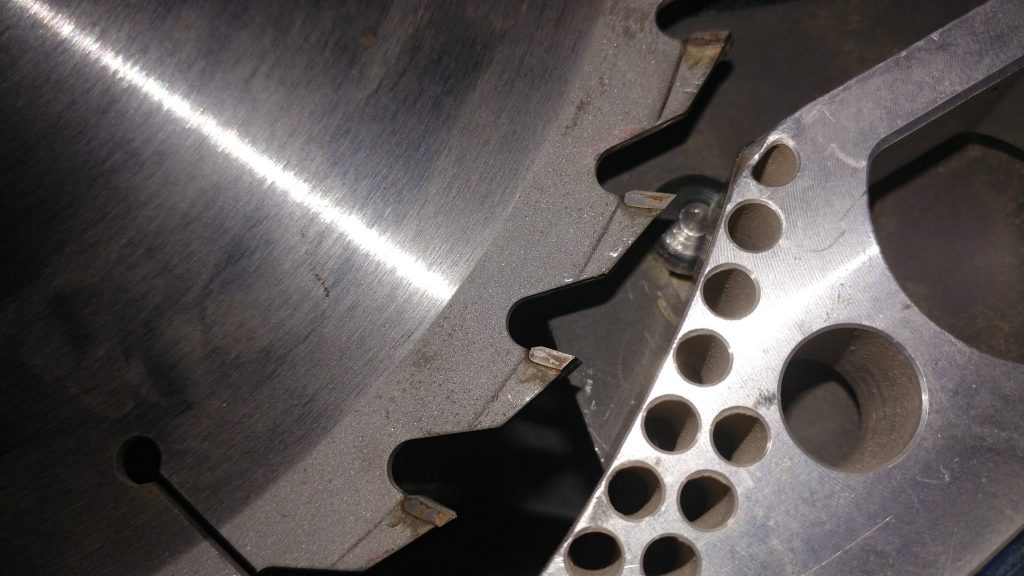
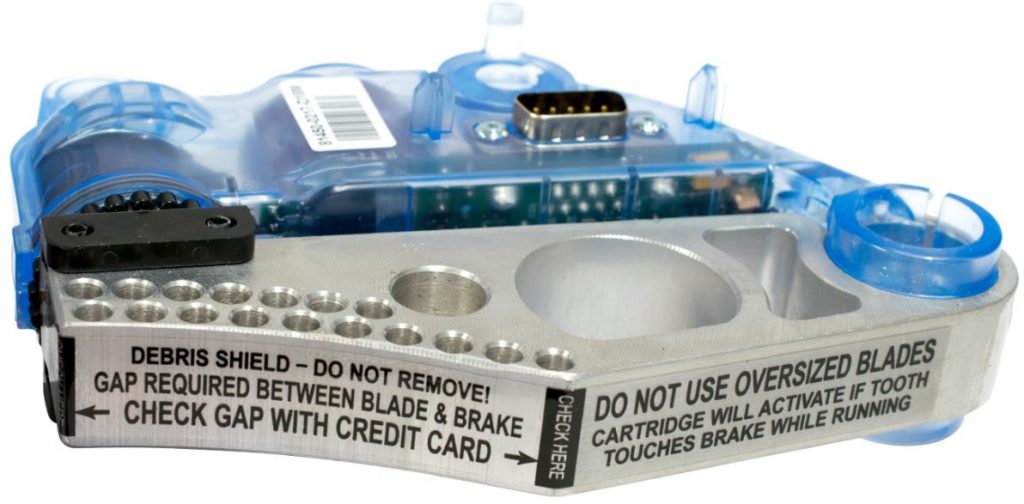
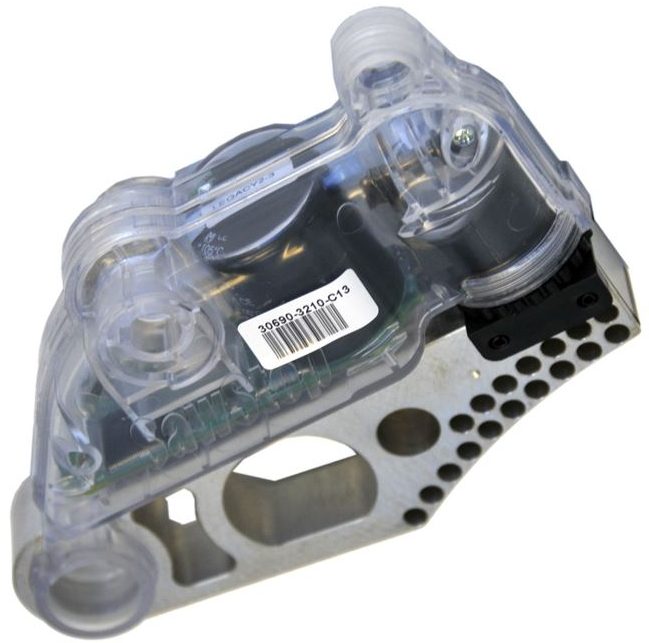
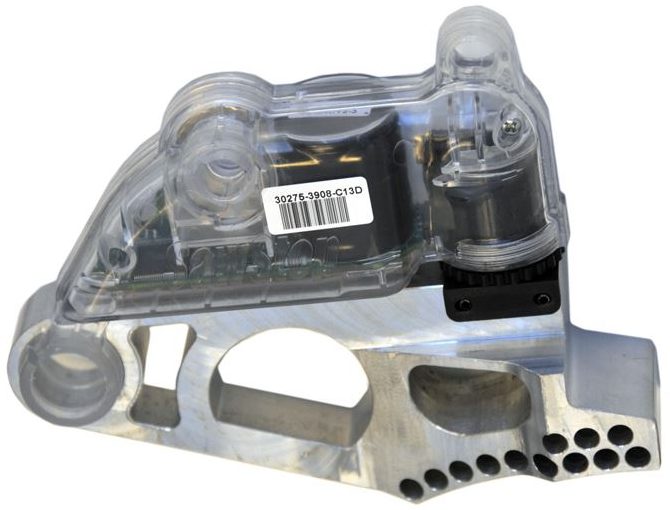
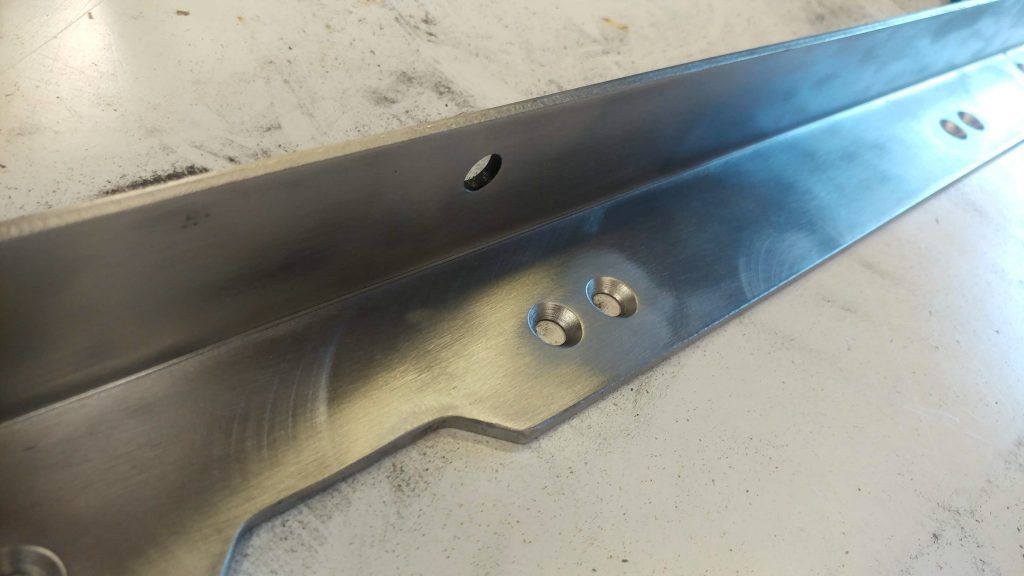
Brake spacing is literally the space between the brake cartridge and the blade as shown below.
Why is it important?
The saw blade has 5 volts of electrical current flowing through the blade and the brake is sending out a radio signal to monitor the level of that current. If something conductive, such as a finger, touches the blade it will absorb some of the current and like a sponge in a glass of water, the current level will drop.
The brake needs to be close enough to the blade in at least one location in order for it to successfully monitor the electrical current flowing through the blade. You’ll notice that the aluminum brake pawl is curved to follow the circumference of the blade. It’s very rare that this curve will follow the shape of the blade perfectly.
What happens if the brake is too far from the blade?
If the gap between the blade and brake is too great, the brake will not be able to see the electrical current flowing through the blade. This results in an error message consisting of a solid red light and a slow (about once per second) flashing green light. You will be unable to start the saw until you clear the error message by bringing the brake closer to the blade.
What happens if the brake is too close to the blade?
This is what you really want to avoid. If the brake is too close to the blade then you run the risk of a high tooth on the blade making contact with the aluminum brake pawl and activating the brake immediately at paddle pull.
How do I adjust the spacing?
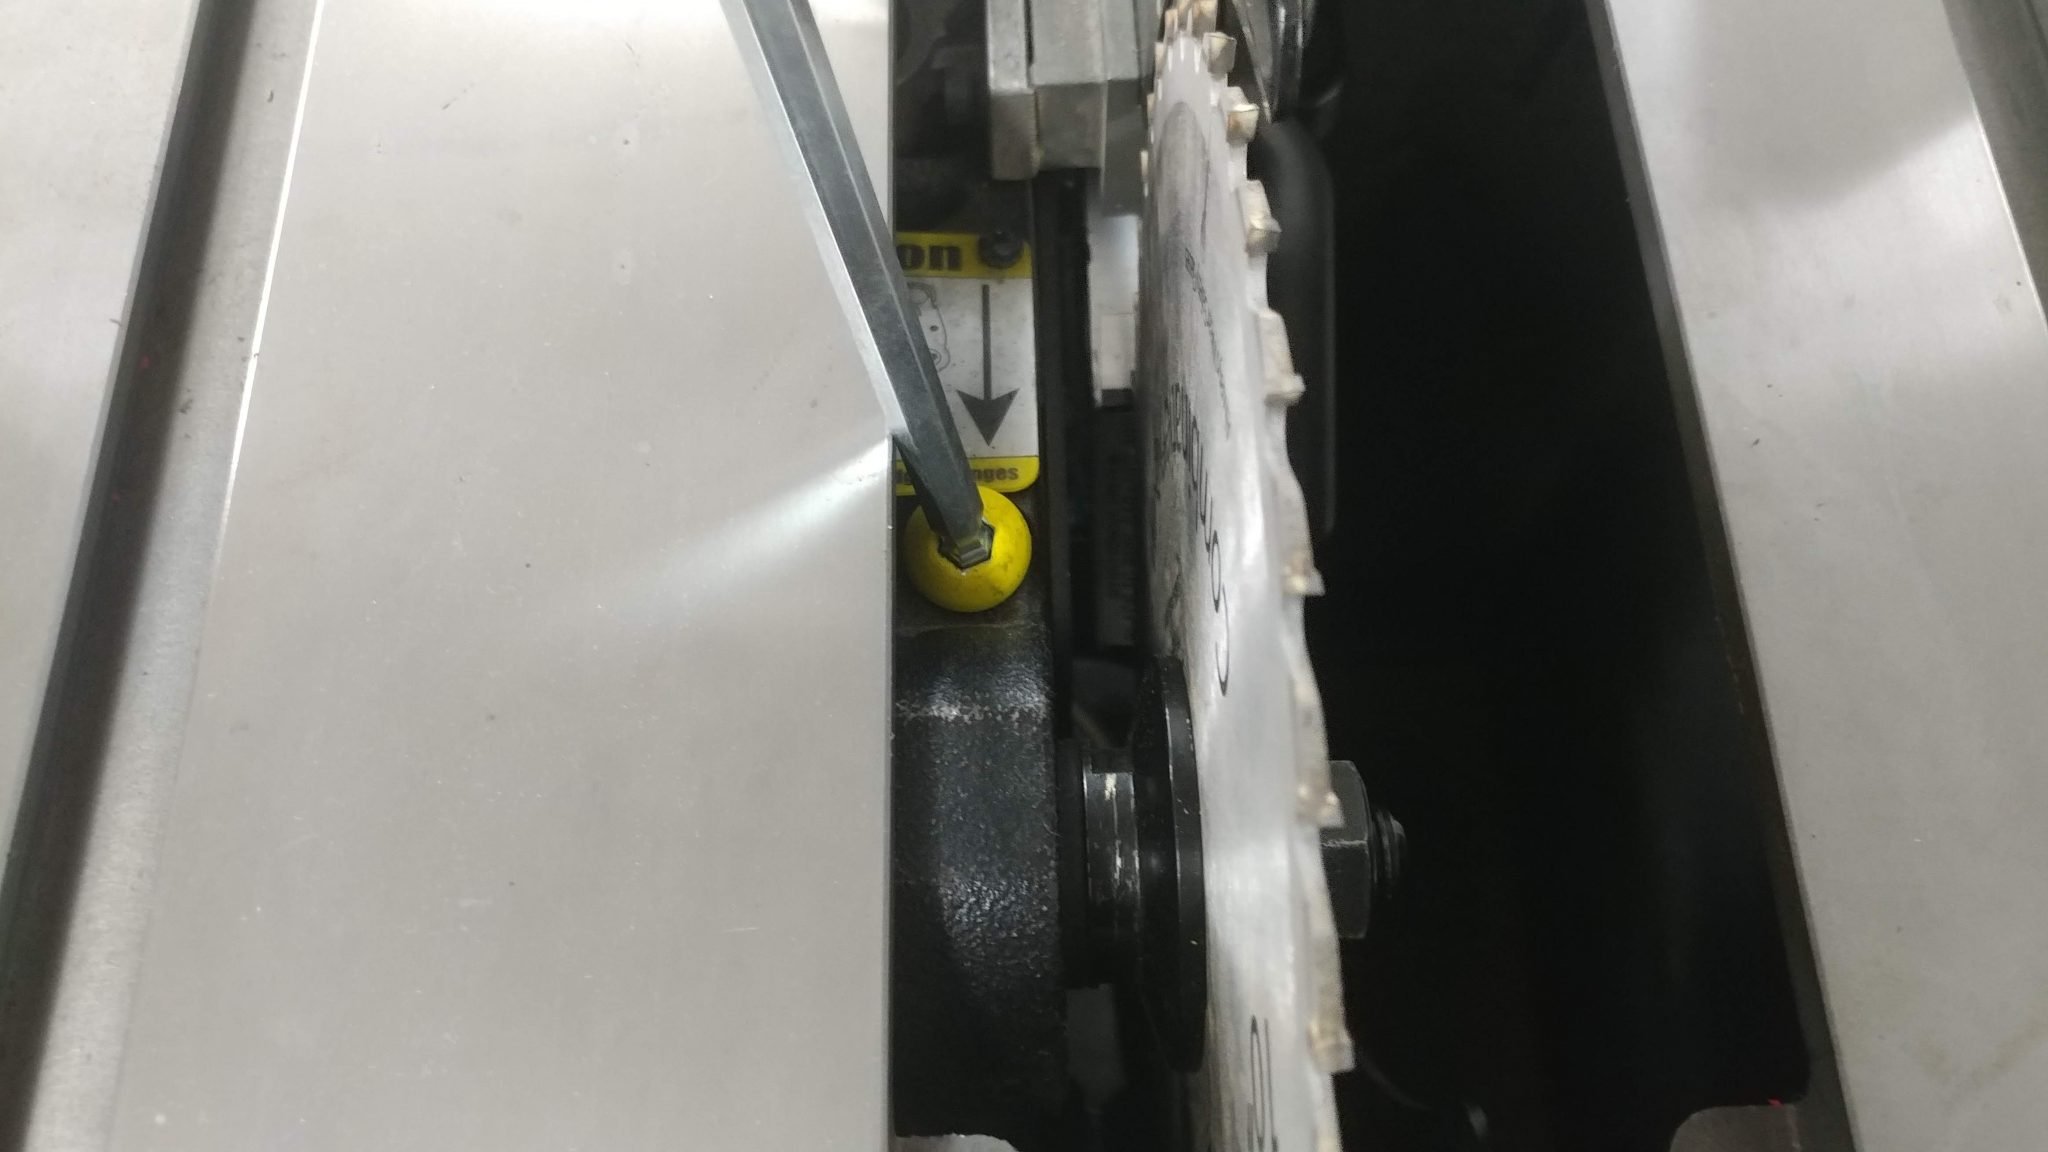
The brake spacing is adjusted with an 8mm allen bolt to the left of the blade. It should be bright yellow and hard to miss.
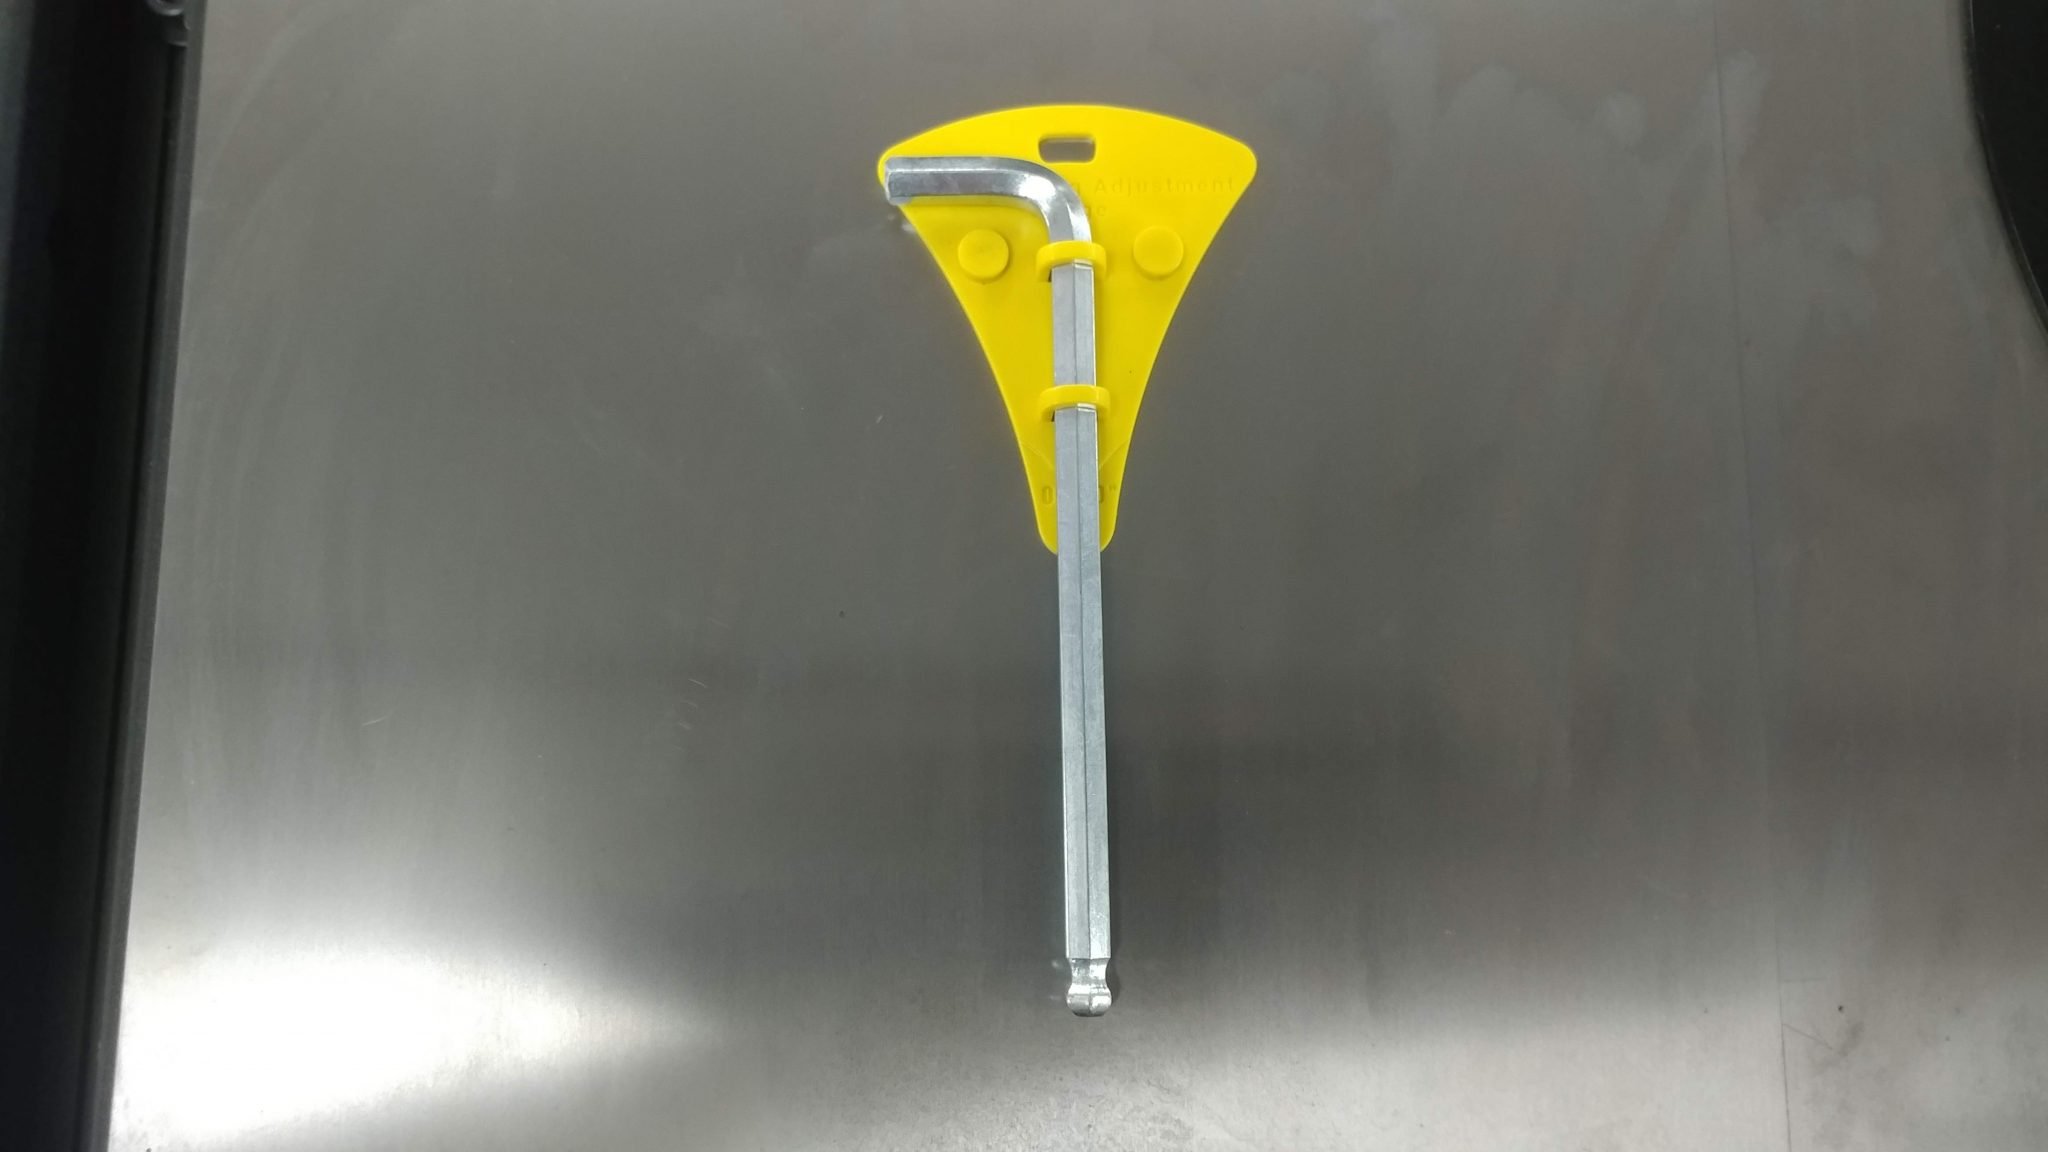
You use a yellow feeler gauge that is provided with your saw to check the gap spacing. If you can’t find yours, look on the side of your saw. It has magnets on the back so most people just stick it to the side of the saw.
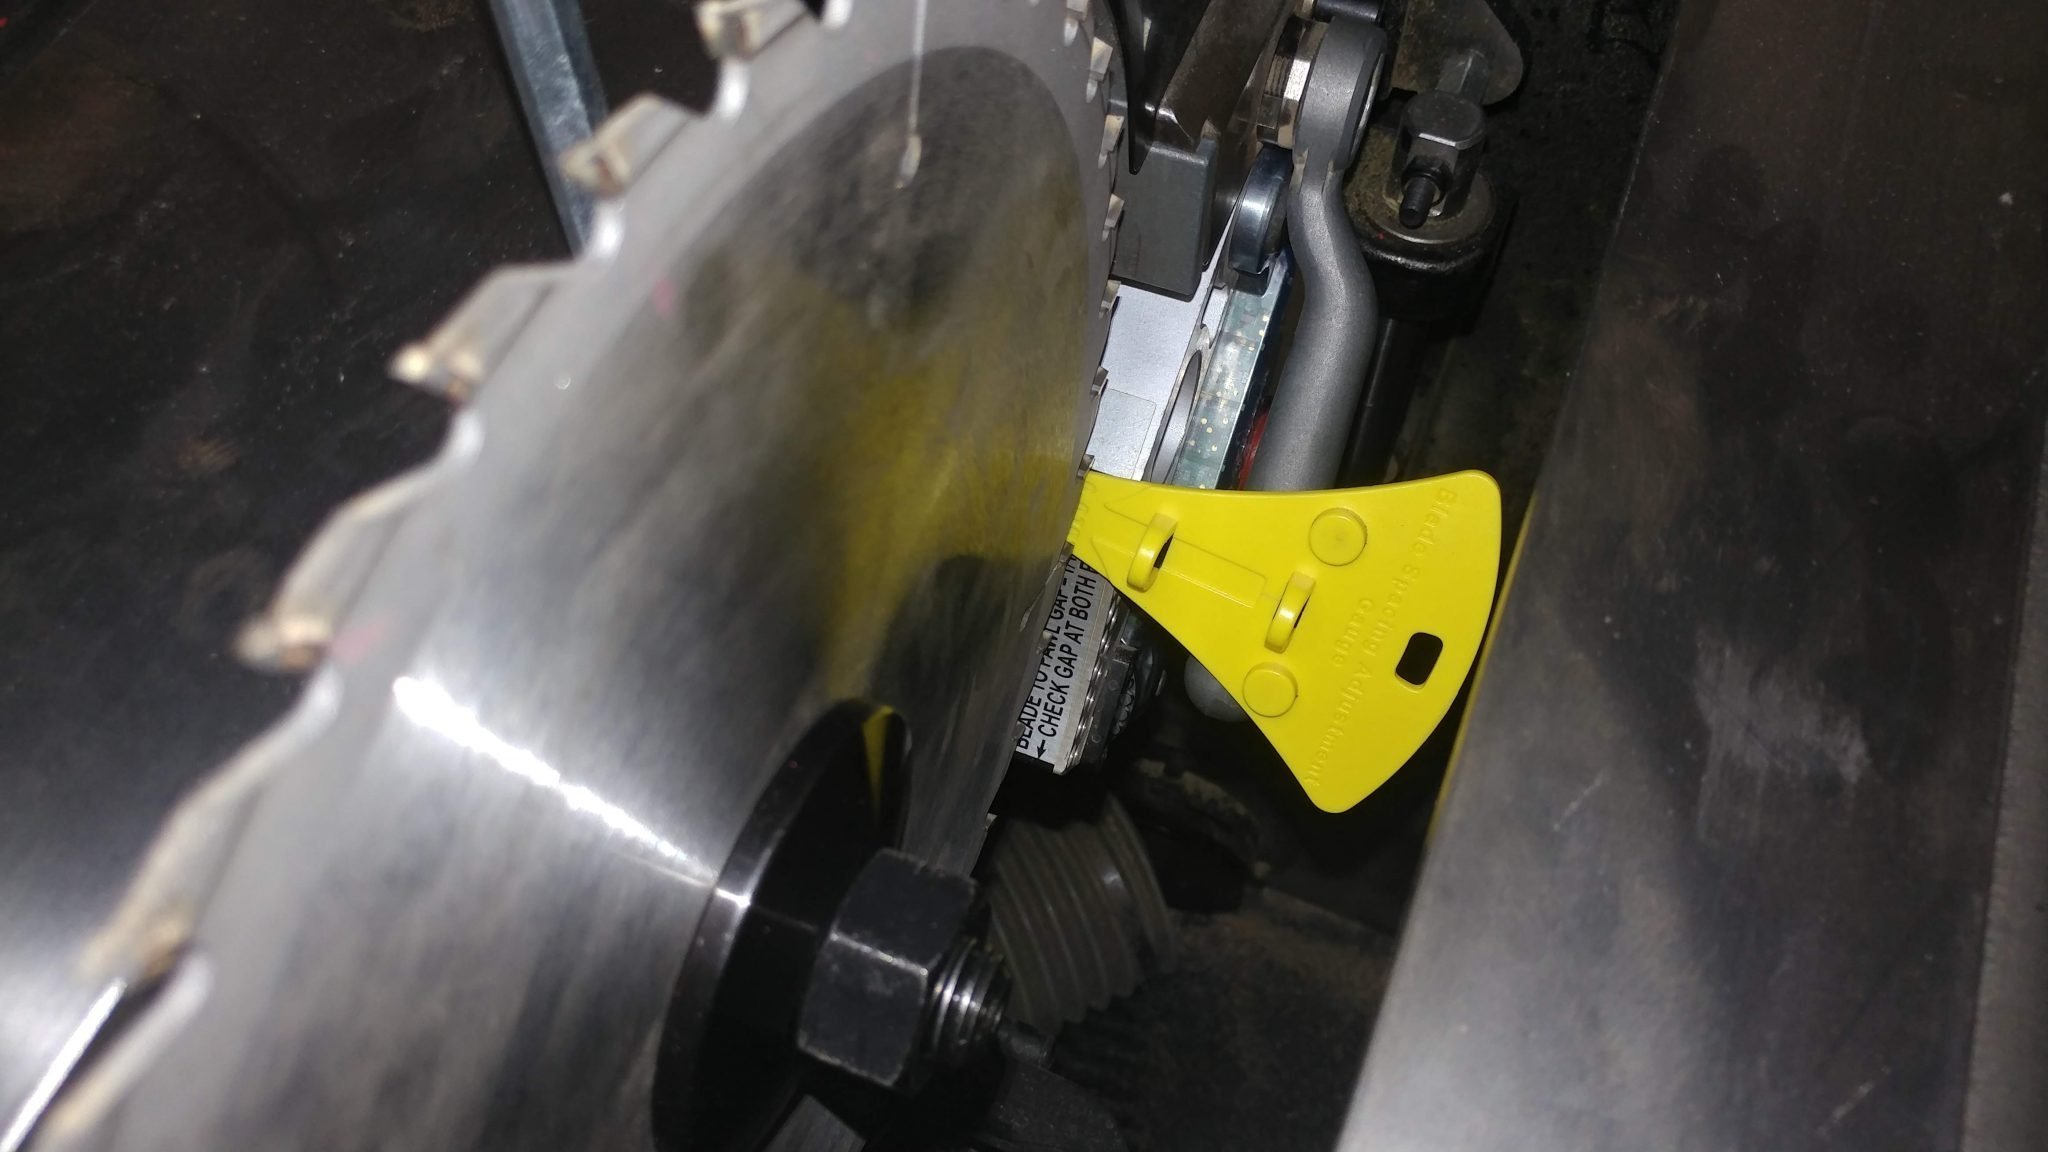
The gauge is .070″ thick and should be inserted between the blade and brake at the point where they are closest. This will most likely be at the top of the curved aluminum.
You should be able to rotate the blade and have the teeth just barely touch the yellow gauge.
If you have misplaced your yellow gauge, you can use a US nickel or even the brass bypass keys that should be on the right side of your switchbox.
Any tips?
The gap doesn’t need to be exact. There is a window that it needs to be within for the system to work. You can have the gap one of three ways: perfect; too big; or too small. If you can’t have it perfect, err on the side of it being too big. If the gap is too big then the worst that will happen is you’ll get the error message. If it’s too close, you might inadvertently activate the brake at paddle pull.
After some trial and error I happened to find the perfect combination of blades where if I set the gap to its biggest the blade is still close enough to the brake to work yet never too close. As a result, I haven’t adjusted or even checked the brake to blade spacing in over two and a half years. If you’re curious, these are the blades I alternate between:
If you are getting the solid red and slow green error message and you can’t clear it no matter how close you bring the brake, there may be something interfering with the signal.
If you have changed the height of the riving knife or blade guard on your saw then the clamp may be too low and interfering with the blade signal. Try installing the riving knife to see if the error goes away. Obviously, if you are trying to make dadoes with an 8″ blade then you can’t make the cut with the riving knife installed, but this is just a troubleshooting step. If the error goes away then we found the problem. You need to raise your riving knife clamp up a little or put a piece of cardboard in the clamp to hold it shut rather than hang loose.
Did I miss anything?
I hope I covered all of the important info related to brake to blade spacing. If I missed something or you have any questions, please leave a comment below and I’ll address it either with a response in the comments or by updating this article.
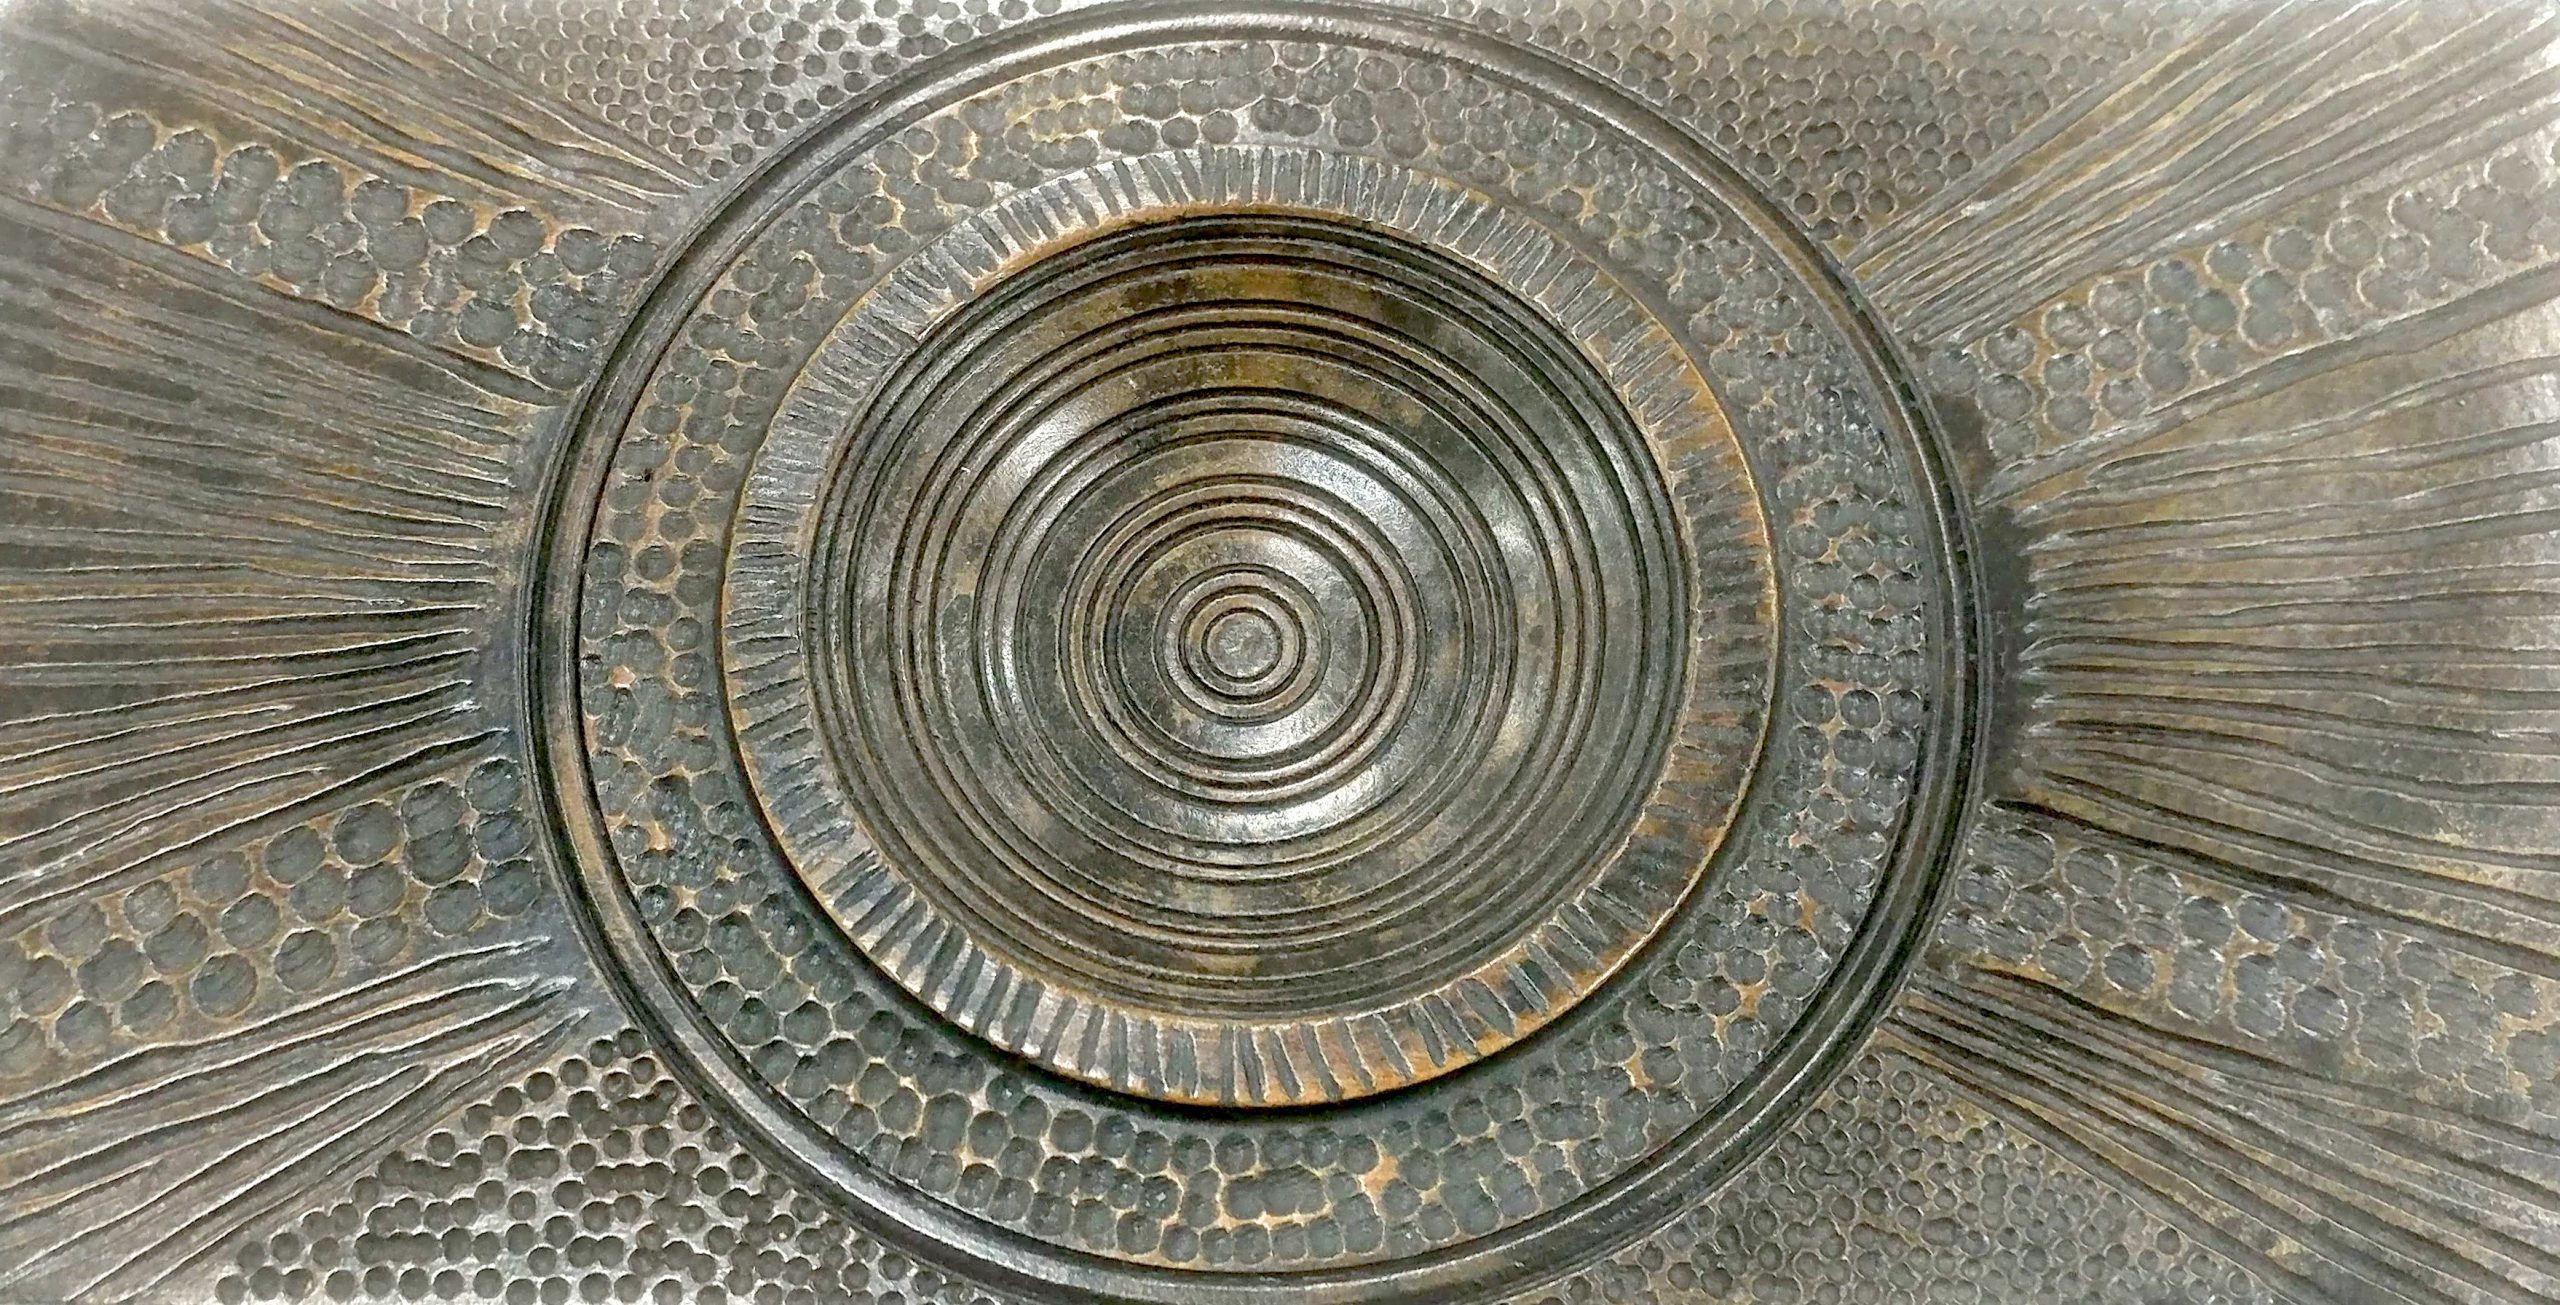
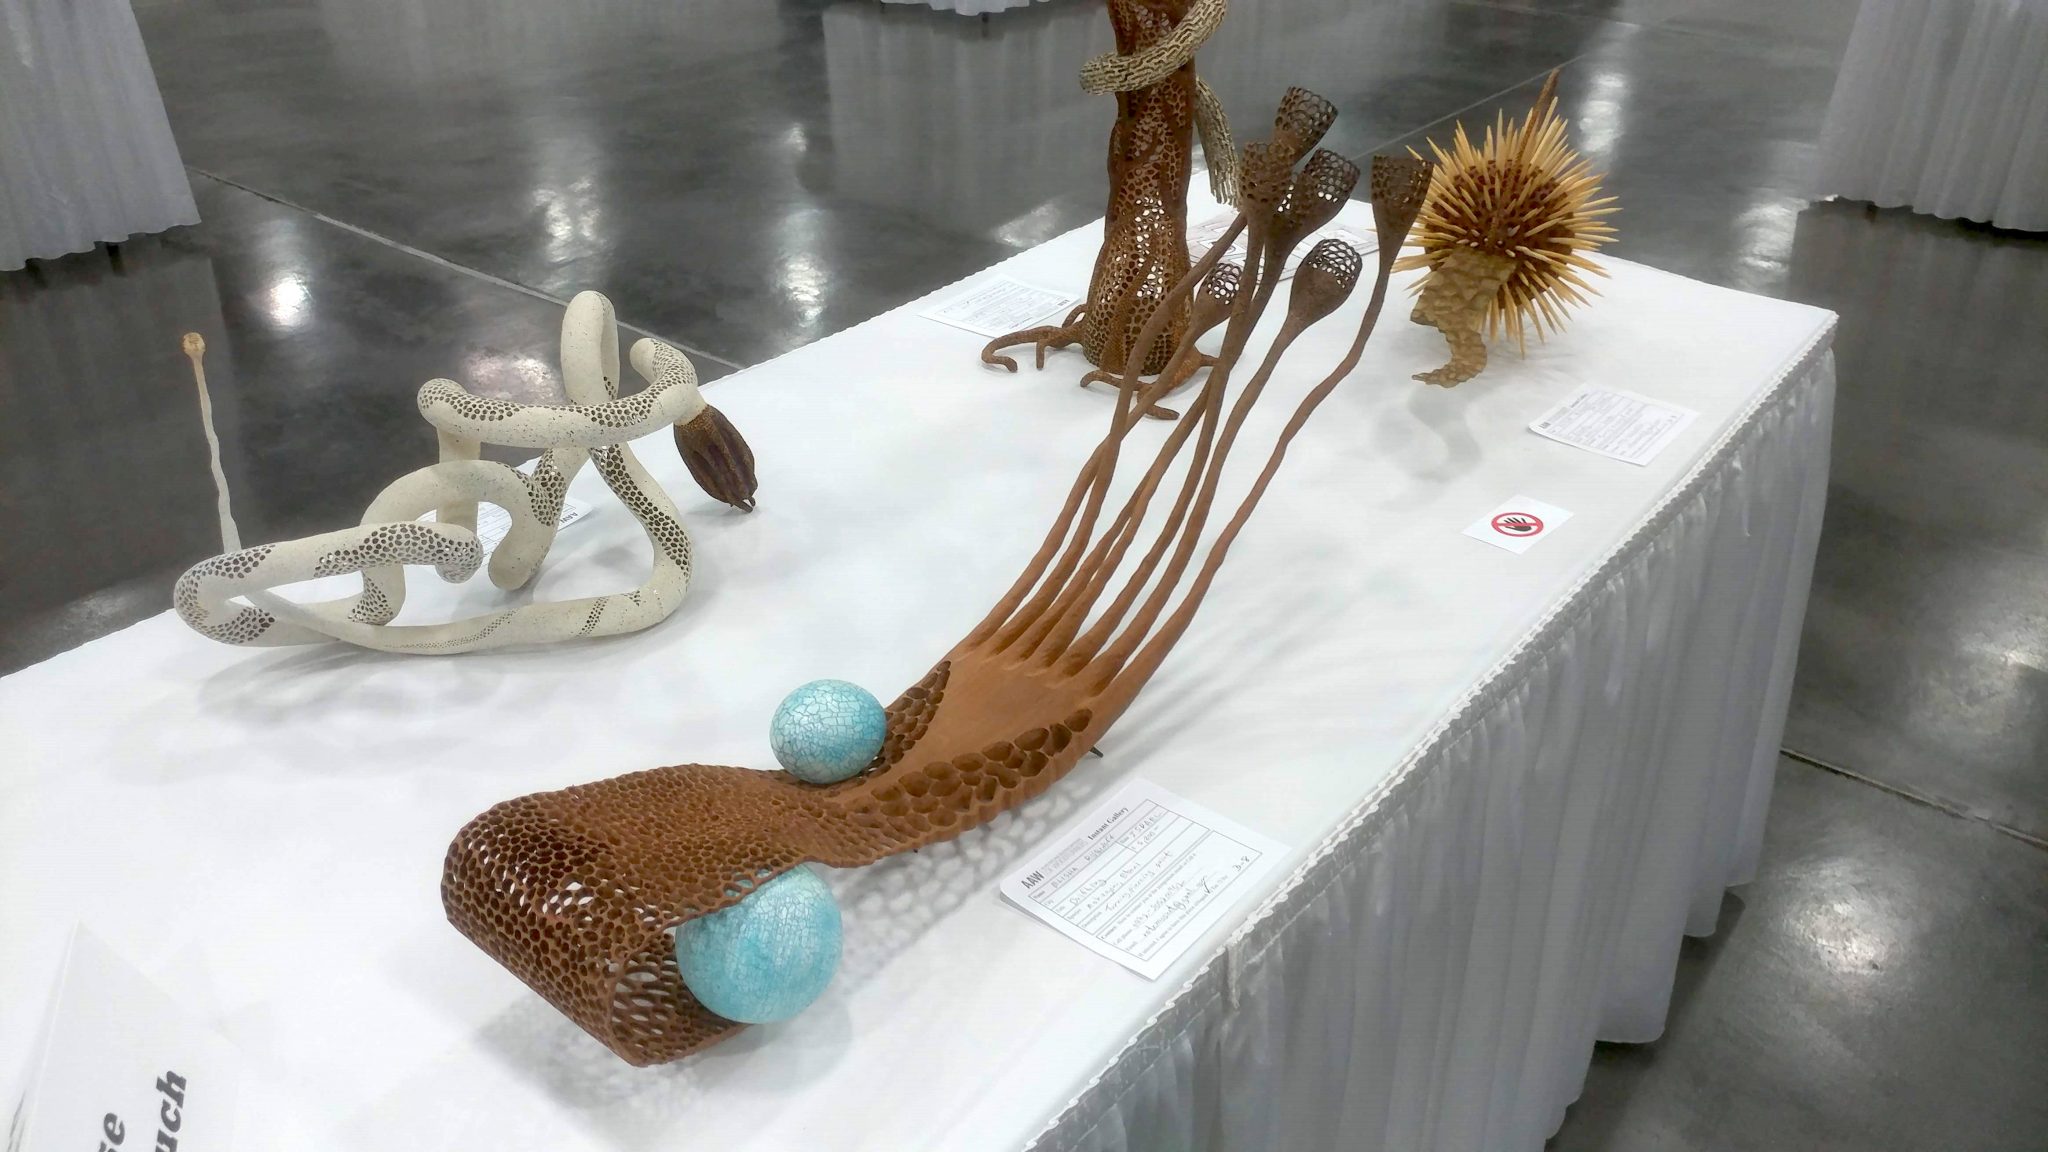
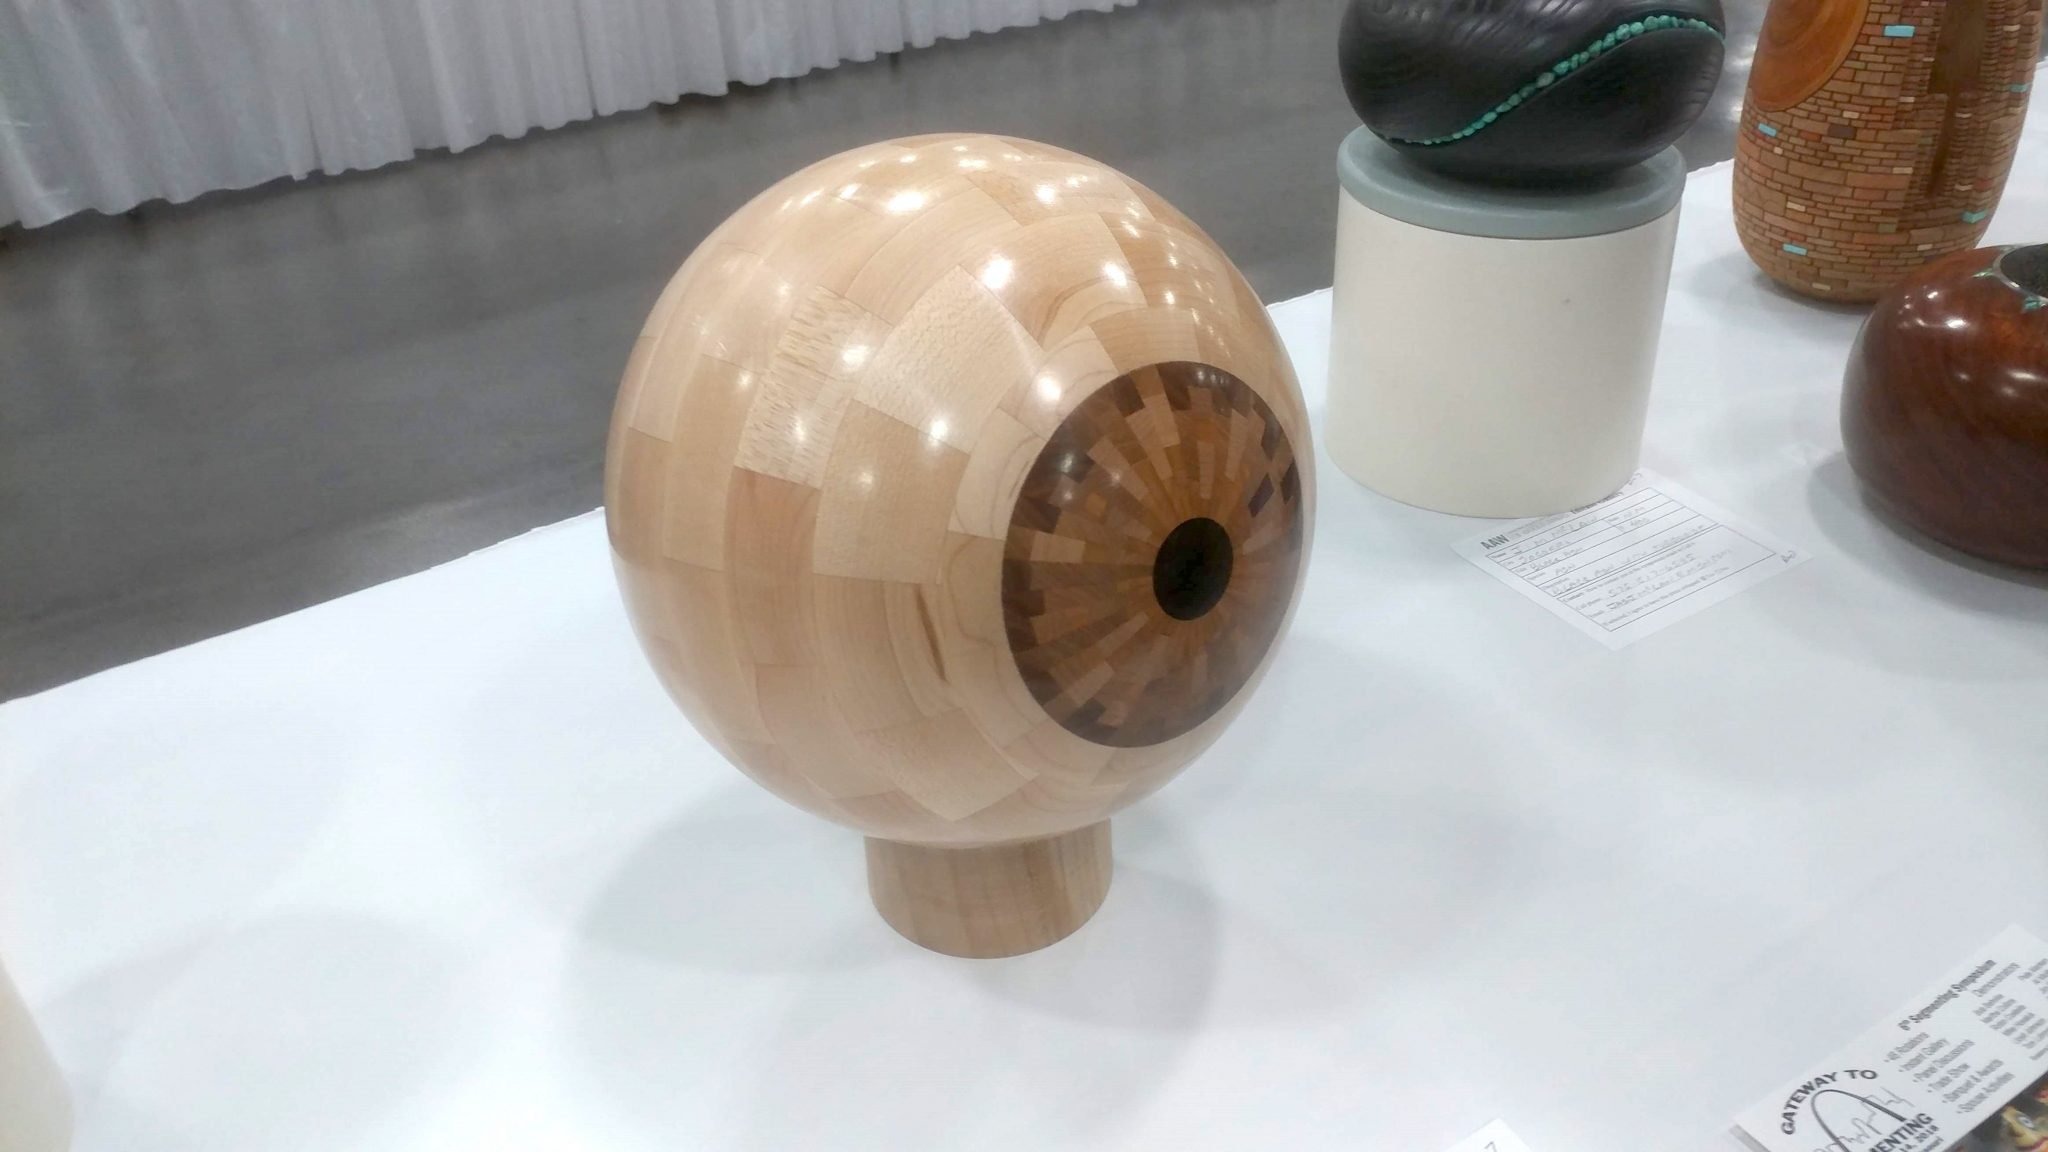
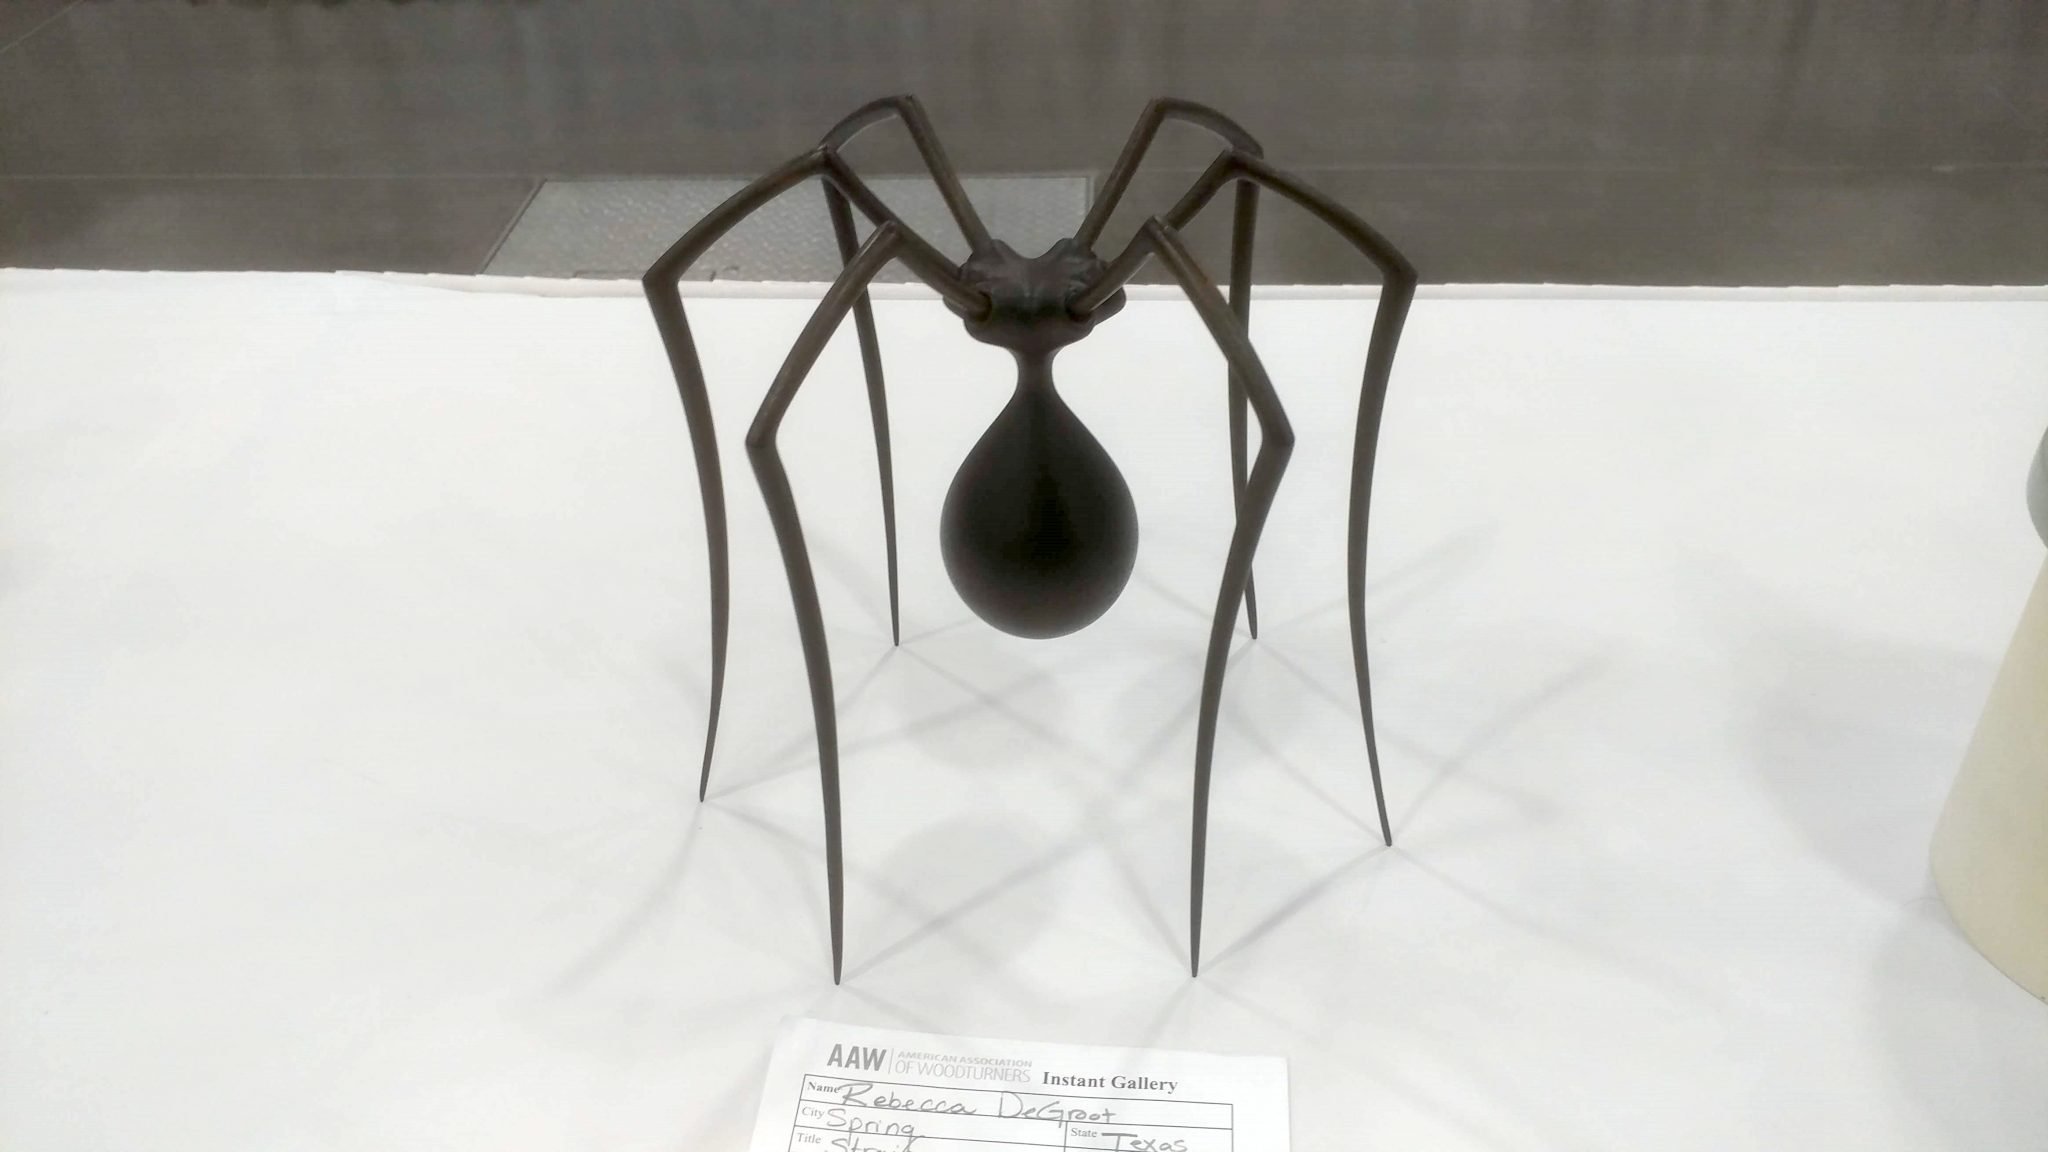
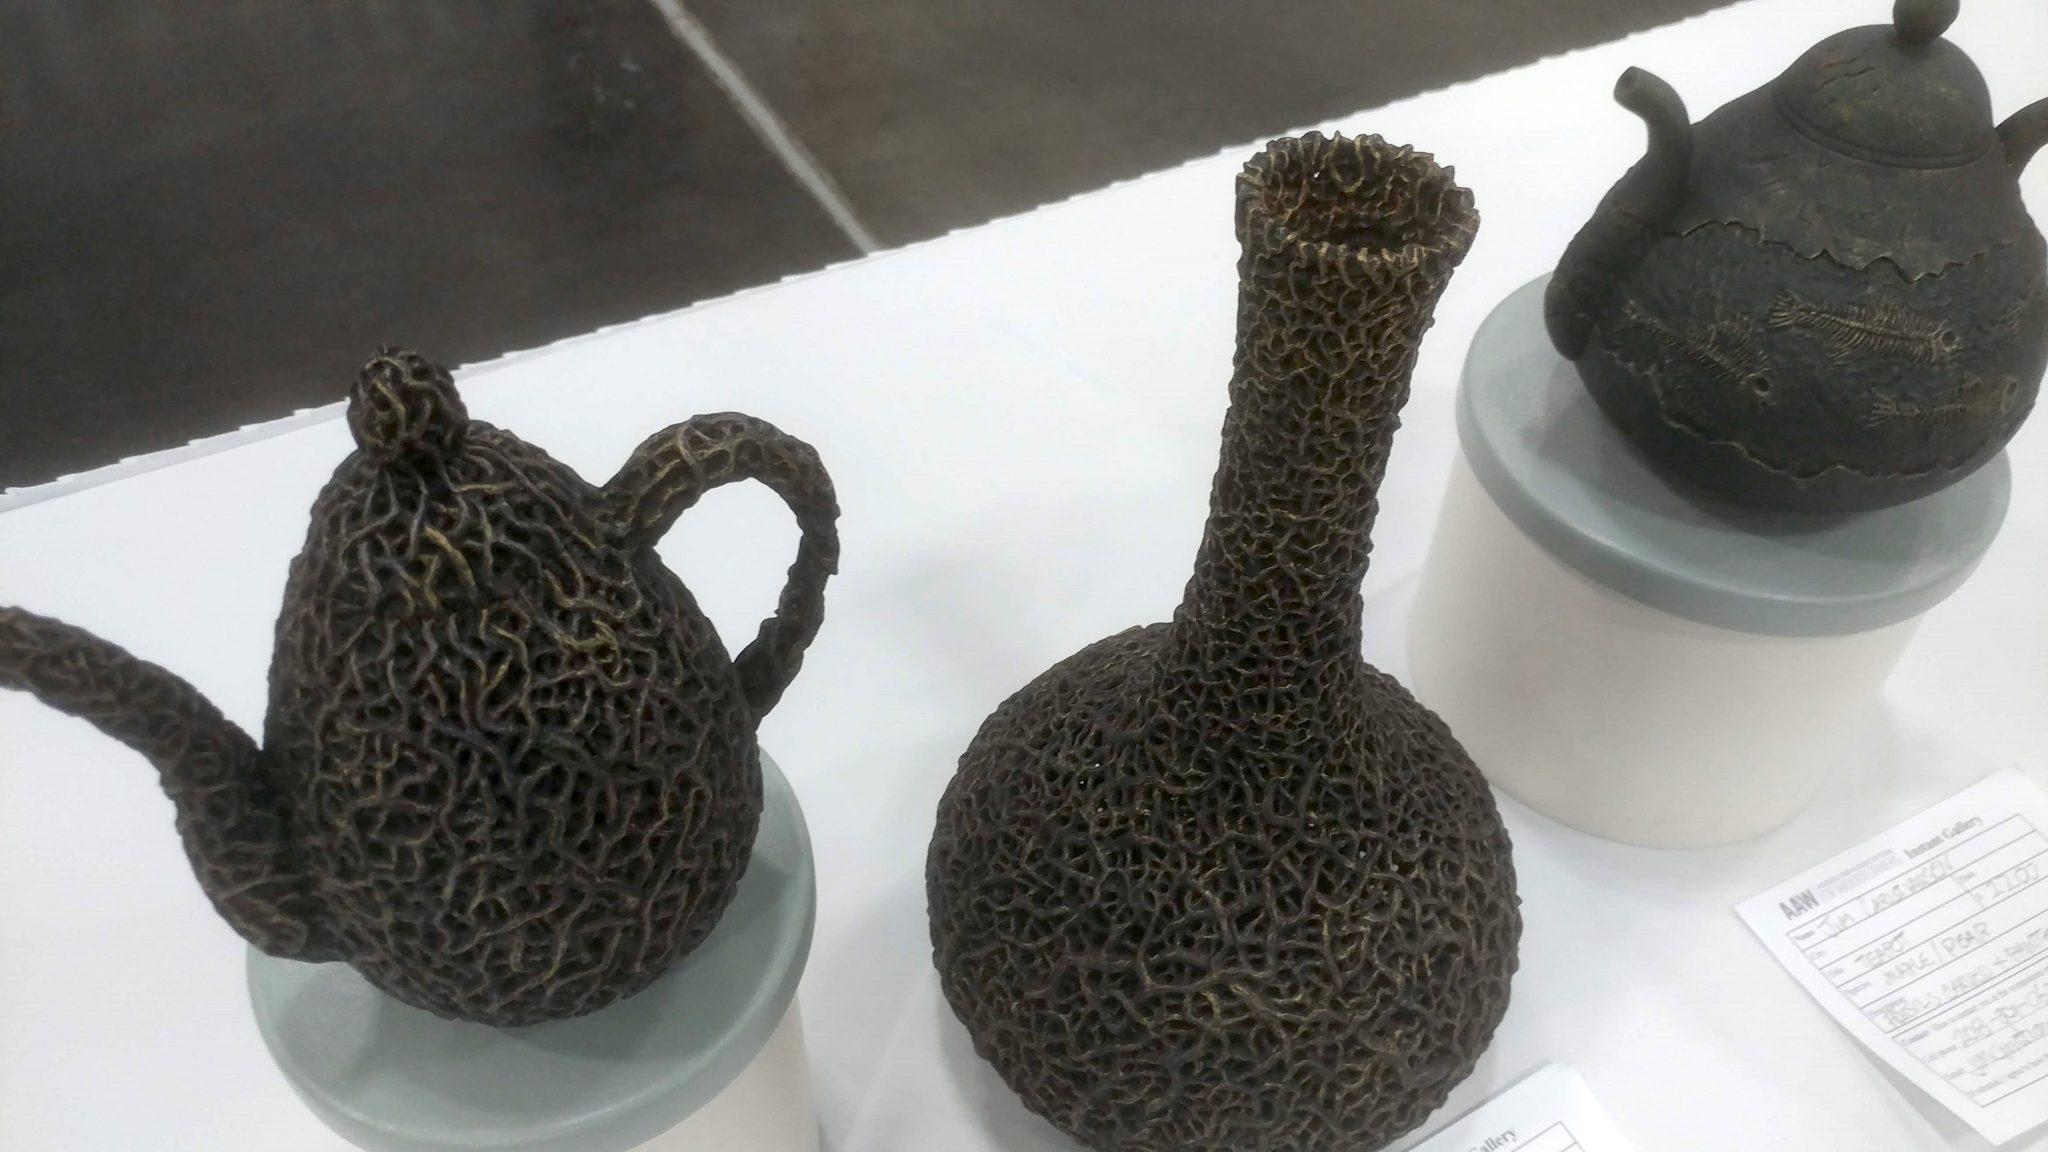
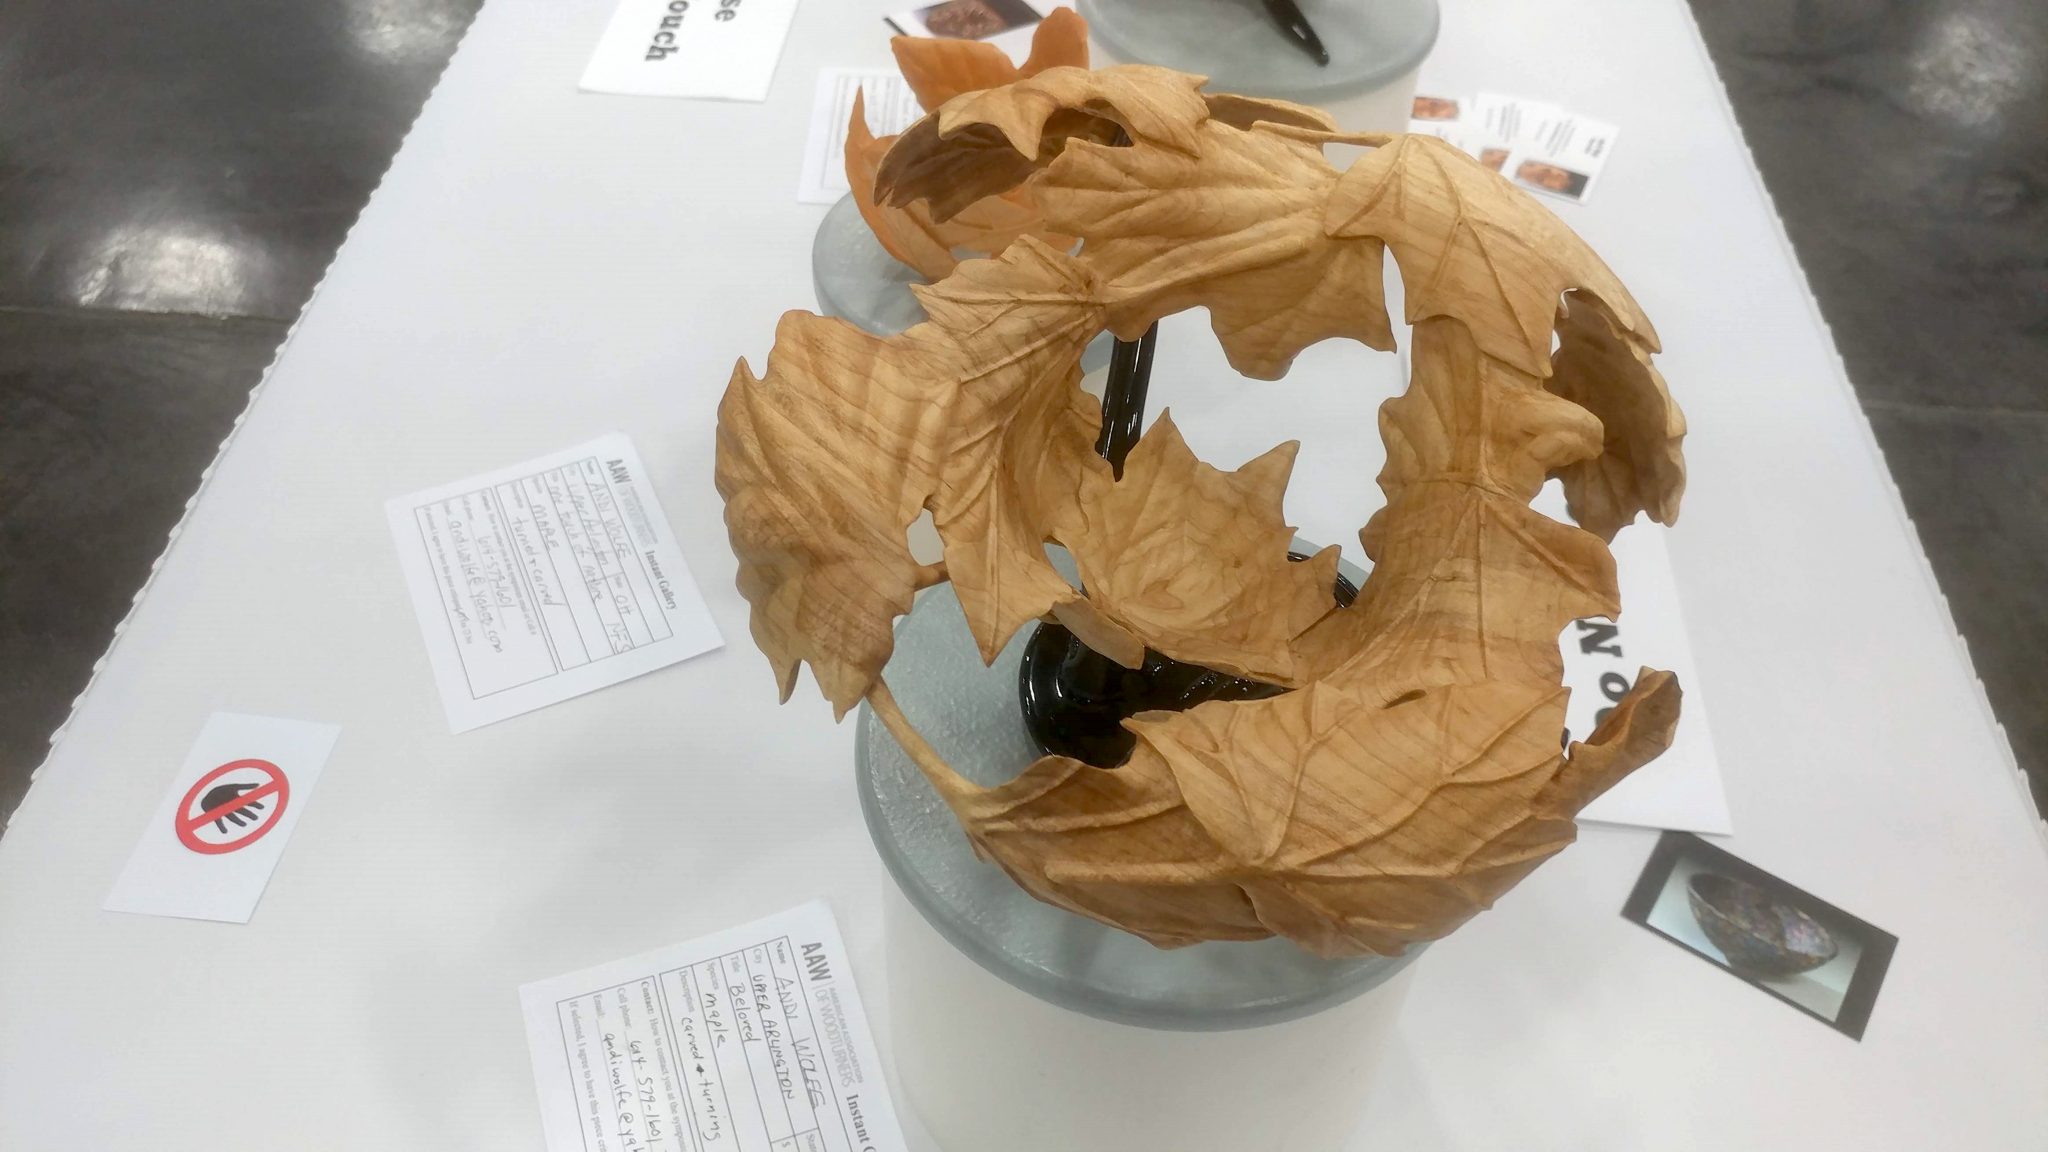
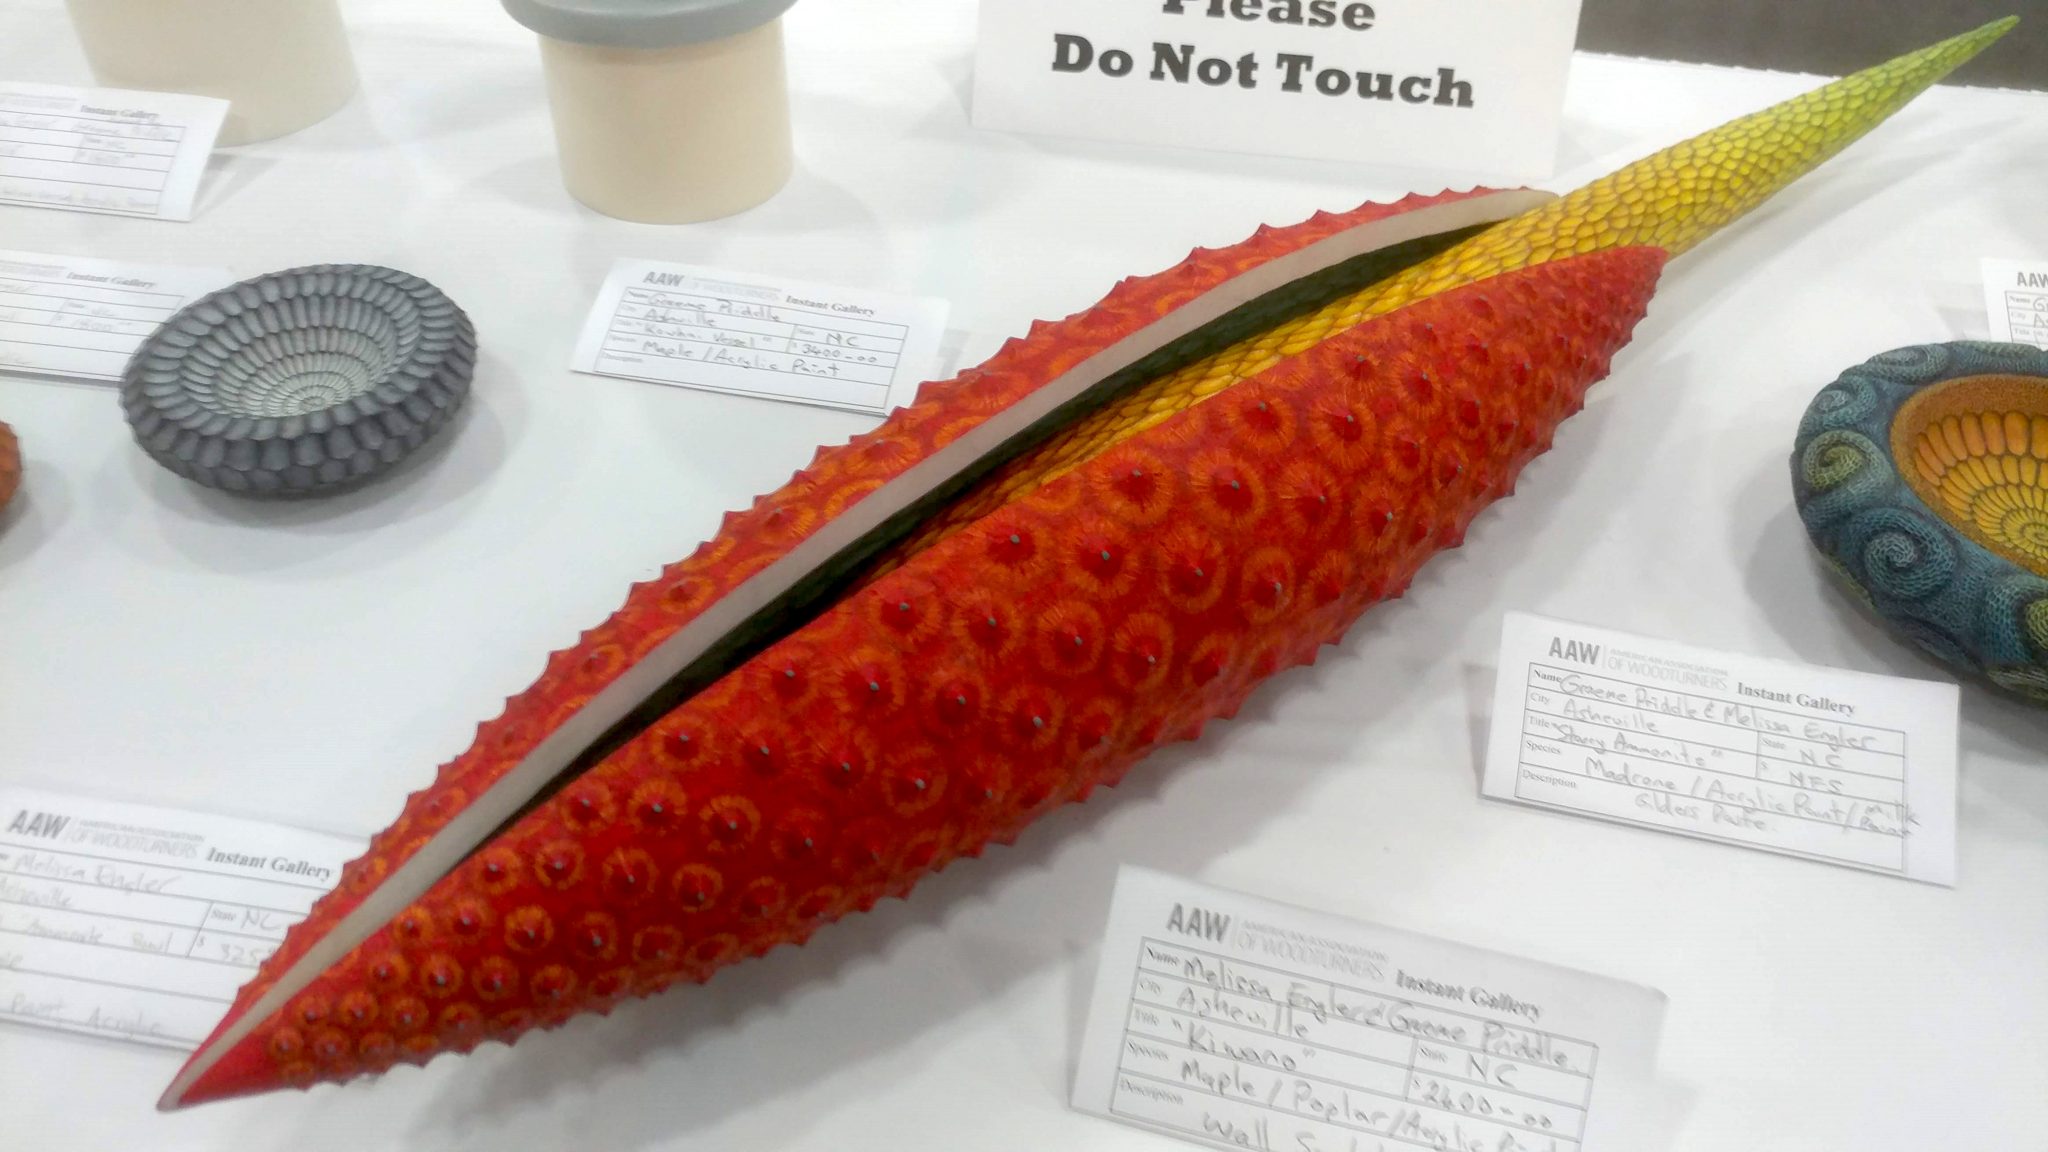
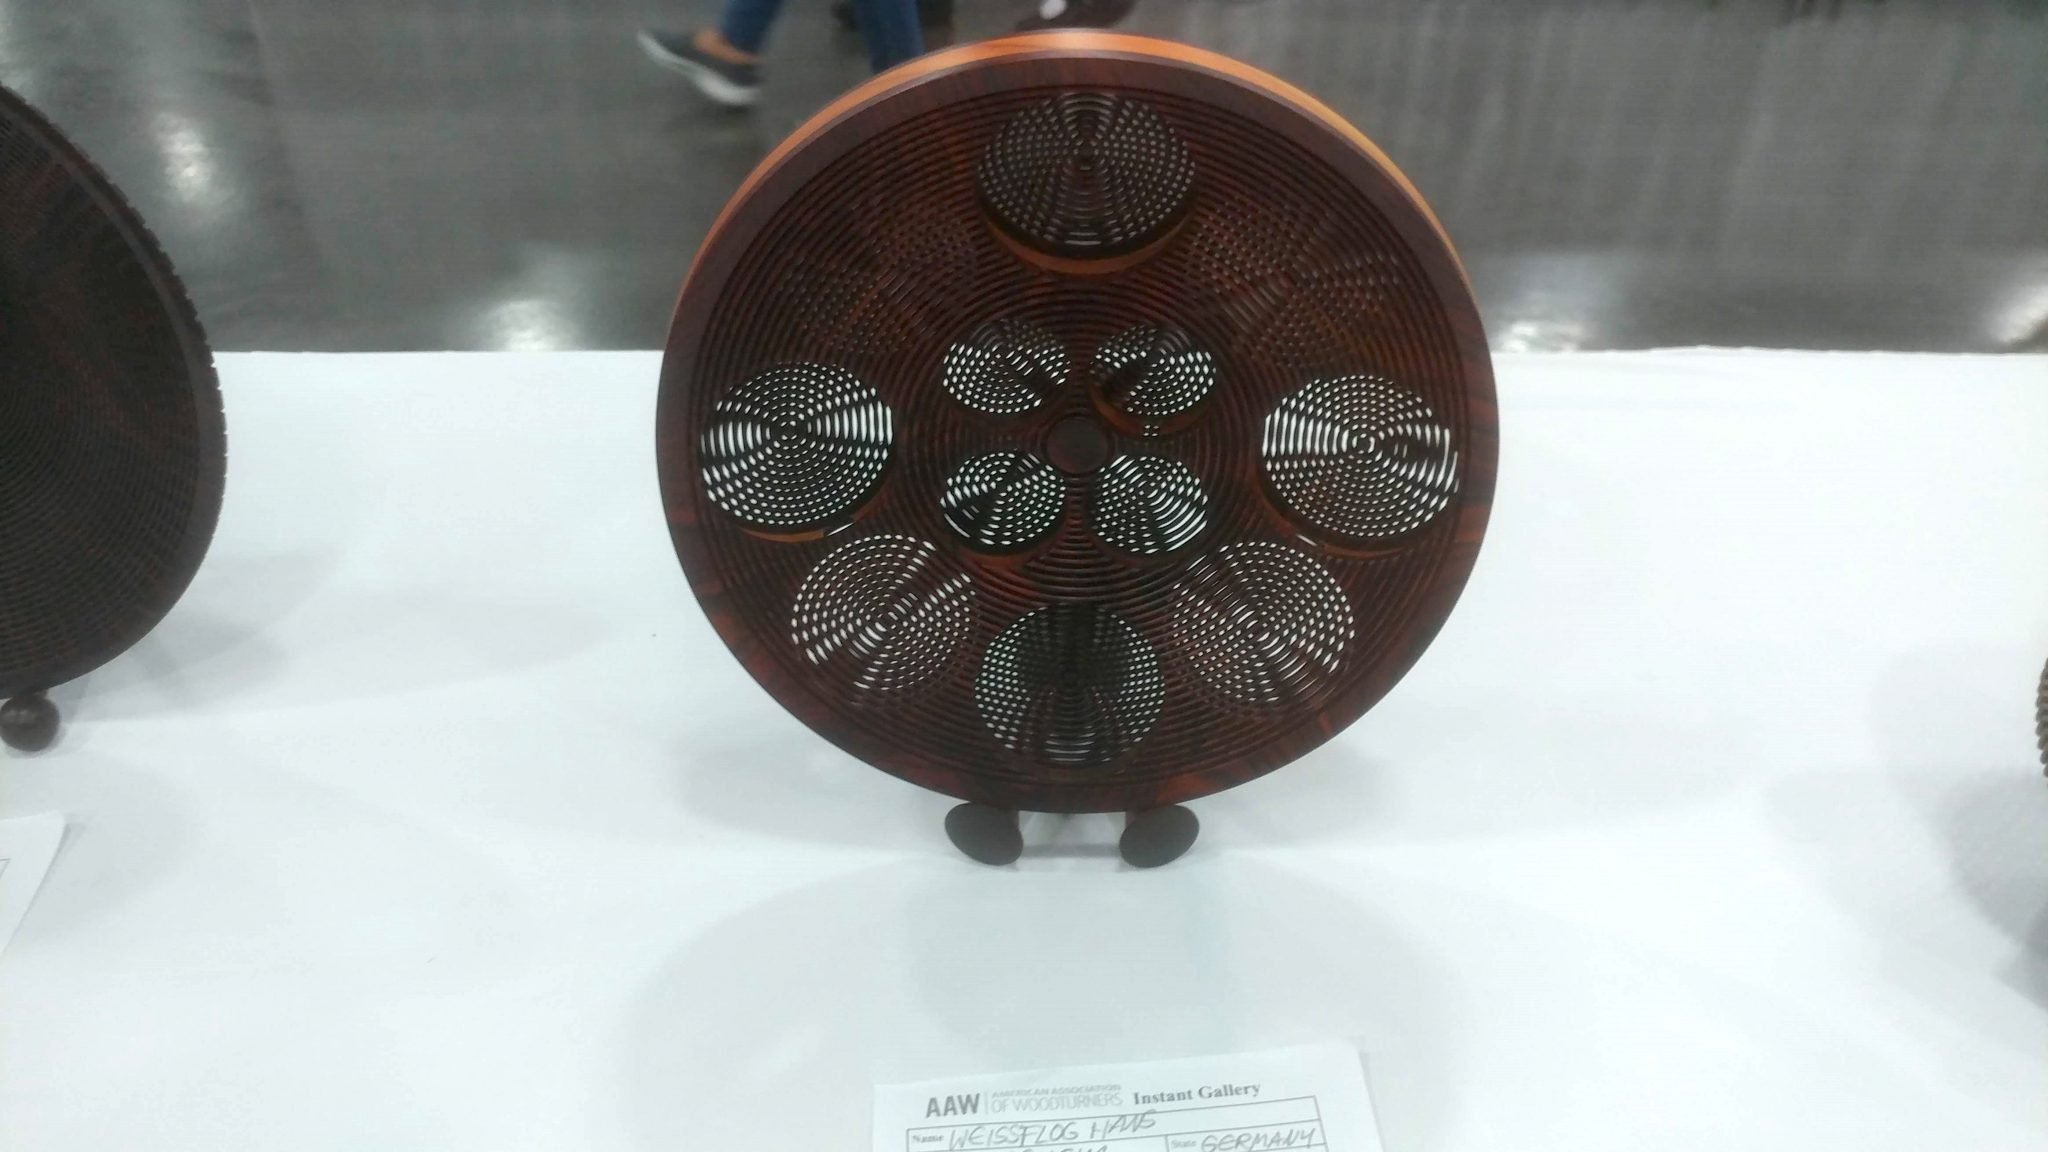
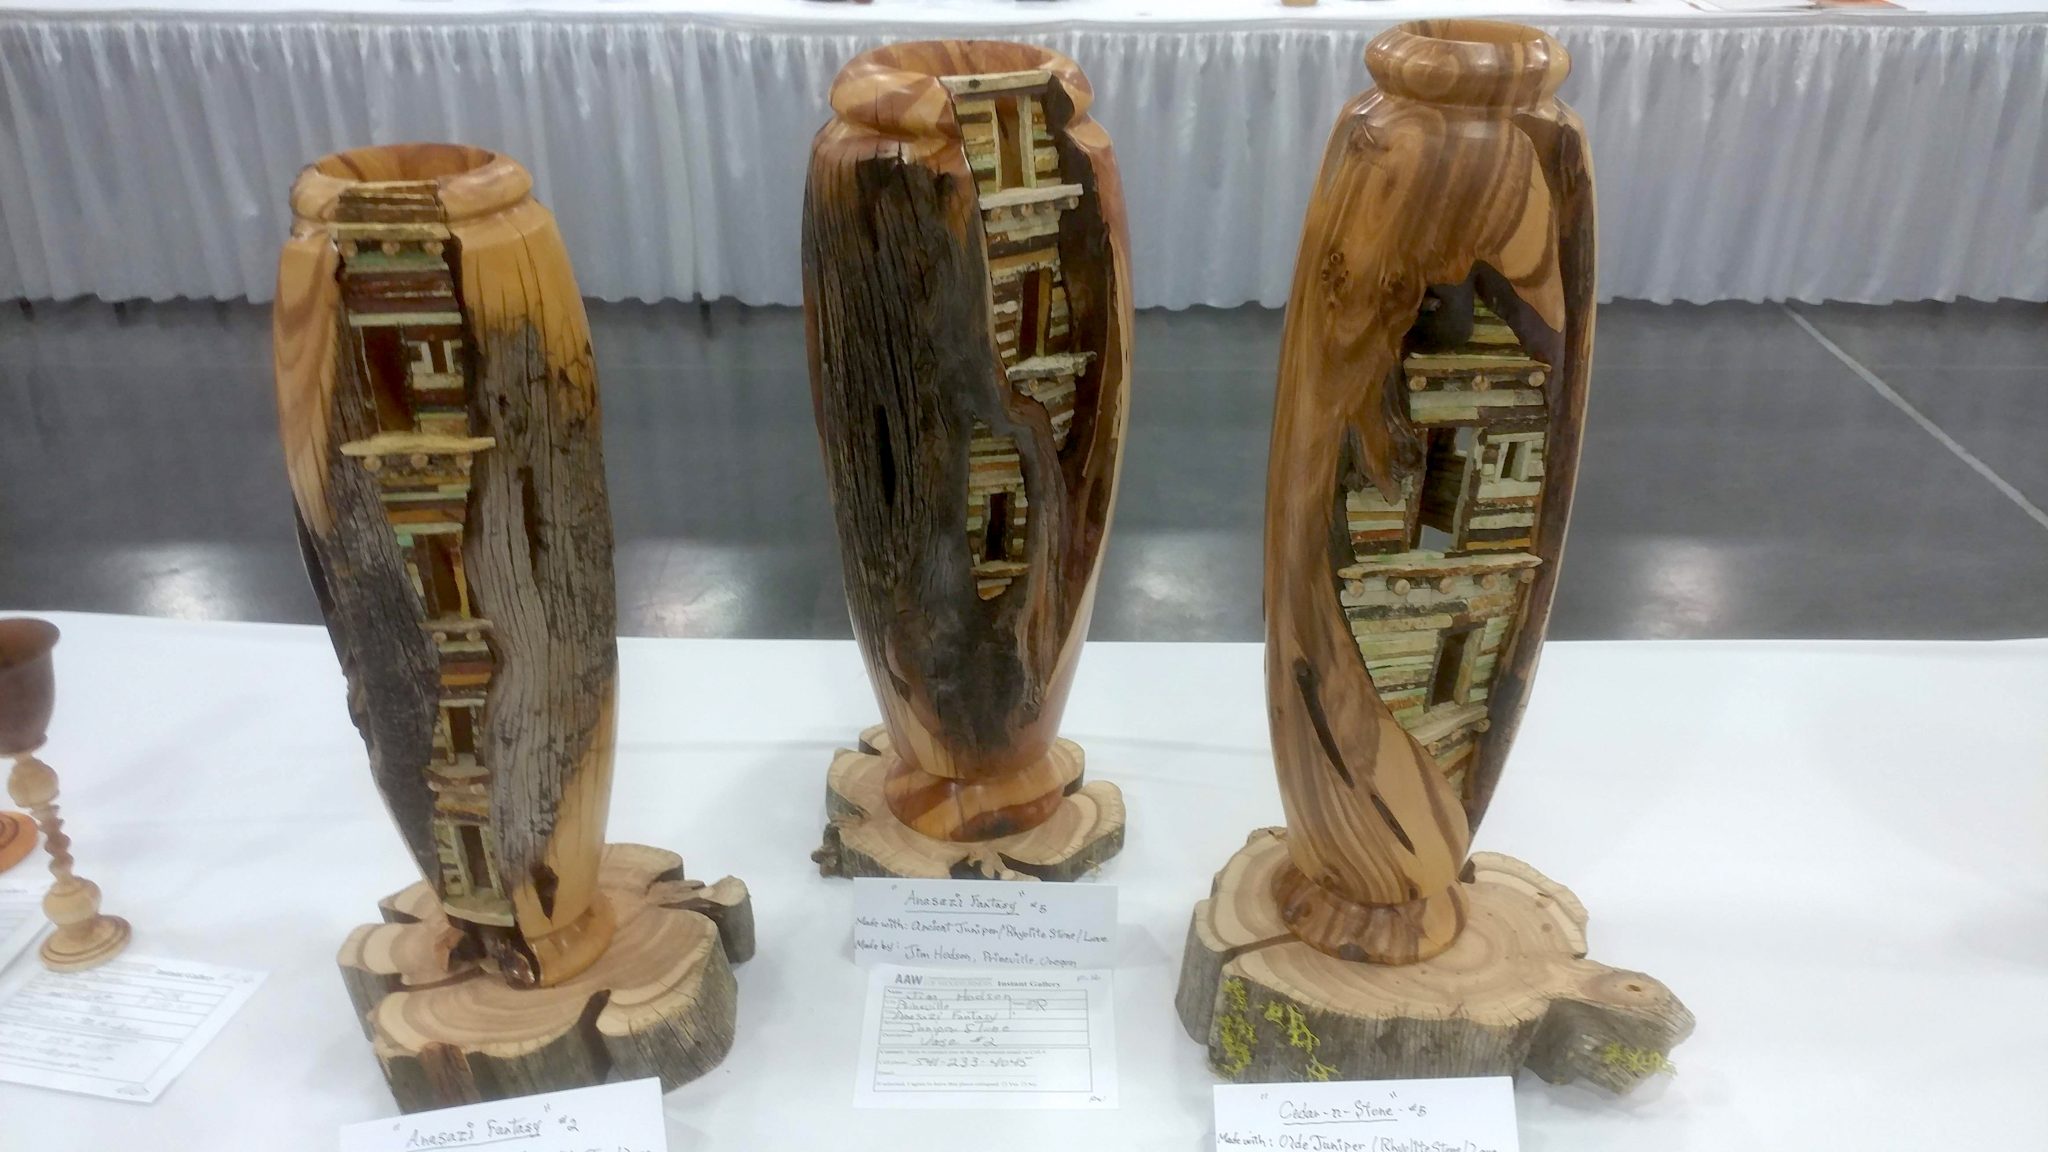
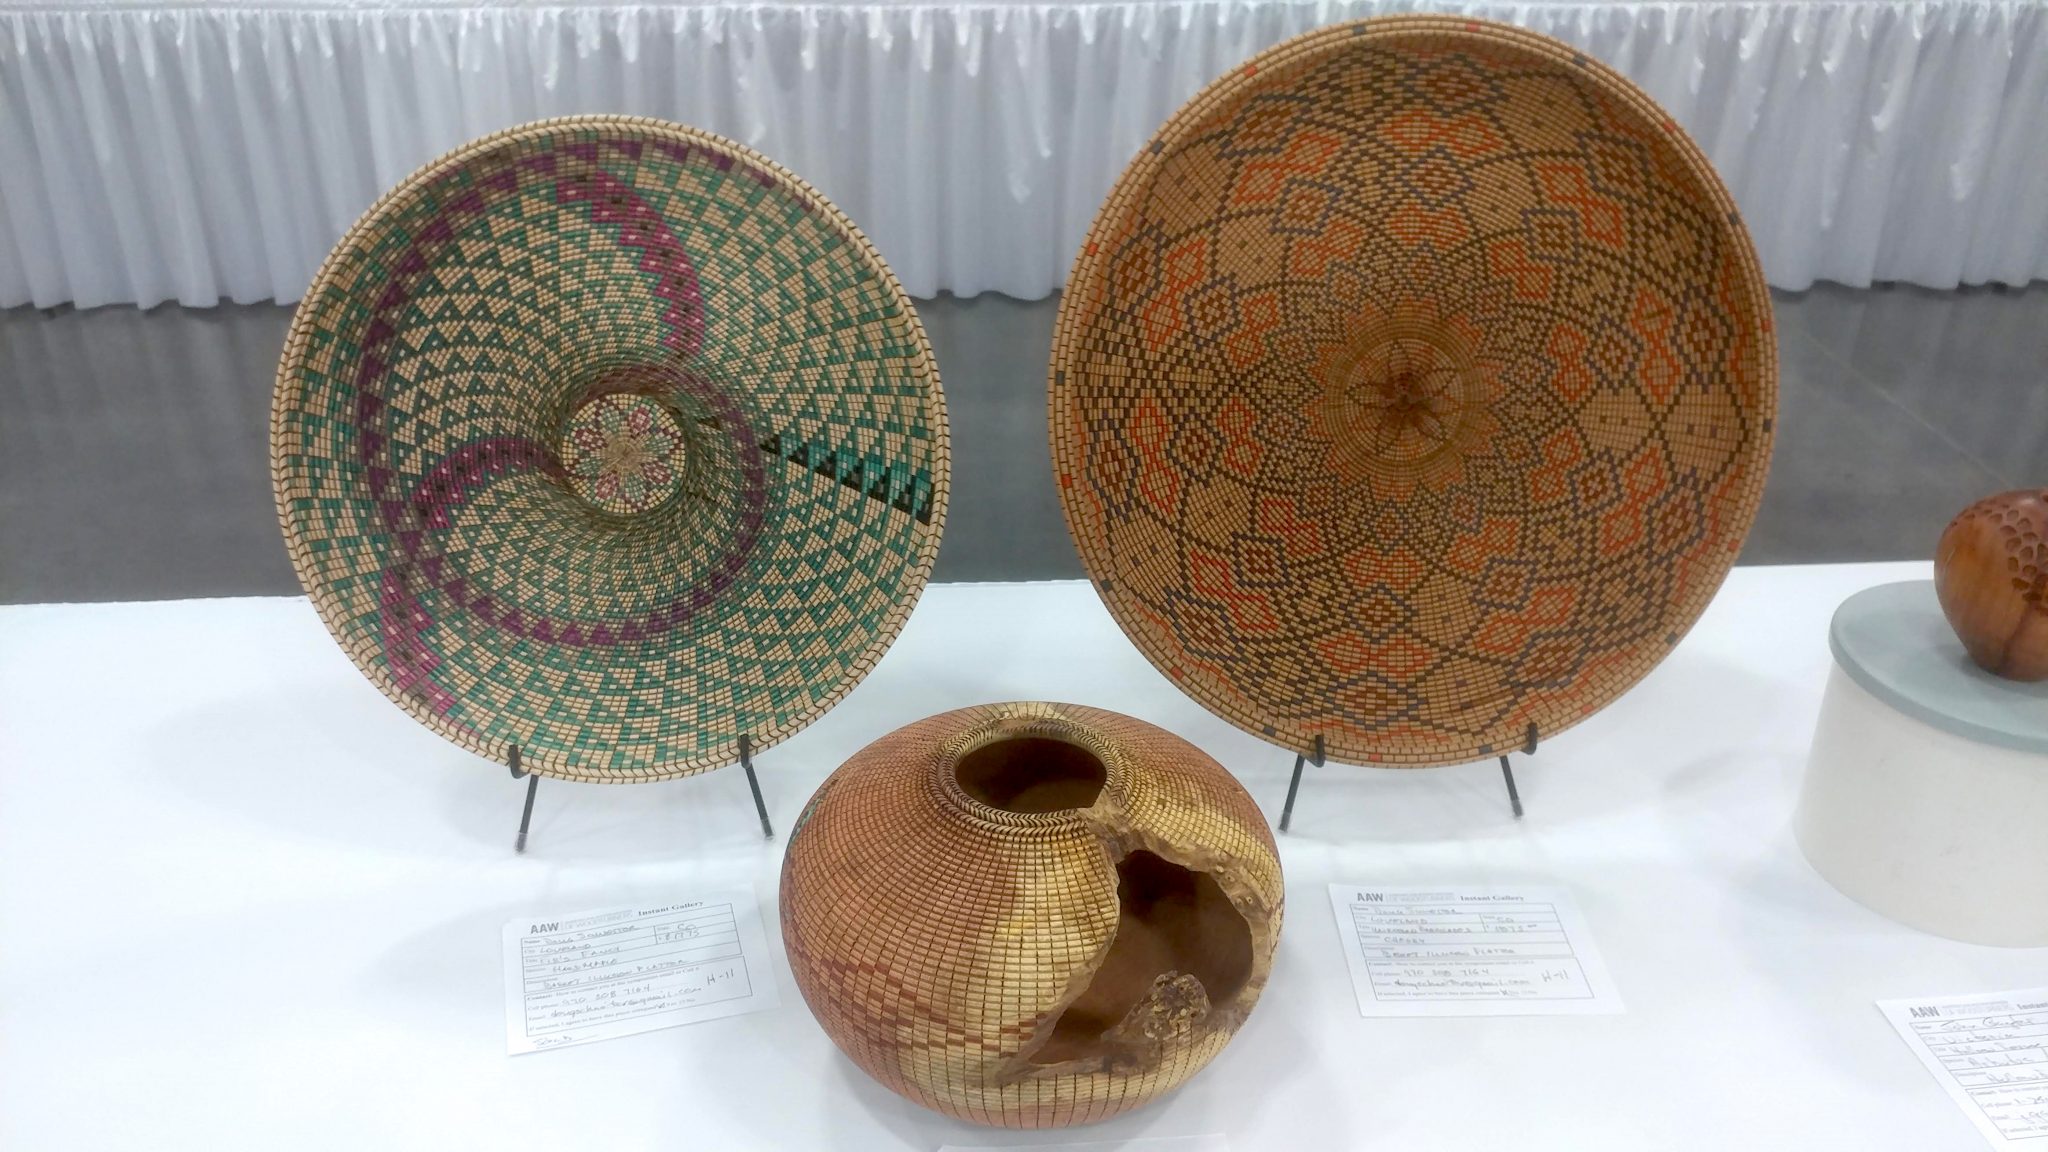
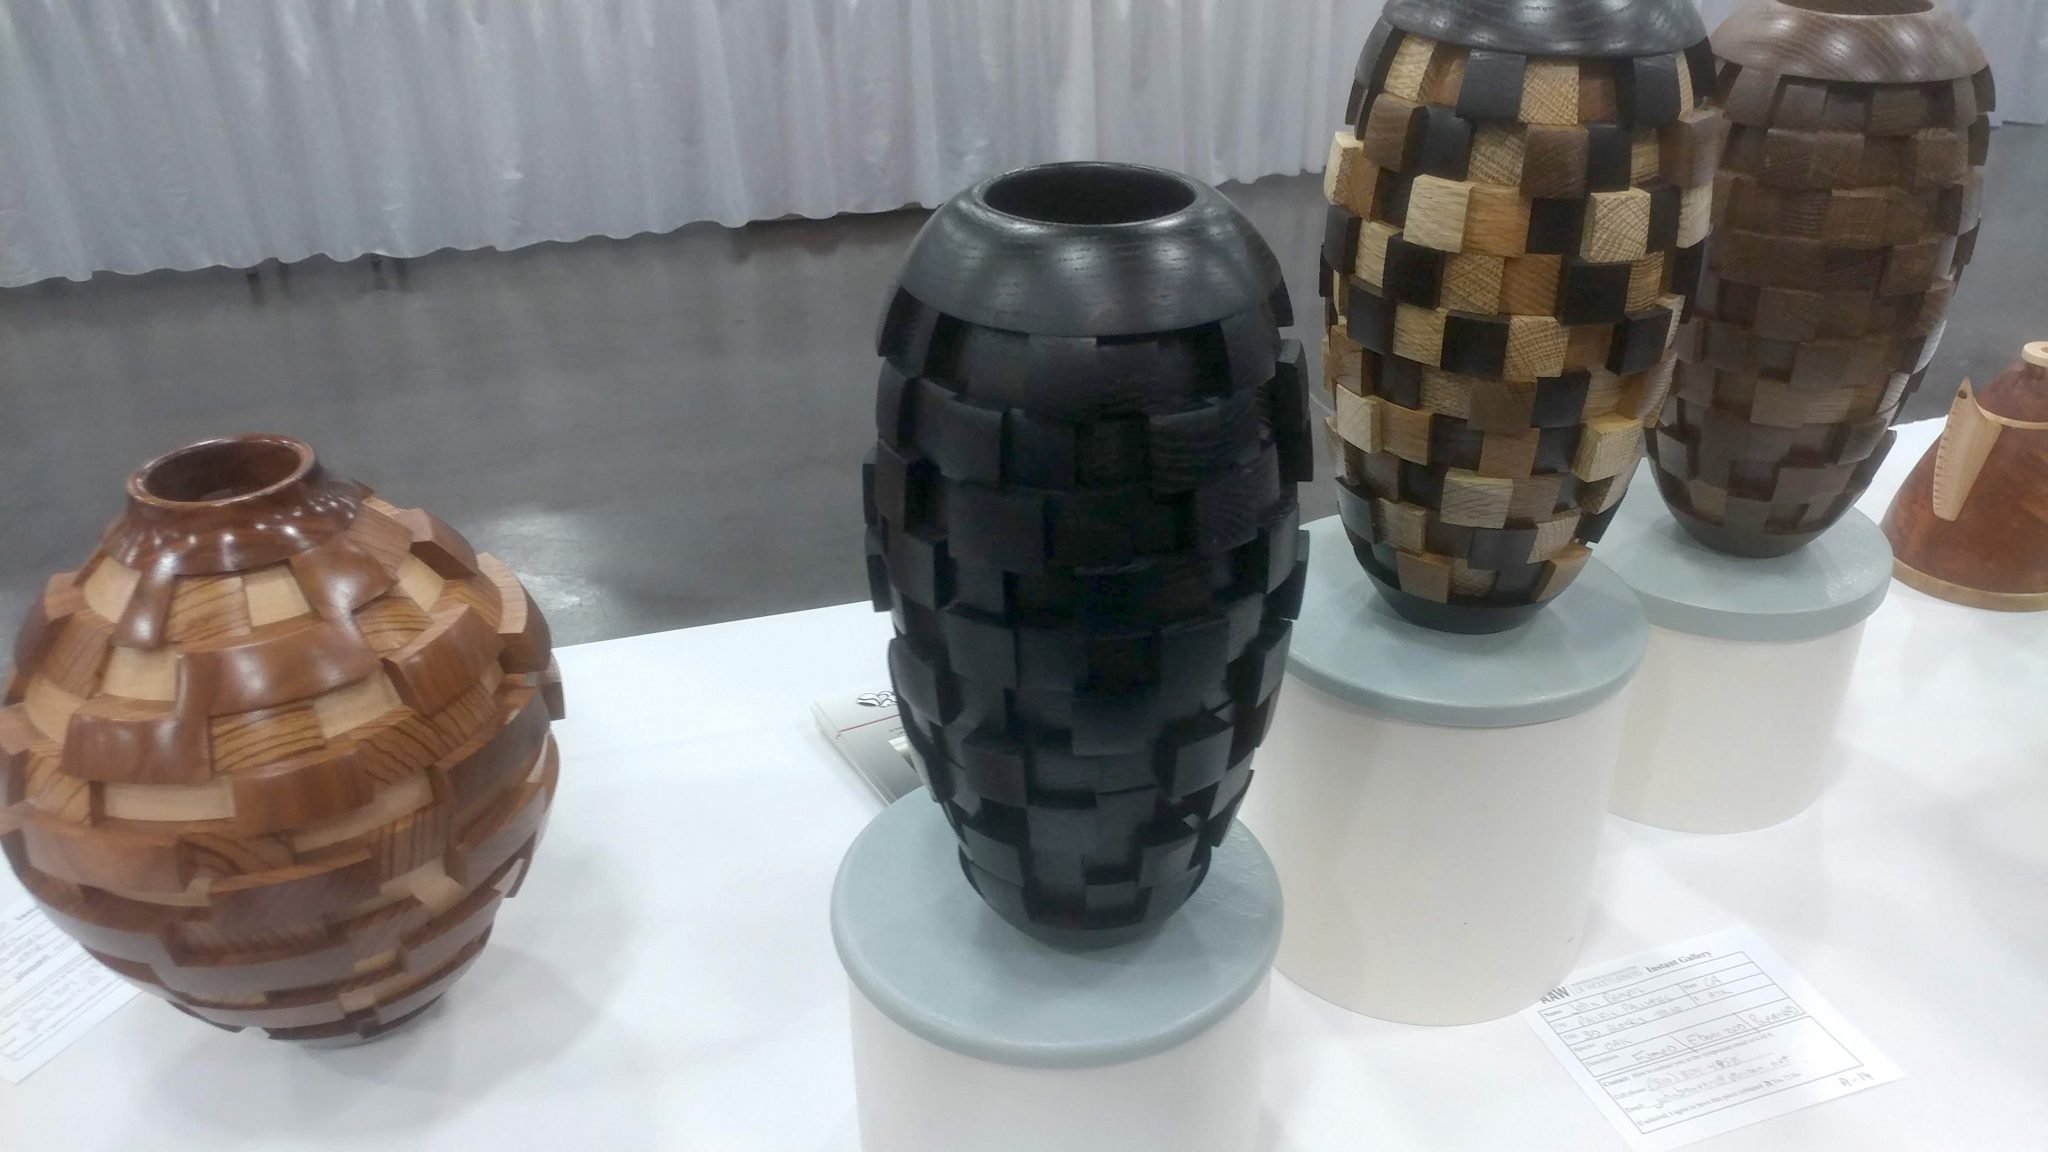
The symposium consisted of many vendor booths and a gallery of inspiring woodworking pieces. I bought some wood and some mother-of-pearl flakes and chips for doing inlay work. I’ve included some photos from the gallery below. I didn’t think far enough ahead so I don’t have all the names of who made what. Sorry.
While the symposium itself was fun, the highlight for me was meeting with some YouTubers the night before at a restaurant near the convention center. I got to hang out with Carl Jacobson and Heath Knuckles and laugh over drinks while listening to stories (from another YouTuber and his wife – I won’t list their names here for privacy reasons) of near death experiences while taking nude photos at the beach and his adventures doing nipple castings at an erotic art convention in Rochester.
The following day I met up with Gord Rock from Canada. If you haven’t checked out his channel, I highly recommend it. He does some really nice woodturning but he is also an excellent teacher and one of the nicest guys I have ever met (which makes sense since he’s Canadian).
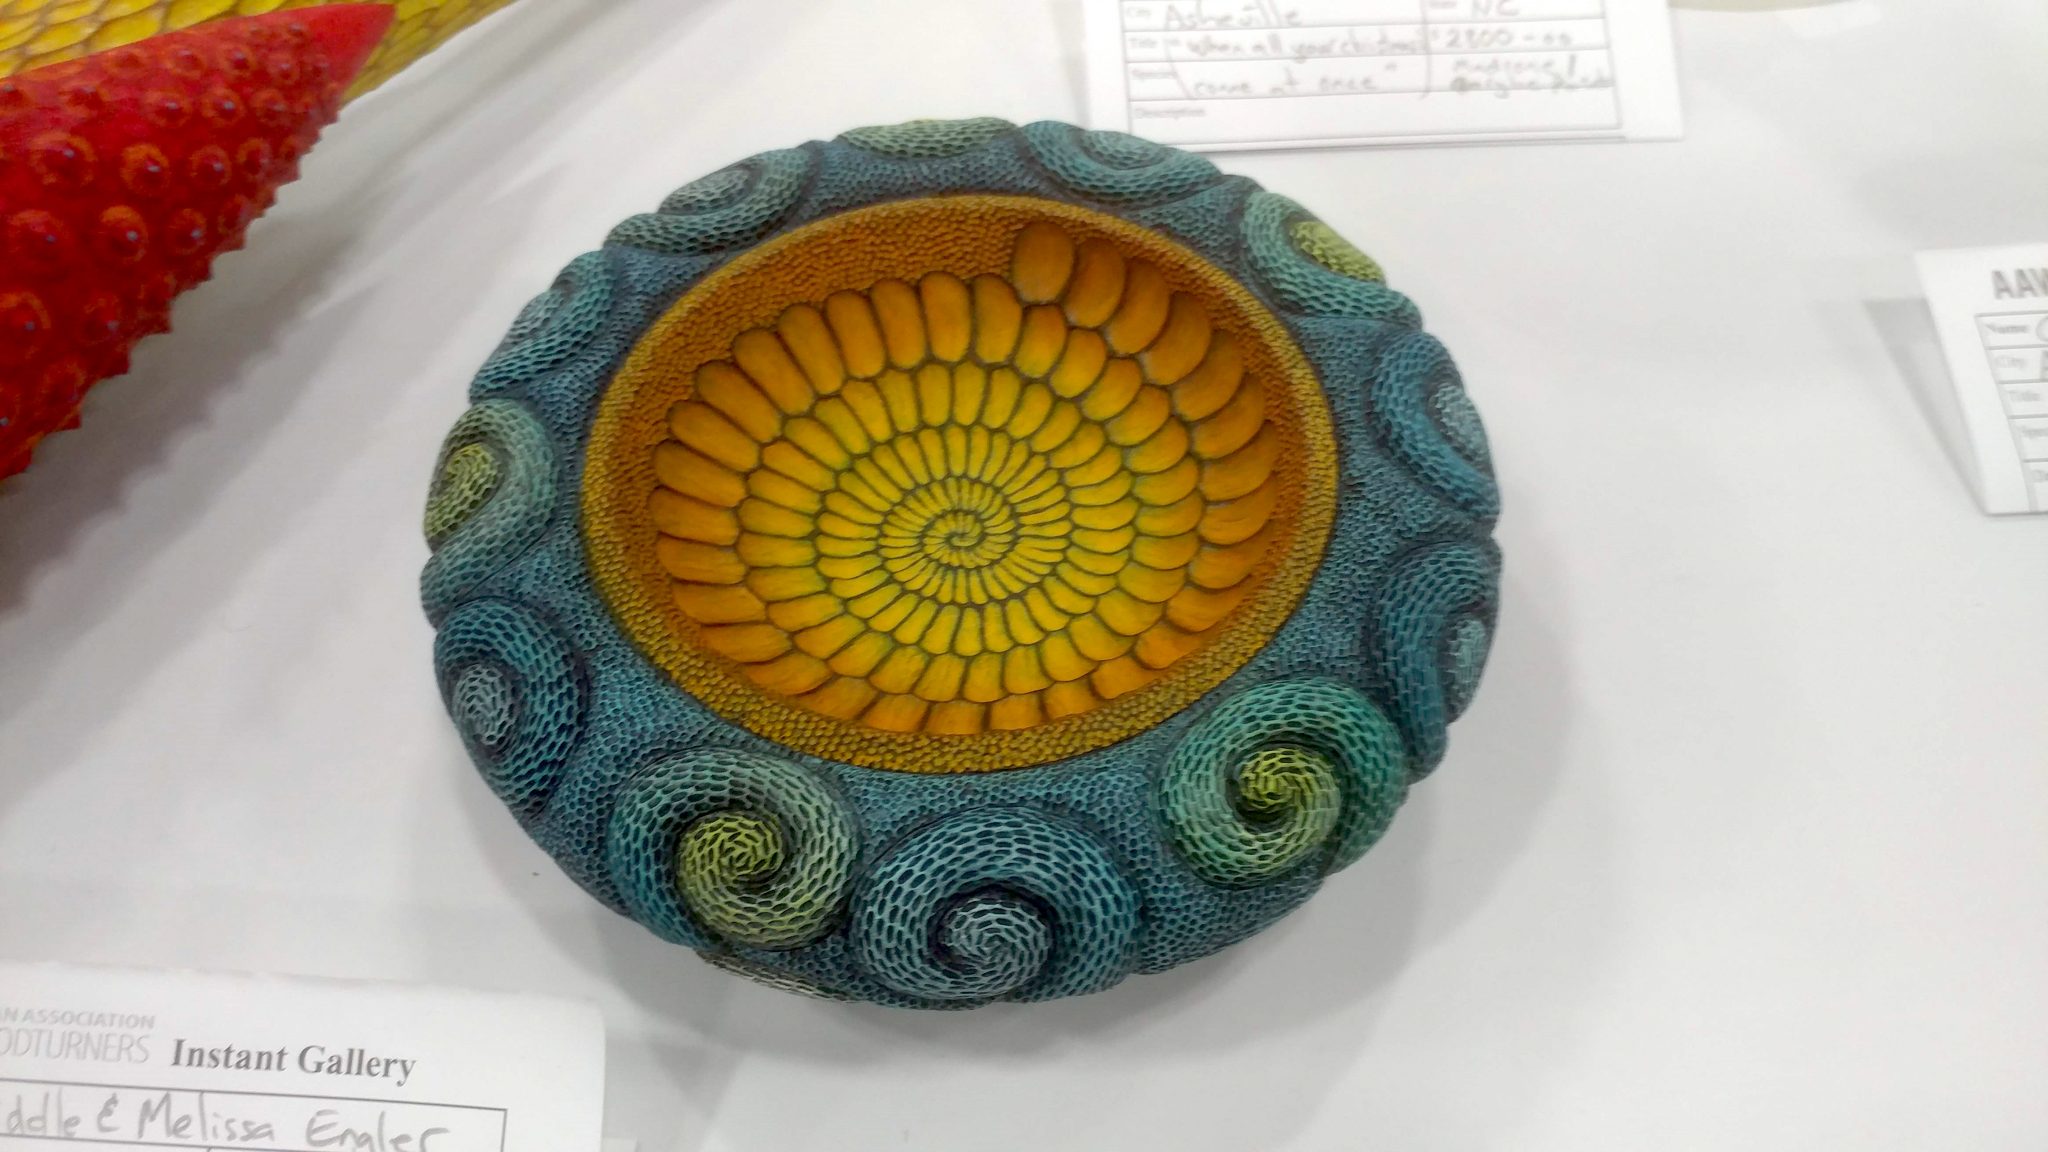
A pleasant surprise was running into Frank Howarth as he was walking around. It was actually pretty awkward since I think I caught him off-guard and I probably came off as a stalker since I’m a big fan of his. I am a student of film and I always appreciate when someone really puts some effort into their YouTube videos. Every single one of his videos is expertly put together and both entertaining and educational. One of his pieces, the eyeball, is pictured below.