Thin-Kerf Blades and Riving Knives

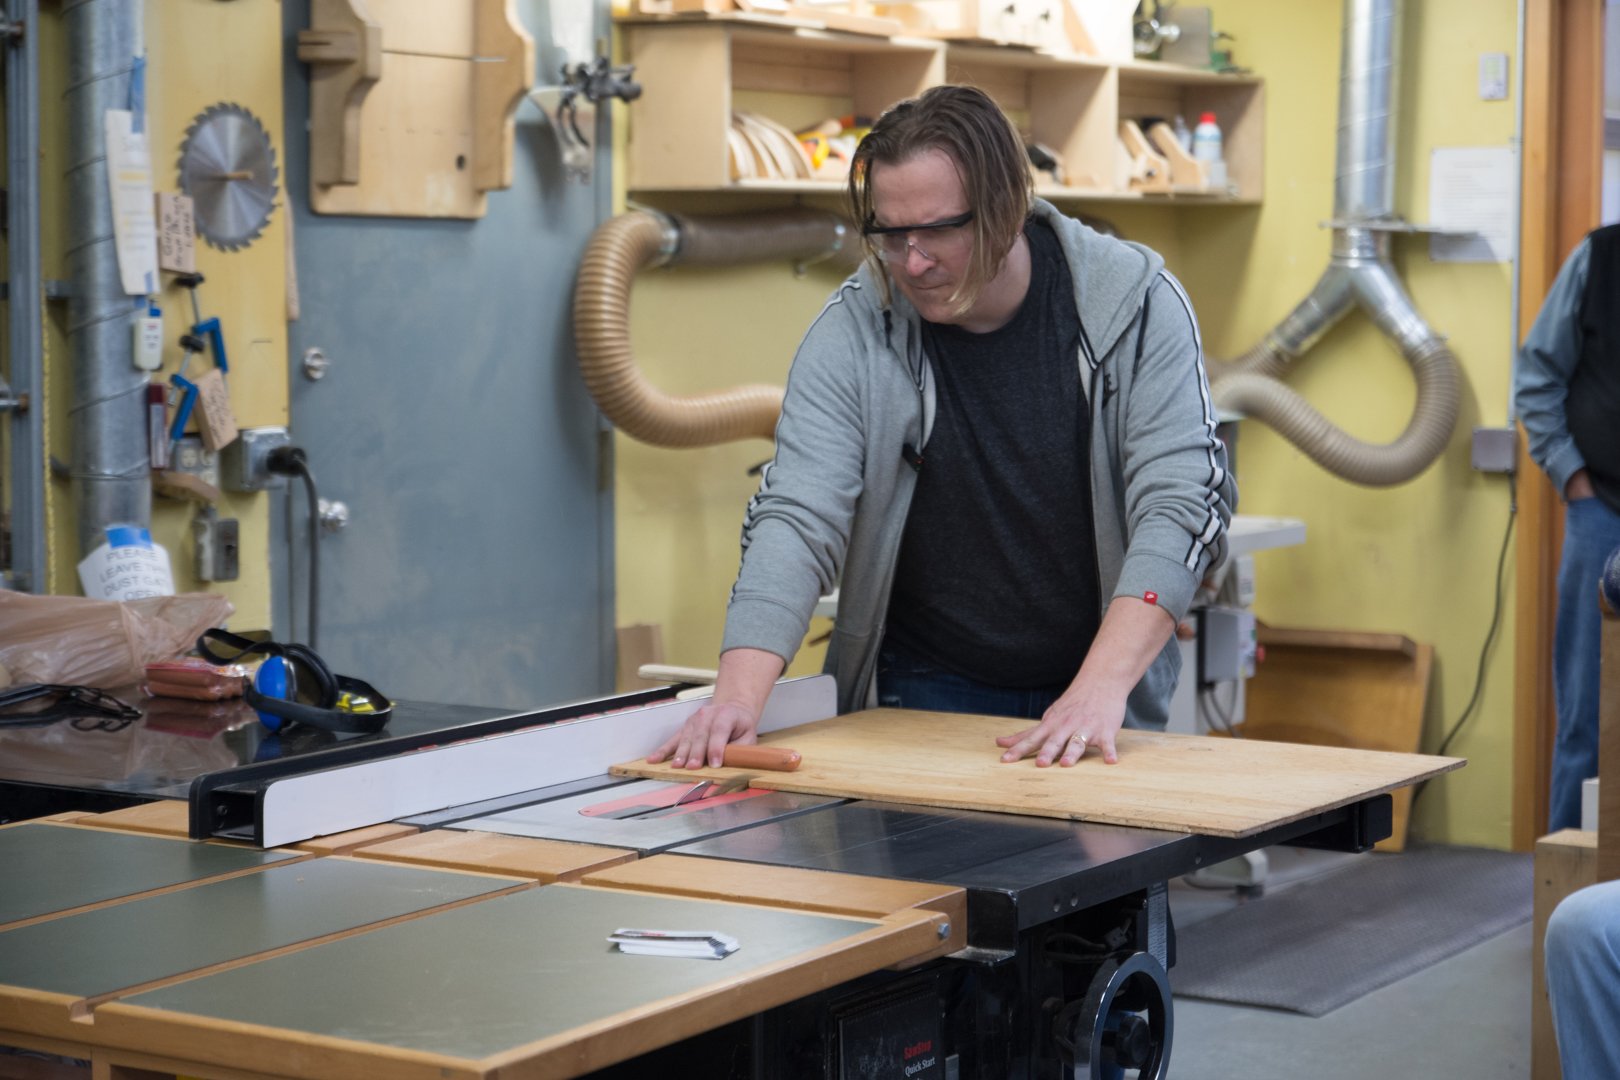
There are times when you may want to use a thin-kerf blade, but what about your riving knives and splitters? Won’t they be too wide? Well, not exactly.

We’re going to touch on the basics of thin-kerf blades, but the main point of this article is to address the issue of a riving knife or splitter causing the wood to bind after switching to the thin-kerf blade. Many people think they need a thin-kerf riving knife, but it may not come to that. Read on…

What Is a Thin-Kerf Blade?

Now, we’re not concerned with ultra thin blades, such as specialty fret-slot cutting blades. If you’re using those blades then you’re on your own to find a good splitter/riving knife solution. What we’re concerned with are the more common thin-kerf blades.

For th​e record, standard-kerf blades are 1/8″ thick, so thin kerf blades are only 1/32″ thinner.

If you go to the store and ask for a thin-kerf blade, chances are they will hand you a blade that has a 3/32″ wide kerf. Most, if not all, Freud Diablo blades are thin-kerf.

Why Would I Want To Use a Thin-Kerf Blade?

There are two main reasons to use a thin-kerf blade, plus a few other uncommon but valid reasons.

1. Lower horsepower saw

This includes any saw with less than 3 HP or running on 120 volts. Once you get up to 3 HP then you will most-likely be running the saw on 230 volt power but that voltage may not always be available to you. This is commonly the situation when working on a job site doing house construction or for home hobbyists who don’t necessarily need anything other than standard 120 volt service.

For various reasons, you may find yourself using a lower horsepower saw.

Since a thin-kerf blade removes 1/4 less material than a standard kerf blade, this makes it easier for lower horsepower saws to make these cuts, especially when cutting through thicker materials.

2. Less material waste

Since a thin-kerf blade removes less material, that means less material wasted.

In my mind, this is usually a silly reason to use thin-kerf blades. If you’re cutting something like ebony, where you scrape up any sawdust you make and save it, then sure, this is a valid reason. If you’re just cutting plywood or even most hardwoods then it might be time to weigh the cost savings vs. the hassles of using a thin-kerf blade.

Which brings me to…

Why Would I NOT Want To Use a Thin-Kerf Blade?

Thin-kerf blades have a tradeoff.

If you’ll forgive me a brief tangent, thin-kerf blades have been over-hyped on the internet. It’s gotten to where people who are new to woodworking are under the impression that you should always be using a thin-kerf blade because that is all anyone ever recommends.
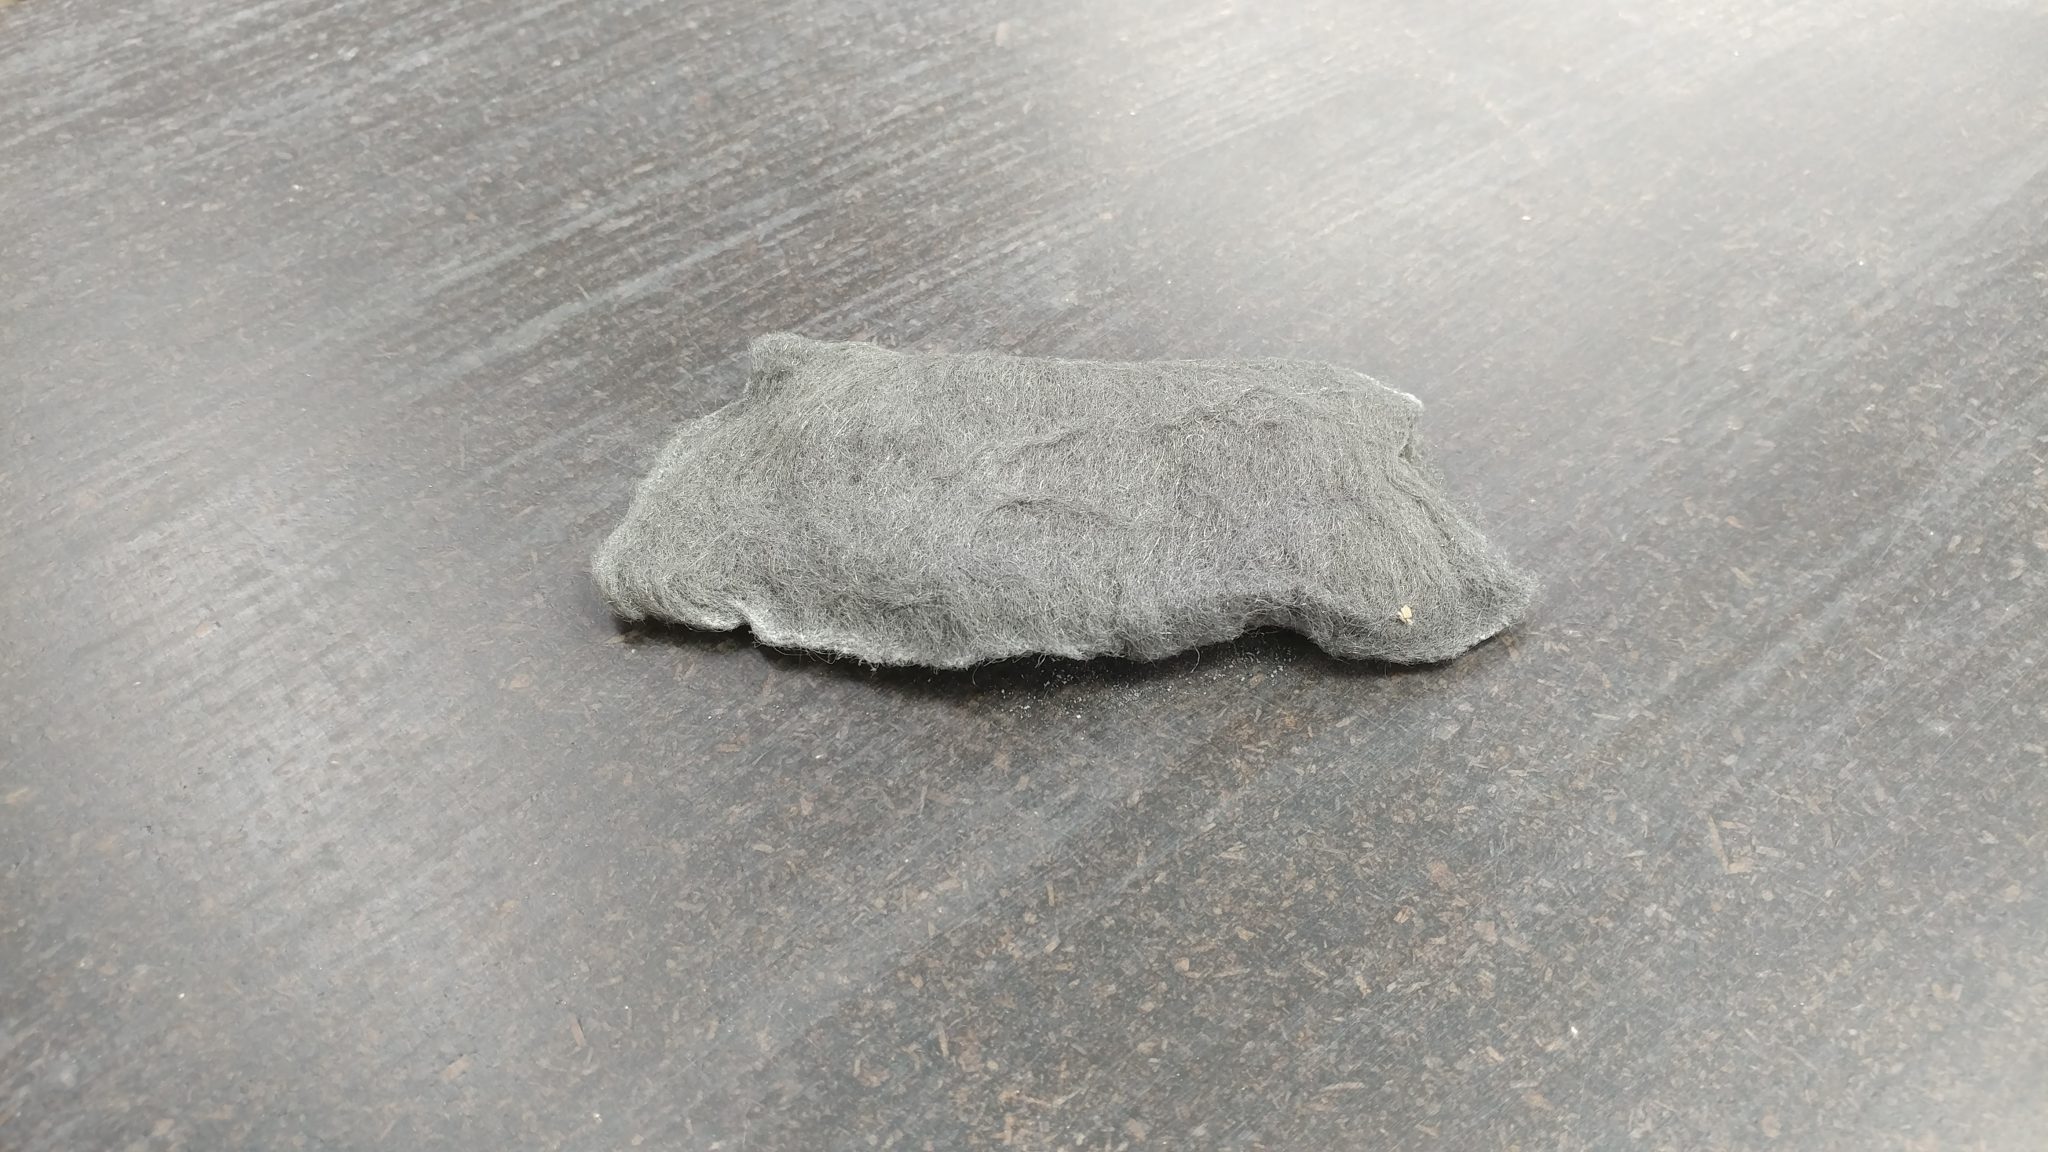
1. Less Stable

A wobbly blade can also contribute to chipping your zero-clearance insert and maybe even nicking the edges of miter gauge or crosscut sled fences. If you’re using a SawStop, we all know how that can end.

Thin-kerf blades have less mass which results in more wobbling of the blade. More wobbling of the blade results in a rougher cut. A rougher cut results in more sanding. More sanding means more wood removal. So much for saving material.

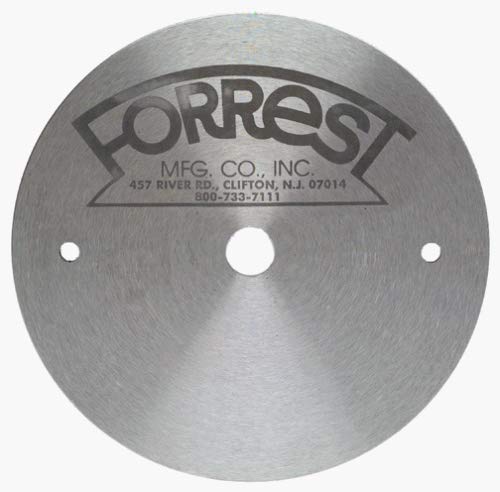
There are stabilizer (or stiffener) discs that you can add to your thin-kerf blade to help eliminate this issue. This adds to the cost so you’ll want to keep this in mind if you are using thin-kerf blades as some sort of cost-saving measure. This also limits the depth of your cut.

Forrest 5″ Stiffener Disc

2. Alignment With Riving Knife or Splitter

If you are using a riving knife or splitter (and you should be) then you may find that it is no longer aligned with the blade. This results in the wood binding as it clears the blade, which can be dangerous.

We’ll come back to this…

But I Really Want To Use A Thin-Kerf Blade!

Go ahead and use a thin-kerf blade if you’ve really got your heart set on it. Just keep in mind that, like everything in life, there are trade-offs.

The main point of this article is to address the issue of riving knives or splitters, so lets take a look at this subject.

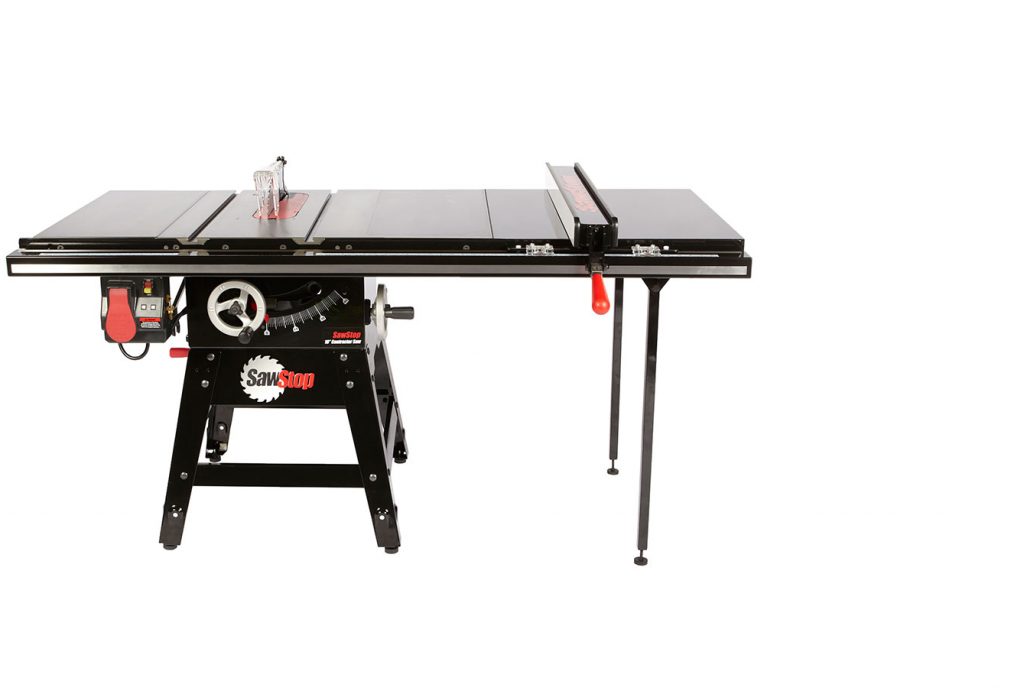
Disclaimer: I am basing this on SawStop table saws because this is what I have access to and because they are the best-selling table saw in North America so they are most-likely what you have access to as well. If you are wanting to address this with another type of table saw, I recommend you contact the manufacturer to get their advice on the matter.

What Riving Knives are Available?

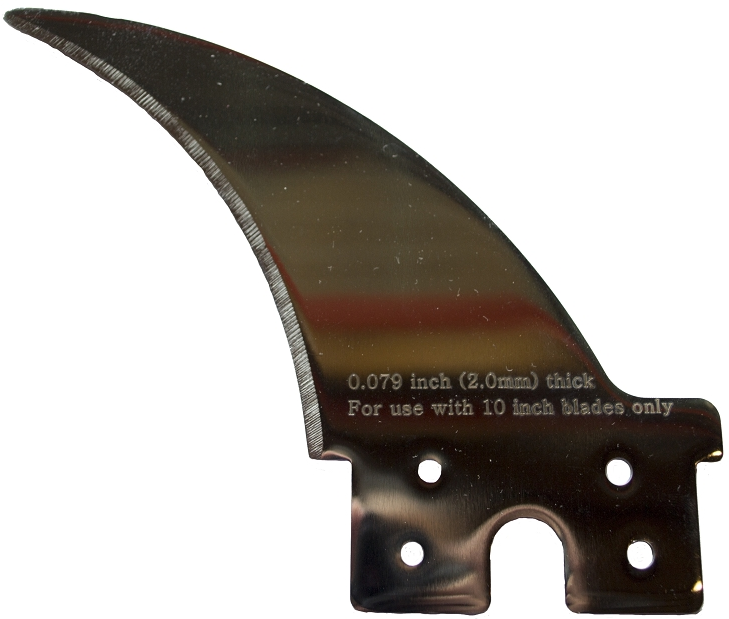
SawStop sells two different riving knives. One is 2.3 mm thick and one is 2.0 mm thick. Chances are, your saw has a 2.3 mm thick riving knife and splitter on your blade guard.

2.3 mm riving Knife
2.0 mm Riving Knife

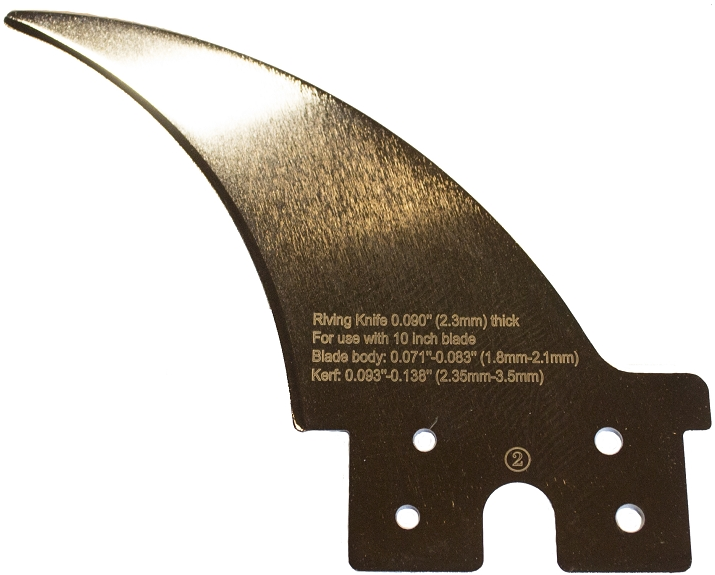
Why the change? Well, up until 2010, the riving knives and blade guard splitters were 2.0 mm but due to government regulation it was changed to the slightly wider 2.3 mm. It may not sound like a huge difference, and it really isn’t, but 0.3 mm is enough to cause a significant issue, as we’ll address shortly.

Should I Buy a 2.0 mm Riving Knife Instead?

On one condition: you never plan on using your standard blade guard.

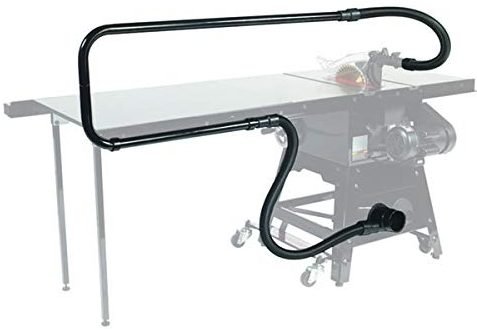
Again, we’re talking about SawStops here, but there are three blade guard options:

TSG-MG – Micro Blade Guard
TSG-DC – Dust Collecting Blade Guard
TSG-FDC – Floating Dust Collecting Blade Guard

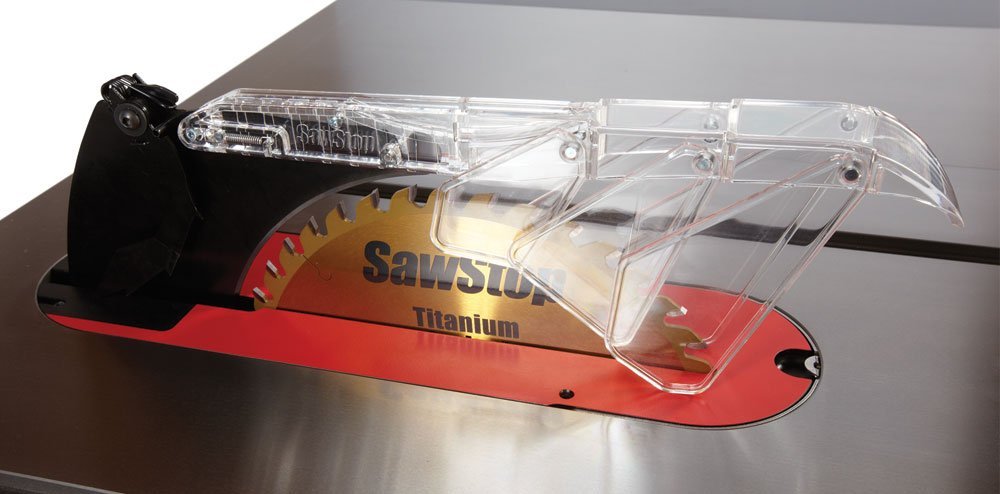
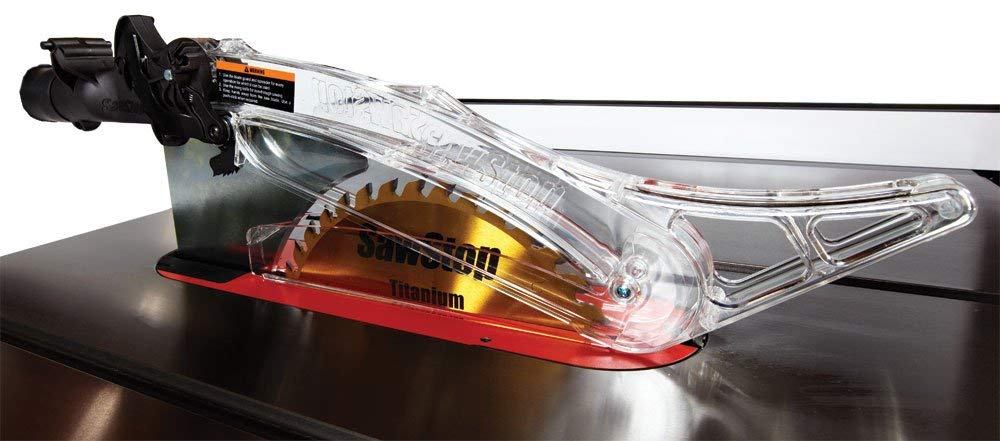
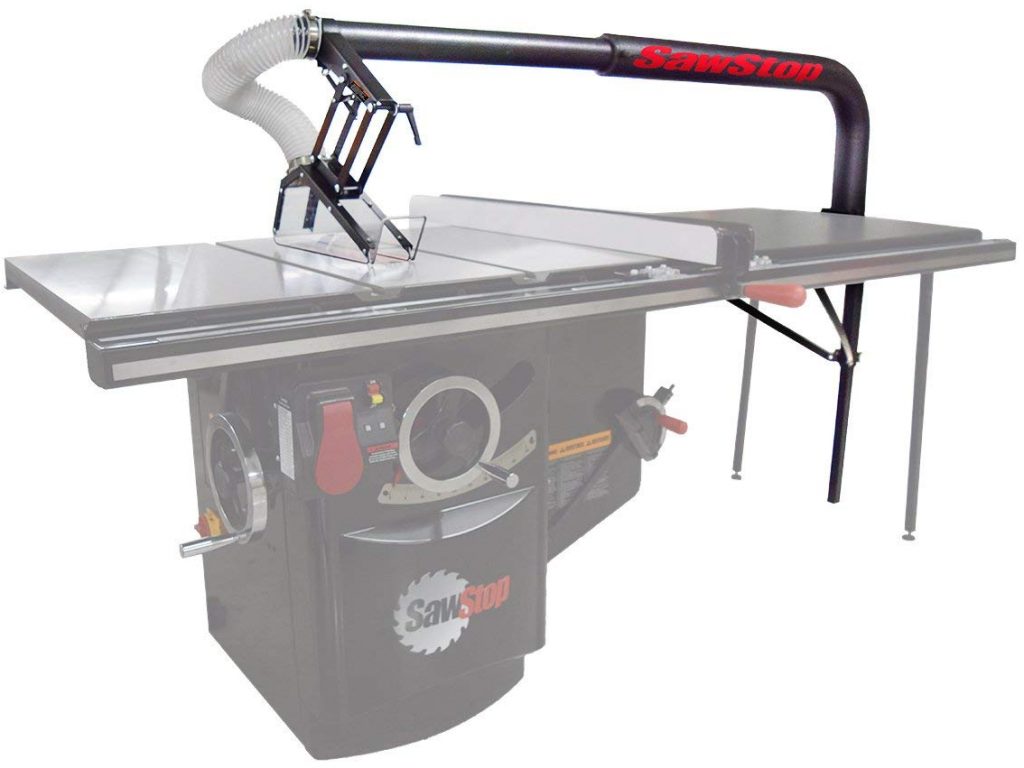
It you are using the Floating Dust Collecting Blade Guard then you are fine, but if you are using either the Micro Guard or the Dust Collecting Blade Guard then you will want to steer clear of the 2.0 mm riving knife. Here’s why…

The Problem With a 2.0 mm Riving Knife

If you make the switch to a 2.0 mm riving knife then the clamp that holds it will be too loose since it is set to 2.3 mm. This can be unsafe and should be fixed by tightening the riving knife clamp. This will make it too tight to hold onto the splitter for the Micro Guard or the Dust Collecting Blade Guard.

You basically have to pick one or the other: either you’re using a 2.0 mm riving knife or you’re using a blade guard. Unless you feel like adjusting the clamping pressure of your riving knife clamp every time you switch back and forth, you’re better off just staying with 2.3 mm.

A friend of mine asked if you could just put a piece of tape on the right side of the 2.0 mm riving knife as a shim. Well…yeah. Jeeze! Don’t ruin the point I’m trying to make!

Seriously, though. If you’re comfortable putting tape on the side of the 2.0 mm riving knife, go ahead, but as you’ll read next, you shouldn’t have to do that.

But Don’t I Need a 2.0 mm Riving Knife If I’m Using a Thin-Kerf Blade?

No, you don’t. Do the math.

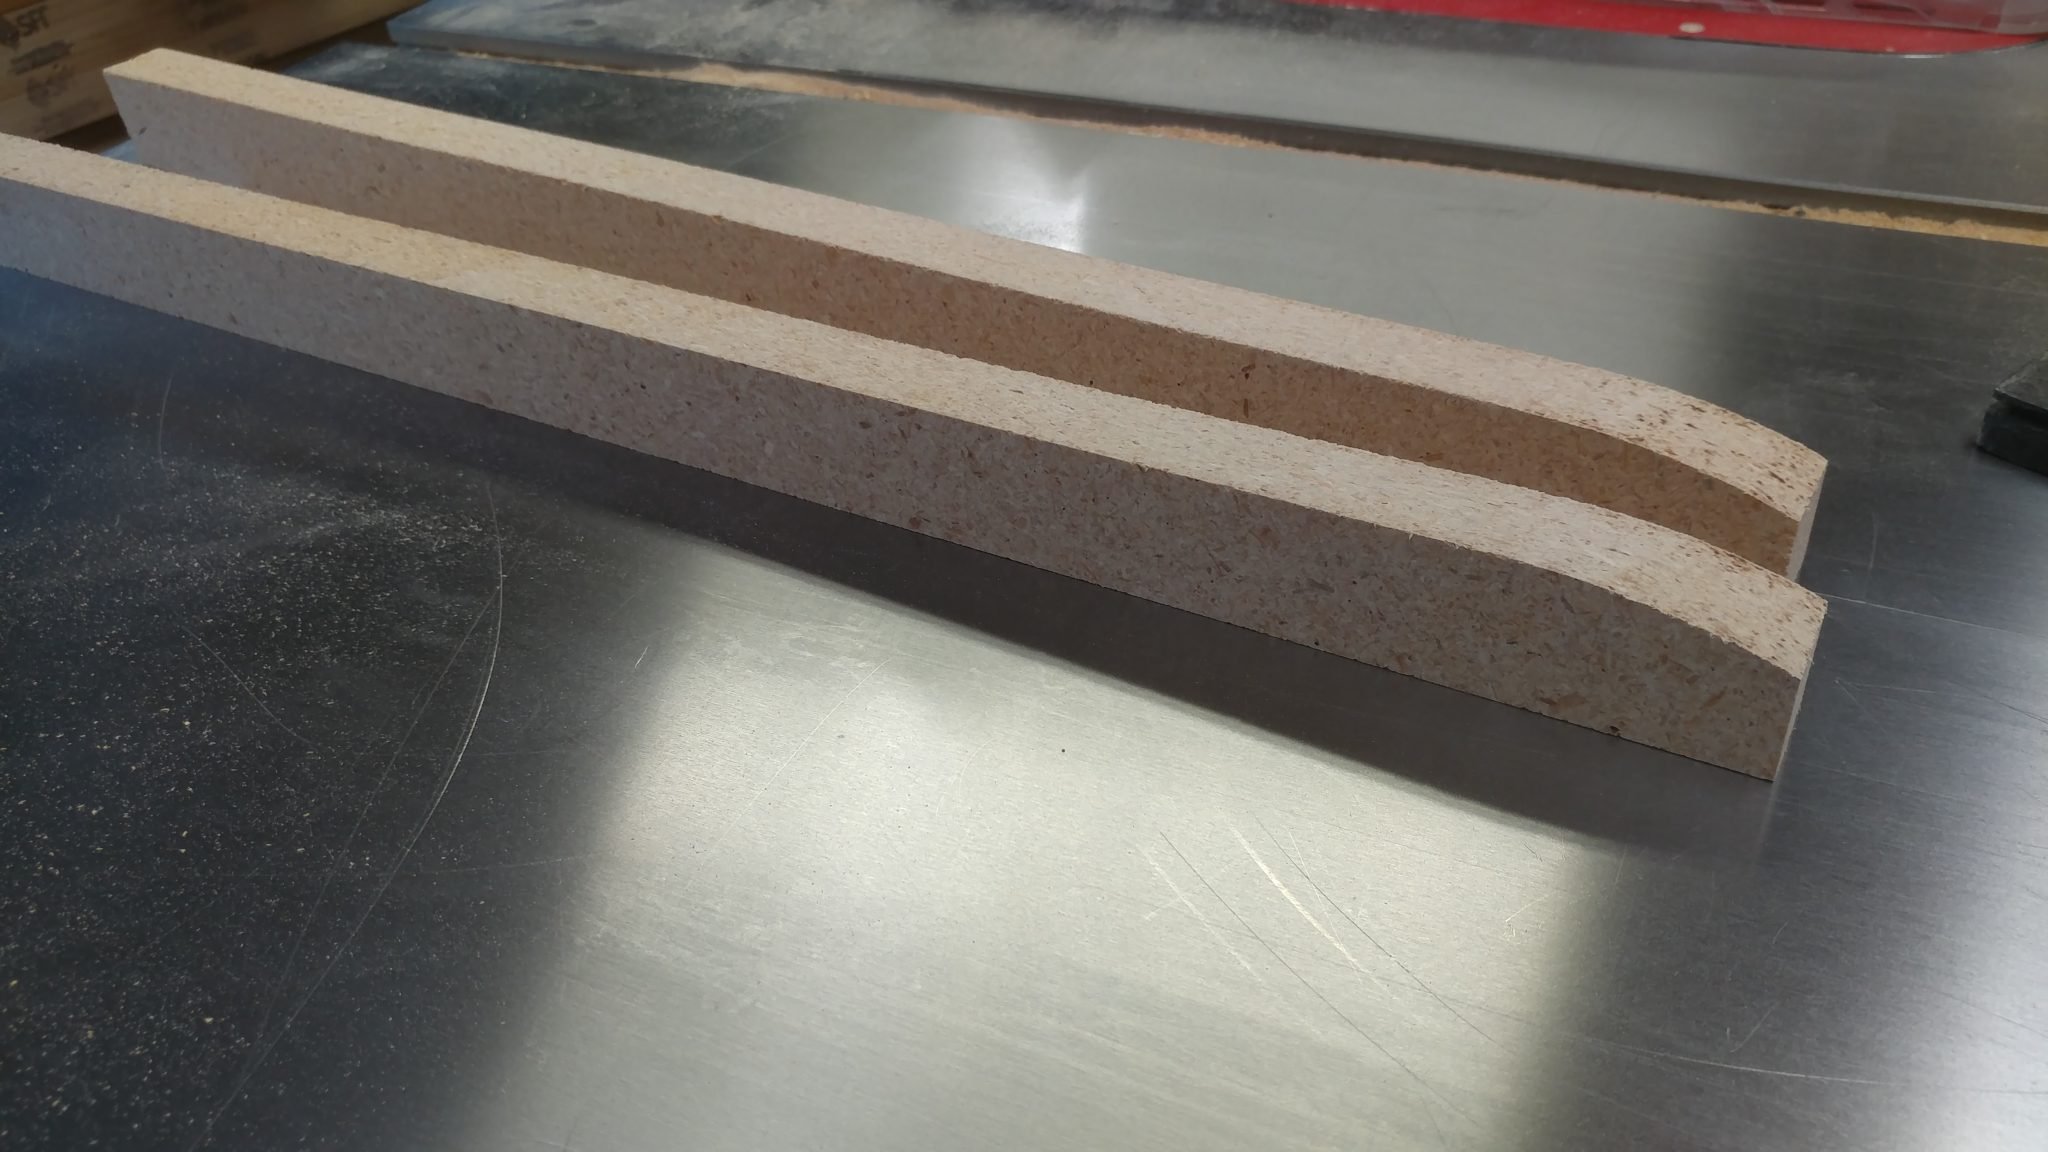
For the next few pictures, I’ve created a 3D model of the saw with a riving knife that I’ve colored green for clarity.

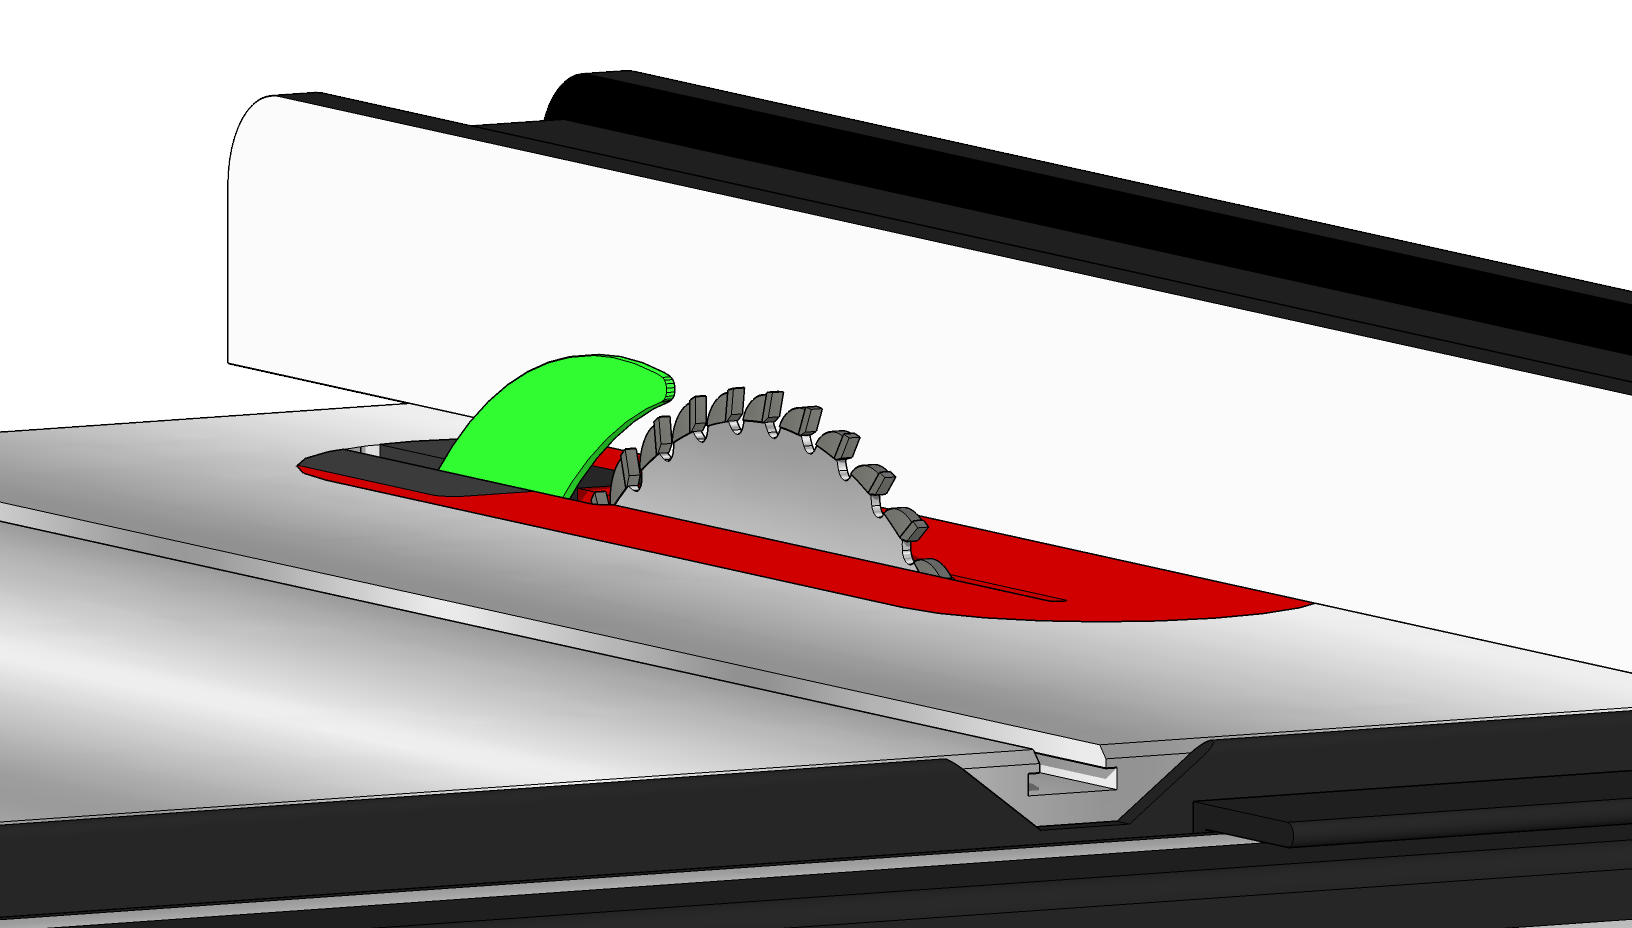
Let’s look at the standard 2.3 mm riving knife compared to both a 1/8″ standard-kerf blade and a 3/32″ thin-kerf blade.

1/8″ = 3.125 mm

3/32″ = 2.38 mm

This means that even the widest of the two riving knives is still thinner than a thin-kerf blade.

Now, if you are considering switching to a thinner riving knife, I assume it’s because you are experiencing problems. Let’s take a look at the REAL issue here…

But The Wood Is Binding Up When I Use a 2.3 mm Riving Knife!

Of course it is, but it’s not happening for the reason you think.

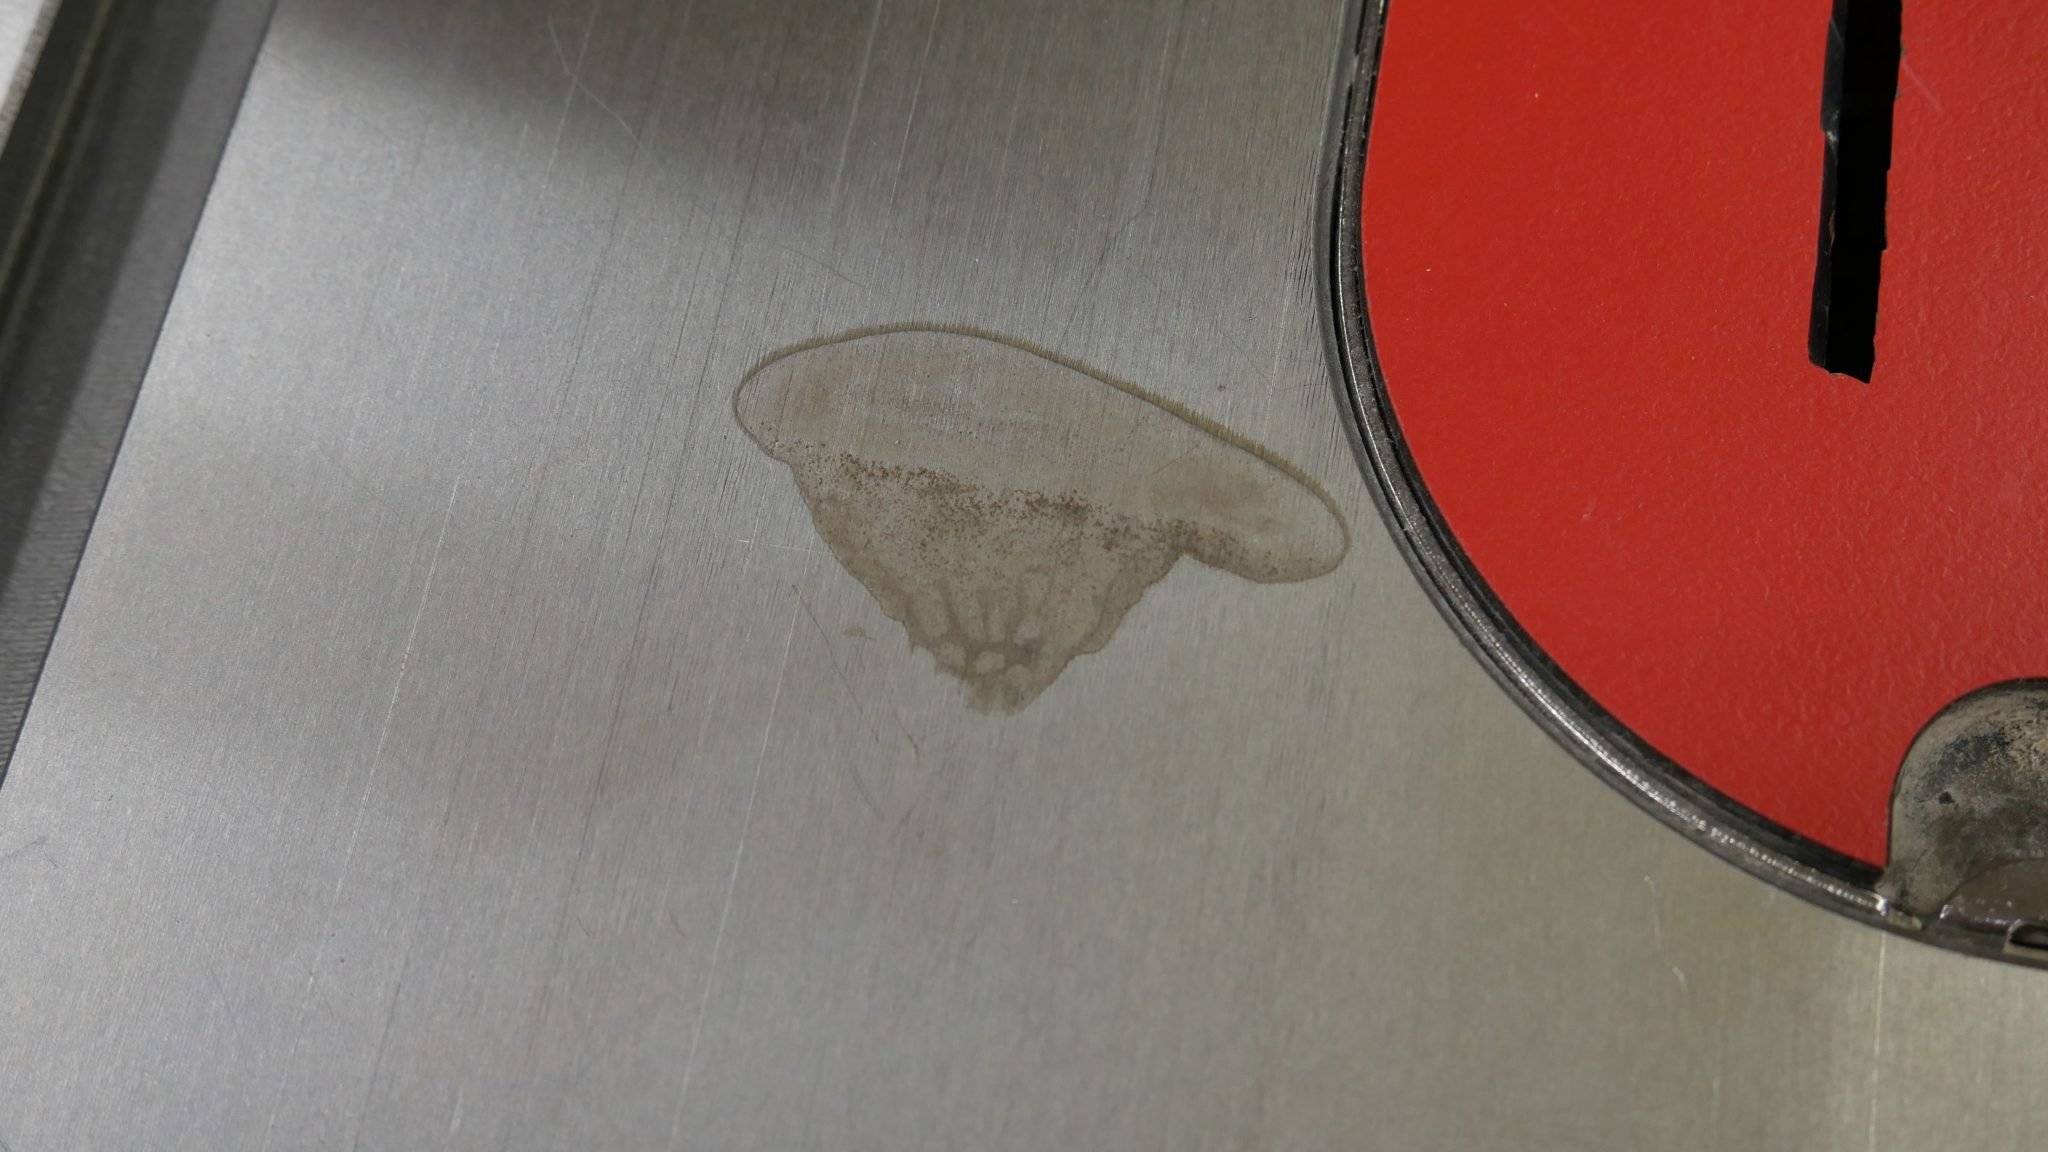
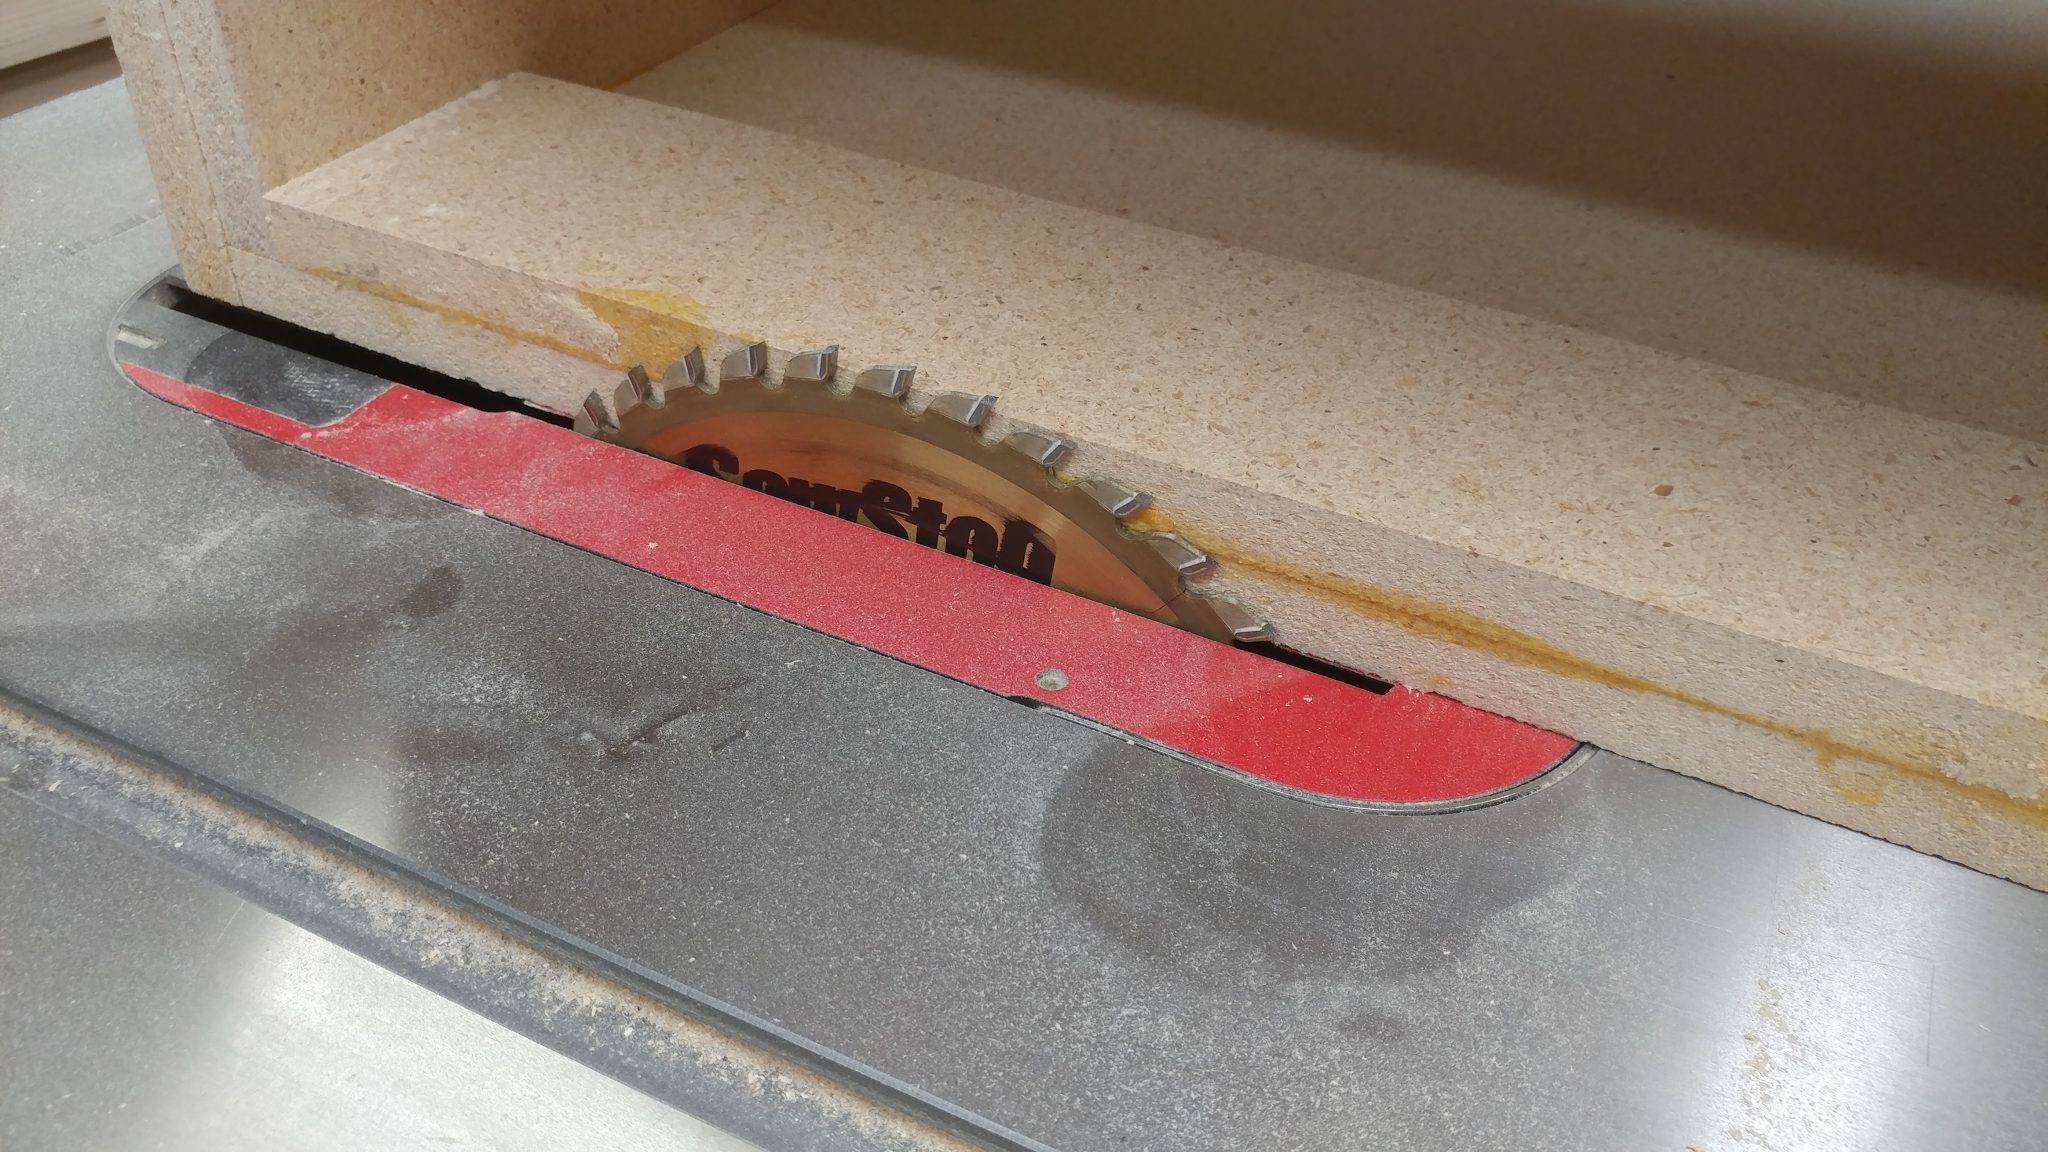
When the saw leaves the factory, it ships with a standard-kerf blade, (actually, it’s .118″ rather than .125″, but definitely bigger than a thin-kerf blade which is .094″). However, as we already established, the riving knife is for a thin-kerf blade. To make this a non-issue, the riving knife is centered on the blade, as shown below.

Full kerf blade with riving knife

The thing about left-tilt saws is that the blade mounts onto the arbor shaft from the right. This means that the left side of the blade is constant. It never changes. All of the change happens to the right, which is where we usually have the fence.

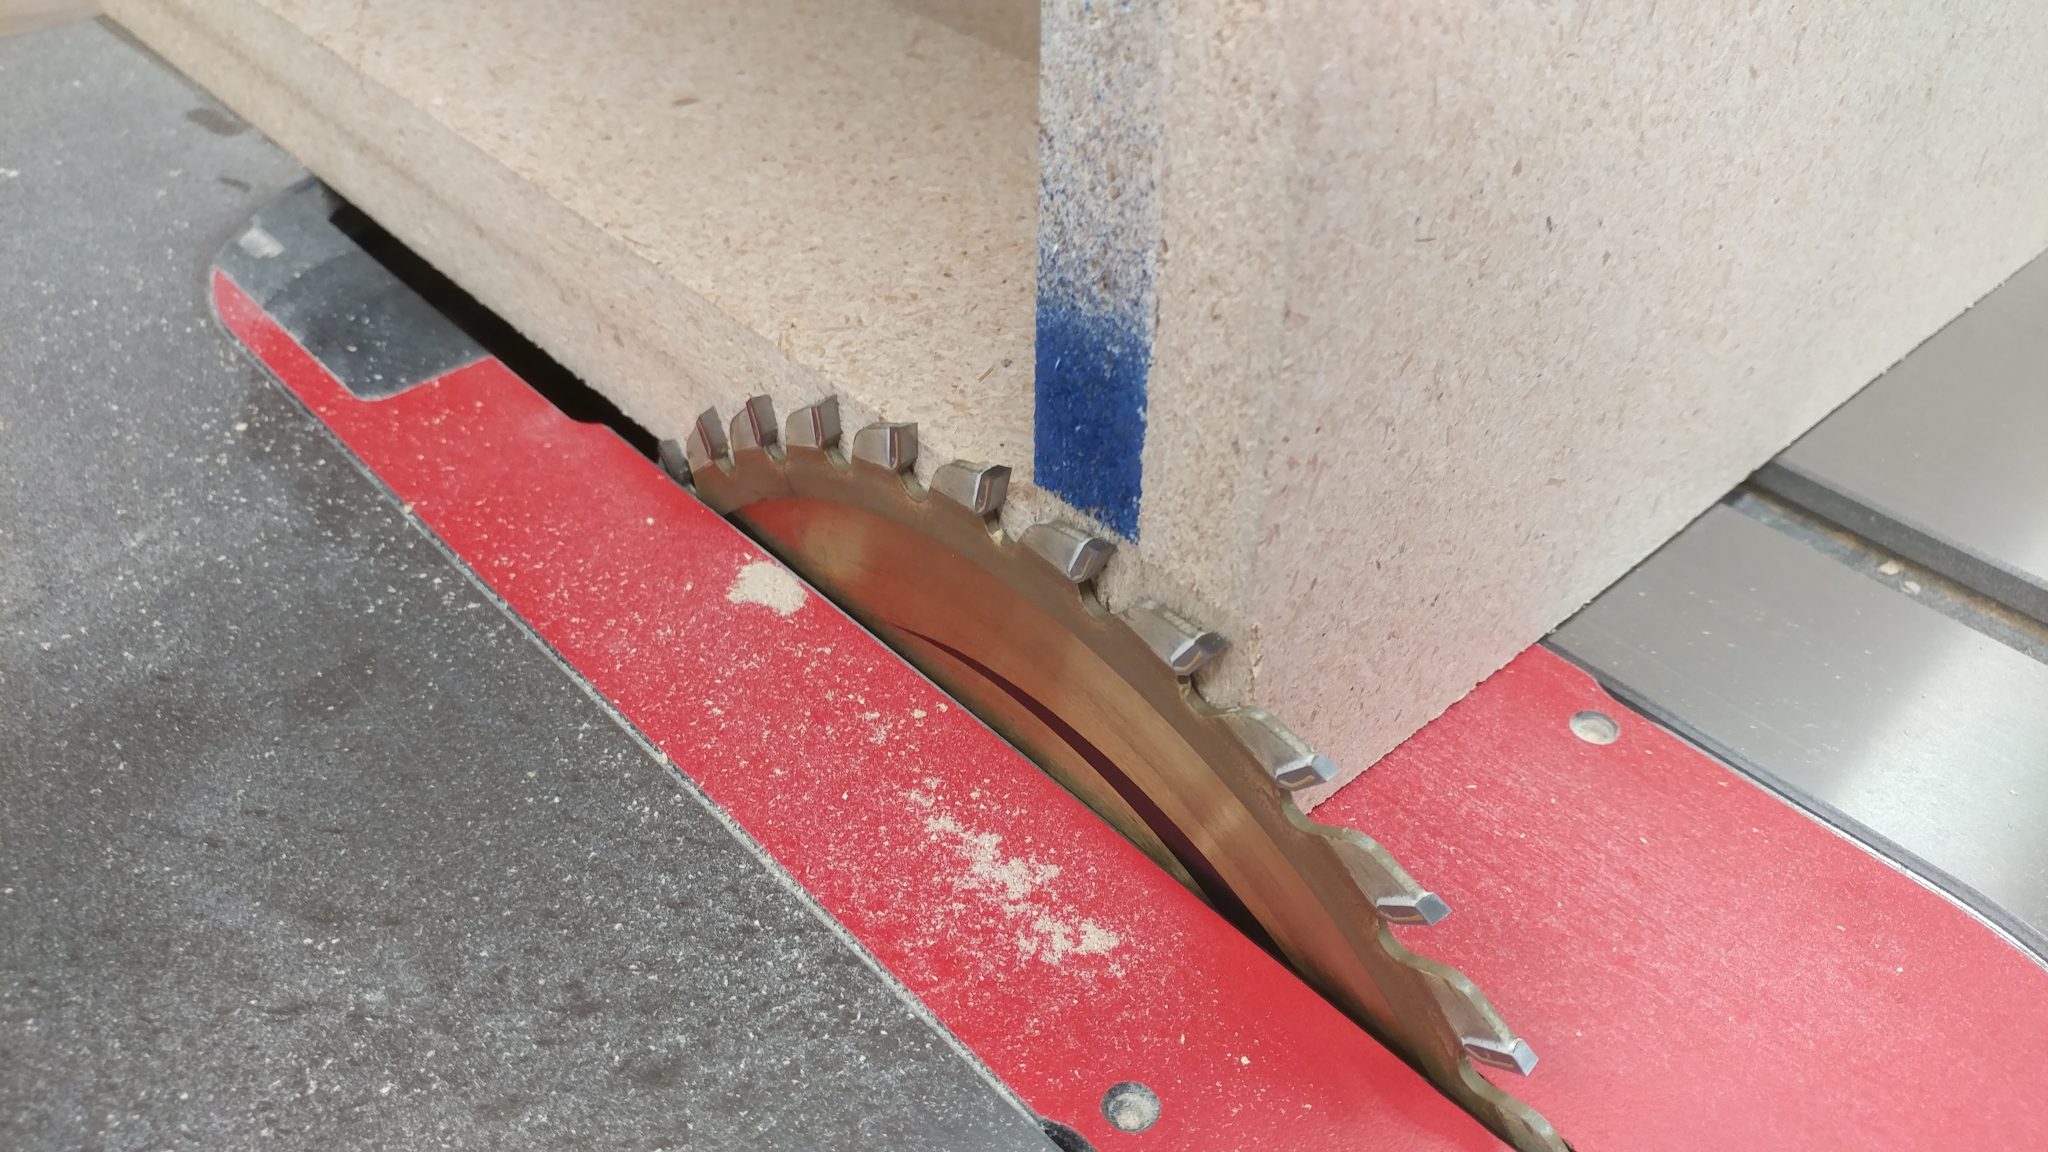
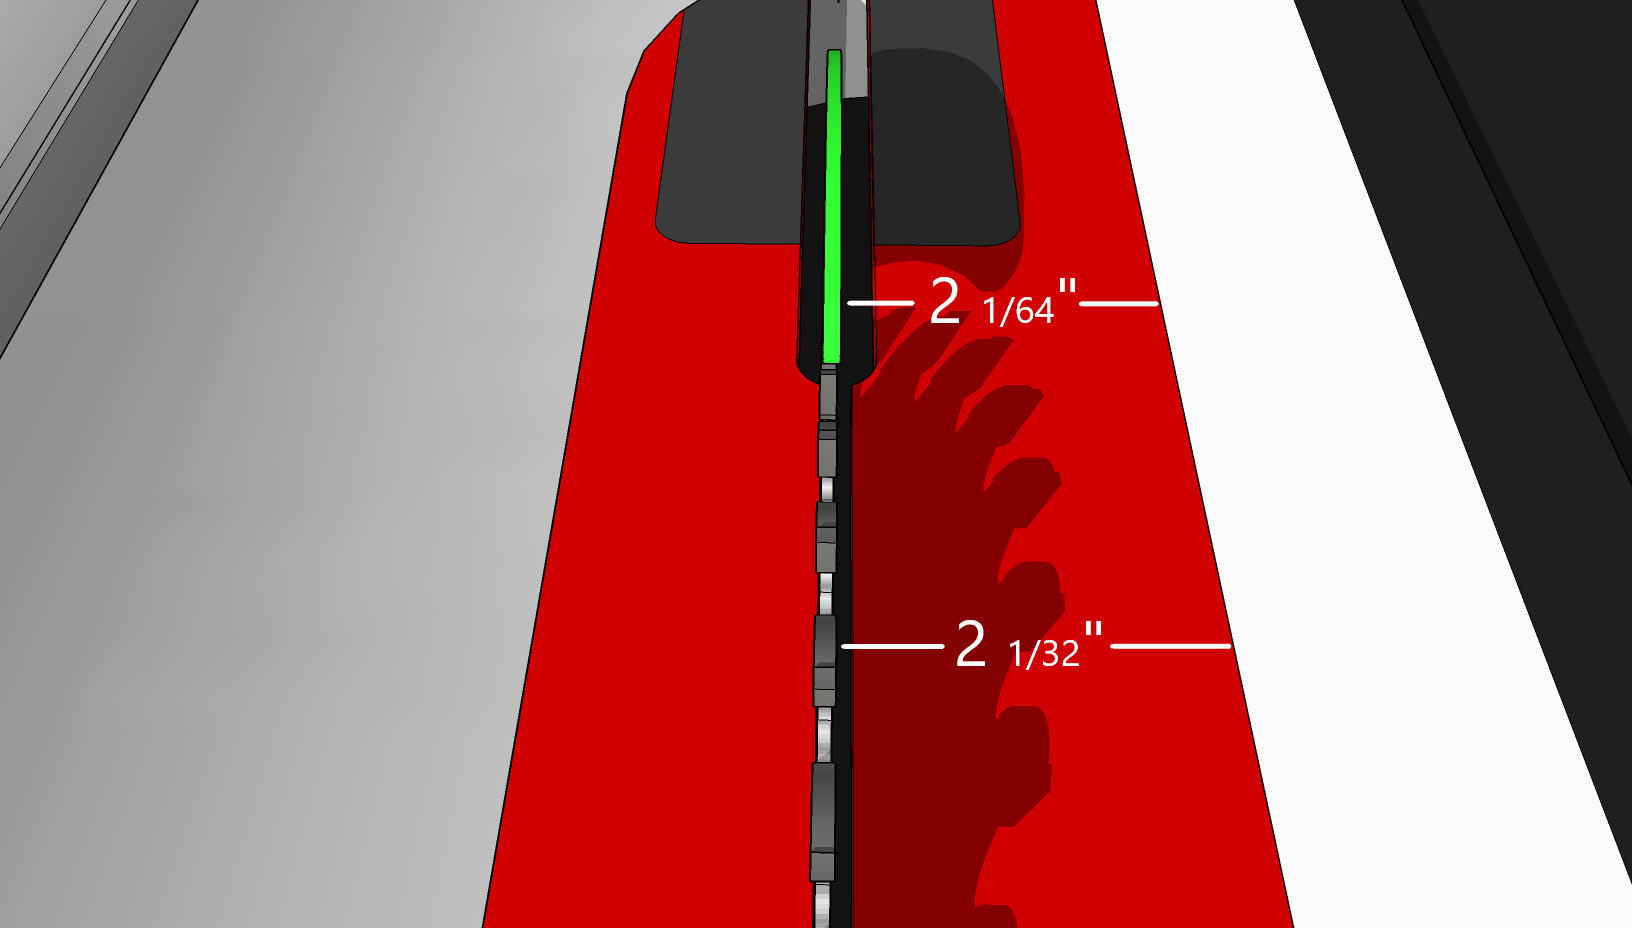
See where I’m going with this? If the riving knife is centered on a 1/8″ blade then that means that the blade is 1/64″ wider than the riving knife on both the left and right. If you change to a thin-kerf blade, then you are taking 1/32″ off the right of the blade, but nothing on the left. This means that the riving knife now sticks out 1/64″ to the right, making the space between the riving knife and the fence 1/64″ narrower than the space between the blade and the fence. You’re now trying to slide a board through a space that is too narrow for it. This causes the binding you are experiencing.

Thin-kerf blade with riving knife

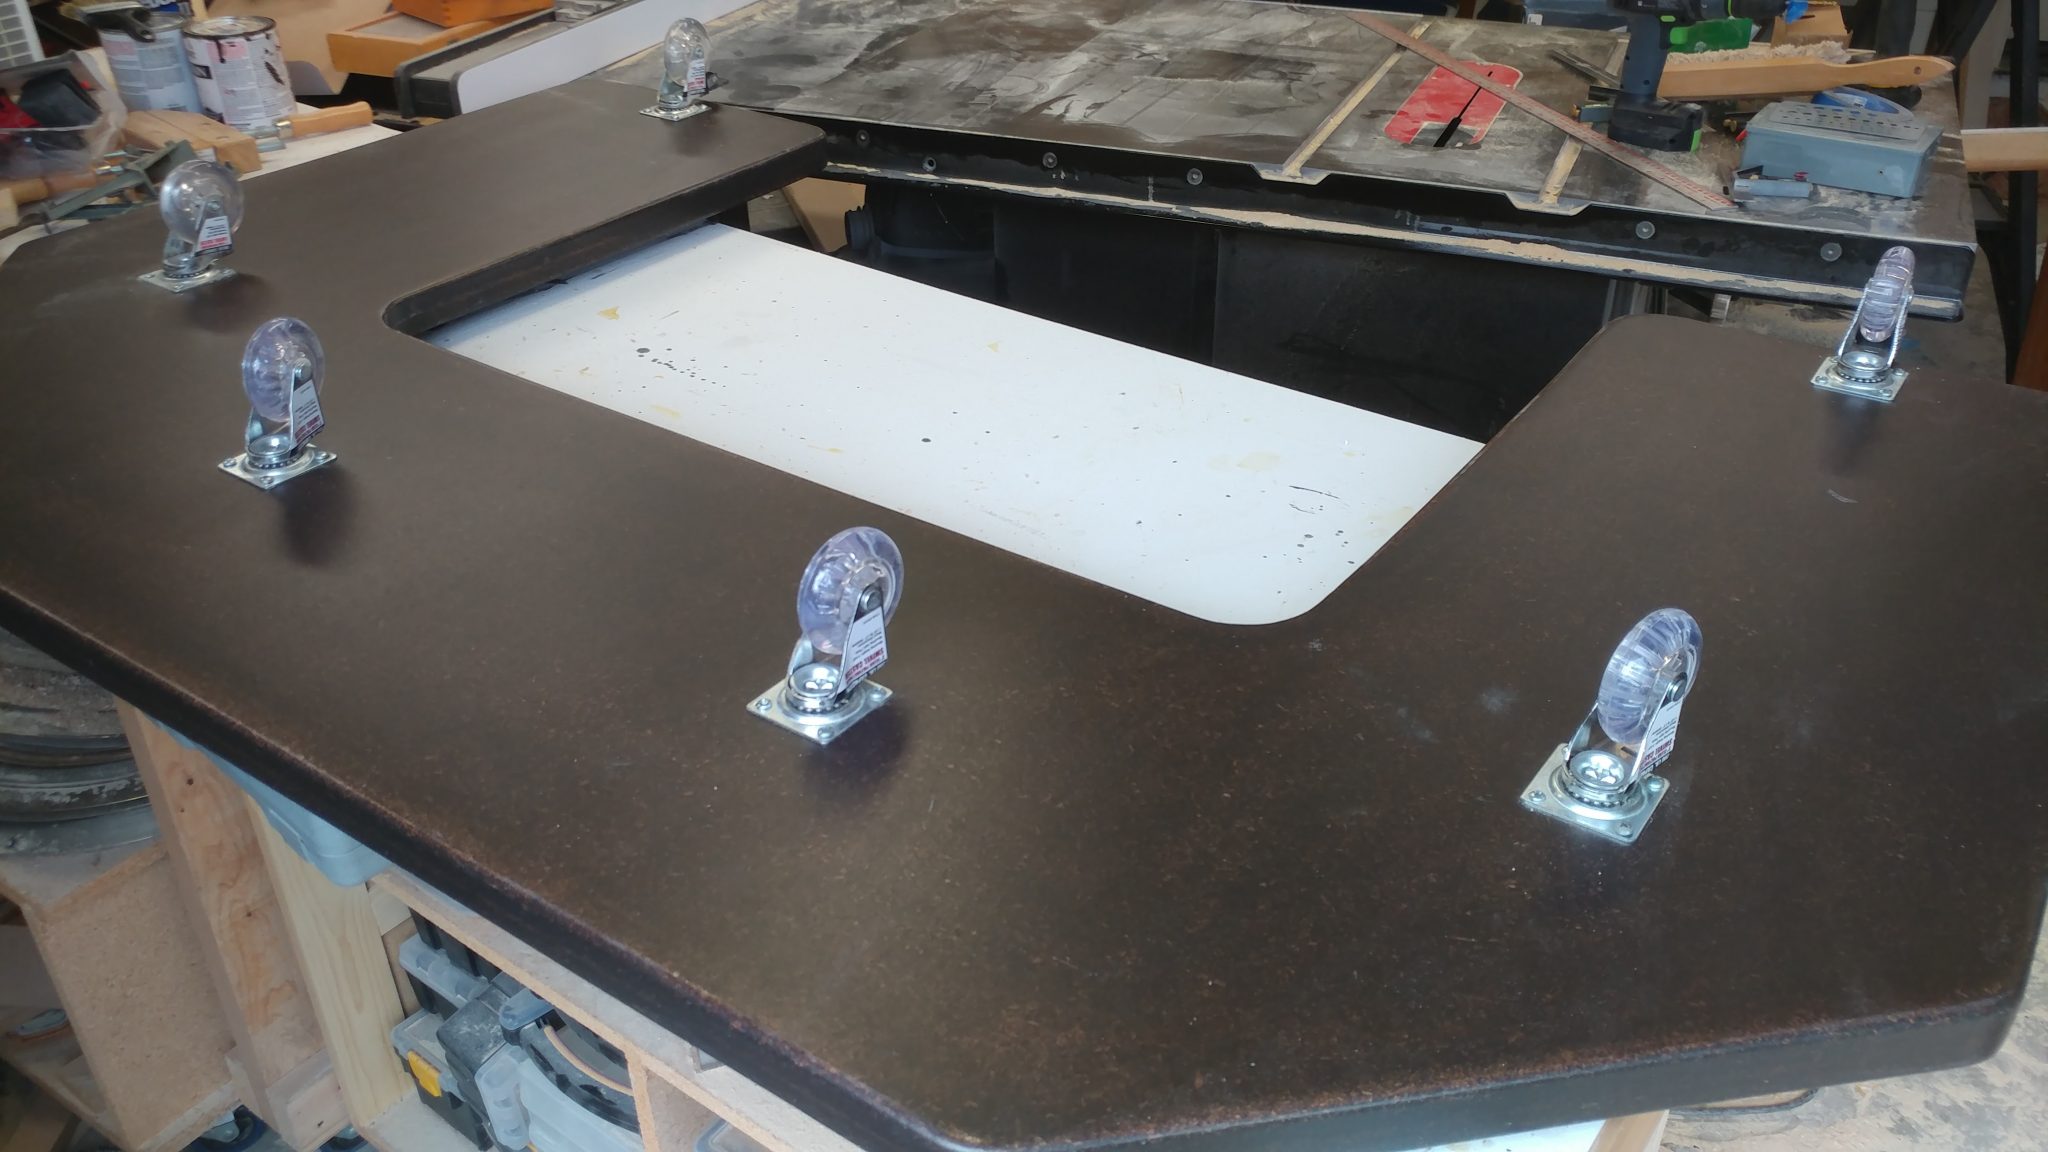
To actually fix this issue, you should slide the riving knife 1/64″ to the left. Your saw may be different, but here’s how to adjust this on a SawStop.

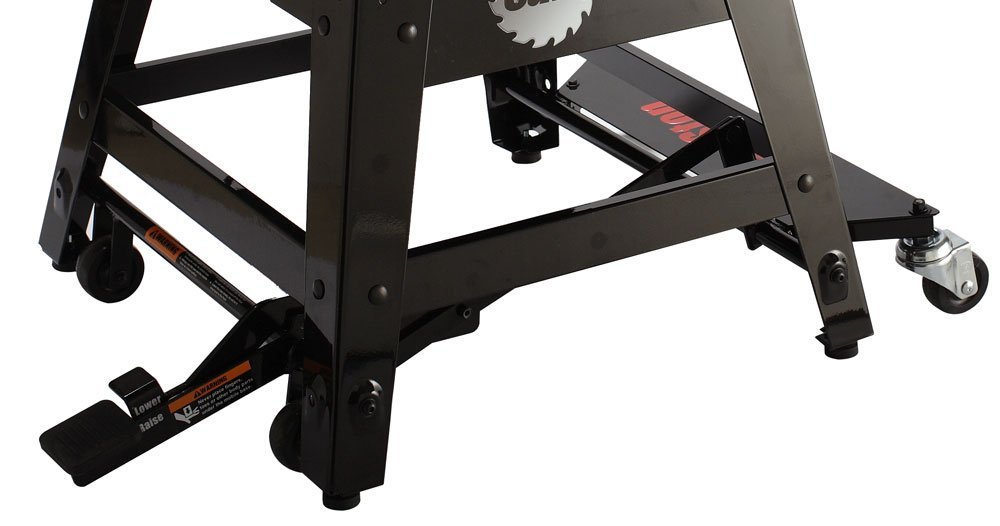
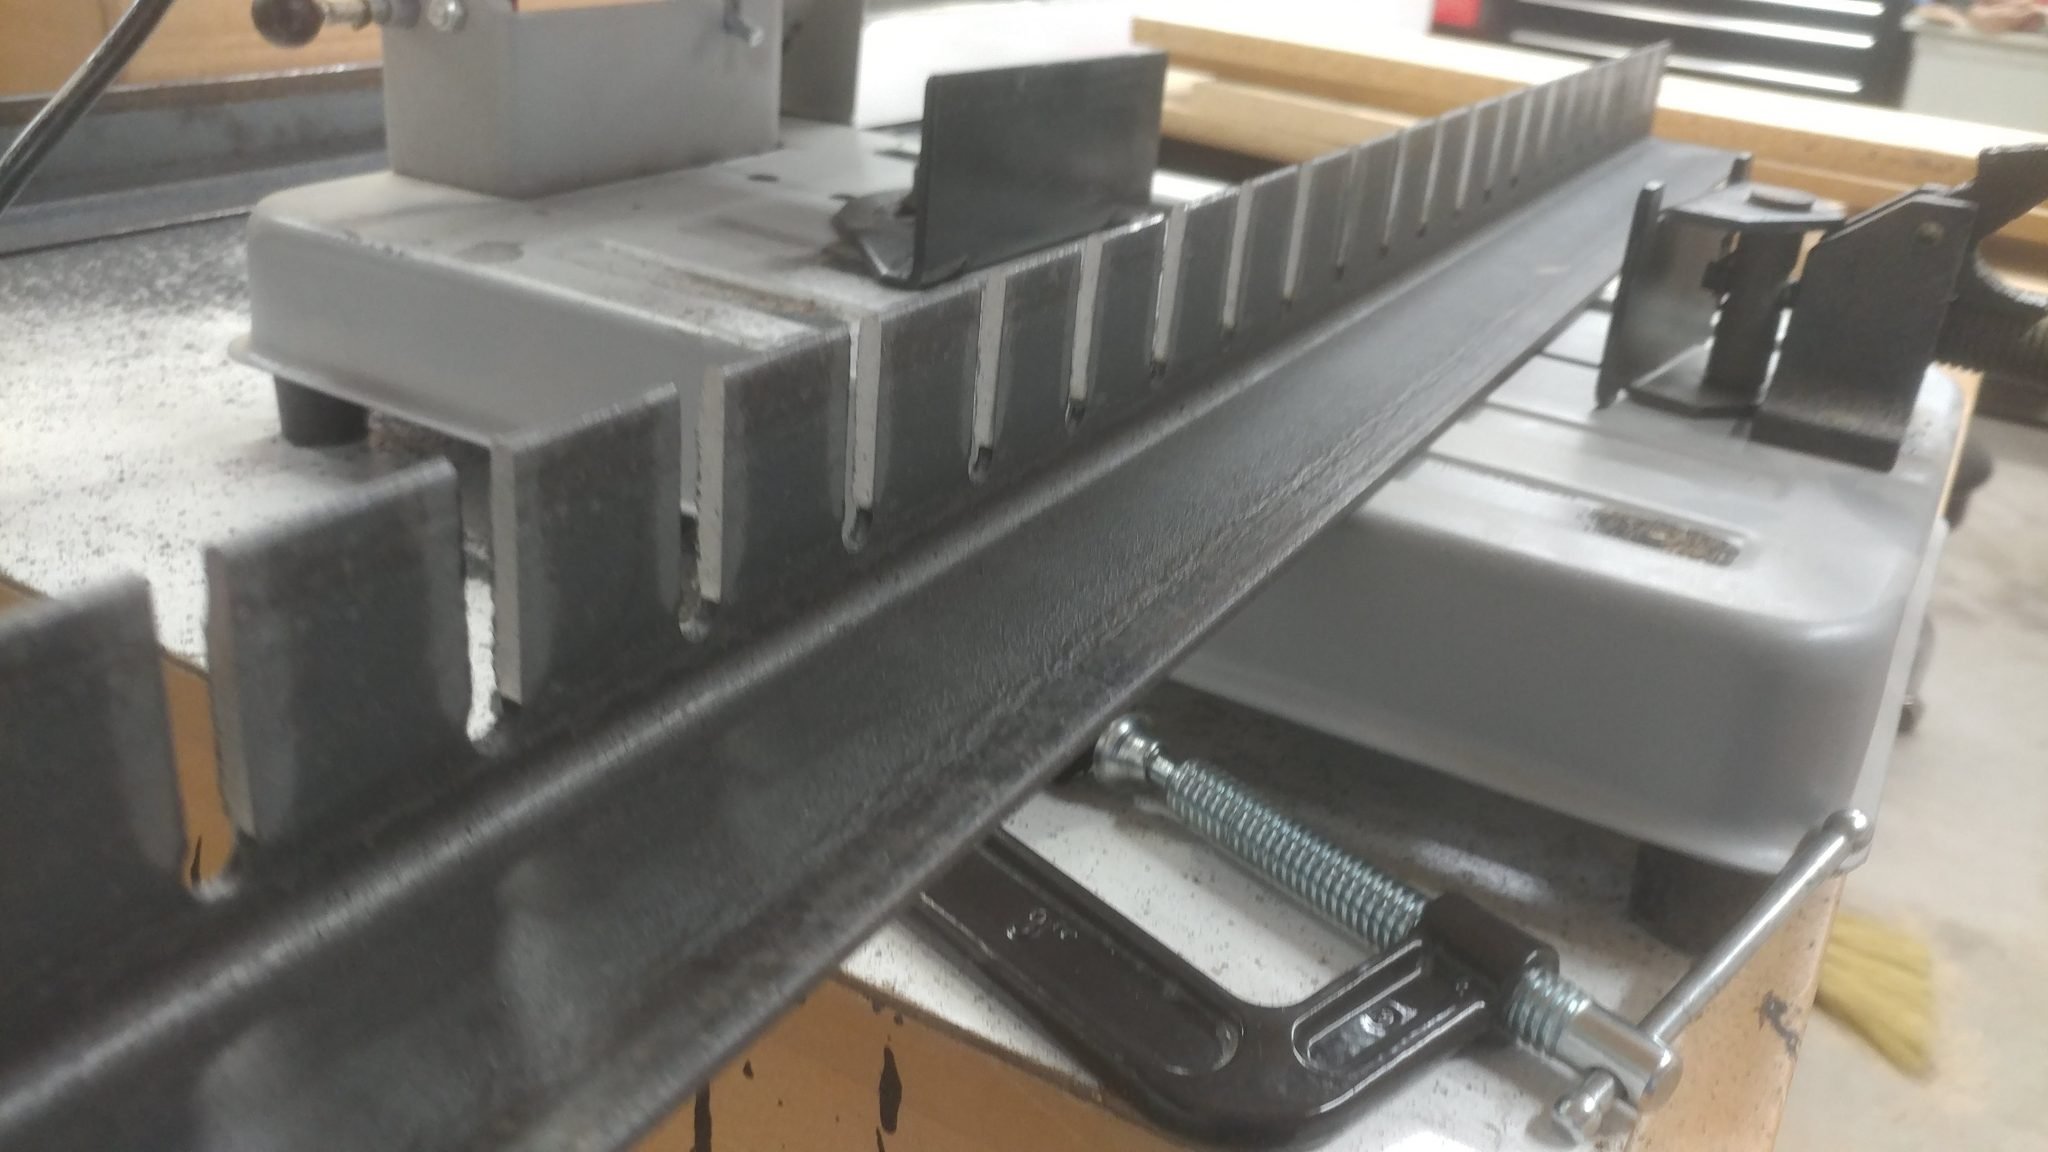
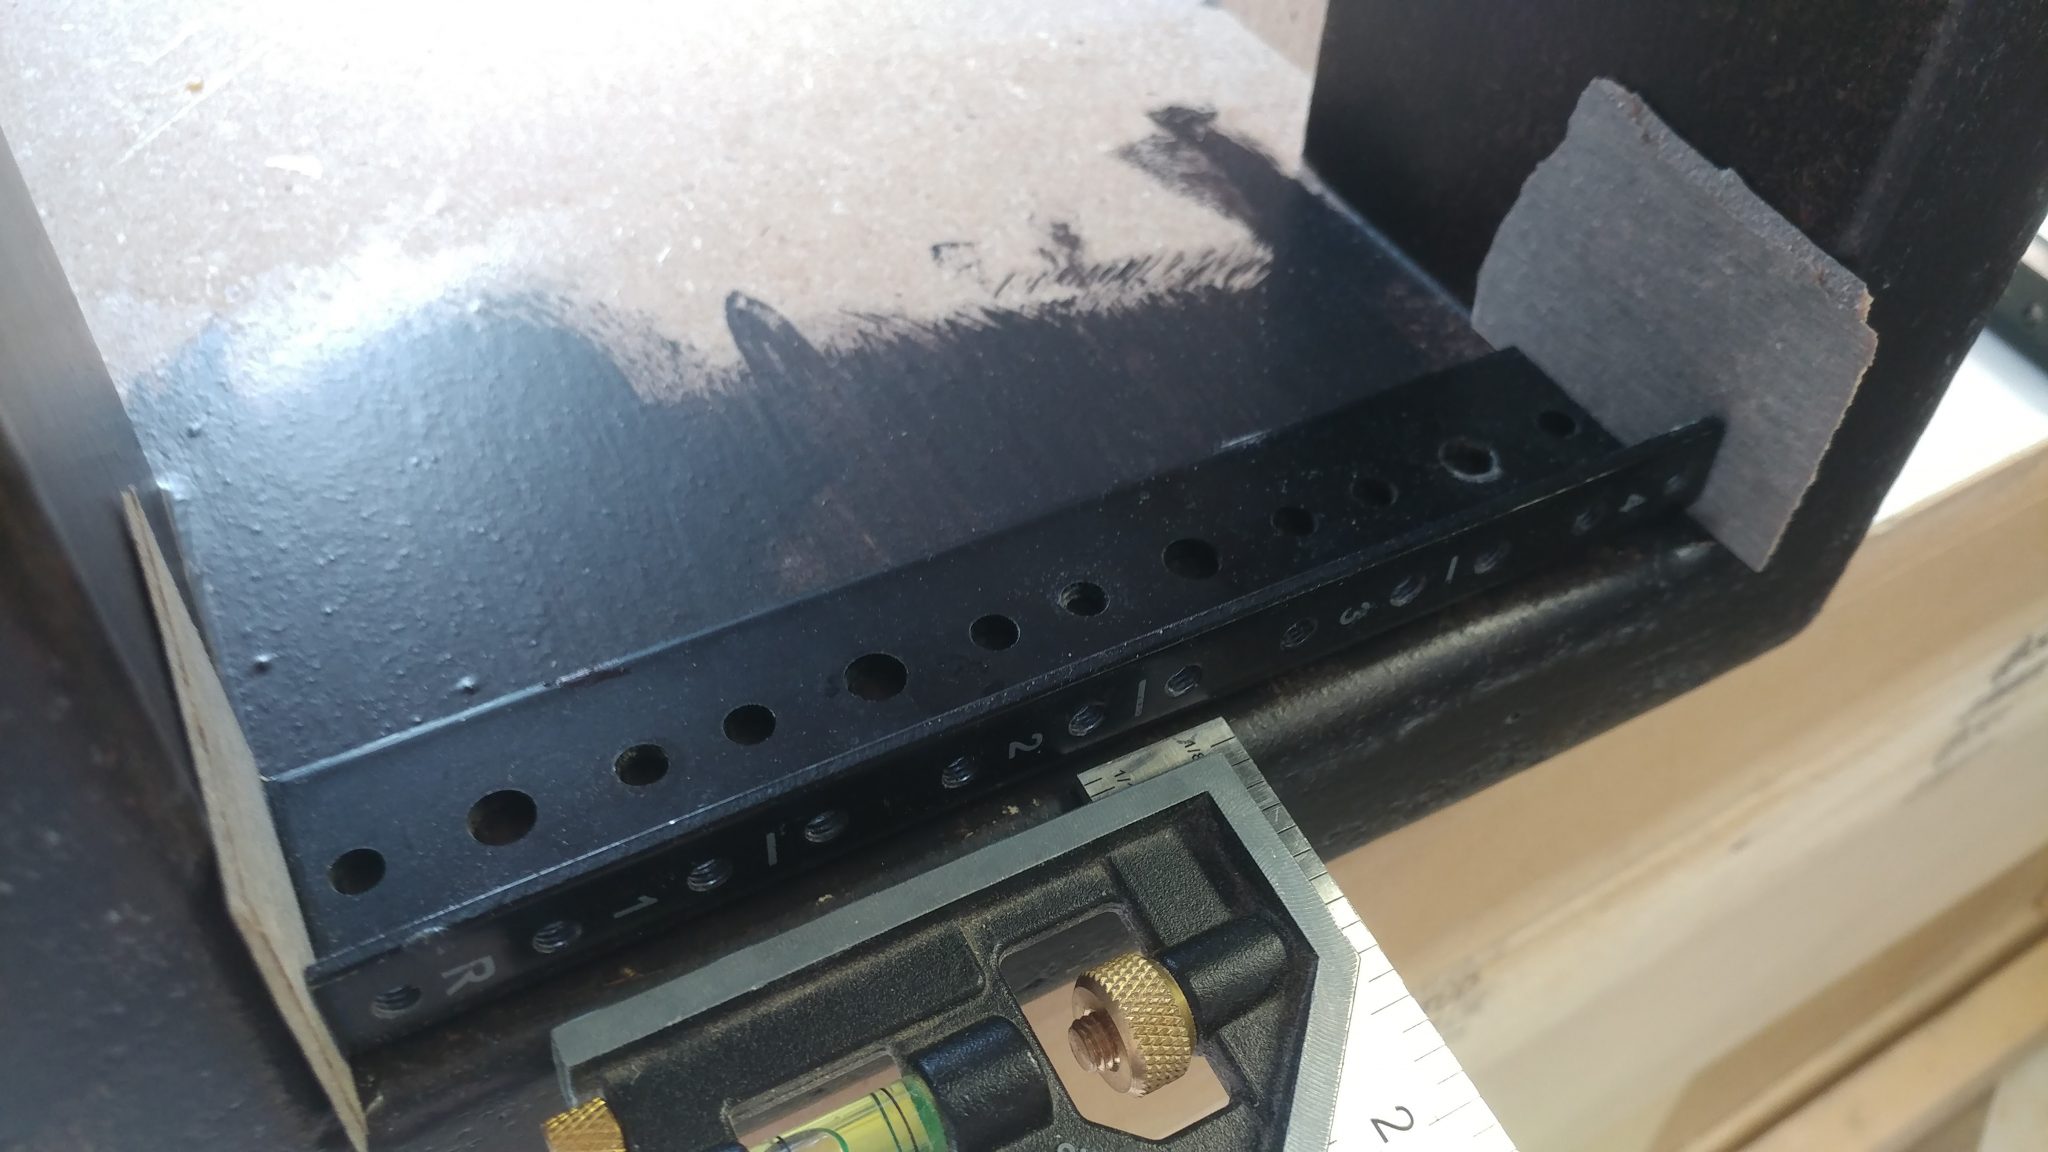
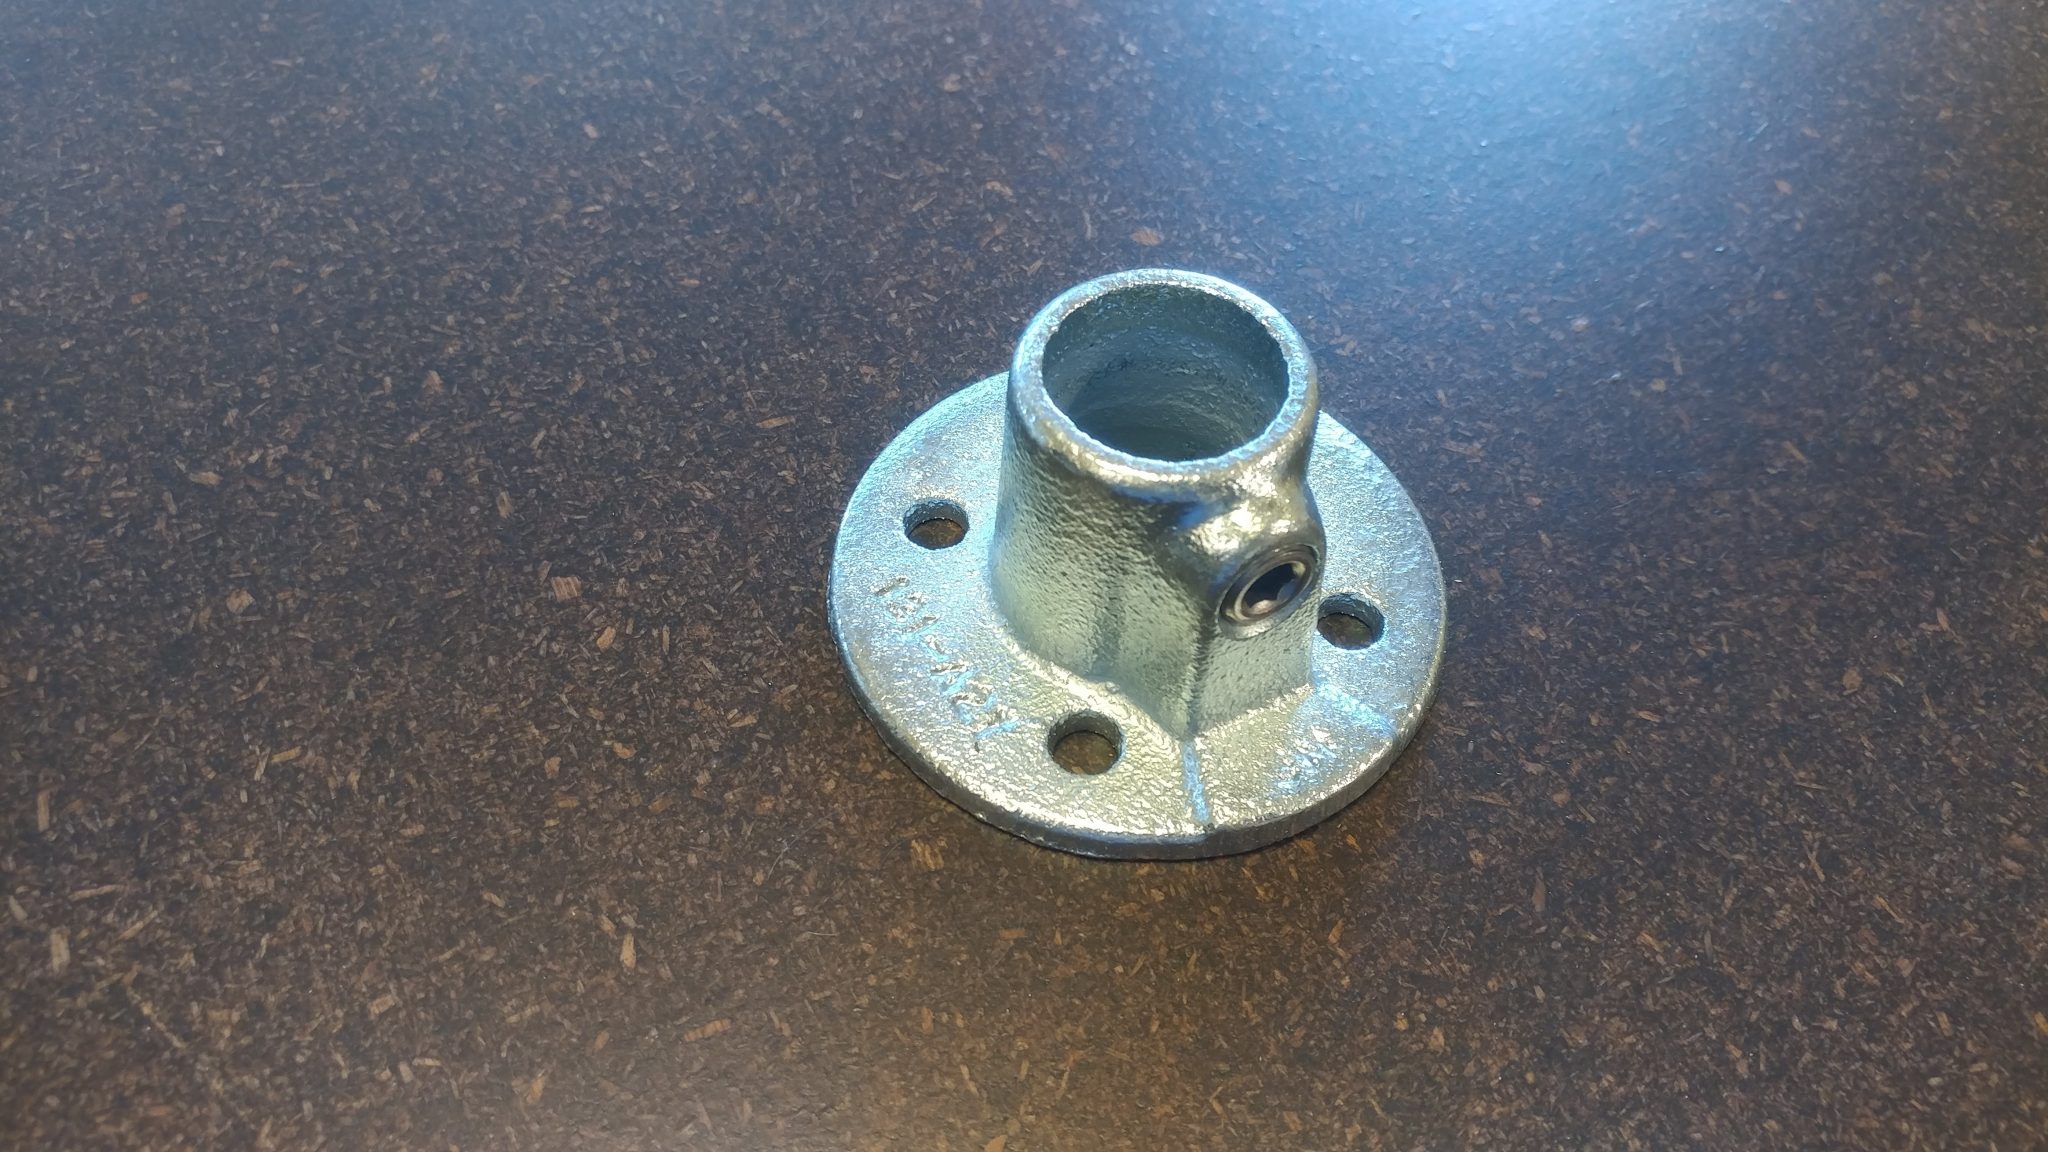
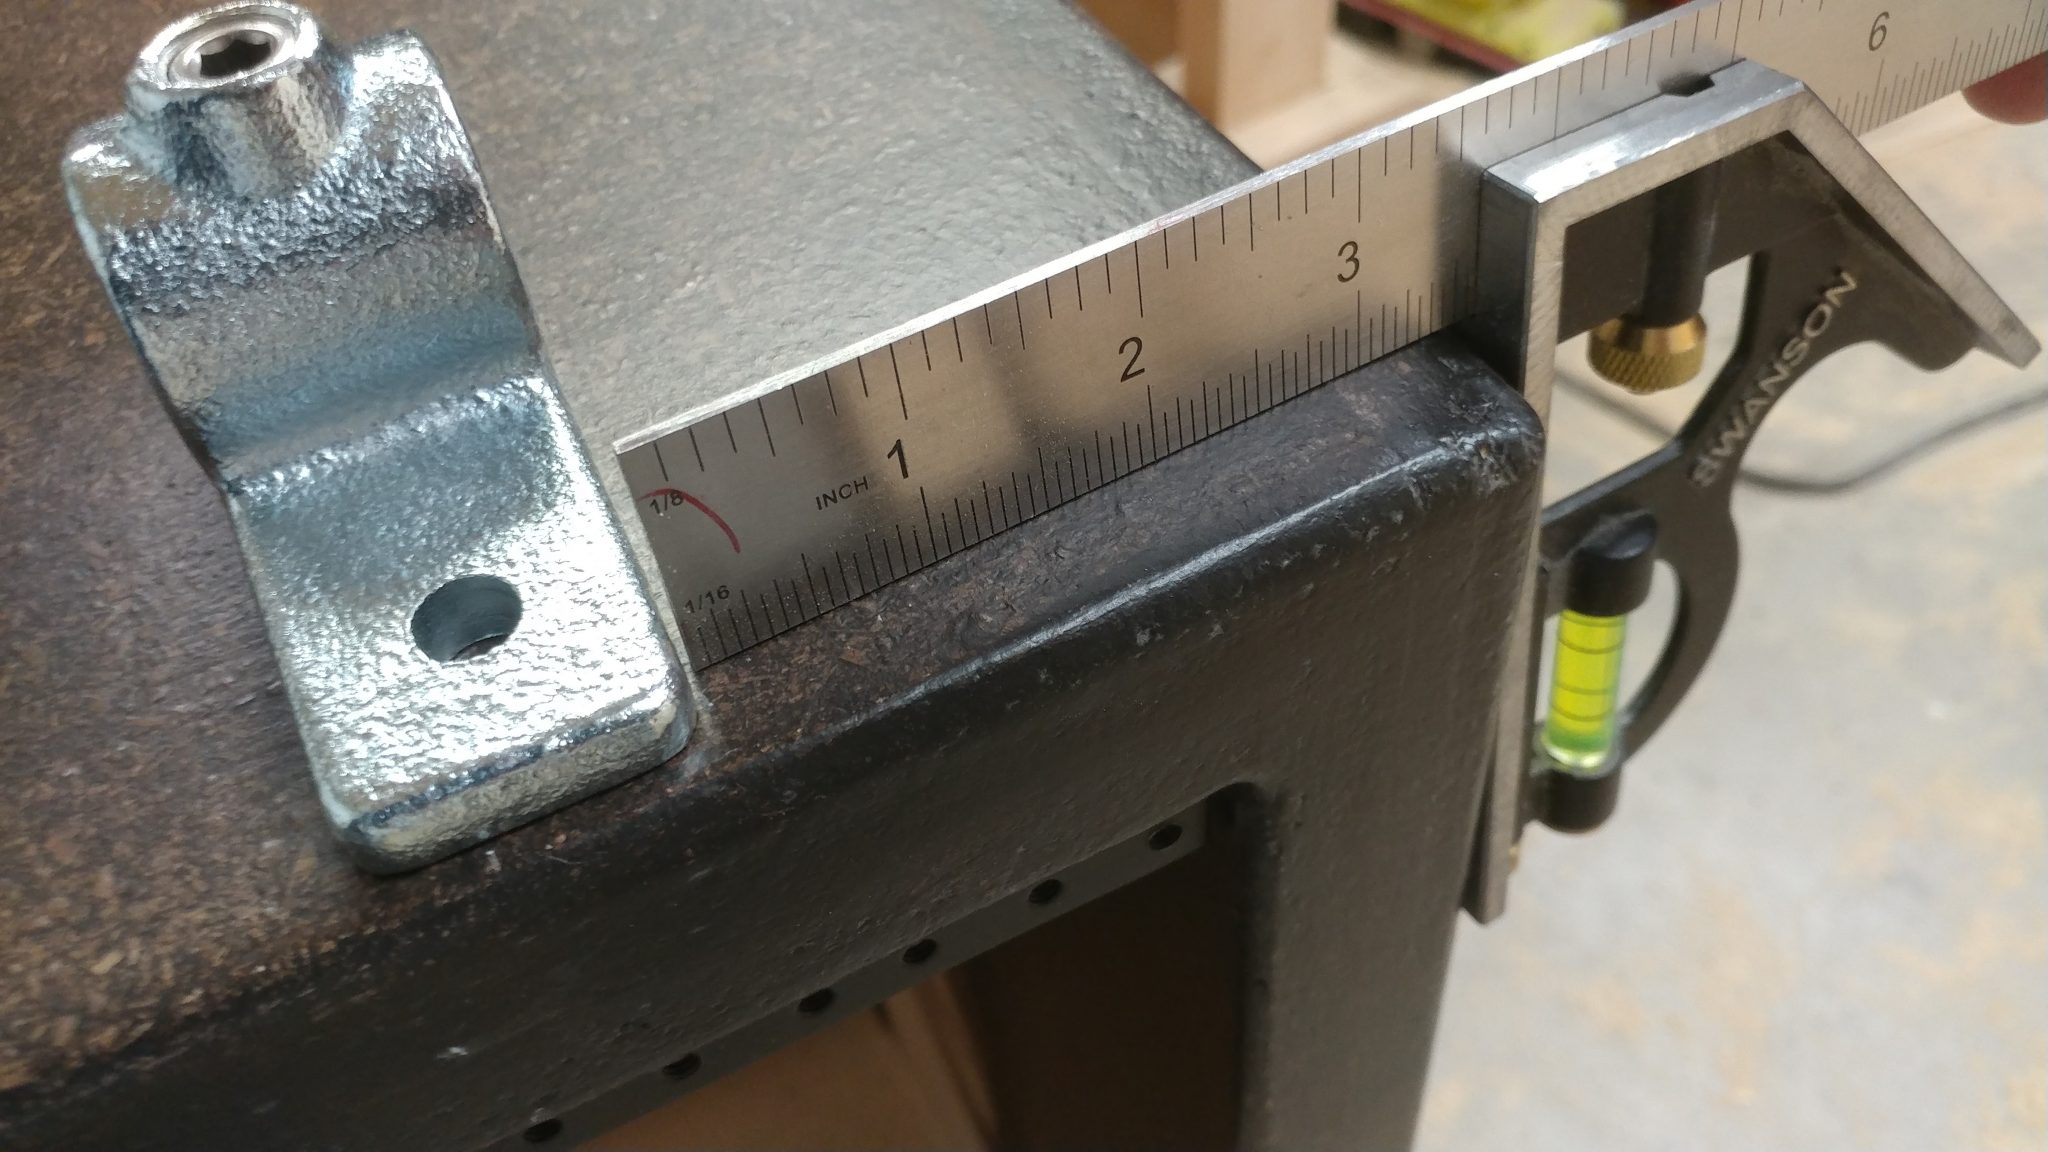
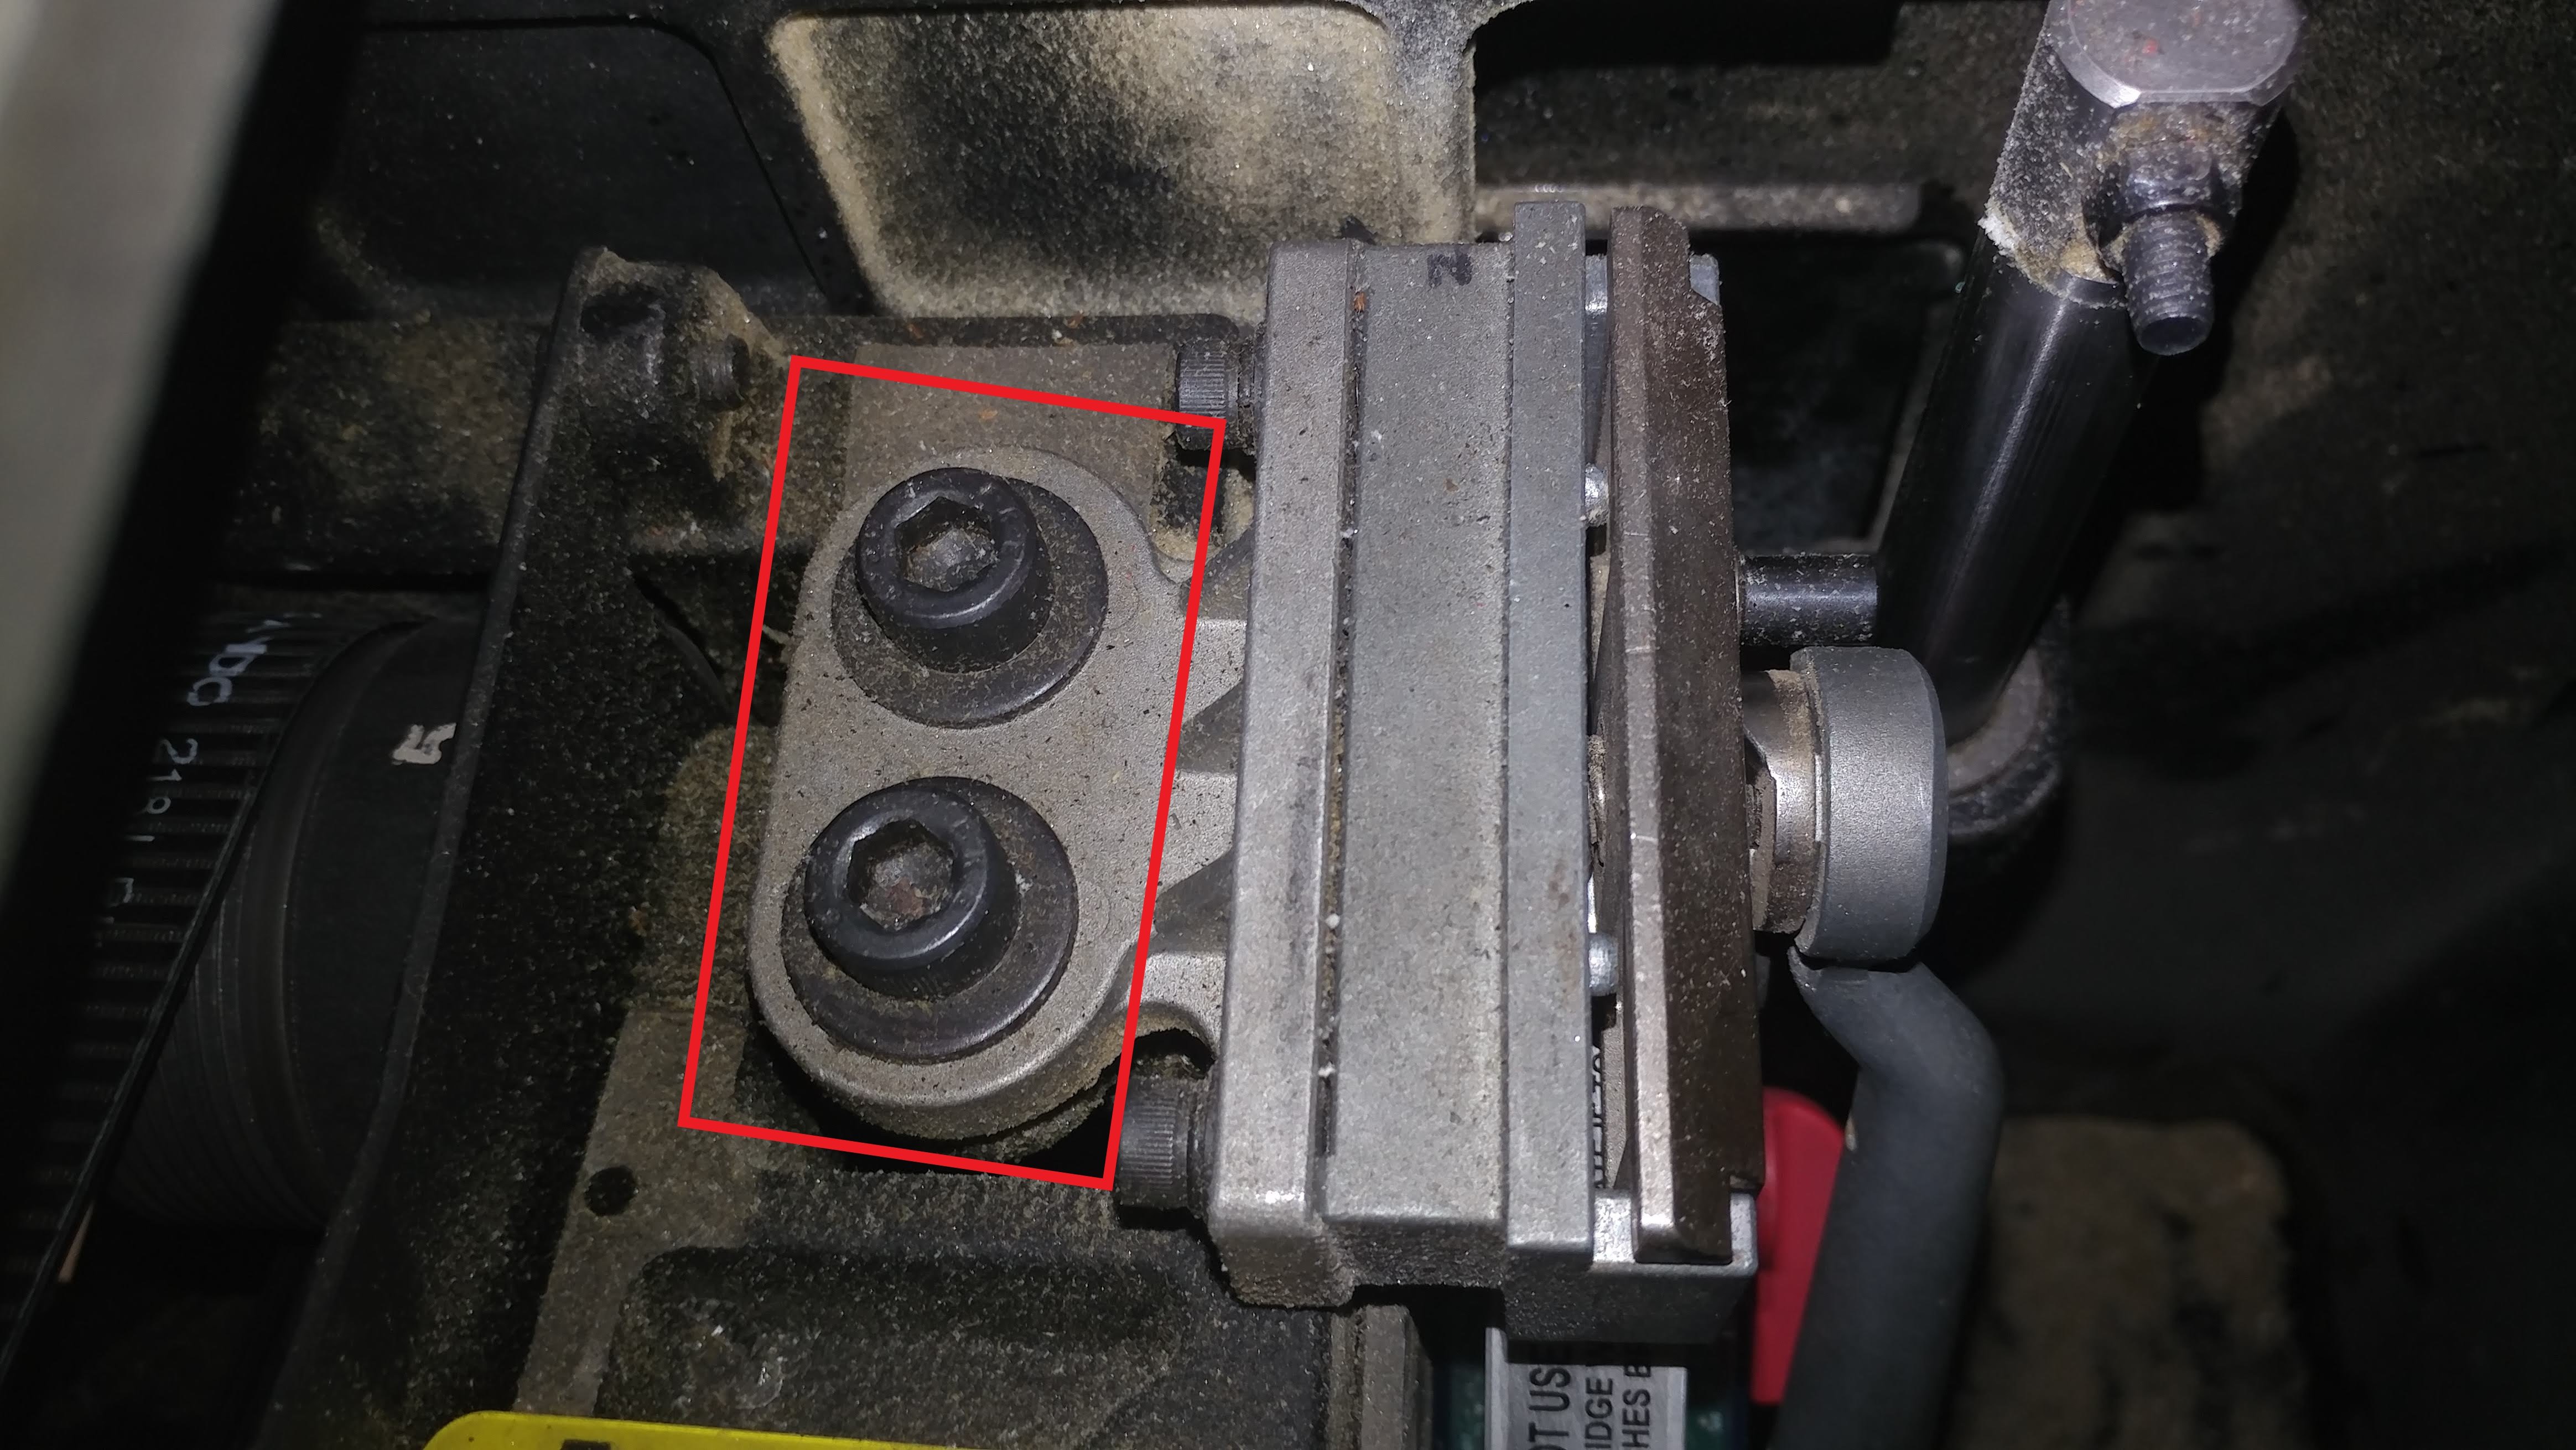
On any of the cast-iron SawStop table saws, there is a pair of 8 mm cap screws that adjust the horizontal positioning of the riving knife or splitter. Slimply loosen these slightly and nudge the clamp a little to the left. It’ll take some back and forth but the end result you are shooting for is for the left face of the riving knife to be co-planer with the left face of the blade, and for the right face of the riving knife to be no closer to the fence than the right face of the blade.
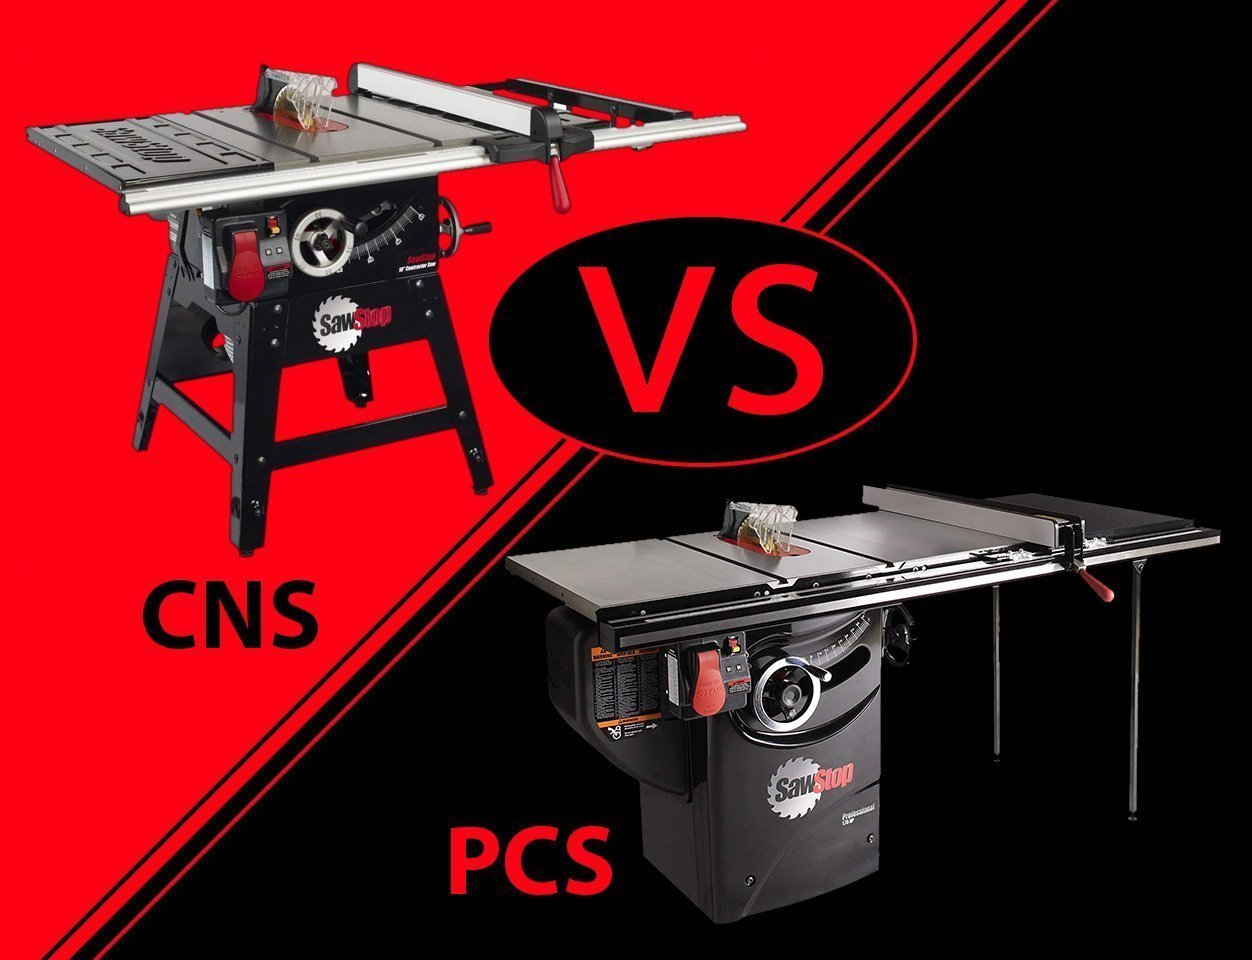
PCS

CNS or ICS

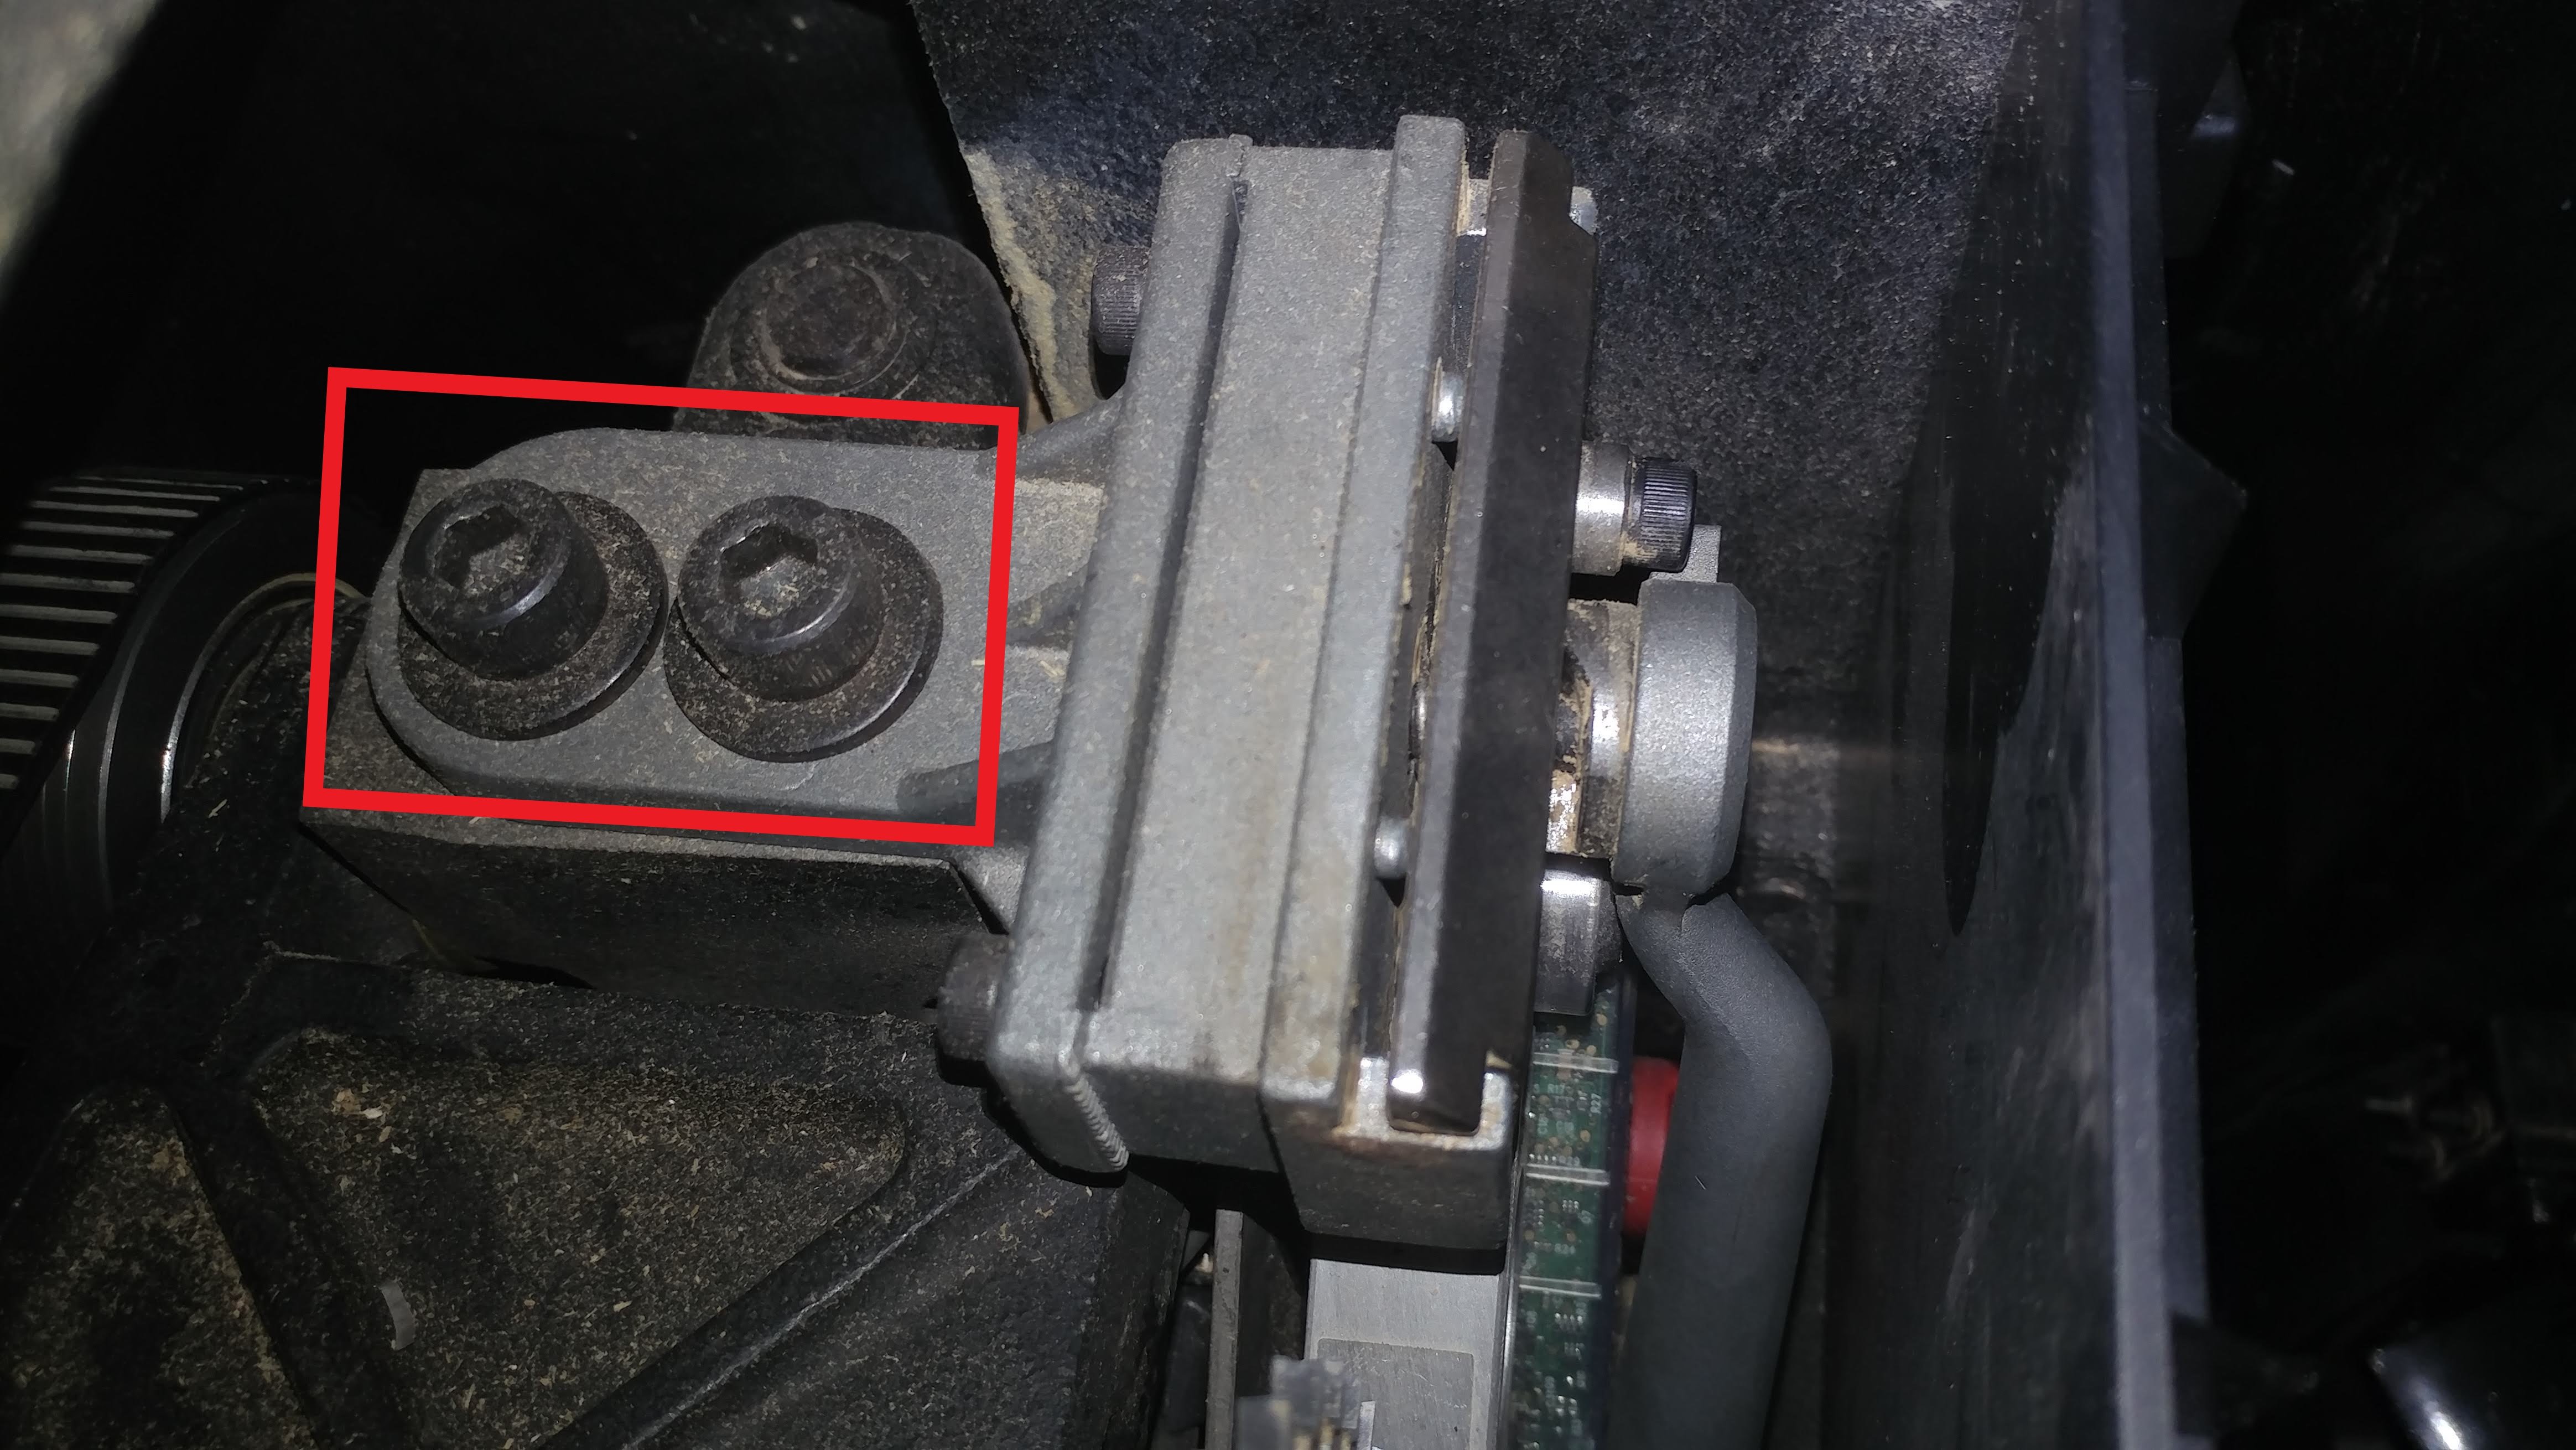
Tip: Since you have to come at these bolts at an angle, use a ball-end allen wrench, such as the one provided with your saw that you would normally use to adjust the spacing between the brake and blade.

Conclusion

As you can see, there isn’t any real reason you would need to get a 2.0 mm riving knife, even when using thin-kerf blades. I feel that it’s always best to address the real problem rather than look for an easy workaround.

I hope this has been helpful. If you feel like I should add anything, please feel free to leave a comment below. Also, I encourage you to share this article with anyone who is considering using thin-kerf blades with their table saw.

News – July 30th, 2019 – Teaching, Filming, and Turning

Teaching

I recently got to teach a class on Router basics. Other than it having to be rushed due to the time constraints, it went well. I’ll be converting the documentation for this class into a post on this website, much like I did with my Dado Information class.

I was also working on a beginning woodworking class for Skillshare but life got in the way and I wasn’t able to finish it before the deadline. While making the class, I realized that the subject matter was much too broad for the amount of time I had to put it together. I’m still going to put together some Skillshare classes but I’m going to have them be more focused and less broad.

Filming

I’m working on a video that will walk through how I am making a small 8″ snare drum using stave construction. I filmed Day 1, which ended up covering everything up to the glue-up. As the glue was curing, I started editing the video. That’s where I discovered a pretty big problem.

Lets see if I can explain this…

My snare drum is going to consist of 16 staves. A circle, as you are aware, has 360 degrees. which divided by 16 is 22.5. This amount gets divided by two, since the staves will each have two sides, so each edge needs to have an 11.25 degree bevel.

Still with me?

Now, I use a digital angle gauge. I first square it to the table, then attach it magnetically to the blade. When I do that, it changes from 0-degrees to 90-degrees. This means that when I angle the blade, I need to set it to 90-degrees minus 11.25 degrees. This comes to 78.75 degrees. I knew this, but for some stupid reason (probably because I was distracted with trying to get this on video) I accidentally set it to 79.75 degrees. This makes each edge of each stave one-degree off, which multiplied by 32 edges comes to a total of a 32 degree gap for the drum shell.

Of course, being an idiot I just assumed that the glue was making things too tight so I clamped it down and didn’t think much of how off my measurements were. I didn’t notice the actual problem and its cause until I was editing the video. By this point, the glue had pretty much cured so there wasn’t anything I could do about it.

It’s time to start from scratch, being a little more careful this time.

As a present for you, since you’ve been so patient with me sharing this story, I’ve decided to upload the edit of the video I shot. Keep in mind that it’s a very early update. I was leaving room for a voice-over in parts so some of the shots are too long since I was going to edit in the voice-over then cut as the video to work with the audio.

Turning

I’ve been doing a good amount of woodturning lately and I’ve been getting into bowl-making, which although I’ve been turning for years, I never really got into. Below are some examples of my turning experiments.

One downside to bowl-turning is that I really don’t have anything to do with these. I don’t have a desire to place decorative wooden bowls around my house and most of these don’t have a food-safe finish so they’re not really functional. This is why I wasn’t really interested in bowl-turning in the first place. I like that I’m learning some new techniques but I suspect that I won’t be making a whole lot more bowls.

Choosing a SawStop – Contractor VS. Professional

Share this article…

Choosing a table saw for a home shop can be frustrating.  Especially for the more advanced home shop. While I can’t tell you which saw will be best for you, I can help you decide for yourself.

I want to discuss the differences between the SawStop Contractor Saw (CNS175) and the SawStop Professional Saw (PCS175 and PCS31230).  I’m going to take the approach of looking at what may be important to you and address them in turn. If I have failed to cover something that you consider important please let me know in the comments below and I will update this article.

Keep in mind that this particular article is only discussing the differences between the CNS and the PCS saws. I will write separate articles discussing the JobSite Saw (JSS) and the Industrial Saw (ICS).

My Recommendations

Don’t have time to read and just want to know my personal recommendations? Well, here you go…

Casual Hobbyist

Weekend Warrior

Serious Home Woodworker

With that said, let’s get started with the details.

Portability

All SawStop saws can be made portable to a certain degree.  The ultimate in portability is the JobSite Saw, but in the early days before SawStop made the JobSite Saw, the Contractor Saw was the go-to option for portability.

Mobile BaseCNSPCS
MB-CNS-000
Contractor Saw Mobile Base
X
MC-CNS
Contractor Saw Mobile Cart
X
MB-PCS-000
Professional Saw Integrated Mobile Base
X
MB-PCS-IND
Industrial Mobile Base with PCS Conversion Kit
X

Contractor Saw Options

The CNS has two mobility options: the Mobile Base and the Mobile Cart.

CNS Mobile Base

https://amzn.to/2BLXIxu

The CNS Mobile Base uses two fixed and two swivel casters to move the saw around.  There is a weight limit with this mobile base so adding accessories such as a cast-iron router table may not be an option.

Pros:

  • Easy to maneuver compared to some other mobile bases.
  • Four wheels are very stable compared to three-wheel mobile bases by other manufacturers.

Cons:

  • Assembly can be difficult for some.
  • Two fixed casters are typical with most mobile bases but not as easy to maneuver as a mobile base with four swivel casters.
  • Doesn’t lift optional outfeed table.
  • Weight limits can make certain accessories technically incompatible.

MB-CNS-000 – Contractor Saw Mobile Base

CNS Mobile Cart

MC-CNS – Contractor Saw Mobile Cart

https://amzn.to/2BVRP0T

The CNS Mobile Cart uses two 10” solid rubber tires and two fixed feet.  It moves much like a wheelbarrow and works on rougher terrain, such as what you would find at a job site.

Pros:

  • Ultimate in maneuverability.
  • Designed to be fit through a standard doorway when the motor is removed.

Cons:

  • Doesn’t lift optional outfeed table.
  • Only compatible with the 30” or 36” fence system, not the 52”.

Professional Saw Options

The PCS has two mobility options: the Integrated Mobile Base and the Industrial Mobile Base with PCS Conversion Kit.

PCS Integrated Mobile Base

https://amzn.to/2LCyZ36

The Integrated Mobile Base is very similar to the CNS mobile base in that it uses two fixed and two swivel casters.  It shares the same pros and cons as the CNS Mobile Base as well.

Pros:

  • Easy to maneuver compared to some other mobile bases.
  • Four wheels are very stable compared to three-wheel mobile bases by other manufacturers.

Cons:

  • Assembly can be difficult for some.
  • Two fixed casters are typical with most mobile bases but not as easy to maneuver as a mobile base with four swivel casters.
  • Doesn’t lift optional outfeed table.
  • Weight limits can make certain accessories technically incompatible.

MB-PCS-000 – Professional Integrated Mobile Base

Industrial Mobile Base with PCS Conversion Kit

MB-PCS-IND – Industrial Mobile Base with PCS Conversion Kit

https://amzn.to/2BHhzO4

Now we’re getting serious! The Industrial Mobile Base uses four swivel casters which allow you to spin your saw in place. It was designed for the Industrial Saw which weighs almost twice as much as the Professional Saw so it can handle the weight of pretty much any accessory you can throw at it. It requires you to purchase and install the PCS Conversion Kit which modifies the Industrial Mobile Base to work with the slightly smaller PCS. Note: The link above contains both the mobile base and the conversion kit.

Pros:

  • Extremely easy to finely position your saw anywhere in your shop.
  • Strong enough to lift the PCS and any accessory attached to it.

Cons:

  • PCS Conversion Kit requires removal of screws with blue Loc-Tite on them, which can be difficult.
  • Will cause you to despise all other mobile bases you ever use.
  • Doesn’t lift optional outfeed table.

Extension Wings

Both the CNS and the PCS have cast-iron main tabletops. The CNS comes stock with a stamped steel 12″ extension wing on each side of the main table. This is because the CNS is designed to be portable and the stamped steel wings weigh quite a bit less than the cast iron wings that come standard with the PCS.

You have the option of adding the cast-iron extension wings to the CNS which increases the weight of the saw, resulting in less vibration.

Fence Options

Both the CNS and the PCS are available in a 30”, 36”, and 52” fence configurations.

Fence SystemRip
Capacity
CNSPCS
CNS-SFA
Contractor Saw Standard Fence Assembly
30″X
PCS-PFA
Professional Saw Premium Fence Assembly
30″X
TGP2-FRT36A2
36″ T-Glide Professional Fence System
36″XX
TGP2-FRT52A2
52″ T-Glide Professional Fence System
52″XX

CNS Standard Fence Assembly (SFA)

The 30” Standard Fence Assembly for the CNS is a lightweight aluminum fence system that secures at both the front and the back of the saw. Because of this, some accessories are not compatible with the 30” fence system.

Pros:

  • Lightweight, which may be important if using a CNS on a jobsite
  • Small footprint

Cons:

  • Not as sturdy as the T-Glide fence system
  • Limited to 30″ rip capacity
  • Face-plates are not replaceable

CNS175 with 30″ SFA Fence System

PCS Premium Fence Assembly (PFA)

The 30” Premium Fence Assembly for the PCS is similar to a Biesemeyer style fence that you find on larger cabinet saws. It secures to the front rail only. The faceplates for the PFA are non-replaceable.

Pros:

  • Very sturdy
  • Small footprint

Cons:

  • Not as sturdy as the T-Glide fence system
  • Limited to 30″ rip capacity
  • Face-plates are not replaceable

T-Glide Professional 36″ or 52″ (TGP2)

Both the 36” and 52” fence systems use a larger, more heavy-duty Biesemeyer style fence. It has replaceable faceplates.

Although the name has “Professional” in it, this system is also completely compatible with the CNS.

Pros:

  • Extremely sturdy
  • Allows up to 52″ of rip capacity
  • Face-plates are replaceable

Cons:

  • Larger footprint

Miter Gauge

The miter gauge for the Contractor Saw is similar to the one provided with the Professional Saw but there is one minor difference. The miter gauge for the Professional Saw has spring bearings on the side of the miter bar that work to ensure the miter gauge is always held firmly in the slot without any play to it.

The miter gauge for the PCS (above) and the CNS (below). Note the addition of spring bearings on the side of the miter bar for the PCS miter gauge.

Shop Space

The amount of space that each saw takes up can be misleading. While both the CNS and the PCS saws share the same table dimensions, the CNS has a motor that hangs off the back of the saw which adds to the amount of space that it takes up.

Saw ModelWidthDepthHeight
CNS w/ 30″ Fence58 ½40″34 ¾”
CNS w/ 36″ Fence69 ⅛”45″34 ¾”
CNS w/ 52″ Fence85 ¼ “45″34 ¾”
PCS w/ 30″ Fence61 ¾”31 ⅛”34″
PCS w/ 36″ Fence69 ⅛”33″34″
PCS w/ 52″ Fence85 ¼”33″34″

A few things to keep in mind: the height of the Contractor Saw is adjustable since it has screw-in feet at the bottom of each leg; the industrial mobile base adds an additional ¼ ” to the height of the saw.

Power (Horsepower)

Horsepower (HP)CNSPCS
1.75XX
3.0X

The Contractor Saw is only available with a 1.75 HP motor which can be wired for either 110 Volts A/C (VAC) or 220 VAC.  Whether it is wired for 110 or 220 doesn’t affect the horsepower at all. More in this in a little bit…

The Professional Saw is available in either 1.75 HP at 110 or 220 VAC, or 3 HP at 220 VAC only.  

If you’re going with the Contractor saw then you are pretty much limiting yourself to 1.75 HP, which may not necessarily be a bad thing.  

The Professional saw, however, adds the possibility of moving up to 3 HP.  This can be done when you initially acquire your saw by purchasing the PCS31230 or it can be done at a later date by purchasing a PCS175 then buying a new motor and contactor box when you decide to do the upgrade.  This option is more expensive than just buying the PCS31230.

Is 3 HP necessary?  Not necessarily. I’ve used 1.75 HP saws for years without any problems, you just need to know how to work within those limitations.  If you’re making cabinets and spend the bulk of your time cutting sheet goods, a 1.75 HP machine should be fine. If you need to cut the occasional hardwood then it helps to switch to a thin blade with fewer teeth, or simply lower your feed rate but that can cause burning on your material.  

One trick that I have done in the past is to cut my material just a hair wider than I need it at a slower feed rate.  This will cause some burning but won’t over-tax the motor. Then, I move my fence over and cut the material to the final width at a normal feed rate so I’m not removing much material but going fast enough to help minimize any burning.

That being said, it is really hard to bog down a 3 HP motor.

Power (Electrical Requirements)

Saw Model110 Volts220 Volts
CNS175 X X
PCS175 X X
PCS31230 X

Both the CNS and the PCS175 come wired to 110 VAC but can be upgraded by purchasing an optional 220 VAC contactor box and changing the wiring in the motor junction box.

The contactor boxes for changing to 220 VAC are available here:

The 3 HP PCS31230 is only available in 220 VAC.

One question I get asked a lot is what are the advantages of going from 110 VAC to 220 VAC. The bottom-line is no, you won’t see an increase in power. There are some other advantages, however.

A 1.75 HP motor running on 110 VAC will have an amperage load draw of 13 Amps. This means that under load, the saw will require an average of 13 amps to keep the motor spinning at speed. If you bog down the motor by cutting dense wood, the motor draws more amps to keep spinning at speed. If you are pulling 13 Amps on a 15 Amp circuit then you don’t have much headroom before the breaker is tripped.

A 1.75 HP motor running on 220 VAC will have an amperage load draw of 10 Amps. This causes the motor to run cooler, which is better for the motor in the long-run, but also gives you more headroom before the breaker is tripped. This comes in handy when resawing dense hardwood or anything else that really pushes the motor.

Both 220 contactor boxes come equipped with a Nema 6-15 plug. This means that it is a style 6 plug rated for 15 amps. You should be able to run the saw on a 15 Amp circuit without any problems. Most people run these saws on a 20 Amp breaker.

Dust Collection

A standard airflow requirement for most table saws is 350 CFM in order to provide decent dust collection.

By design, any cabinet saw should have better dust-collection than a contractor saw. Cabinet saws are enclosed so the sawdust that doesn’t make it down the dust chute will still be contained within the body of the saw. Contractor saws, on the other hand, are much more open so loose sawdust will fall to the floor under and around the saw.

CNS-DCP – Dust Collection Panel

The Contractor Saw has an optional accessory called the Dust Collection Panel (CNS-DCP) which allows you to hook up either a 4” or a 2 ½” hose to the back of the saw, while making the connection point much more accessible. The 2 ½” port enables the use of a Shop-Vac rather than a dust collector. While Shop-Vacs do not generally provide the required CFM, they’re better than nothing.

The Contractor Saw and the PCS175 both come with the Micro Blade Guard (TSG-MG).

The advantage of the Micro Blade Guard is that the clear plastic shell can be easily removed which allows you to use a splitter with anti-kickback pawls.

TSG-MG – Micro Blade Guard

TSG-DC – Dust Collecting Blade Guard

Any saw that is 3 HP or more will come with the Dust-Collecting Blade Guard (TSG-DC). Either of the 1.75 HP saws will work with the TSG-DC but it will need to be purchased separately. This brings us to our next subject…

Compatibility

The Contractor Saw and the Professional Saw share a lot of the same characteristics. As such, they share a lot of the same accessories.

While the 30” fence options are different for each saw, the 36” and 52” T-Glide fence system is completely identical for both saws.

The table depth is 27” on both saws, so the cast-iron wings for one saw will technically fit on the other one although they are slightly different in a superficial way.

This also means that the inline router table will technically work on both saws although it isn’t officially supported on the Contractor Saw. More on this in a bit. Let’s address all of the accessories in turn.

First, here’s a checklist of each accessory and it’s compatibility with each saw.

AccessoryCNSPCS
MC-CNS
Contractor Saw Mobile Cart
X
MB-CNS-000
Contractor Saw Mobile Base
X
MB-PCS-000
Professional Integrated Mobile Base
X
MB-PCS-IND
Industrial Mobile Base with PCS Conversion Kit
X
OFT30-CNS-000
30″ Outfeed Table
X
TSA-FOT
Folding Outfeed Table
X
CNS-DCP
Dust Collection Panel
X
TSA-ODC
Overarm Dust Collection
XX
TSG-FDC
Floating Dust Guard
XX
RT-TGP
Inline Router Table
XX
TSA-SA48
Sliding Crosscut Table
XX
TSA-SA70
Large Sliding Table
XX

Contractor Saw Mobile Base

MB-CNS-000 – Contractor Saw Mobile Base

https://amzn.to/2BLXIxu

The Contractor Saw Mobile Base allows you to move the Contractor saw around your shop easily but it’s not designed to lift extremely heavy loads. This limits the compatibility with some accessories such as the router table and the sliding crosscut tables.

This mobile base features two fixed and two swivel casters, similar to most mobile bases on the market.

Saw ModelCompatibleTechnically IncompatibleIncompatible
CNSX
PCSX

Contractor Saw Mobile Cart

MC-CNS – Contractor Saw Mobile Cart

https://amzn.to/2BVRP0T

The Contractor Saw Mobile Cart makes the Contractor saw extremely portable. If you team this up with the 30″ SFA fence system and the stock stamped steel wings then the saw is relatively lightweight and easy to maneuver.

It should be noted that the mobile cart is technically not compatible with the 52″ fence system, simply because it is so long that it will stick out over the cart handle.

Saw ModelCompatibleTechnically IncompatibleIncompatible
CNSX
PCSX

Professional Integrated Mobile Base

MB-PCS-000 – Professional Integrated Mobile Base

https://amzn.to/2LCyZ36

The Professional Saw Integrated Mobile Base is much like the Contractor Saw Mobile base in that it has two fixed casters and two swivel casters It also has a weight limit that makes some accessories technically incompatible with it since it may not support the weight.

Saw ModelCompatibleTechnically IncompatibleIncompatible
CNSX
PCSX

Industrial Mobile Base

MB-PCS-IND – Industrial Mobile Base with PCS Conversion Kit

https://amzn.to/2BHhzO4

The Industrial Mobile Base is the ultimate in tool portability. It features a hydraulic jack and four swivel casters which allows you to literally spin the saw in place if you need to. Although it technically has a weight limit, I have yet to reach that.*

*I have an ICS (which weighs almost twice as much as the PCS) with an extra cast-iron wing, the TSG-FDC Floating Dust Guard, and the Inline Router Table attached to it and the mobile base lifts the entire thing up without even the slightest hesitation.

Saw ModelCompatibleTechnically IncompatibleIncompatible
CNSX
PCSX

30” Outfeed Table

https://amzn.to/2CDaVKx

The 30″ Outfeed Table is a quick, easy way of adding outfeed support to your saw. This was designed for the Contractor Saw but is perfectly compatible with the PCS as well.

It should be noted that the 30″ Outfeed Table is not compatible with a mobile base because there isn’t anything to support the legs for the outfeed table. That being said, I am proud to include myself in the large group of people that have jury-rigged and modified it so that it works fine with a mobile base. You just need to get creative.

Saw ModelCompatibleTechnically IncompatibleIncompatible
CNSX (with T-Glide Fence System)While using a mobile base
PCSX (with T-Glide Fence System)While using a mobile base

Folding Outfeed Table

https://amzn.to/2Rt12aN

The Folding Outfeed Table provides a large outfeed surface while being portable and compatible with both mobile bases. It also, as the name implies, folds down out of your way when not needed.

The Folding Outfeed Table is not compatible with the CNS for two reasons. 1. The motor will get in the way. 2. The motor will hit the Folding Outfeed Table when the blade is angled past 40-degrees.

Saw ModelCompatibleTechnically IncompatibleIncompatible
CNSXX
PCSX

Dust Collection Panel

CNS-DCP – Dust Collection Panel

https://amzn.to/2SlAeGt

Normally you would hook up a dust-collector hose to the underside of the contractor saw. This is fine if you plan on leaving it permanently hook up to the saw but if you are needing to remove it and reattach it to another saw or if you want the option of using a ShopVac with a 2 1/2″ hose then the Dust Collection Panel is a worthwhile upgrade.

This item places both a 4″ and a 2 1/2″ dust port at the rear of the saw rather than underneath.

Saw ModelCompatibleTechnically IncompatibleIncompatible
CNSX
PCSX

Overarm Dust Collection System (TSA-ODC)

https://amzn.to/2GUk6dA

The TSA-ODC allows you to hook up the dust collecting blade guard (TSG-DC) to your saws existing 4″ dust port. The CNS175 and PCS175 come with the Micro Guard (TSG-MG) which does not have a dust port on it. If you are wanting to install the TSG-DC on either of those saws then you will need to purchase the TSG-DC. Since the PCS31230 comes with the TSG-DC then there isn’t anything else that needs to be added.

Saw ModelCompatibleTechnically IncompatibleIncompatible
CNSX*
PCSX*
PCS31230 X

*With purchase of TSG-DC. Only compatible with the T-Glide fence system.

Floating Dust Guard

https://amzn.to/2VeS2Vs

The Floating Dust Guard (TSG-FDC) provides above-the-table dust collection while allowing you to use simply the riving knife or even no blade guard, such as when you are cutting dadoes.

The 4″ port provides slightly improved dust collection over the TSA-ODC while increasing blade visibility. It also allows you to position the guard much closer to the blade so you can make thinner rip cuts while still using the blade guard.

The TSG-FDC requires either the 36″ or 52″ T-Glide Fence System since it attaches to the far right end of the wooden extension table.

Also, for the exact same reason, if attaching the TSG-FDC to a saw with a cast-iron router table attached, the router table will need to be attached to the left rather than the right.

The TSG-FDC is technically not compatible with either the Contractor Saw Mobile Base or the Professional Saw Integrated Mobile Base due to weight limitations. It works fine with the Industrial Mobile Base.

Saw ModelCompatibleTechnically IncompatibleIncompatible
CNSWhile using a mobile base
PCSXWhile using integrated mobile base

Inline Router Table

https://amzn.to/2QVZYfN

This is an extremely popular addition to your SawStop. The Inline Router Table consists of a cast-iron router table that attaches to either the left cast-iron wing or in place of the wooden extension table at the far right.

I will be writing a detailed article about the different router table configurations and some of the considerations for each.

This addition is not compatible with either the Contractor Saw Mobile Base or the Professional Saw Integrated Mobile Base due to weight limitations. It works fine with the Industrial Mobile Base. It also is not compatible with the stamped steel wings that come stock on the CNS.

If you have a CNS with cast-iron wings and don’t use a mobile base then there is no reason you can’t attach the inline router table to your saw.

Saw ModelCompatibleTechnically IncompatibleIncompatible
CNSWhile using a mobile base
PCSXWhile using integrated mobile base

Sliding Crosscut Table (TSA-SA48)

https://amzn.to/2LD136j

The Sliding Crosscut Table adds the ability to crosscut sheet-goods up to 48″ in width. It mounts either to the left wing or in place of it, which requires cutting down the front and rear rails and the front tube.

I don’t consider this a replacement for a miter gauge or a sled, but, rather, yet another tool in your arsenal.

This addition is not compatible with either the Contractor Saw Mobile Base or the Professional Saw Integrated Mobile Base due to weight limitations. It works fine with the Industrial Mobile Base.

Saw ModelCompatibleTechnically IncompatibleIncompatible
CNSXWhile using a mobile base
PCSXWhile using integrated mobile base

Large Sliding Table (TSA-SA70)

https://amzn.to/2AgzD1K

If you need to crosscut even larger sheet goods, the Large Sliding Table (TSA-SA70) has several configuration options which allow you to crosscut up to 70″ in width.

This addition is not compatible with any mobile base.

Saw ModelCompatibleTechnically IncompatibleIncompatible
CNSXWhile using a mobile base
PCSXWhile using a mobile base

Conclusion

Whether you choose a Contractor Saw or a Professional Saw, I’m confident you will happy with your purchase. Hopefully what I have assembled for you here has helped you make a decision on which saw is right for you.

I accept that it’s impossible to cover all considerations in this article. Still, that’s my goal. As such, if you have any other questions that I did not address, please leave them in the comments below and I will update this article.

Share this article…

News – April 20th, 2018 – Where have I been?

It’s been a few months since my last update and a few people have asked if I was still around.  Here’s what’s been going on…

Death In The Family

Sadly, my family was dealt a tragic blow with the death of my mother-in-law on March 1st.  She was a truly inspiring person and one of my best friends.

She was an art teacher at Heritage High School in Vancouver, WA.  Unlike most art teachers, she didn’t just teach kids to draw and finger-paint.  Rather, she taught 3D animation, video game design, 3D printing, and many more subjects that changed throughout the years but were always exciting and engaging.

Some of her students went on to work at places like Pixar and Laika and she had working relationships with such companies as Wacom and Big Fish Games.

I assembled a five-minute video for her memorial service which was attended by several hundred people, many of them current and previous students.

It’s difficult to fill the void left in your life with the loss of a person like her, especially when it was as sudden and unexpected as this.  My family has had to adapt to the sudden imbalance but we have supported each other well and this experience has brought us all a bit closer together, not that that was a problem to begin with.

Since she was an educator and passionate about art, I decided it would be nice to create a scholarship fund in her name.  We are working on this now and it looks like it is going to happen.

Table Saw Rust

I had to do a hasty glue-up and I didn’t have space on my assembly/outfeed table for it to dry.  Like a fool, I set it up on my table saw to dry, but I forgot to deal with the glue squeeze-out.  Then, family required me to focus on other things for a few days.  When I came back to it, the glue had dried on the cast-iron.

This gave me a good opportunity to apply the technique in one of my other articles on removing rust and protecting a cast iron table top.  I’m happy to say that the rust has been removed.

Playing around with Macro-Photography

I recently started playing around with macro-photography but not with any degree of seriousness/  I’m just having fun.  Above is a piece of oak endgrain.  Below is a nailhole in a piece of recycled barnwood.  Both shots are blurry because I clearly have no idea what I’m doing.

The featured image at the top of this article is a close-up of one of the rust spots I removed from my table saw.  It’s interesting how the focus works with macro photography.  I’ve got a lot to learn but so far it’s been fun.

General Shop Updates

My shop is a mess.  Don’t judge; yours probably is too.

I’ve been working on trying to add more storage and organization to my shop, all while adding more metalworking tools, so I’m fighting myself every step of the way.  As soon as I clear up some space, I fill it with something new.

I gave in and started replacing my shop-built storage solutions with commercially available storage options.  I prefer to use hand made solutions when available since I can customize them but I really hate making drawers which led to me having tools set up on carcases that just end up with crap stuffed in them.

It’s no secret that I’m a big fan of Harbor Freight.  Sure, they make and sell a lot of crap but they also sell some really great products.  One of the things I like is their US General tool storage solutions.  I’m adding a few of the carts shown at left.

I pick these carts up when they are on sale for $100.  I can’t build drawers for that price so this is a great deal and it allows me to focus my time on actually making stuff.

Writing Assignment

I am working with Fox Chapel Publishing to edit and co-write the updated version of one of their table saw books.  The publication was pushed back a season so I don’t have any official info to share but I have submitted the final draft and we’re just waiting on photos at this point.  I’ll post more info when it is available.

I have also started working on a new book that will focus on experimental musical instrument construction.  It’s still in the early planning phases but I’ll be posting updates as I progress.

Clamp Storage

All of my clamps are just thrown in a box.  It’s embarrassing but I’ve been planning on making some adequate clamp storage for some time and I keep putting it off thinking that I’ll have a better idea for it later.  I decided to just go with my latest idea and if I decide to change it later, I will.

I’ll be writing an article on this sometime in the near future.

Studio Desk – Part 5: Attaching the hardware

This is a continuation of Studio Desk – Part 4: Applying The Finish   For me, all projects have a point where they start to fall apart.  This is what happened here. Don’t get me wrong, I’m happy with how the desk turned out but I also have a few things that I really want to change.

Attaching the Casters

I decided to go with 3″ polyurethane casters since this is going to sit on hardwood floors.  This was my first mistake in that I grossly underestimated the weight of this desk when completed.  More on this later.

1. Rough-positioning the casters

First I laid out where they would be placed on the underside of the bottom piece.

2. Fine-positioning the locking casters

I roughly centered the wheels on the sections that extend out the back by placing the casters 6-3/4″ from the outside edge…

…and 1″ from the rear edge.  This will allow me to lock the casters when I don’t want the desk rolling around.

3. Attaching the locking casters

I secured the casters with 1-1/2″ button-head screws.

4. Fine-positioning and attaching the middle non-locking casters

The casters that are not at the rear of the desk are non-locking.  I used my combination square to ensure that the middle casters are inline with the rear casters.  These were attached with the same 1-1/2″ button-head philips screws.

5. Finishing up with the front non-locking casters

The casters at the front are more centered to better bear the heavy load of all of the desk gear.

Installing the Rack Hardware

Equipment racks are one of the most overpriced pieces of studio gear and it gives me great pleasure to be able to make my own for a small fraction of the cost.  If you have a use for a studio rack, I highly recommend you try making your own.

1. Positioning the 4-space rack rails

The rack rails were installed so they were 1/8″ from the front of the rack body.  I used two scrap pieces of laminate left over from my router enclosure build to shim between the top and bottom of the rack rails and the inside of the rack body, ensuring that they would be centered and consistent on both the front and back of the racks.

2. Attaching the 4-space rack rails

These rails were attached with screws as well.

Each rack got four rails; two for the front and two for the rear.

3. Determining the location for the grommet

Each rack will have a number of cable pass-throughs.   I wanted the pass-through to be placed towards the back and towards the top, which will make it easier to conceal the cables.  I decided to have the computer pass-through located 2″ from the top of the rack and 5-1/4″ from the rear.  This was a slight mistake, as you’ll see below.

I marked the spot on painters tape and drilled a pilot hole.

4. Prepping the circle-cutter

I used a circle cutter on my cordless drill.

I only used one cutter to do this.  Having the second cutter installed was feeling a bit sketchy.

5. Cutting the circle for the grommet

I used the pre-drilled pilot hole to start cutting

The circle cutter uses the pilot hole to keep it in the proper location.

6. My first major screw-up

This is where I screwed up.  I forgot that the top and bottom of the racks have two layers of 3/4″ particle board rather than just one.  I didn’t calculate that when I decided on a hole placement.  This means that the top of the rack will interfere with the pass-through.

7. Fixing the screw-up

I used a chisel and a rasp to clear out enough room to allow the pass-through grommet to be fully inserted and provide more room for cables.

Much better.

8. Installing the grommet

The grommet fits nicely and covers the jagged edge around the hole.  I used some 5-minute epoxy to secure the grommet in place since the hole cutter didn’t really cut a smooth hole in the particleboard..

9. Taking it all in

This is how the rack will be positioned in the desk.  You can see the pass-through grommet in the upper rear corner on the side of the rack.

10. Ensuring that the PC will fit in the rack

I set the rack on its back and dropped the computer in.  I screwed it to the rack rails but right now there isn’t anything supporting the computer, which is very heavy.

11. Measuring the space under the PC

I set the rack upright again and went around the back.  You can see that there is a gap between the computer and the inside floor of the rack.

I measured that to be 1-1/8″.

12. Making the PC supports

I cut two strips of MDF at that width and slightly tapered the end on a disc sander.  These will go between the computer and the rack floor to help support the computer.  The taper at the end will make it easier to insert the computer from the front.

This is where the wood supports will be placed.

13. Installing the 8-space rack rails

I installed the 8-space rack rails to the larger two racks in the same manner.  They don’t need the wooden supports added to them but I did install a few grommets on both the left and right to allow the cables to pass between the boxes.

Installing the Leg Mounts

The leg mounting hardware needs to be mounted in a way that will allow each of the three racks to be installed in either location.  This didn’t seem like it would be that big of a problem but it took some thinking before I could even get started.  Each rack unit will have three legs; two on the sides towards the outside of the desk and one underneath towars the inside of the desk.  I decided to start with the legs on the sides.

1. Steel-Tek hardware

The side flange is part number 679-804HC from Steel-Tek and can be bought from Lowes.

The floor flange is part number 673-104HC from Steel-Tek and can be bought from Lowes.

2. Determining the position of the side flanges

I positioned the side flange on the side of the rack as far forward as I could.  I positioned it 3-1/2″ down from the top.  This doesn’t add anything in terms of stability, it just looked best and it ensured that the bolts I used to attach the bracket wouldn’t hit the screws for the rail hardware.

3. Attaching the side flanges

The side flanges were installed on both sides of one of the larger 8-space racks.  I will install them on the other rack later.

4. Attaching the side flanges

By using some temporary leg rails I was able to place the PC rack on top of one of the larger 8-space racks.  This allowed me to determine the locations for the side flanges.

The side flanges were attached three and a half inches from the top, just to be consistent.

5. Positioning the first floor flange

Then it got a bit squirrely.  I took the PC rack off the larger 8-space rack.  Then I turned the 8-space rack upside down and set the PC rack back on top and installed the temporary leg rails.   I then used another temporary leg rail and two of the leg mounting brackets and one of the floor flanges, which will be installed on the underside of each of the 8-space racks.

This is how the flange looked after it was installed.

6. Installing the legs

I cut smaller tubes for the legs that will be installed in the flanges.  Then, to get an idea of how it will all look, I put it all together on the workbench, complete with the flanges that will be attached to the desk base.

Attaching the Legs to the Base

New I get to take it all out of my shop and move it into the studio.  I could almost sense my shop breathing a congested sigh of relief as I moved the components out.  Don’t worry, little shop.  I’ll fill you with tripping hazards again soon.

1. Positioning the right-side rack.

With the legs installed on one of the larger racks, I positioned the legs and flanges in position, using the wall to ensure the outside face of the rack is flush with the outside face of the base.  I set the flanges on blue shop towels to make sure I didn’t scratch the base.

2. Dealing with another screw-up

This is another area where I realized that I really screwed up.  As you can see, the flange sticks out past the edge of the base.

I rotated the flange 45-degrees so I could attach it to the base with three bolts rather than just two.

3. Attaching the right-side flanges

All three flanges were attached with 1-1/2″ lag bolts.

4. Attaching the left-side flanges

I performed the same procedure for attaching the flanges on the left side.  To test it out, I installed the PC rack.  It went into place perfectly.

5. Attaching the center flanges

I installed the flanges for the central rack using the rack from the right side.

To make sure that the central rack has the side flanges installed correctly, I used the first 8-space rack to position them by removing that rack from the desk and setting the second rack upside-down on top of it.

6. Attaching the side flanges for the second 8-space rack

I inserted the leg rails in the lower rack and then attached the side flanges in place.  I positioned them 3-1/2″ from the lower edge.

7. Attaching the floor flange on the second 8-space rack

To install the central flange on the underside of the second rack, I set it upside-down on the floor and used the PC rack to position the flange just like I did with the other 8-space rack.

8. Installing the legs and upper flanges

Once I was done with the racks, I set them aside and installed each of the legs and the top flanges.  I left the racks off because I need to attach the flanges to the underside of the desk top and the racks will just be in my way.

Putting it All Together

The hard work is over and now it’s time to put it all together.  I’m really getting tired of working on this, mainly because of how much space it is taking up in my shop so this is a very welcome moment.

1. Positioning the desk top

I placed the desk top loosely in place.  It actually started to resemble a desk at this point.

2. Marking the hole locations

From underneath I could see where I needed to drill the holes for the lag bolts.  This is where I almost screwed up.  I realized that there was some play in the flanges and that would cause the legs to tip a bit.  In order to ensure that everything was installed correctly and that the racks would be able to go on squarely, I reinstalled the racks and placed the desktop back on then marked the holes with a silver Sharpie, then rook the top and the racks back off, put the top back on and lined up the holes, then drilled the holes for the lag bolts and attached the flanges.  These parts are very heavy and this was a LOT easier said than done.  As a result, I was too flustered to take photos of that agonizing process.

3. Installing the racks

Once the flanges were attached, I removed the top and reinstalled the racks.

4. Attaching the desk top

After that I finally put the top back on and the desk assembly was complete.

This concludes part 5.

Closing remarks

This was a pain in the butt.  Each of these pieces weighs a ton and was very difficult to maneuver.

This is also where I ran into a major problem.  The desk is too heavy for the casters.  It’s so heavy that the casters get a flat spot on them if the desk sits in one spot for any length of time.

I don’t know why I missed this but I think it is a good representation of the dangers of keeping your focus on one little detail and not taking in the entire picture.  I was so focused on getting polyurethane wheels that I totally missed the weight issue.

I might try doubling up on the casters.

The next step is to do the electrical.

If you have any suggestions, please leave them in the comments below.  I’d love to see any desk builds you’ve done.  Also, if you haven’t already, please consider signing up for my mailing list so you get e-mail notifications when I post new articles.

News – January 8th, 2018 – Outfeed surface, Recording, and Cthulhu

Outfeed table

Almost a year ago I decided to try a new work surface for my outfeed/assembly table.  I wrote about this here.  After using and abusing it for almost a year, my official opinion is that I don’t really care for it much.  I found the texture to be problematic in that it retained glue and stain.  I also set my chop saw on it and it was bombarded with hot metal shavings which would melt into it and turn it into a big sheet of sandpaper.  Let me be clear; this isn’t a fault of the material.  All this shows is that it isn’t well suited for something that it wasn’t designed to handle.  Makes sense.

In the end, I decided to go back to my old standby: white hardboard.


Recording Woes

It is proving more problematic to get time to record lately.  In the meantime, I will be using that opportunity to perform and write-up the Shure SM57 right-angle-mod and also the MXL 603 capacitor mod which makes a $100 condenser mic sound like a $500 condenser mic (your mileage may vary).

My Amazing Wife

My wife doesn’t like to show off her work so I am doing it for her.  This is a felted Cthulhu that she made as a Christmas present for her brother.  I’d love for her to start a blog because she does some really amazing work.  If you’d like to see more, let me know and I’ll pass it along.


Other work…

There are a few other things in the works that I can’t speak of yet but I’ll post an update when they’re secured.


News – December 11th, 2017 – Teaching, last-minute performance, and woodturning

Sorry for the delays in my posts.  The holidays are always pretty hectic so I’ve been busy.

Teaching

Two weeks ago I was given the opportunity to teach a class for The Guild of Oregon Woodworkers on The Care and Feeding of Your SawStop.  The class went really well, with over 20 saw owners attending.  I got to do a hot dog demo in order to demonstrate how to remove an activated brake and blade from the saw.  I will be creating an article for this blog consisting of the documentation that I created for the class in the coming weeks.


Last-Minute Gig with Cody Weathers and The Men Your Mama Warned You About

It’s short notice but I have a gig on December 16th at The 45th Street Pub & Grill in Portland starting at 9:00.   I’ve been friends with Cody for a few years now but I’ve never played with these guys so it’ll be interesting.  Swing on by if you’re in the area.

Wedding Pens

A friend of the family is getting married in a few weeks and they requested that I make them pens from their birth woods, Ash and Hazel.  I’ve never turned either of these woods and I didn’t know what to expect.  To make things even more interesting, the hazel was still wet and was already starting to warp and twist.  From what they say, they only need the pens for the actual wedding ceremony so I just need them to last a few weeks.  This is good because the hazel pen seems to be cracking in a few places already.


Studio Desk Part 5

I’m still working on the articles for the studio desk.  It’s done and I’ve been using it for over a month but there are several things I want to change about it and a few components I decided to add to it so there is a bit of a delay in updating the articles.  I hope to have part 5 posted this week.


News – November 2nd, 2017 – Wiring, teaching, and recording

I’ve been lax in posting news updates.  I’m going to try to be better about this.

Wiring

I’ve got the studio desk pretty much done, but I’m doing some additional wiring, such as adding a few electrical outlets to the desk itself.

I’m also making all new audio cables.  This includes 32 XLR cables for inside the desk, 16 XLR cables for the drum mics, dozens of 14″ TRS cables, and a 16-channel XLR snake.  I keep pushing this off since I’m not looking forward to that much soldering.  Tedious work while hunched over a workbench gets old really quick.  I’m going to do these in batches.


Shure SM57 Right-Angle Mod

I have several Shure SM57 microphones that I am going to perform the right-angle mod to.  I plan on documenting this thoroughly so anyone can do this.  In the following picture you can see the microphone on the right, which has the right-angle mod applied, is much more out of the way than the one on the left, which does not have the mod applied.

Teaching

On November 29th, I will be teaching a class for The Guild of Oregon Woodworkers on the care and feeding of a SawStop (the class isn’t advertised on their site yet).  It’s been a while since I taught a class so I’m really looking forward to this.  I’ll try to convert all the info into articles on my blog so if you are unable to make it to the class – due to previous commitments or the fact that you are thousands of miles away from Portland Oregon – you can still make use of the information.


Recording for Bright & Shiny

Recording is still going on for the album by Bright & Shiny.  It’s hard for me to get time to record, lately.  I only have the drum tracks to a few songs left, then I can proceed with the auxiliary percussion.  After that, I will begin posting videos of each song.


The Map of Alice

Sadly, I had to call it quits with The Map of Alice.  There were some personality conflicts and the visions for the project were just not lining up.  It was mostly fun while it lasted.

Studio Desk – Part 4: Applying the Finish


This is a continuation of Studio Desk – Part 3: Assembling the Racks


Now that the components are built, they’re ready to be stained and finished.

I was going for a specific look that I think worked but I’m having my doubts that I’ll be happy with it in the long run.  I was inspired by a piece that I saw at a restaurant a while ago.  They used plywood where I used particleboard but what I was drawn to was the feel of the piece.  The best way I could describe it was “too much poly with no sanding between coats”.  You couldn’t feel any wood grain through the finish but you could feel the brush marks.

I figured that for this piece, I might as well try to replicate that since I liked it so much.  I think I succeeded but now I’m not sure how much I like it.


Staining the wood

I started with the parts all sanded and ready for stain.


Before applying stain or finish, I like to wipe down the material with denatured alcohol.  This helps remove loose dust particles.


I’m applying Varathane brand Kona wood stain using a cheap foam brush.


I recommend having someone help when staining something this big.  One person can apply the stain and the other can follow up with a towel to remove the excess after letting it sit for a few minutes.  Since it was just me working on this, I had to apply the stain in sections and then wipe it off before moving on to the next section.  This can be tricky since the stain can overlap and make for darker sections.


I used blue shop towels to wipe up the excess stain.


I really like the look of the particleboard with the Kona stain applied.


I applied the stain to one side and let it sit overnight, then applied to the opposite side.


The areas that I patched up take the stain differently, as expected.


Applying polyurethane to the upper section

Once the stain set up, I started applying Varathane brand polyurethane matte finish.


Foam brushes cause bubbles in polyurethane so you’ll want to use a decent synthetic brush.


It goes on milky but dries clear.


This is how I did the top surface of the upper section of the desk.  The underside of the upper section just had three coats of polyurethane applied.

I let the first coat dry for a few hours.  You can see on closer inspection that the wood still has a bit of a rough texture that you can feel through the polyurethane.  Normally, I would lightly sand between coats, regardless what the instructions say.  I chose not to in an effort to add a subtle texture to the finish.  My goal is to apply enough finish so it has more of a plasticy feel to it.


The second coat was applied.


I let that cure for a few hours.


The third coat was applied without any sanding.


After letting it dry, I really liked the look and I could have stopped here but I wanted to add several more layers to give it the look and feel I was after.


I added a fourth coat.


And let it dry.


It’s starting to get that “too much poly” look that I’m after but there are a few high spots that I wanted to knock back.  I decided that I would sand the surface with a 220-grit adhesive-backed sanding disc.

I grabbed a scrap piece of MDF to use as a sanding block and stuck the disc to it.


This resulted in a nice flat sanding block.


I sanded the high spots off then went over it again with a piece of 0000 steel wool.


I made sure to wipe all the sanding dust off.  I didn’t want to introduce a chemical to the finish at this point so I just went over it a few times with blue shop towels.


Then I applied a fifth coat of polyurethane.


After letting it dry for a few hours I could still see some of the sanded areas through the finish.


A close up shows that the finish still has a texture to it but the gritty bumps have been removed.


This is really starting to feel ridiculous, but I added a sixth layer of polyurethane.


I can still see a few dull spots form the sanding.


A closer look shows the slightly duller areas left over from the sanding.  I am actually pretty happy with the texture at this point but I figured one more coat should hide the rough spots.


I applied the seventh and final coat.


All done.  Now I just need to let it cure for a week.


Applying polyurethane to the lower section

I applied the polyurethane to the lower section in the exact same manner as I did on the upper section.

I first tackled the underside of the lower section.  As with the upper section, I put three coats of polyurethane on the underside.


I let it sit for two days.                     


I flipped it over and applied the polyurethane to the underside.

The first coat.


The second coat.


The third coat.


The fourth coat.


Like the upper section, I sanded the high spots after the fourth coat.


The fifth coat.


The sixth coat.


I didn’t get a photo of the seventh coat after it had dried but here it is shortly after applying the final coat.


Applying polyurethane to the racks

Again, I applied three coats to the undersides of the racks and seven coats to the sides that will be seen.

I wanted to try something different with the racks.  Instead of using glue and sawdust, I tried Elmer’s Wood Filler.  I applied some to all of the seams then sanded it flat.  This stuff doesn’t accept stain very well and I wanted to see how it would look since I’m going for a rough industrial look.  You can see some applied near the edges of the racks.  It shows up as lighter spots.  Personally, I think they add some texture and character.  Elmer’s makes a stainable wood filler but I wanted a rough look here so I went with the regular kind.


I added the first coat.


Then the second.


And the third.


Then the fourth.


I lightly sanded the racks after the fourth coat.


Then I applied the fifth coat.


And the sixth.


Then finally the seventh.


This concludes part 4.


Closing remarks

I think I succeeded in getting the finish how I originally wanted it, but I’m not so sure how much I like it now that it’s complete.  I guess I’ll grow accustomed to it over time.  Also, I can just remake them if I don’t like it.


The next step is to attach the hardware then install and configure the electrical components.


If you have any suggestions, please leave them in the comments below.  I’d love to see any desk builds you’ve done.  Also, if you haven’t already, please consider signing up for my mailing list so you get e-mail notifications when I post new articles.


Studio Desk – Part 3: Assembling the Racks

The top and bottom are ready to be stained and finished.  I’m going a bit out of order at this point.  I have already finished the top and the underside of the bottom but I’m going to bundle that in with my next post.  Here, I’m going to show how I assembled the carcases for the racks.

If you look closely, you will notice the stained desk bottom in the background of some of these photos.


I started with the boards all cut.  I’m not going to show you how I did this since it’s just a bunch of cutting at the table saw and is quite boring.  For something like this, I think it’s really important to clearly label the pieces.  I did this with blue painters tape and a Sharpie.


Assembling the PC Case

Before doing any glue-up I like to do a dry fit just to make sure I haven’t screwed anything up.  I did this with some corner clamps and a quick-release clamp.  Everything looks good.


I decided not to have any visible fasteners on the wooden parts of the desk so I’m holding the whole thing together with a butt-load of Titebond II wood glue.  Here, I am attaching the inside of the tops and bottoms to the outside of the tops and bottoms of the PC case.  I spread a good amount of wood glue on the underside of the insides…


…then flip them over and lay them on the outsides.  I used a scrap piece of 3/4″ particleboard up against the inside piece to ensure that they are positioned correctly.


Then I clamped it all up and let them sit for about a half hour.


I tend to over-glue (as you’ll see in a bit) so there is usually some squeeze-out that I have to clean up.  For particle board I prefer to let it cure quite a bit then come back with a chisel to take the glue beads off. In this case I wasn’t allowing enough time for the glue to cure so I had some messy blobs to work around.  This wasn’t a problem as you’ll see in the next step.


The two pieces glued up effectively make a piece that is 1-1/2″ thick with a 3/4″ X 3/4″ rabbet along two edges.  I applied glue along these edges so I could attach the sides.


I used quick release clamps to hold one side in place while I maneuvered the second side in place.


The same quick-release clamps held both sides in place so I could drop the top assembly in place.


The top is just like the bottom so I added glue to the rabbets.


I dropped the top part in place and  kept the clamps loose enough so I could  nudge the pieces so they were well aligned.


Rather than make the side pieces on the inside of each rack the entire length of the rack itself, I made them 4″ wide.  This will accomplish a few things.  It will lighten each rack a bit, although they still weigh a ton.  Mainly, they will aid with airflow.  Also, I’m installing cable pass-through grommets and they work best when the material they are going through is 3/4″ thick.  I cut four pieces for the sides of each rack and slathered on the glue.


I then clamped them in place.


After letting it sit overnight, the PC rack is assembled and ready to be shaped and cleaned up.


Assembling the Two Racks

I then repeated the process for the equipment racks.  The tops and bottoms were glued up and ready to be assembled with the sides.


Lots and lots of clamps were used for the assembly since I am relying on glue to hold this all together.


As you can see, I got a little crazy with the wood glue.  It cleans up easy enough and shouldn’t interfere with the finish at all.


Too much glue is better than not enough.


Cleaning up the Racks

I used a random orbital sander to clean up the edges on one face of each rack.


I also cleaned up the tops and bottoms.


To clean up the final face, and to ensure that both of the equipment racks are the same depth, I shaved off the edge of the last side at the table saw.


I shaved off just enough to clean up each edge.


Once each face was clean, I decided to try something different.  I’m going for a rough industrial look with this.  I had seen a piece of furniture once that was made with MDF and had some (what I assume is) wood filler in certain parts.  The way that the filler reacted with the stain and finish had a really interesting rough look.  I decided that I would try this on the racks.  If I end up not liking it, I can always just remake the racks.


I spread wood filler into each seam and let it sit for an hour.


After letting it sit I cleaned up the edges with my random orbital sander then applied a 1/4″ roundover to each edge just like when I made the desk top and bottom.


I cleaned up the routed edges with my random orbital sander again as well as with some careful hand sanding.


This concludes part 3.


Closing remarks

They’re all ready to be stained and finished.


As I said before, I don’t have a lot of room in my shop right now so it’s difficult to get this built but it’ll be worth it in the end.


If you have any suggestions, please leave them in the comments below.  I’d love to see any desk builds you’ve done.  Also, if you haven’t already, please consider signing up for my mailing list so you get e-mail notifications when I post new articles.