- What Is a Thin-Kerf Blade?
- Why Would I Want To Use a Thin-Kerf Blade?
- Why Would I NOT Want To Use a Thin-Kerf Blade?
- But I Really Want To Use A Thin-Kerf Blade!
- What Riving Knives are Available?
- Should I Buy a 2.0 mm Riving Knife Instead?
- The Problem With a 2.0 mm Riving Knife
- But Don't I Need a 2.0 mm Riving Knife If I'm Using a Thin-Kerf Blade?
- But The Wood Is Binding Up When I Use a 2.3 mm Riving Knife!
- Conclusion
There are times when you may want to use a thin-kerf blade, but what about your riving knives and splitters? Won’t they be too wide? Well, not exactly.
We’re going to touch on the basics of thin-kerf blades, but the main point of this article is to address the issue of a riving knife or splitter causing the wood to bind after switching to the thin-kerf blade. Many people think they need a thin-kerf riving knife, but it may not come to that. Read on…
What Is a Thin-Kerf Blade?
Now, we’re not concerned with ultra thin blades, such as specialty fret-slot cutting blades. If you’re using those blades then you’re on your own to find a good splitter/riving knife solution. What we’re concerned with are the more common thin-kerf blades.
For the record, standard-kerf blades are 1/8″ thick, so thin kerf blades are only 1/32″ thinner.
If you go to the store and ask for a thin-kerf blade, chances are they will hand you a blade that has a 3/32″ wide kerf. Most, if not all, Freud Diablo blades are thin-kerf.
Why Would I Want To Use a Thin-Kerf Blade?
There are two main reasons to use a thin-kerf blade, plus a few other uncommon but valid reasons.
1. Lower horsepower saw
This includes any saw with less than 3 HP or running on 120 volts. Once you get up to 3 HP then you will most-likely be running the saw on 230 volt power but that voltage may not always be available to you. This is commonly the situation when working on a job site doing house construction or for home hobbyists who don’t necessarily need anything other than standard 120 volt service.
For various reasons, you may find yourself using a lower horsepower saw.
Since a thin-kerf blade removes 1/4 less material than a standard kerf blade, this makes it easier for lower horsepower saws to make these cuts, especially when cutting through thicker materials.
2. Less material waste
Since a thin-kerf blade removes less material, that means less material wasted.
In my mind, this is usually a silly reason to use thin-kerf blades. If you’re cutting something like ebony, where you scrape up any sawdust you make and save it, then sure, this is a valid reason. If you’re just cutting plywood or even most hardwoods then it might be time to weigh the cost savings vs. the hassles of using a thin-kerf blade.
Which brings me to…
Why Would I NOT Want To Use a Thin-Kerf Blade?
Thin-kerf blades have a tradeoff.
If you’ll forgive me a brief tangent, thin-kerf blades have been over-hyped on the internet. It’s gotten to where people who are new to woodworking are under the impression that you should always be using a thin-kerf blade because that is all anyone ever recommends.
1. Less Stable
A wobbly blade can also contribute to chipping your zero-clearance insert and maybe even nicking the edges of miter gauge or crosscut sled fences. If you’re using a SawStop, we all know how that can end.
Thin-kerf blades have less mass which results in more wobbling of the blade. More wobbling of the blade results in a rougher cut. A rougher cut results in more sanding. More sanding means more wood removal. So much for saving material.
There are stabilizer (or stiffener) discs that you can add to your thin-kerf blade to help eliminate this issue. This adds to the cost so you’ll want to keep this in mind if you are using thin-kerf blades as some sort of cost-saving measure. This also limits the depth of your cut.
2. Alignment With Riving Knife or Splitter
If you are using a riving knife or splitter (and you should be) then you may find that it is no longer aligned with the blade. This results in the wood binding as it clears the blade, which can be dangerous.
We’ll come back to this…
But I Really Want To Use A Thin-Kerf Blade!
Go ahead and use a thin-kerf blade if you’ve really got your heart set on it. Just keep in mind that, like everything in life, there are trade-offs.
The main point of this article is to address the issue of riving knives or splitters, so lets take a look at this subject.
Disclaimer: I am basing this on SawStop table saws because this is what I have access to and because they are the best-selling table saw in North America so they are most-likely what you have access to as well. If you are wanting to address this with another type of table saw, I recommend you contact the manufacturer to get their advice on the matter.
What Riving Knives are Available?
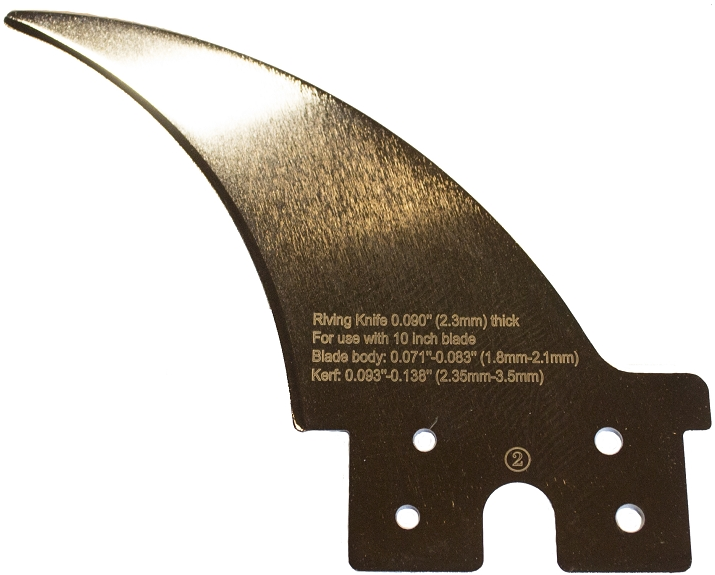
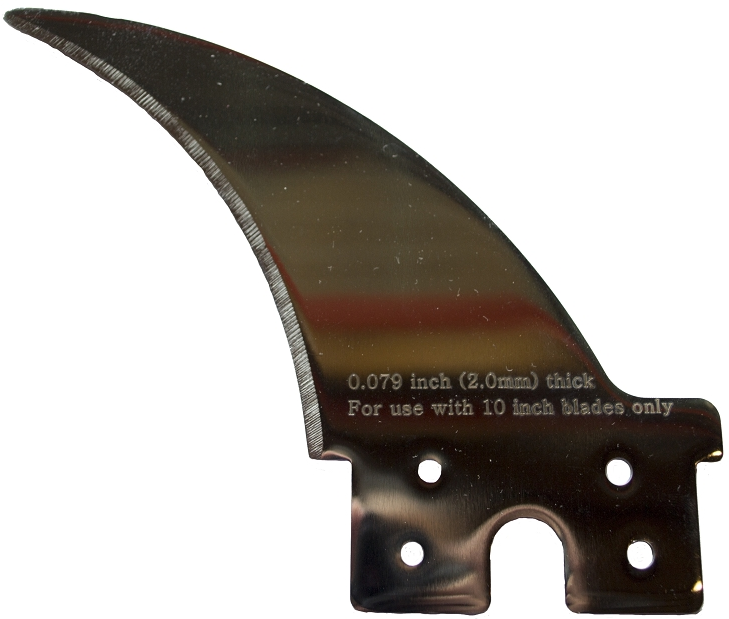
SawStop sells two different riving knives. One is 2.3 mm thick and one is 2.0 mm thick. Chances are, your saw has a 2.3 mm thick riving knife and splitter on your blade guard.
Why the change? Well, up until 2010, the riving knives and blade guard splitters were 2.0 mm but due to government regulation it was changed to the slightly wider 2.3 mm. It may not sound like a huge difference, and it really isn’t, but 0.3 mm is enough to cause a significant issue, as we’ll address shortly.
Should I Buy a 2.0 mm Riving Knife Instead?
On one condition: you never plan on using your standard blade guard.
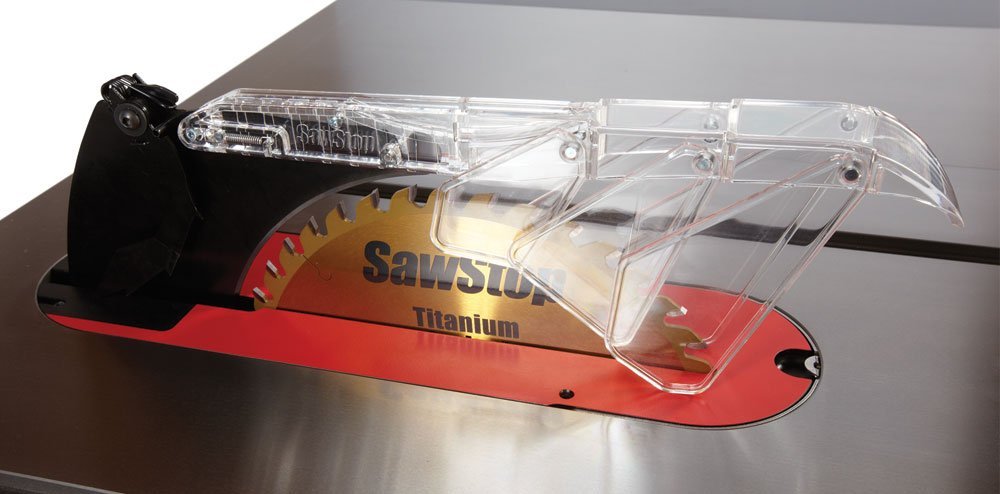
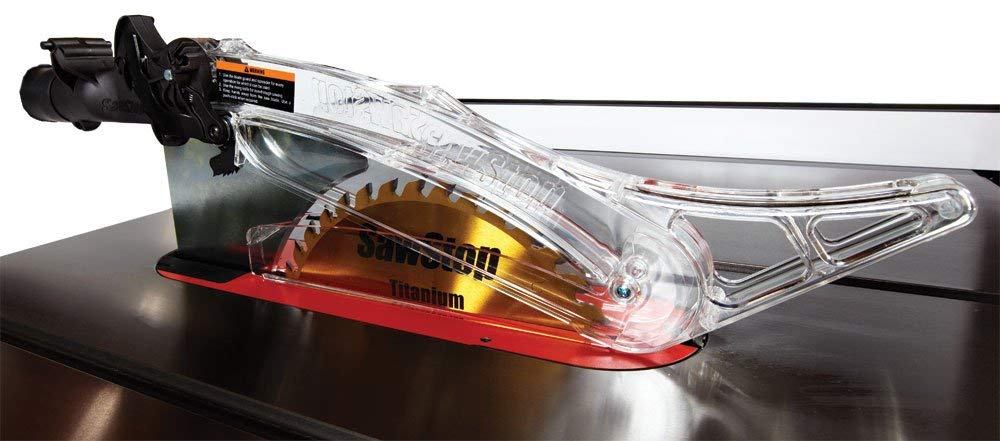
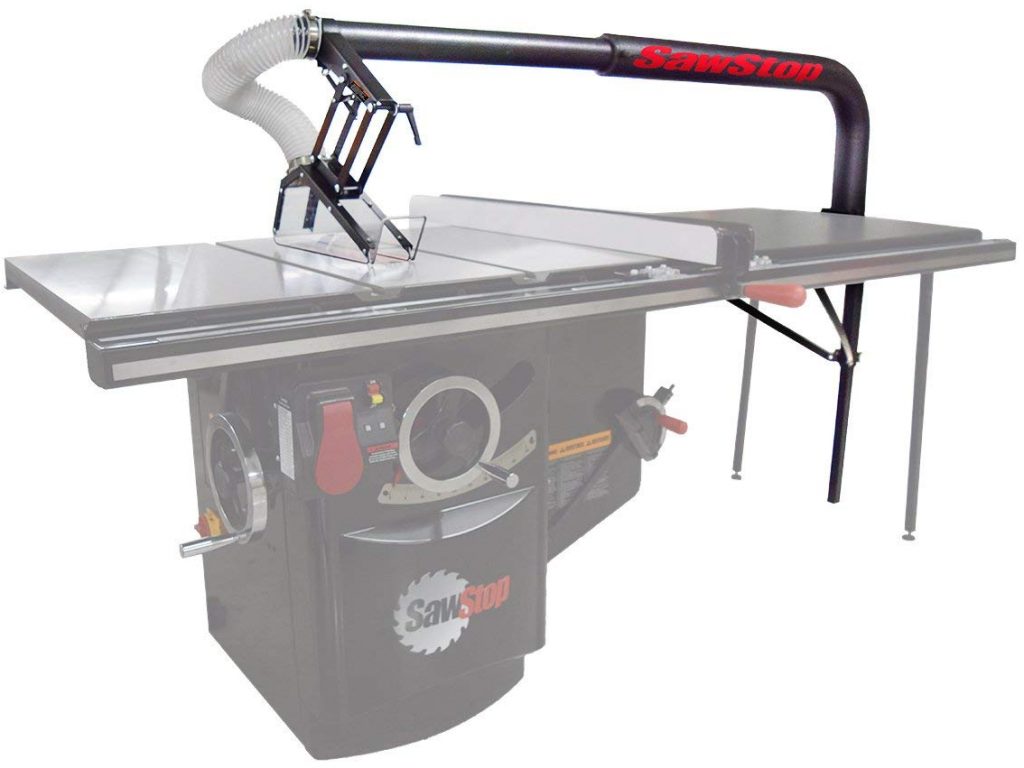
Again, we’re talking about SawStops here, but there are three blade guard options:
It you are using the Floating Dust Collecting Blade Guard then you are fine, but if you are using either the Micro Guard or the Dust Collecting Blade Guard then you will want to steer clear of the 2.0 mm riving knife. Here’s why…
The Problem With a 2.0 mm Riving Knife
If you make the switch to a 2.0 mm riving knife then the clamp that holds it will be too loose since it is set to 2.3 mm. This can be unsafe and should be fixed by tightening the riving knife clamp. This will make it too tight to hold onto the splitter for the Micro Guard or the Dust Collecting Blade Guard.
You basically have to pick one or the other: either you’re using a 2.0 mm riving knife or you’re using a blade guard. Unless you feel like adjusting the clamping pressure of your riving knife clamp every time you switch back and forth, you’re better off just staying with 2.3 mm.
A friend of mine asked if you could just put a piece of tape on the right side of the 2.0 mm riving knife as a shim. Well…yeah. Jeeze! Don’t ruin the point I’m trying to make!
Seriously, though. If you’re comfortable putting tape on the side of the 2.0 mm riving knife, go ahead, but as you’ll read next, you shouldn’t have to do that.
But Don’t I Need a 2.0 mm Riving Knife If I’m Using a Thin-Kerf Blade?
No, you don’t. Do the math.
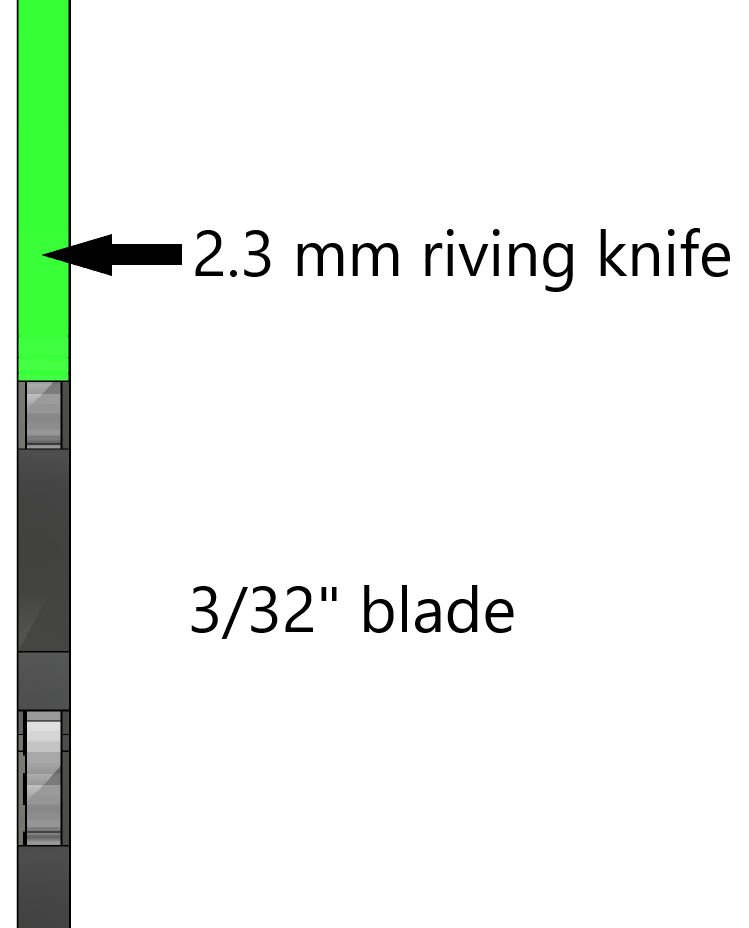
For the next few pictures, I’ve created a 3D model of the saw with a riving knife that I’ve colored green for clarity.
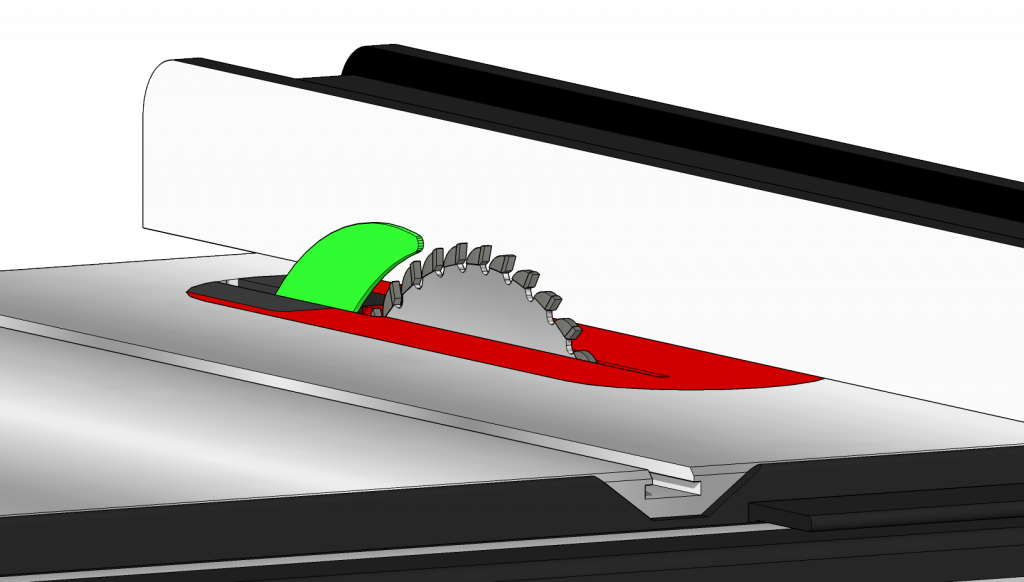
Let’s look at the standard 2.3 mm riving knife compared to both a 1/8″ standard-kerf blade and a 3/32″ thin-kerf blade.
This means that even the widest of the two riving knives is still thinner than a thin-kerf blade.
Now, if you are considering switching to a thinner riving knife, I assume it’s because you are experiencing problems. Let’s take a look at the REAL issue here…
But The Wood Is Binding Up When I Use a 2.3 mm Riving Knife!
Of course it is, but it’s not happening for the reason you think.
When the saw leaves the factory, it ships with a standard-kerf blade, (actually, it’s .118″ rather than .125″, but definitely bigger than a thin-kerf blade which is .094″). However, as we already established, the riving knife is for a thin-kerf blade. To make this a non-issue, the riving knife is centered on the blade, as shown below.
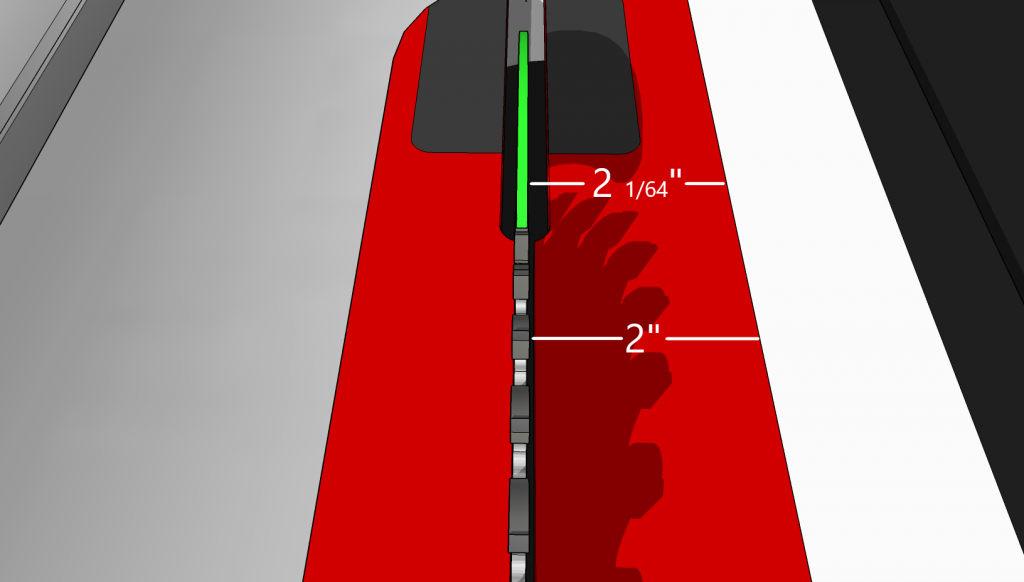
The thing about left-tilt saws is that the blade mounts onto the arbor shaft from the right. This means that the left side of the blade is constant. It never changes. All of the change happens to the right, which is where we usually have the fence.
See where I’m going with this? If the riving knife is centered on a 1/8″ blade then that means that the blade is 1/64″ wider than the riving knife on both the left and right. If you change to a thin-kerf blade, then you are taking 1/32″ off the right of the blade, but nothing on the left. This means that the riving knife now sticks out 1/64″ to the right, making the space between the riving knife and the fence 1/64″ narrower than the space between the blade and the fence. You’re now trying to slide a board through a space that is too narrow for it. This causes the binding you are experiencing.
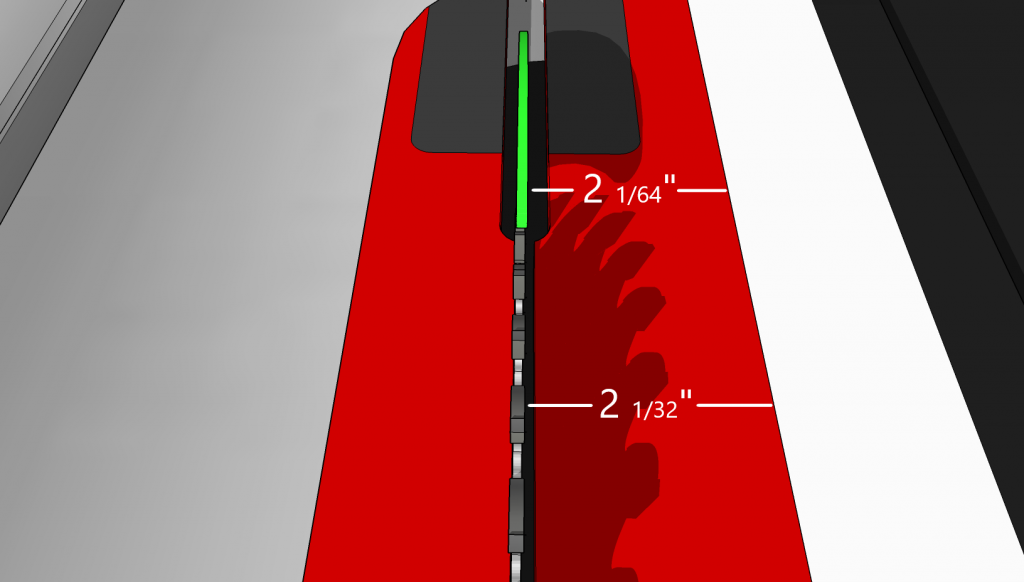
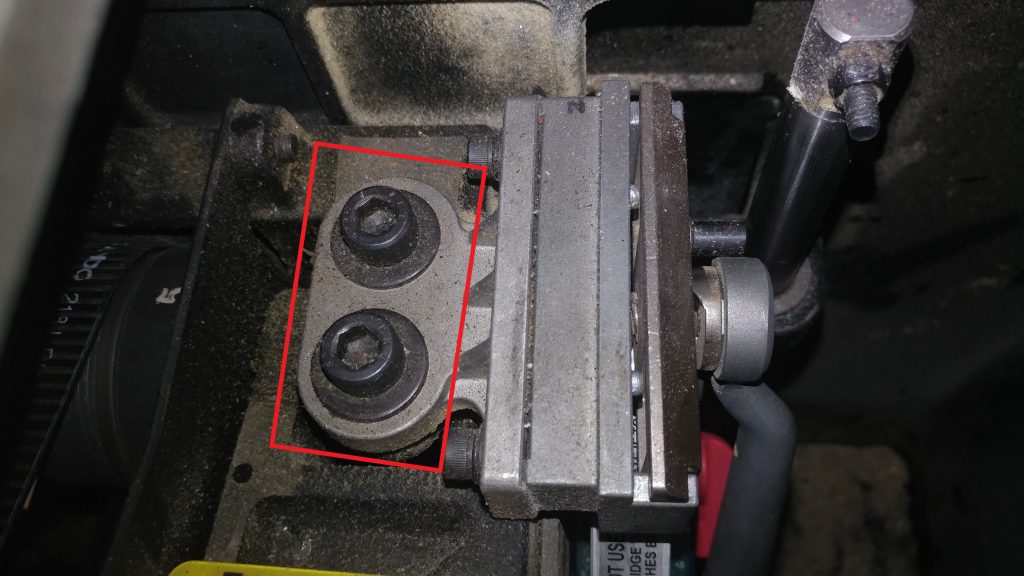
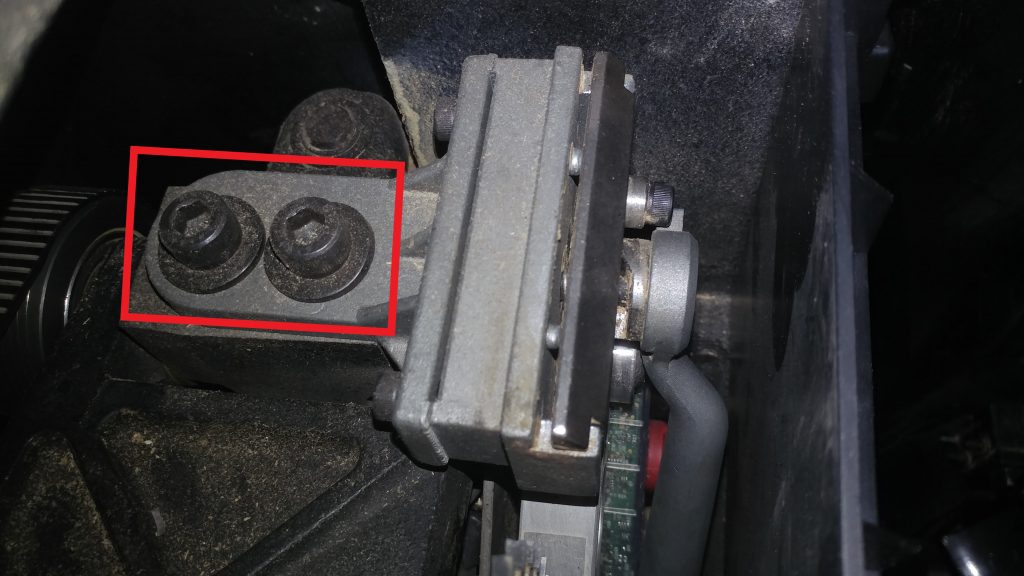
To actually fix this issue, you should slide the riving knife 1/64″ to the left. Your saw may be different, but here’s how to adjust this on a SawStop.
On any of the cast-iron SawStop table saws, there is a pair of 8 mm cap screws that adjust the horizontal positioning of the riving knife or splitter. Slimply loosen these slightly and nudge the clamp a little to the left. It’ll take some back and forth but the end result you are shooting for is for the left face of the riving knife to be co-planer with the left face of the blade, and for the right face of the riving knife to be no closer to the fence than the right face of the blade.
Tip: Since you have to come at these bolts at an angle, use a ball-end allen wrench, such as the one provided with your saw that you would normally use to adjust the spacing between the brake and blade.
Conclusion
As you can see, there isn’t any real reason you would need to get a 2.0 mm riving knife, even when using thin-kerf blades. I feel that it’s always best to address the real problem rather than look for an easy workaround.
I hope this has been helpful. If you feel like I should add anything, please feel free to leave a comment below. Also, I encourage you to share this article with anyone who is considering using thin-kerf blades with their table saw.


Pingback: Helpful SawStop Links - TrentDavis.net
Excellent explanation, thanks for sharing that with us.
Holy shit. Thank you very much for this explanation! I’m literally in my shop, hoping I can use my dust collector guard on my thin kerf blade and you’ve answer exactly this question. Cheers to you!
Great article, I did chuckle at the “simply loosen the 2 8mm cap screws’. My knuckles took a few weeks to heal;)
Thanks again
Mark
Trent, how would you accommodate for this on a jobsite saw?
Great Article, explained very well. Thanks
This is exactly the problem I’ve been having . Thanks for the information. Worth a try before I invest in a new riving knife..
Why not put a shim from a dado stack to the left of the blade?
I had this same idea after reading this! I think I’m going to go that way.
Exactly what I was looking for, thanks!
Thanks for writing this up, very helpful.
Great answer. No i understand what was plaguing me for months. I tried to align everything exfept riving knife!
Thank you, it worked! I had thought the 2.3 mm thick dust-collecting guard was too thick, but it turned out that the bracket for the knife was just very slightly twisted.
Adjusting the riving knife bracket is easier if you first rip a piece of plywood with the thin kerf blade, and leave the fence locked into position. Then after making an adjustment to the bracket, without reinstalling the blade you can install the 2.3 mm riving knife and check for parallel clearance with the plywood.
(This can be appended to my earlier comment.)
Thanks for this explanation and pics.. understand it perfectly now ! I’m a new owner and I do have a 60t Frued that’s thin kerf design that will be used at least for a while.
Re. thin kerf riving knives:
Another easy solution is to reduce the thickness of a standard 2.3mm riving knife by surface grinding just the working area, therefore not changing thickness at the mounting part of the riving knife. However, be mindful of which side is being ground so as to keep the riving knife central to the saw blade.
I like to use full kerf blades to minimize blade wobble. As your picture shows, then thin kerf riving knives are a fair bit thinner than the full kerf blade. This contributes to the wood contacting the back of the blade, throwing sawdust forward. I don’t use the over blade shield / dust collector. Does anyone make a thicker riving knife for sawstop cabinet saws?