A lot has been happening. So much so that I haven’t even had time to write up a new update.
New Web Host
I successfully made the switch to a new web host and (several small hichups aside) it went smoothly. I’m really happy with the speed increase that I’m seeing on this new web host. Hopefully that speed continues.
Recording Studio Changes
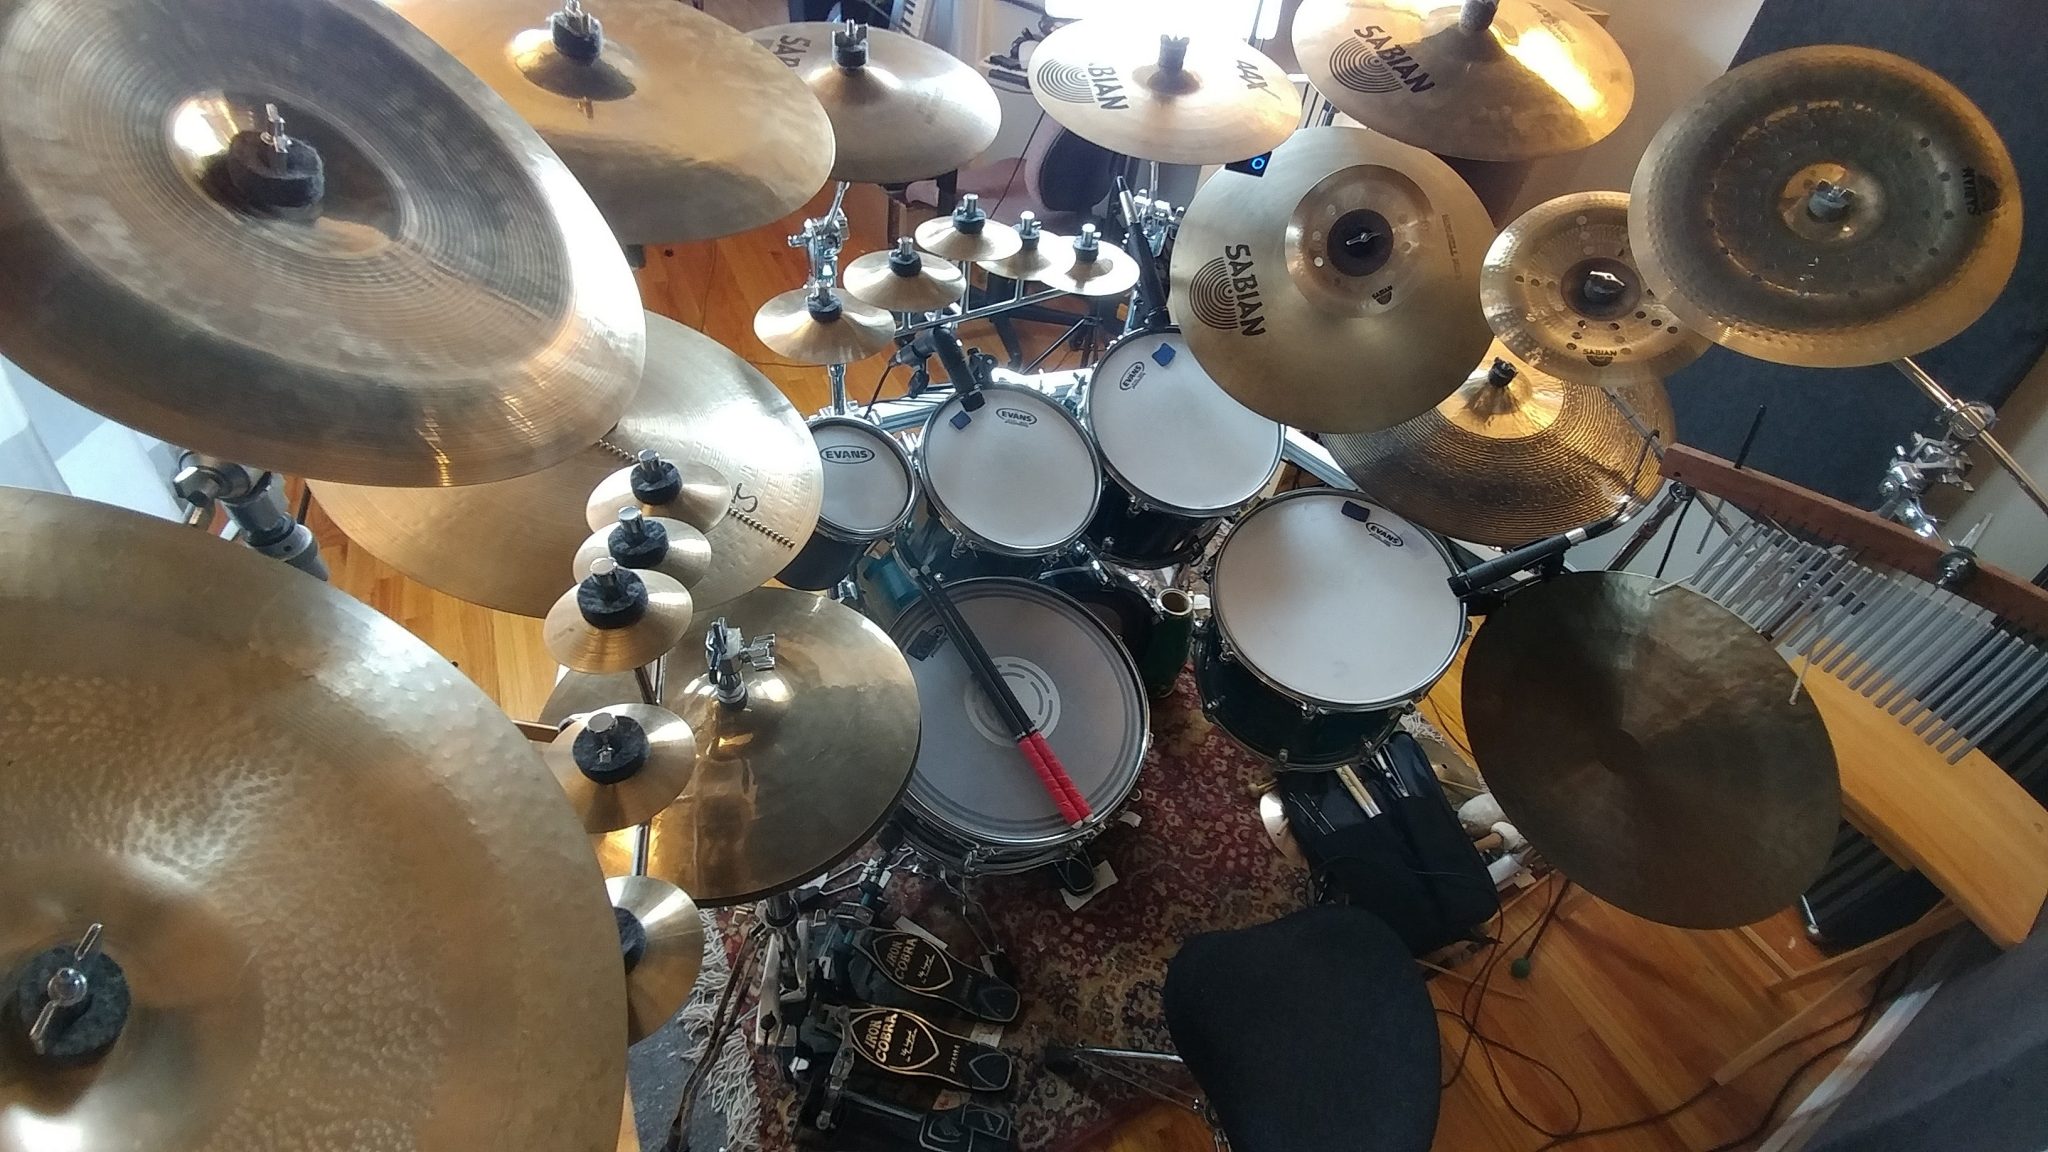
Up til now my recording/rehearsal space has been in our back room. This is not ideal since I can’t record anything without forcing the rest of my family to leave the house. Also, it’s hard to focus on my projects with the T.V. playing in the next room. It has been nice having rehearsals there, however, since we have more room.
I’ve decided to change things up a bit. My 19-year-old daughter is in a bedroom upstairs. My wife and I want to put new floors in that room since it’s just nasty old carpet now. We’re also having problems with my two daughters arguing at all hours of the night. I’m going to put up a semi-permanent wall in the music room, dividing it from the rest of the house. This will be my daughters room until she eventually moves out. We’ll replace the floors and fix up my daughters existing room and that will be my new music room.
At least , that’s the plan.
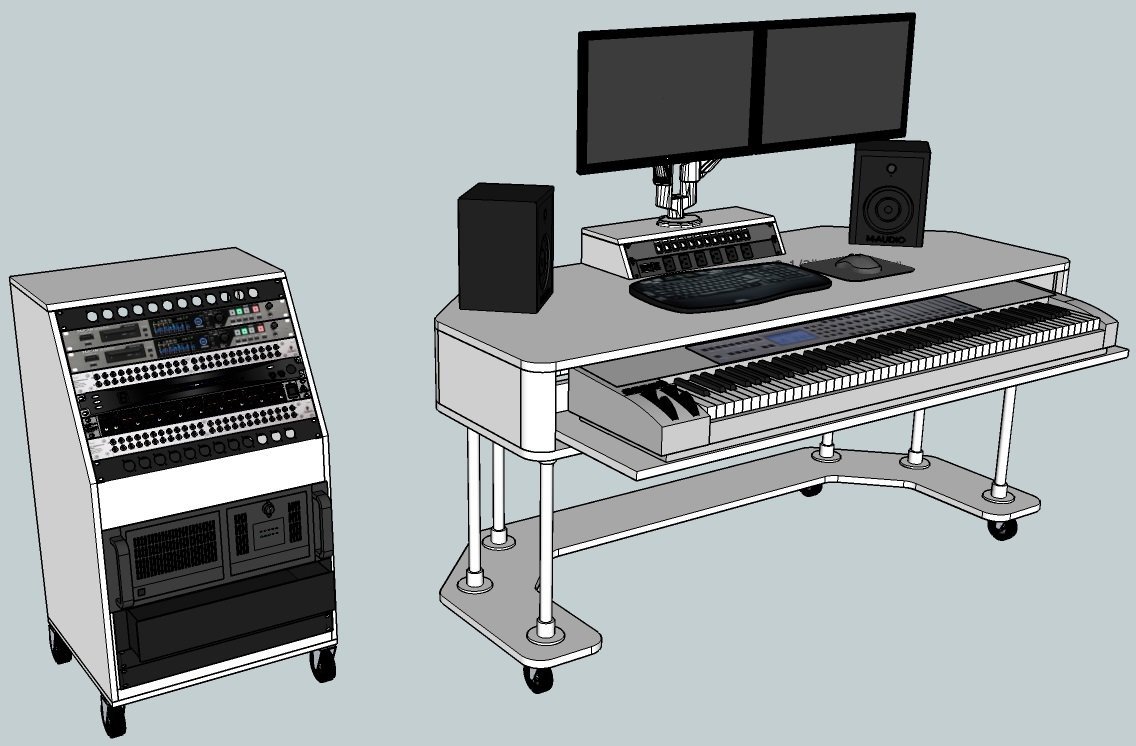
New Studio Desk
I like my recording studio desk, but I don’t love it. It’s too bulky to fit in my new recording space so I’m going to design one that takes up less space. I’m torn between wanting something that I can wheel up to the drum set and something big enough to house my 88-key midi controller.
I think I’m leaning towards making it two different pieces; one being a roll around cart with all the rackmount gear, including the PC, and the other being the desktop / midi controller stand. The two will be connected with a cable snake with a couple USB 3.0 cables, a couple HDMI cables, and two XLR cables for the speakers.
Shop Changes
There have been lots of changes in my shop and there will be lots more to come.
I’ve decided to focus. In particular, I’m trying not to cover everything in my shop but instead I’m going to just focus on the tools that I use for what I like to do, which is make musical instruments. I’ve decided to get rid of some tools. I have a lot of tools that I barely ever use and they would have better lives in other shops.
I’ve upgraded my band saw to a Laguna 14 BX 2.5 HP. I really like the increased power but I’m actually a little disappointed at the build quality. I know that Laguna is highly rated but I’m not overly impressed. Still, it’s a huge improvement over my old Craftsman. This could very well be the last band saw that I ever buy.
I have been making the change from wall-mounted cabinets to rolling tool carts. This may seem counter intuitive but I like having all the drawers. I’ve enter a new phase of tool organization and I really like it.
Upcoming YouTube Videos
I’m finally giving in and making some YouTube videos. This is something that has been requested of me for several years now and I’ve resisted since I’ve never felt like I had anything new to contribute. After meeting with some YouTubers, I’ve realized that it is a great community to be a part of and that I do indeed have something to contribute. If nothing else, I can provide my perspective on things that have been already covered by others.
Gig with Cody Weathers and The Men Your Mama Warned You About
I’ll be filling in the drum chair with Cody Weathers tomorrow night, August 31st 2018, at the Hawthorne Hideway from11:15 to Midnight. Click here for more information.
In Conclusion…
That’s all for now. Actually it isn’t but I don’t want to bore you with the details.
This is a continuation of Studio Desk – Part 4: Applying The Finish For me, all projects have a point where they start to fall apart. This is what happened here. Don’t get me wrong, I’m happy with how the desk turned out but I also have a few things that I really want to change.
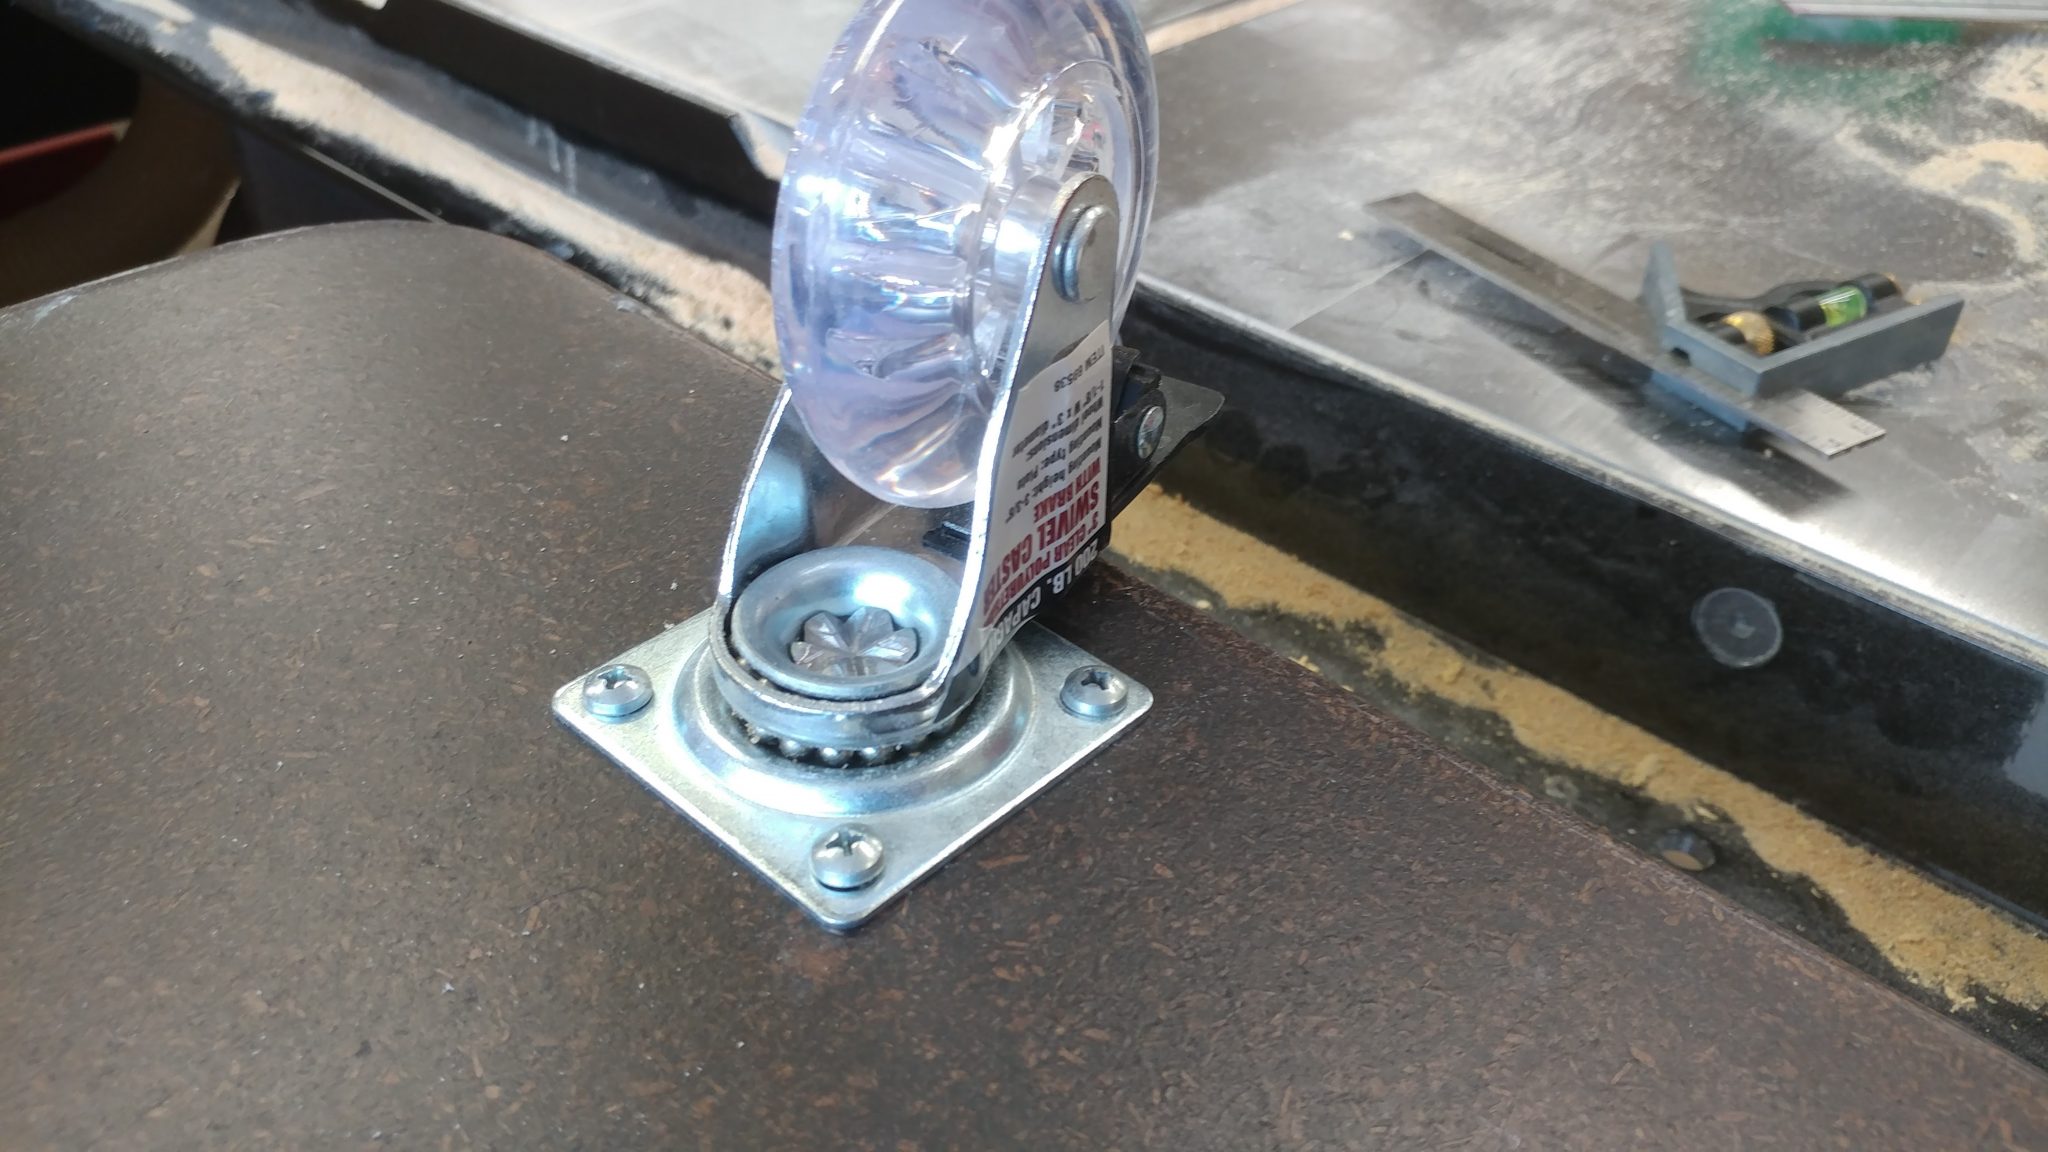
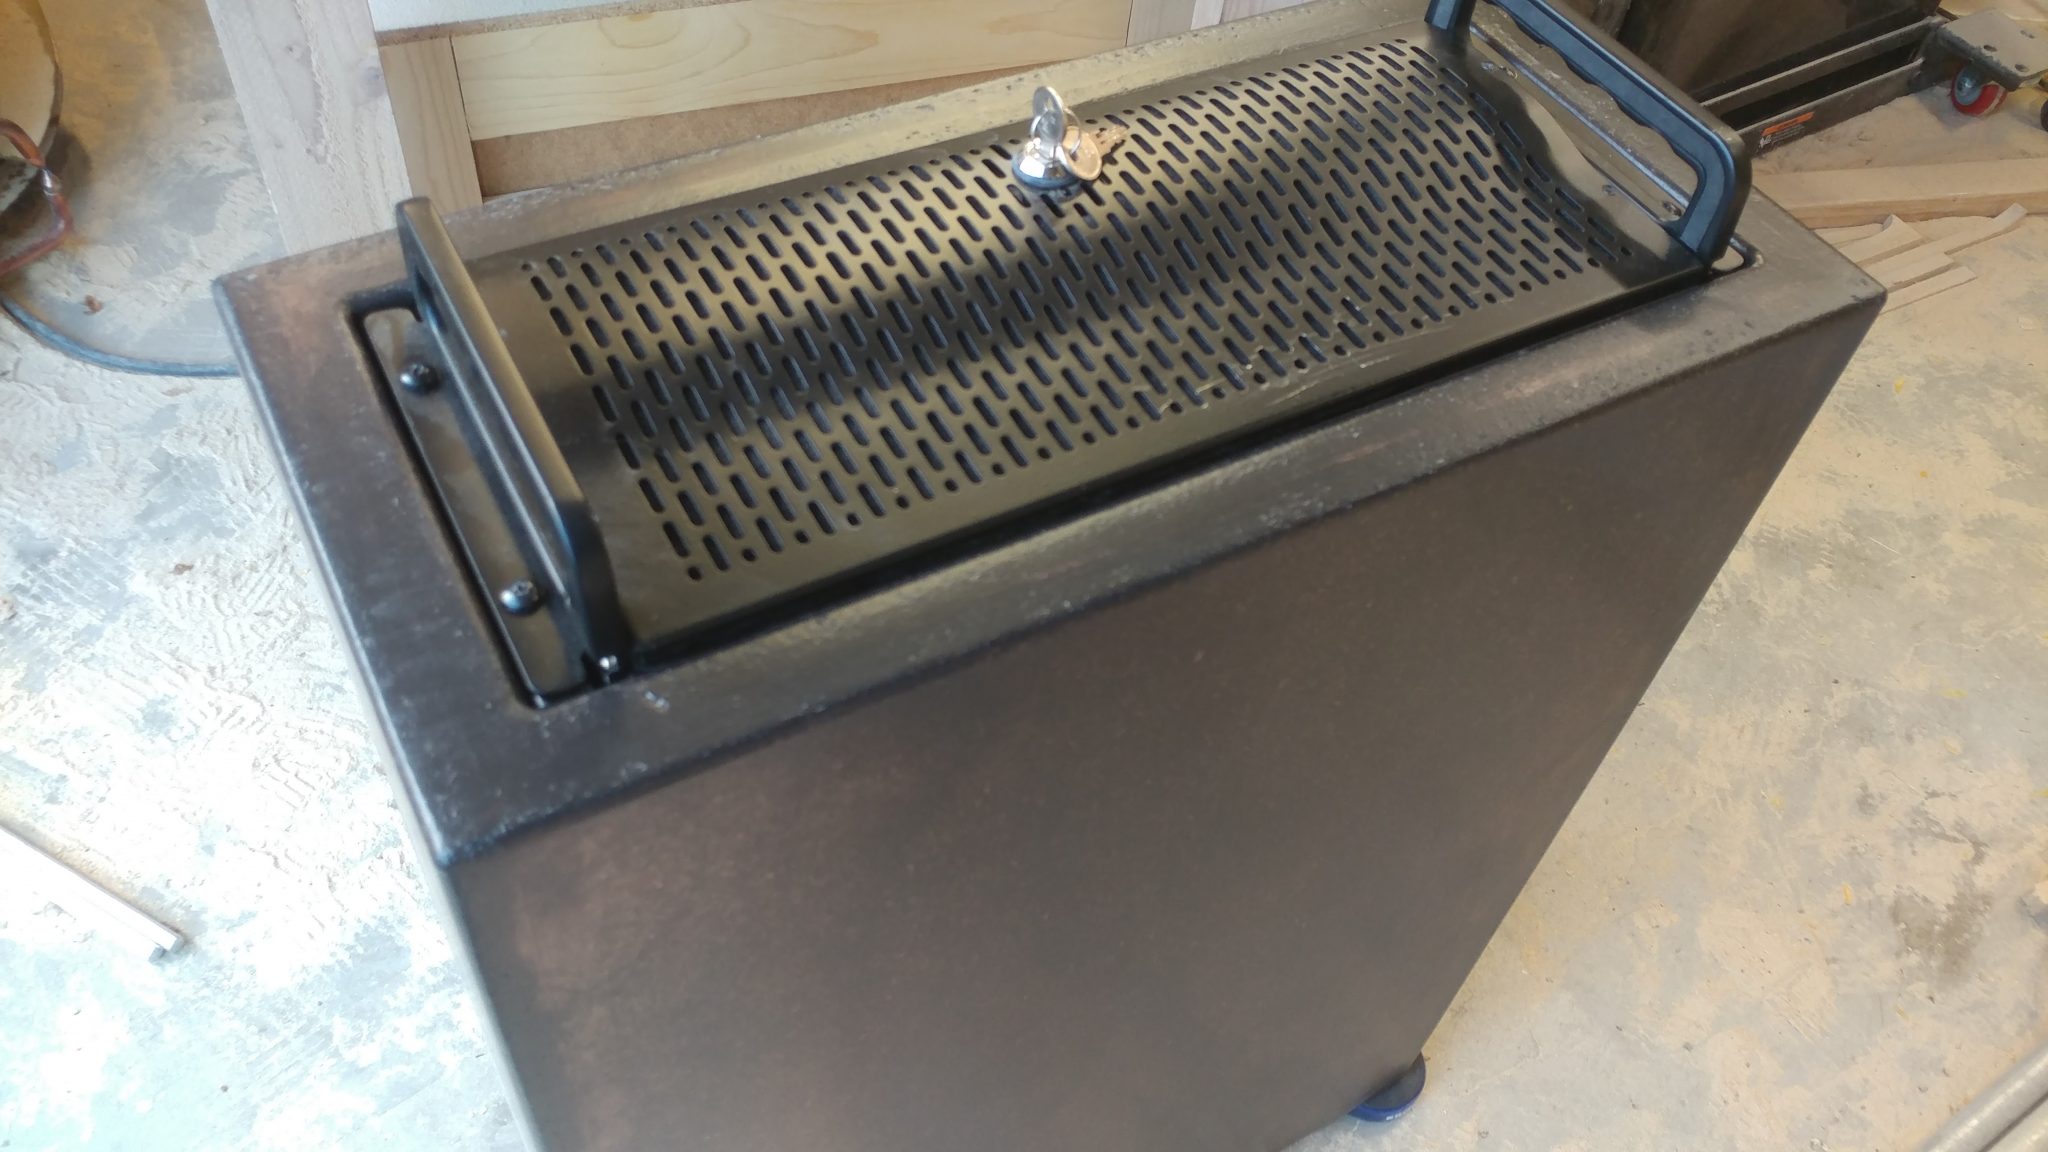
Attaching the Casters
I decided to go with 3″ polyurethane casters since this is going to sit on hardwood floors. This was my first mistake in that I grossly underestimated the weight of this desk when completed. More on this later.
1. Rough-positioning the casters
First I laid out where they would be placed on the underside of the bottom piece.
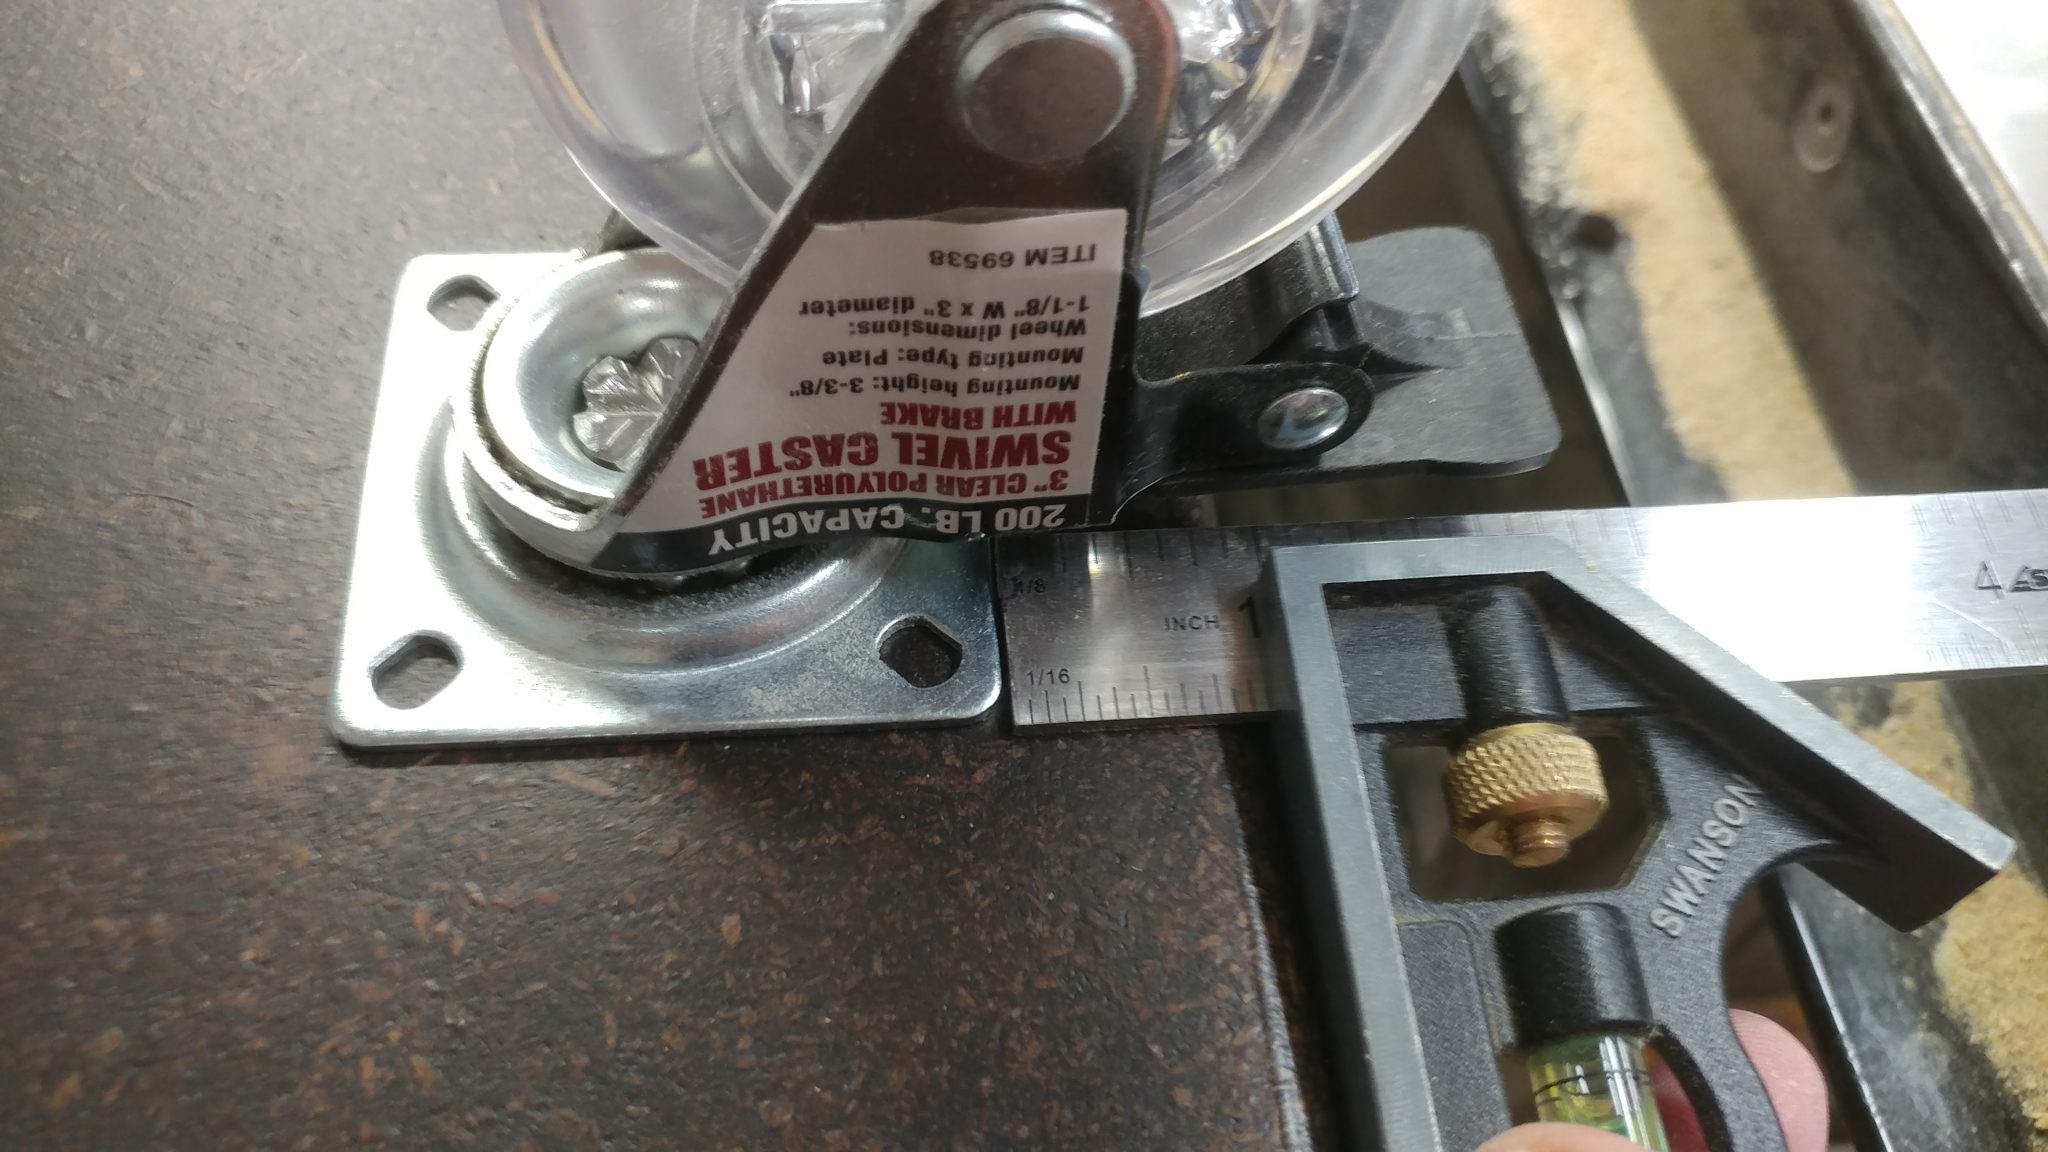
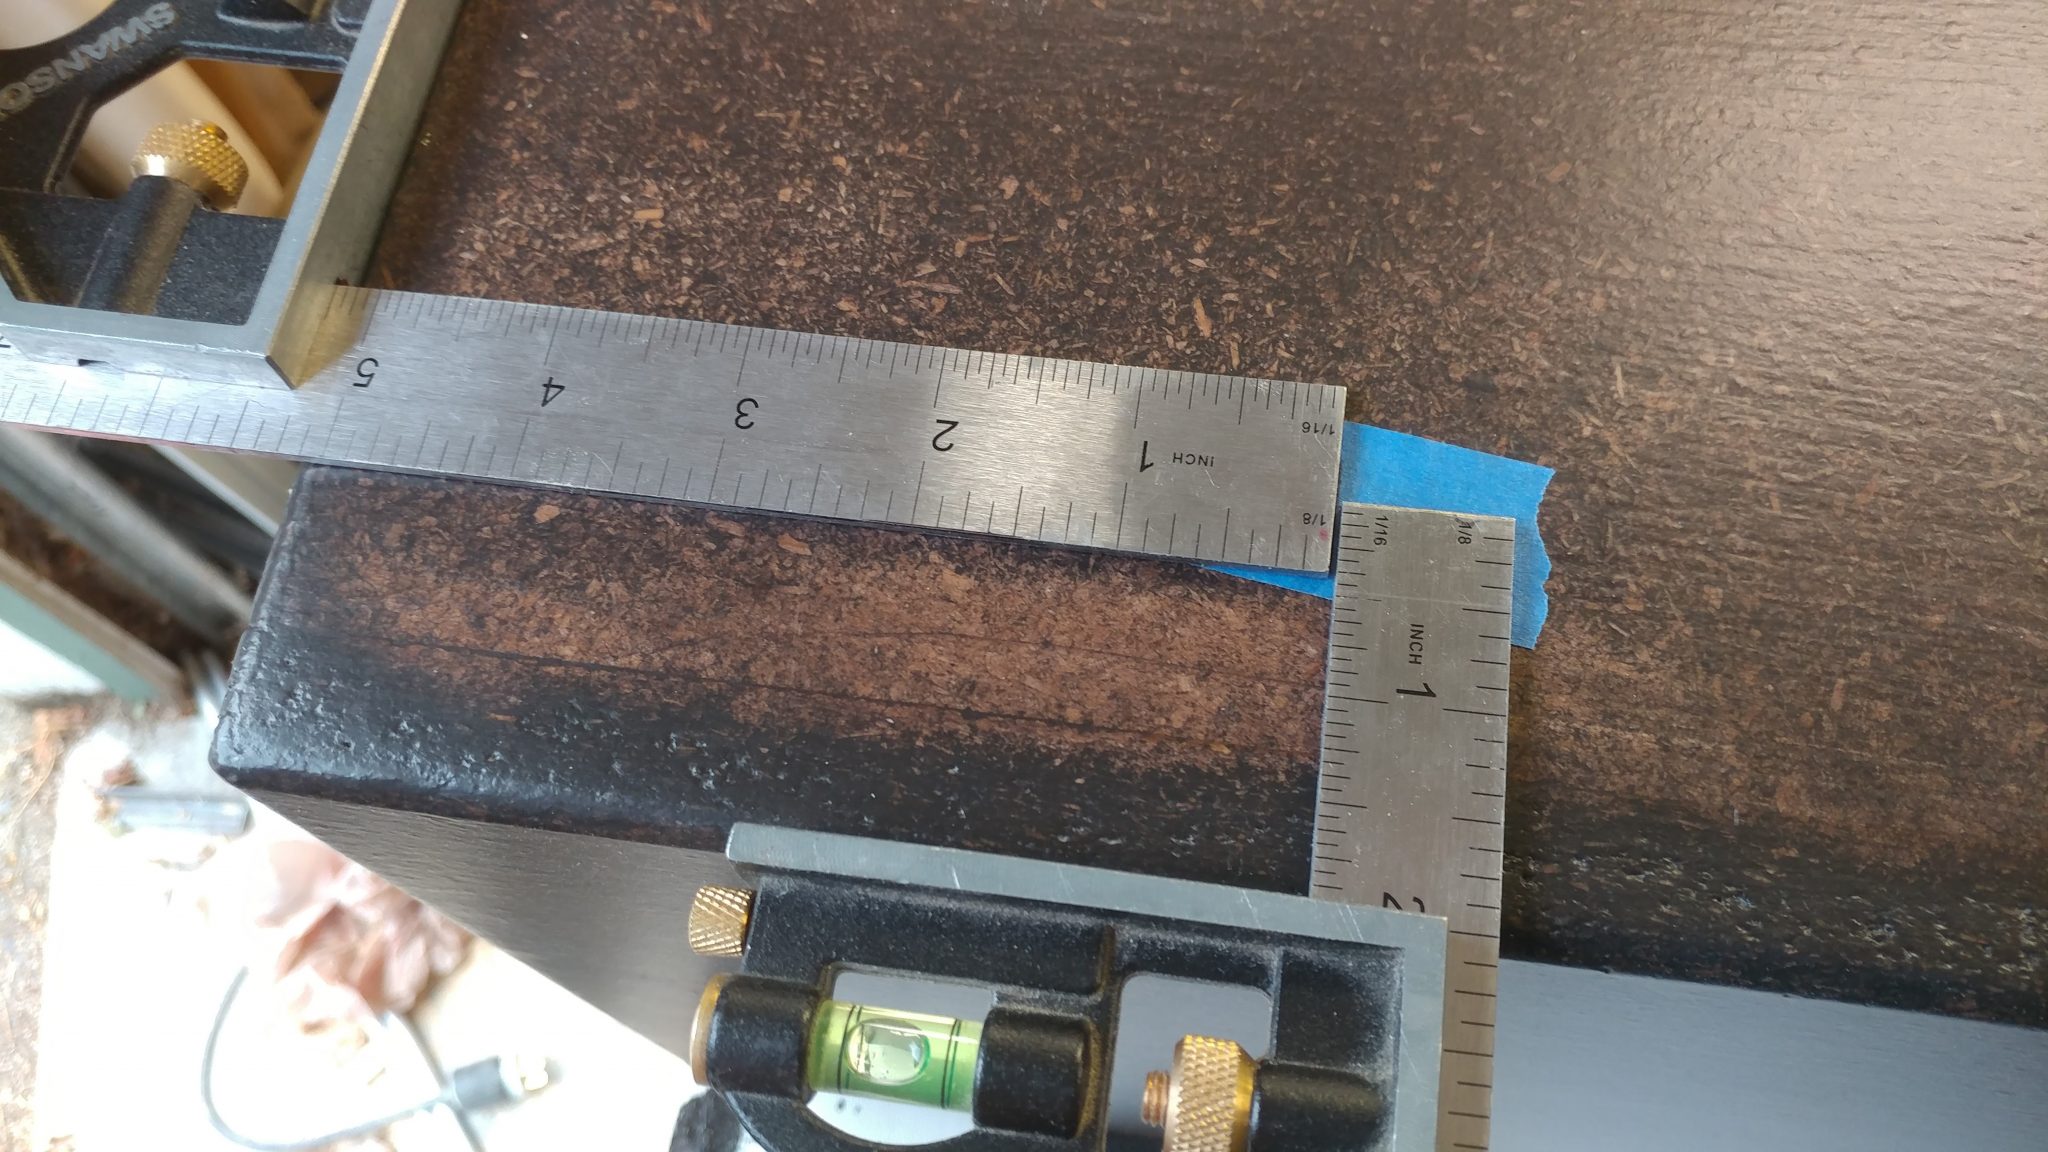
2. Fine-positioning the locking casters
I roughly centered the wheels on the sections that extend out the back by placing the casters 6-3/4″ from the outside edge…
…and 1″ from the rear edge. This will allow me to lock the casters when I don’t want the desk rolling around.
3. Attaching the locking casters
I secured the casters with 1-1/2″ button-head screws.
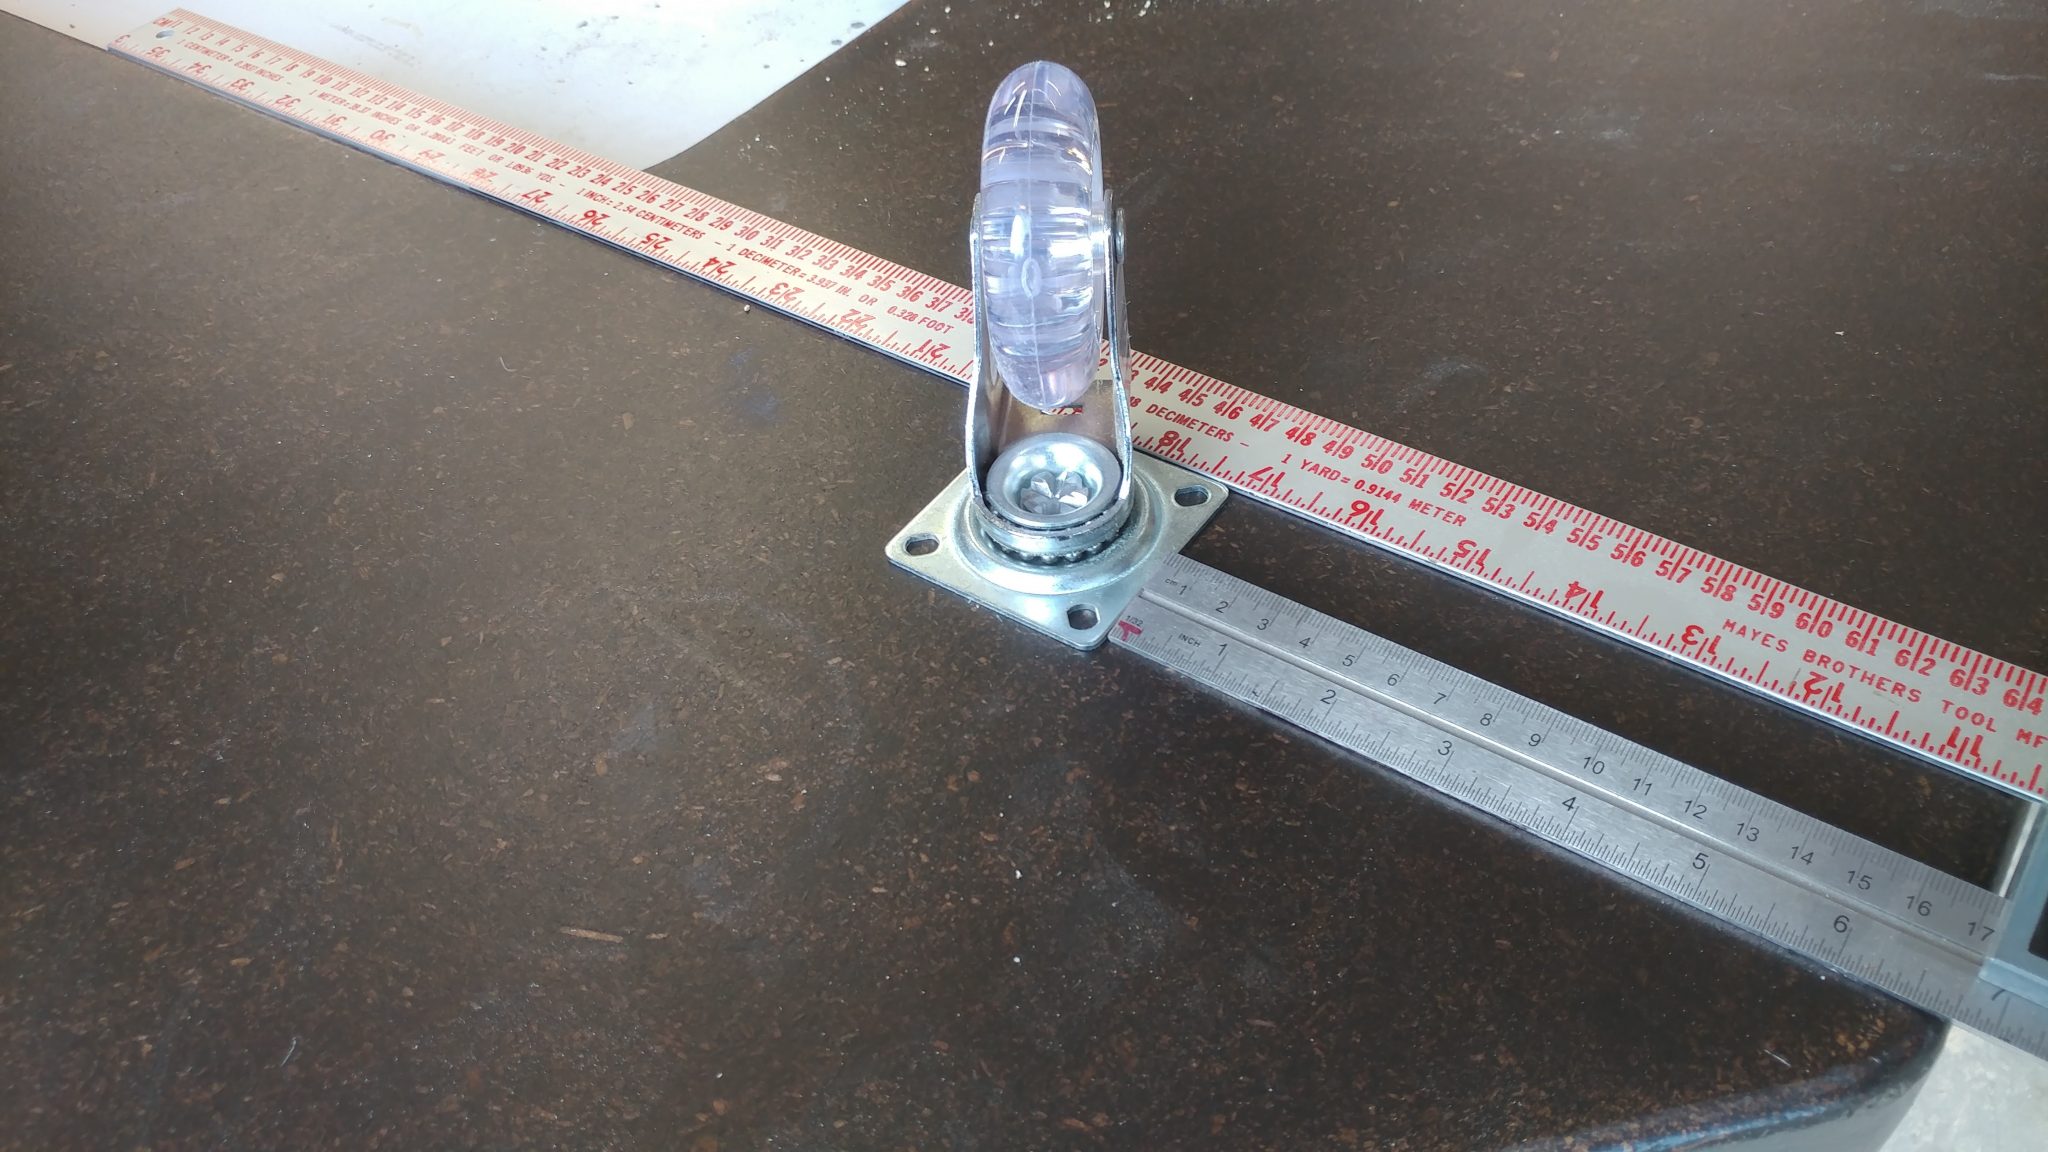
4. Fine-positioning and attaching the middle non-locking casters
The casters that are not at the rear of the desk are non-locking. I used my combination square to ensure that the middle casters are inline with the rear casters. These were attached with the same 1-1/2″ button-head philips screws.
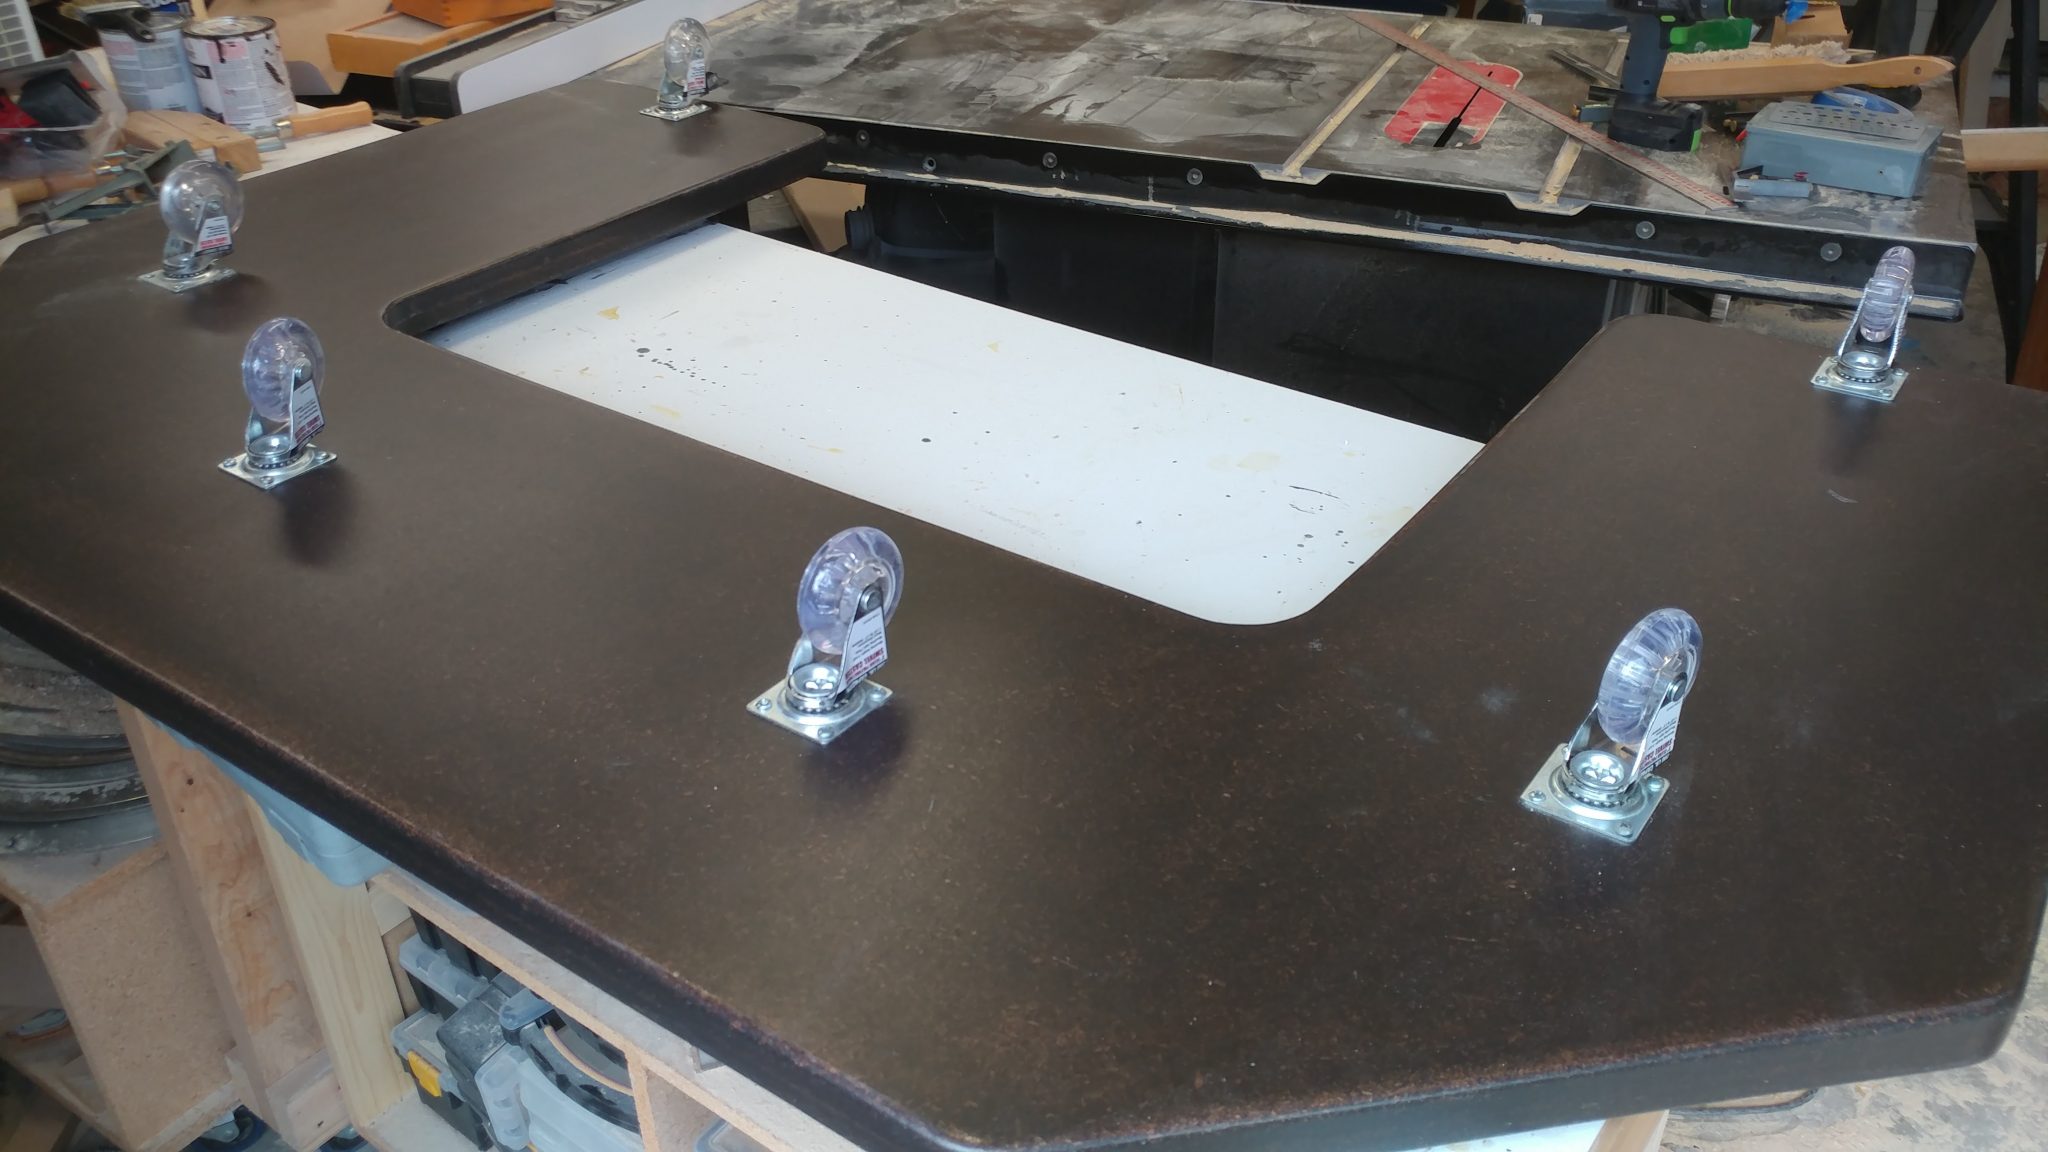
5. Finishing up with the front non-locking casters
The casters at the front are more centered to better bear the heavy load of all of the desk gear.
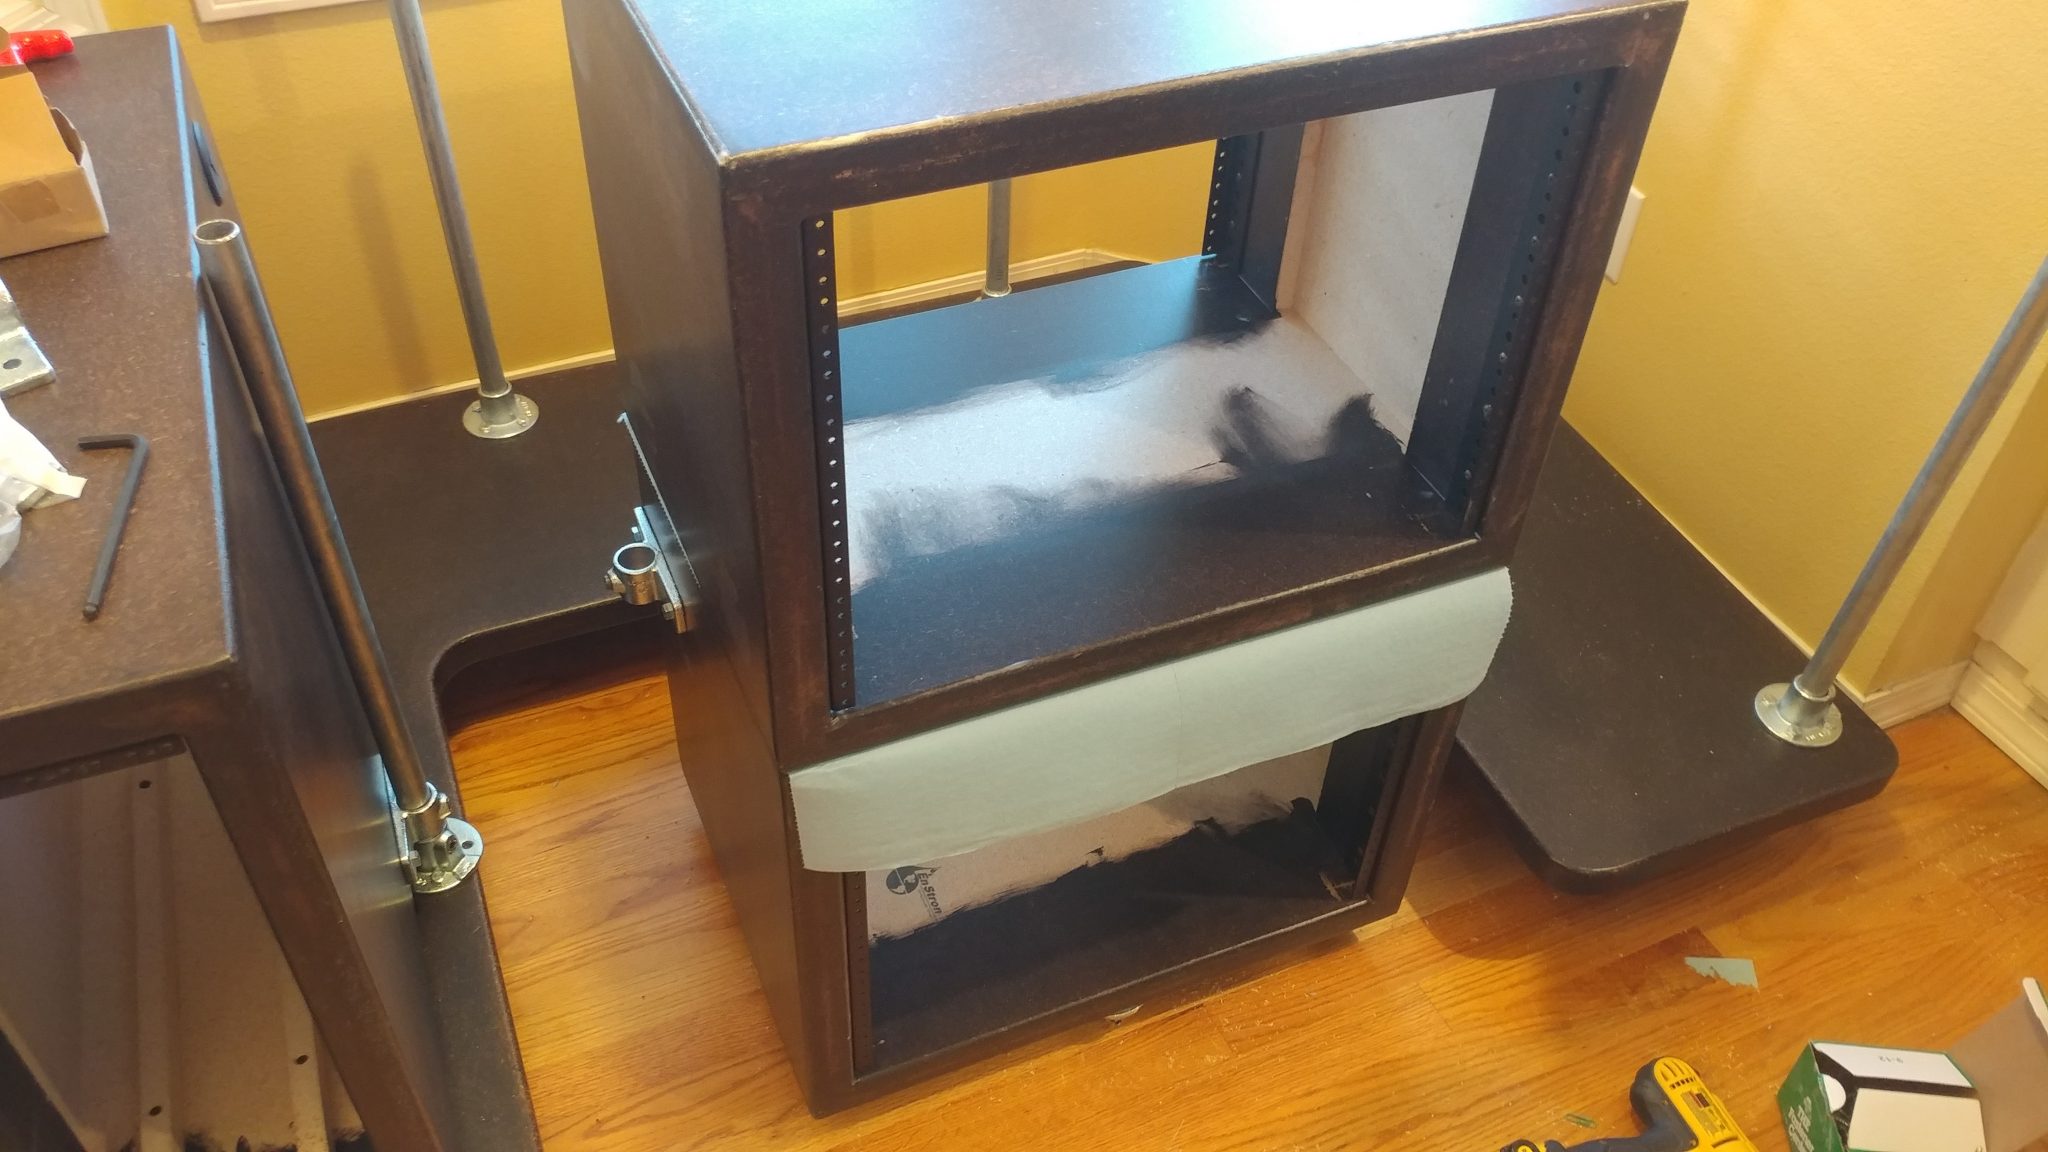
Installing the Rack Hardware
Equipment racks are one of the most overpriced pieces of studio gear and it gives me great pleasure to be able to make my own for a small fraction of the cost. If you have a use for a studio rack, I highly recommend you try making your own.
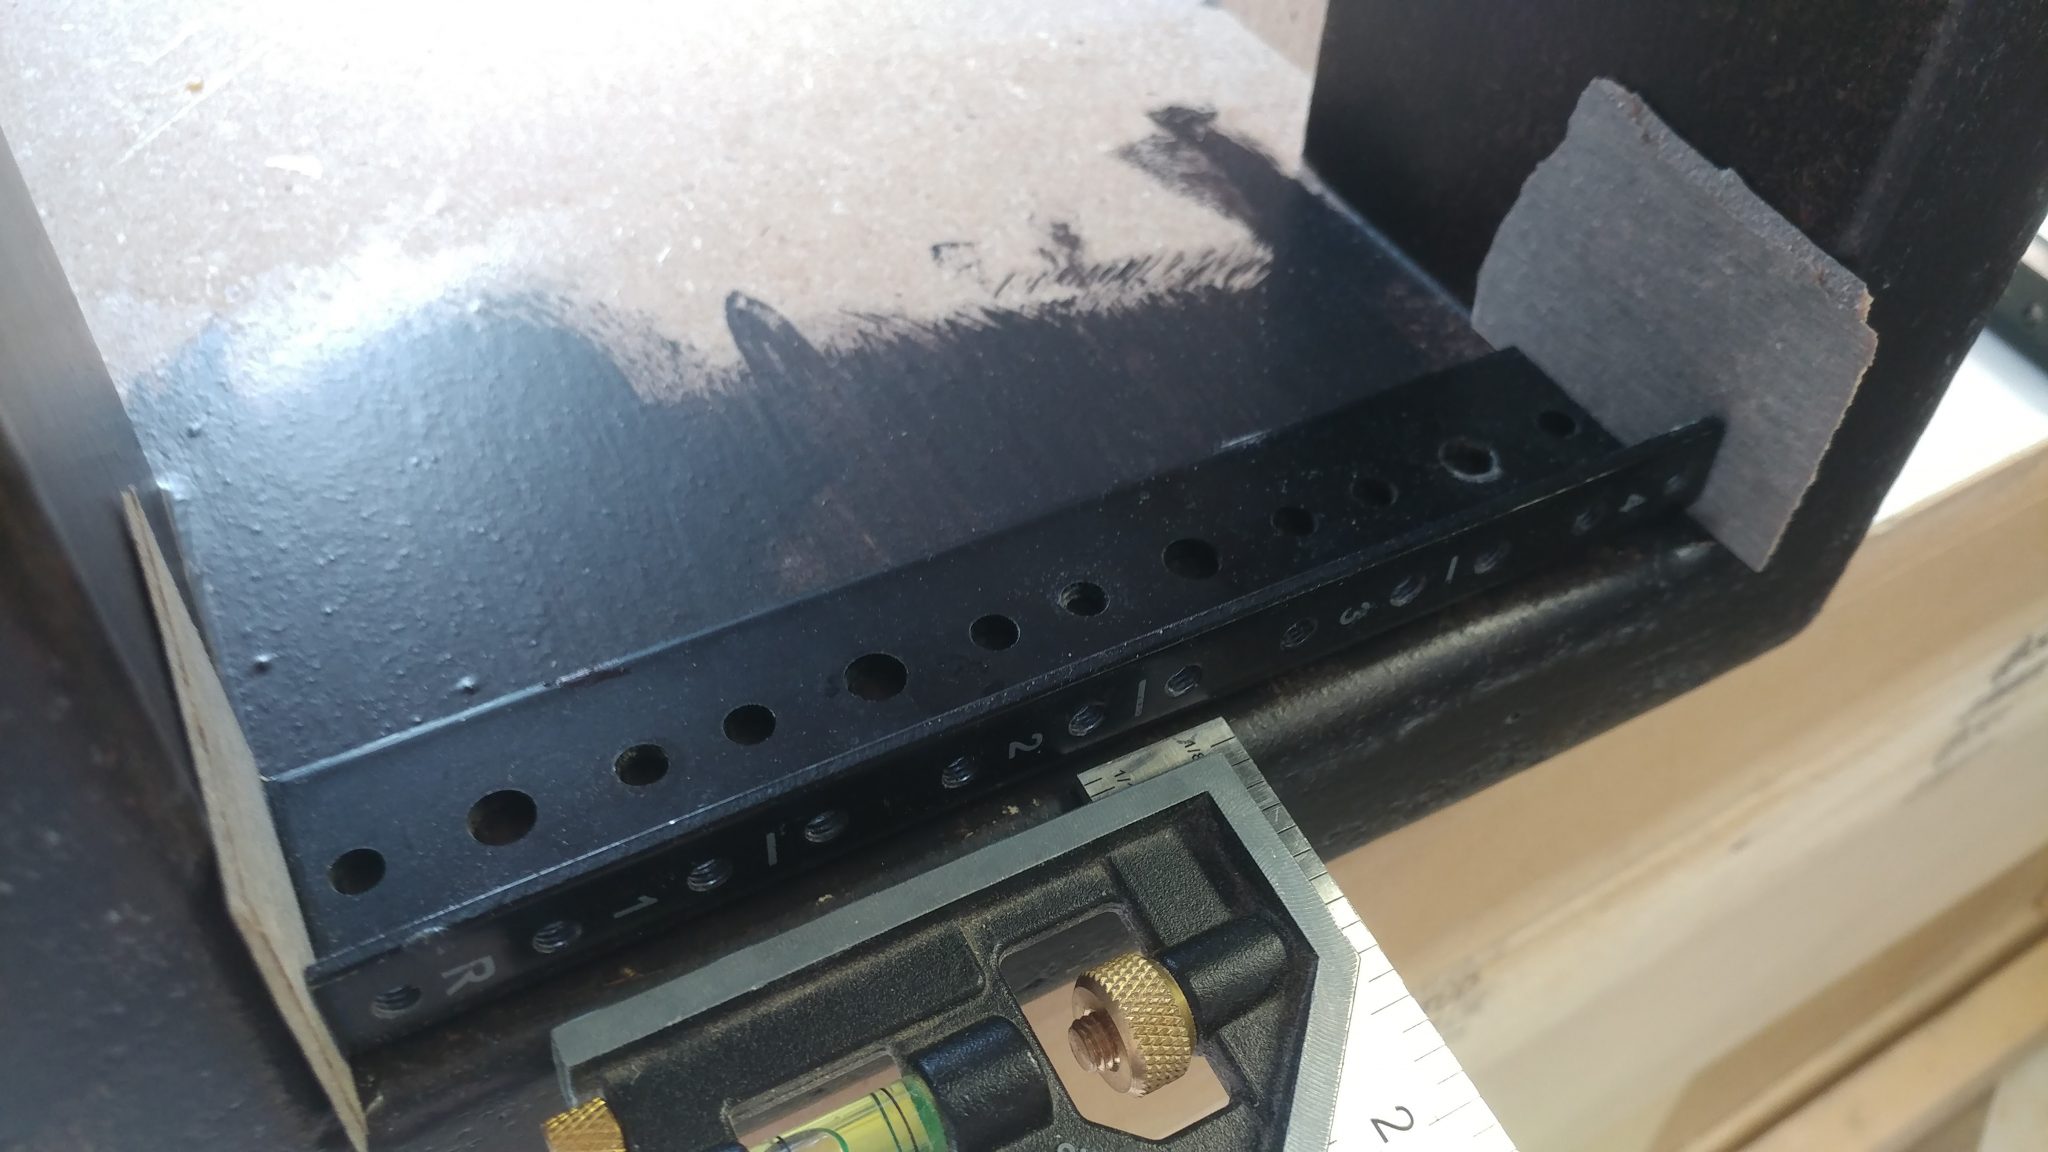
1. Positioning the 4-space rack rails
The rack rails were installed so they were 1/8″ from the front of the rack body. I used two scrap pieces of laminate left over from my router enclosure build to shim between the top and bottom of the rack rails and the inside of the rack body, ensuring that they would be centered and consistent on both the front and back of the racks.
2. Attaching the 4-space rack rails
These rails were attached with screws as well.
Each rack got four rails; two for the front and two for the rear.
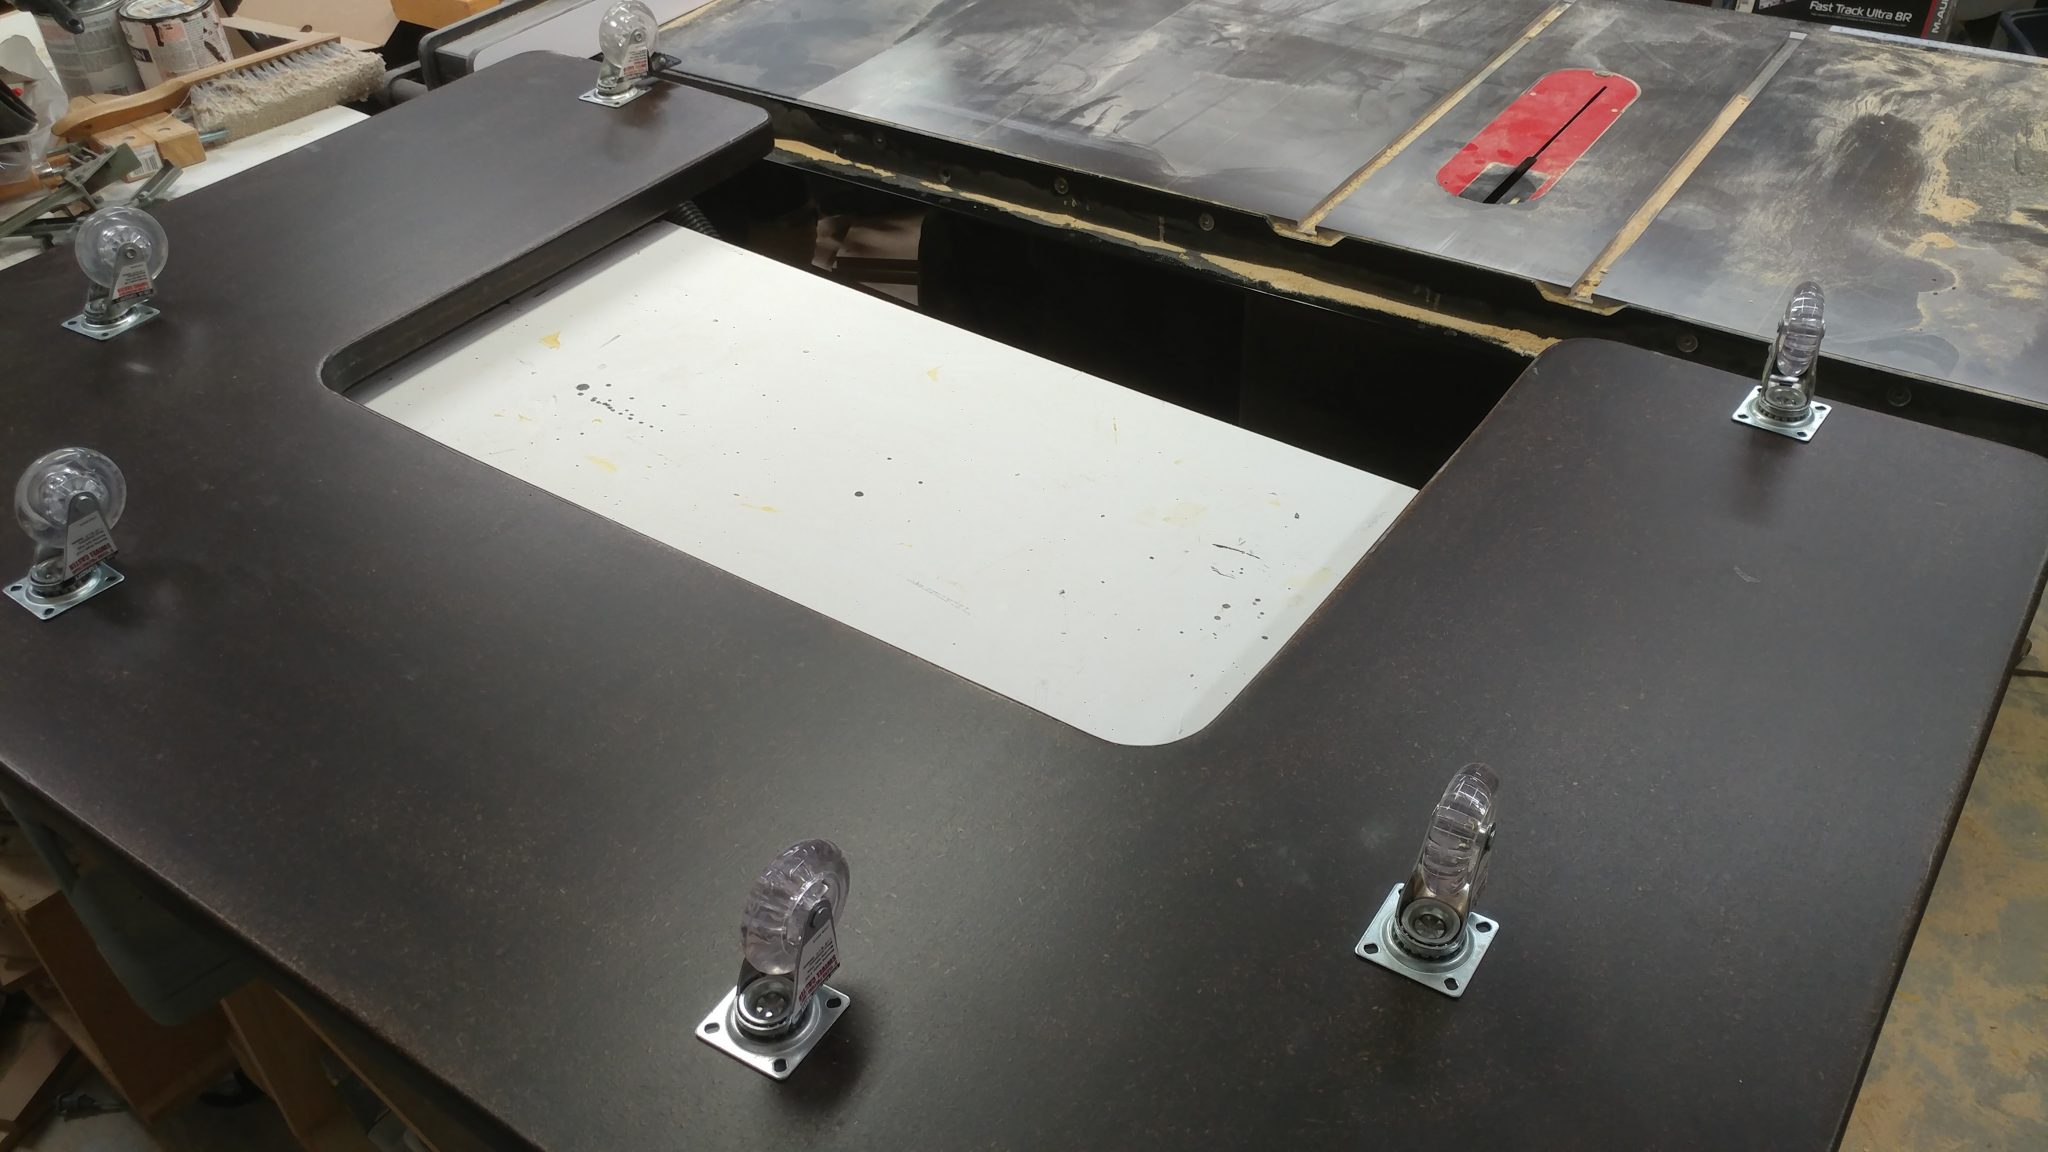
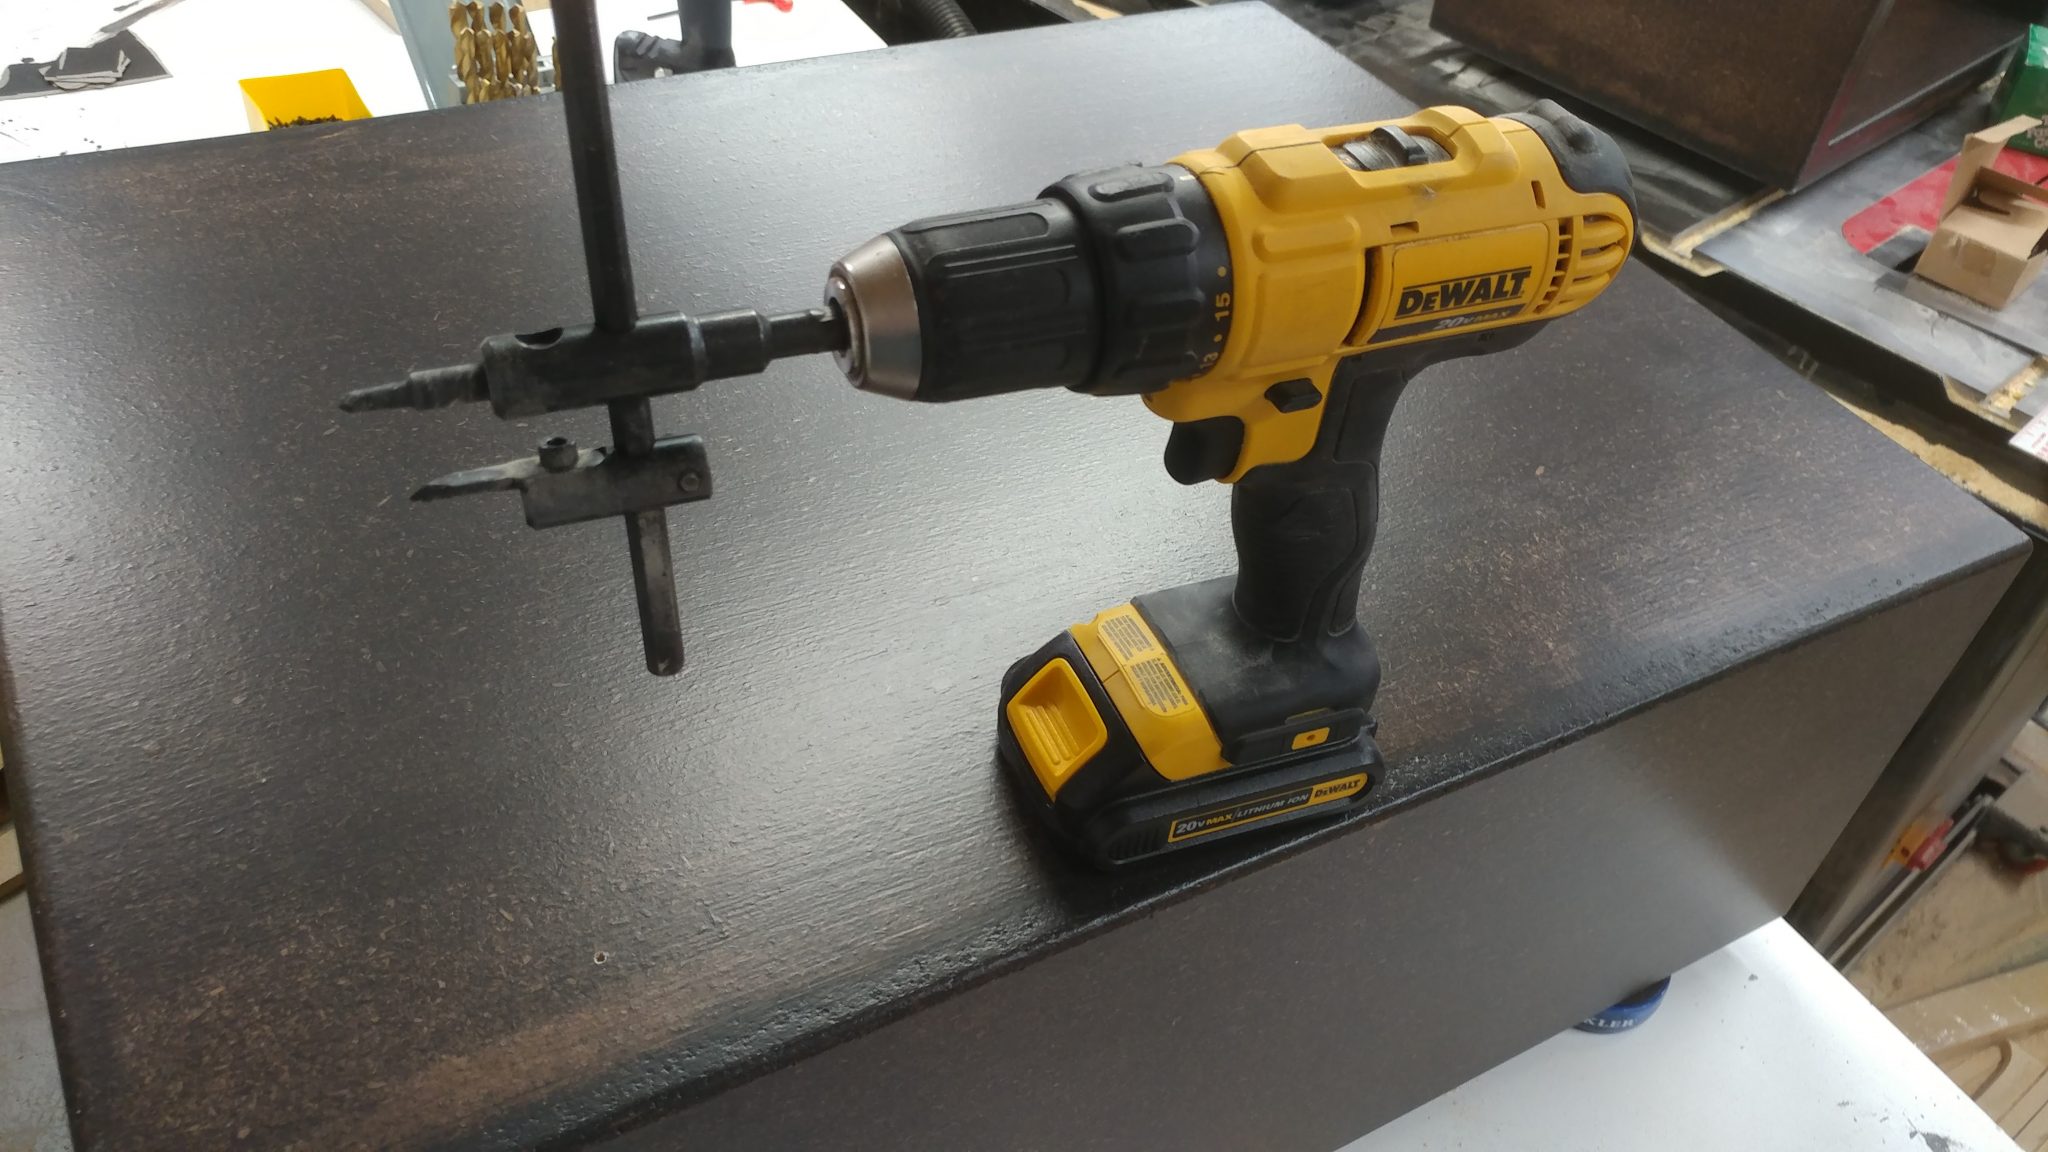
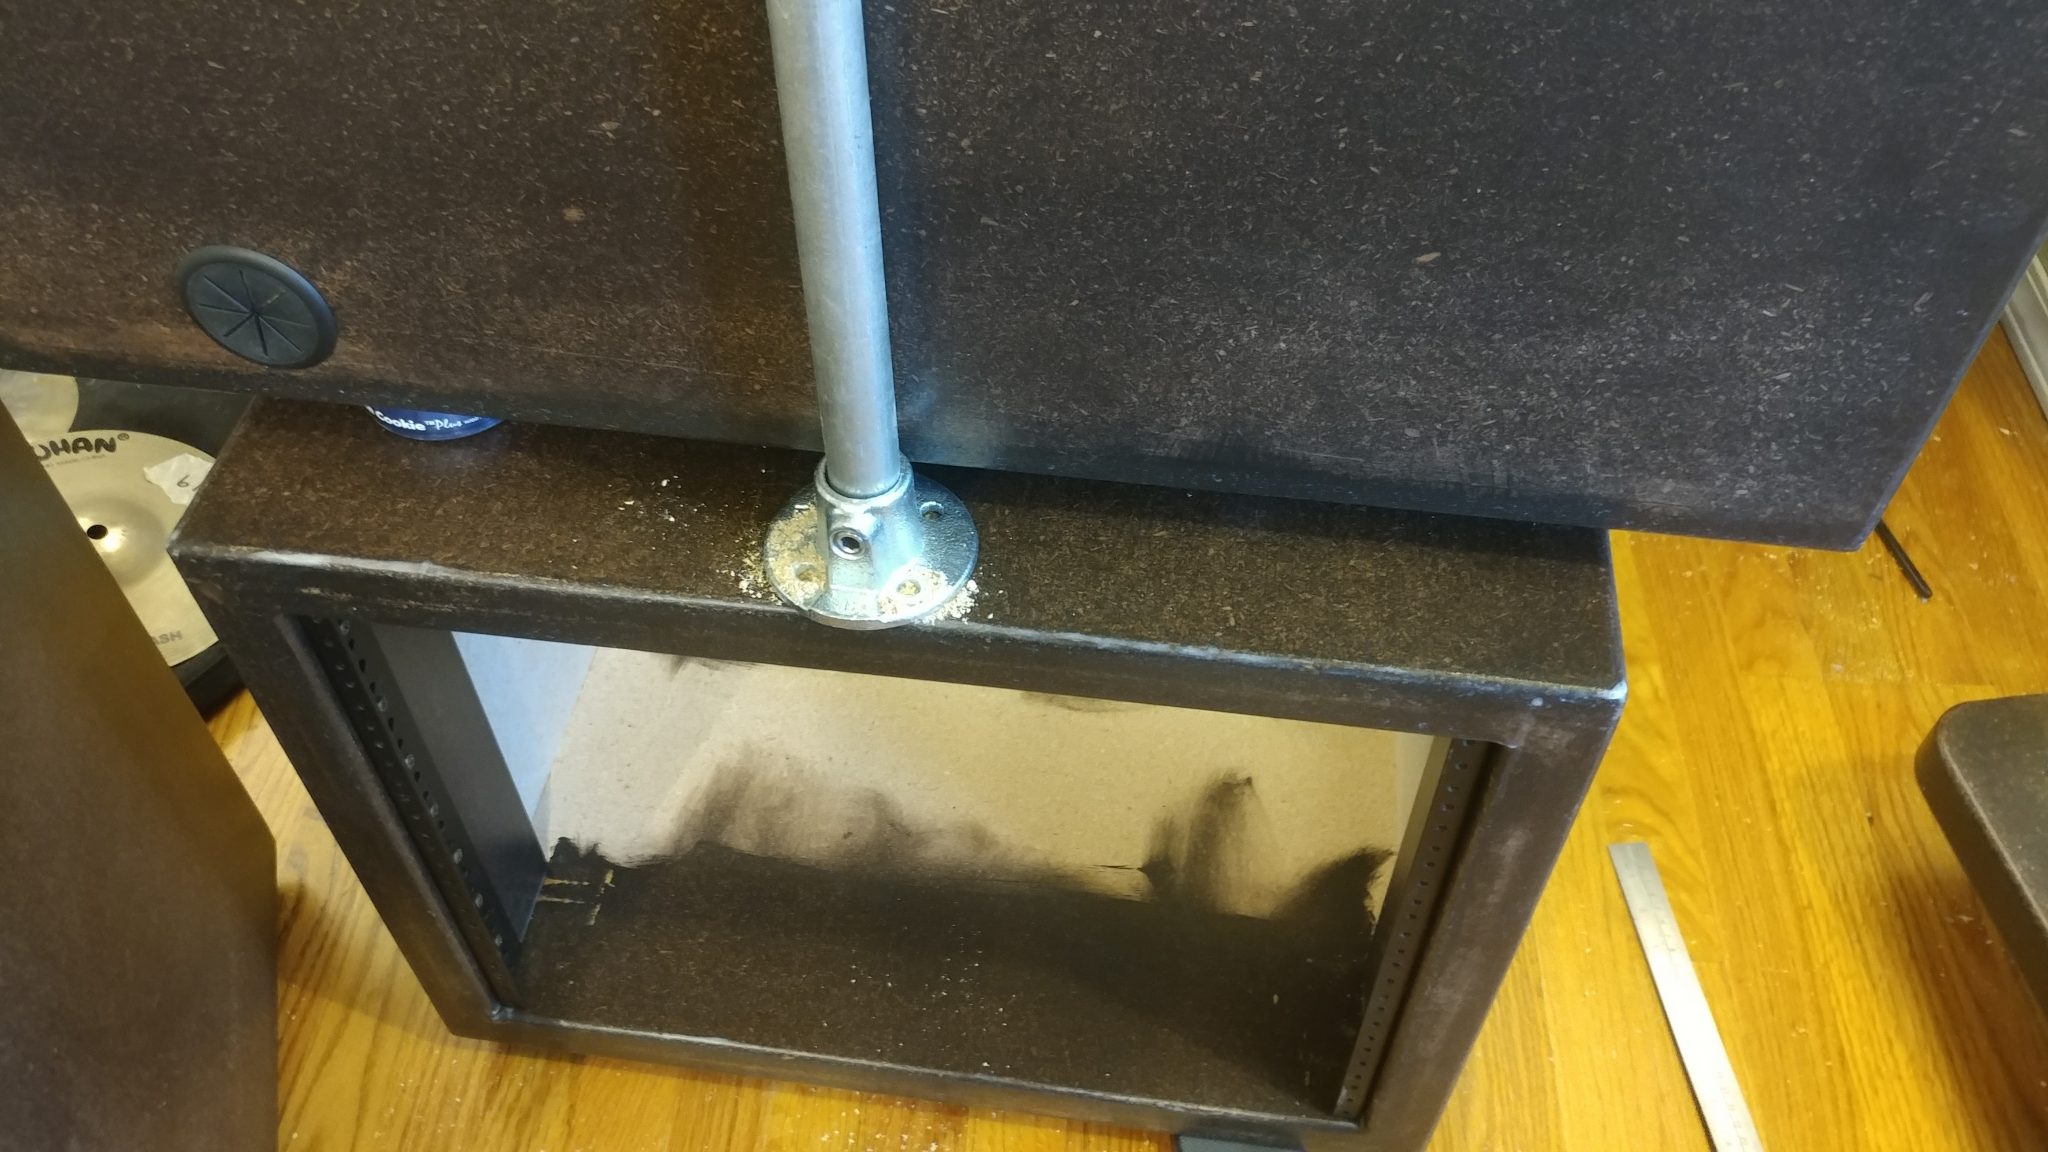
3. Determining the location for the grommet
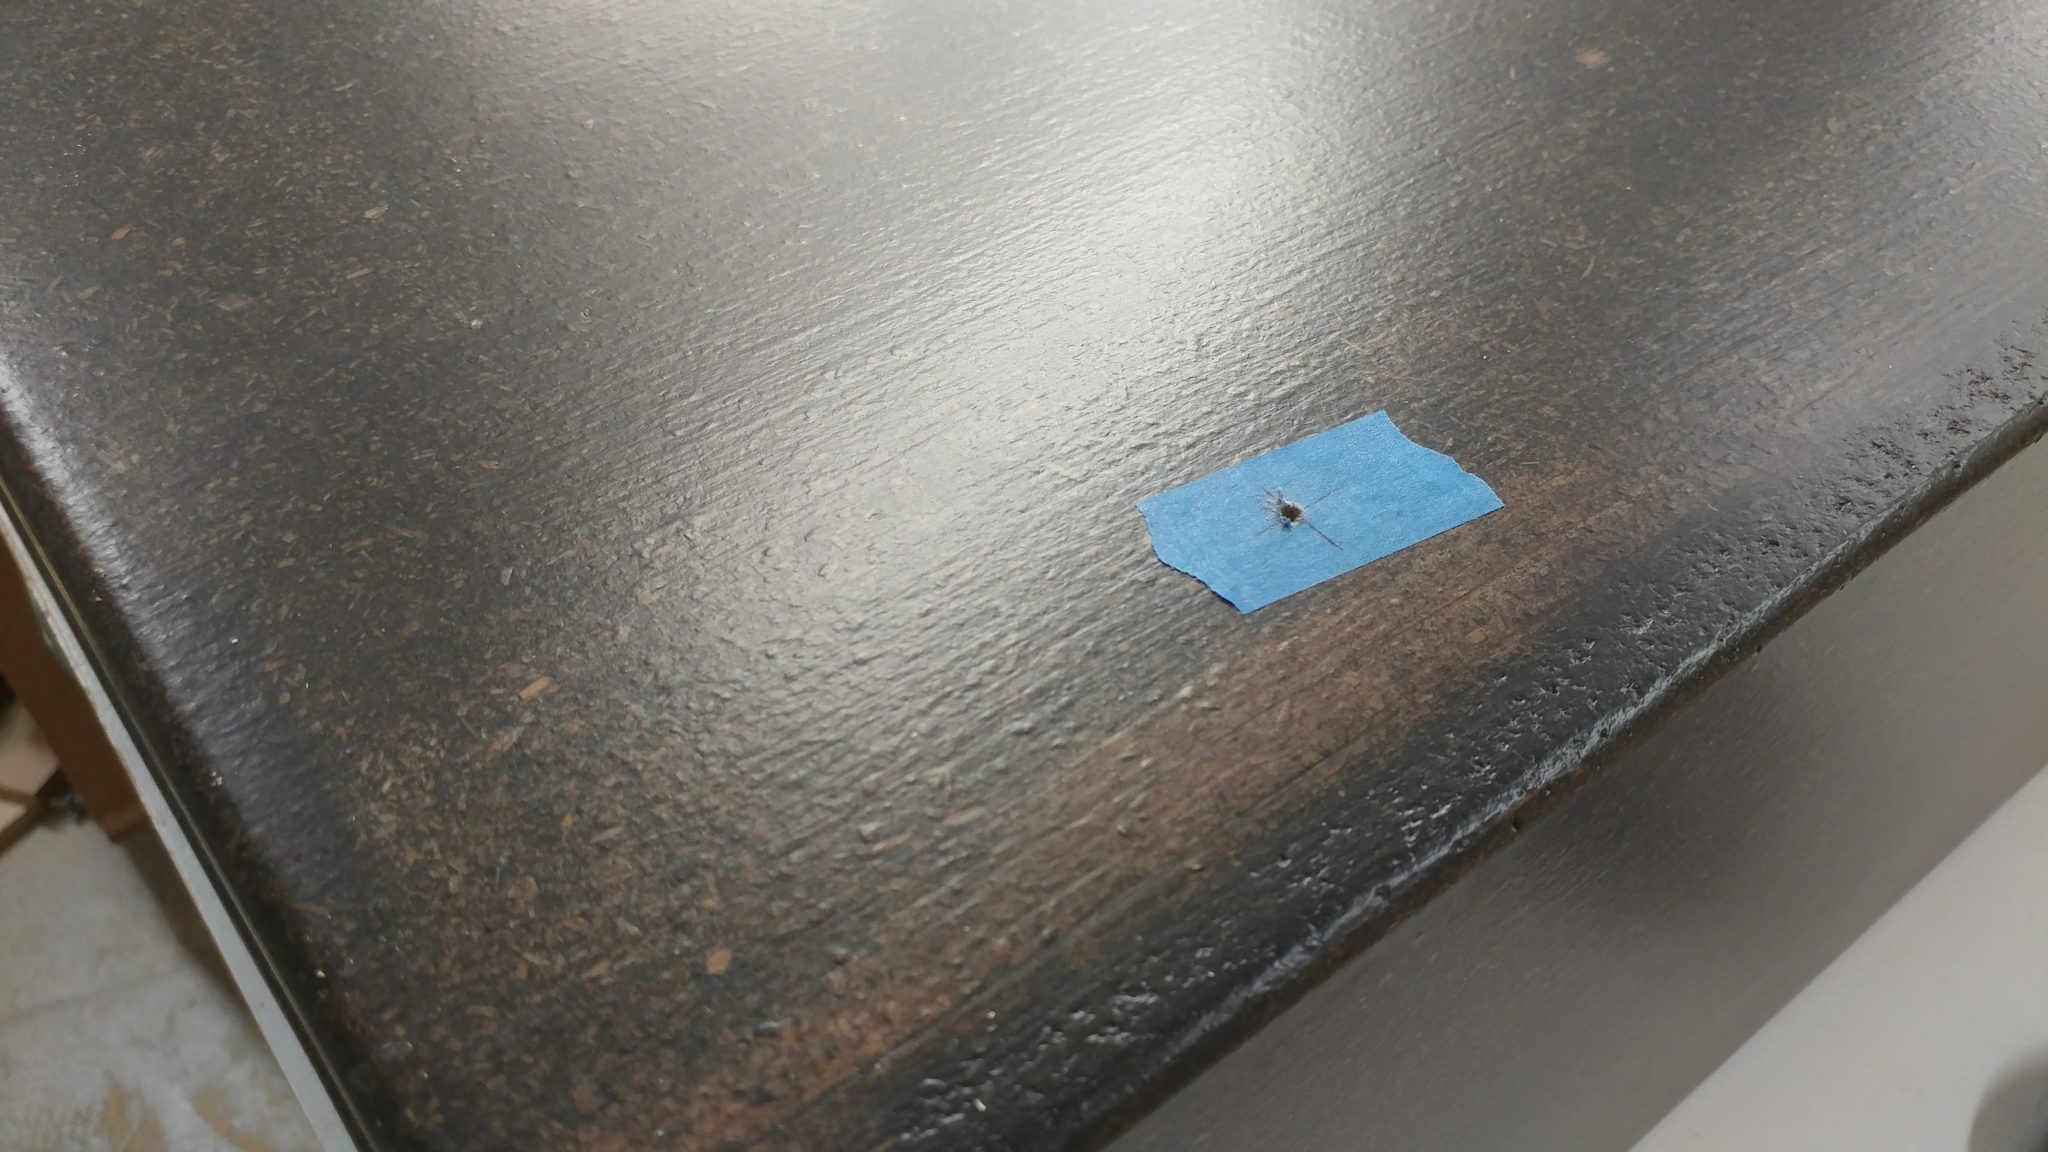
Each rack will have a number of cable pass-throughs. I wanted the pass-through to be placed towards the back and towards the top, which will make it easier to conceal the cables. I decided to have the computer pass-through located 2″ from the top of the rack and 5-1/4″ from the rear. This was a slight mistake, as you’ll see below.
I marked the spot on painters tape and drilled a pilot hole.
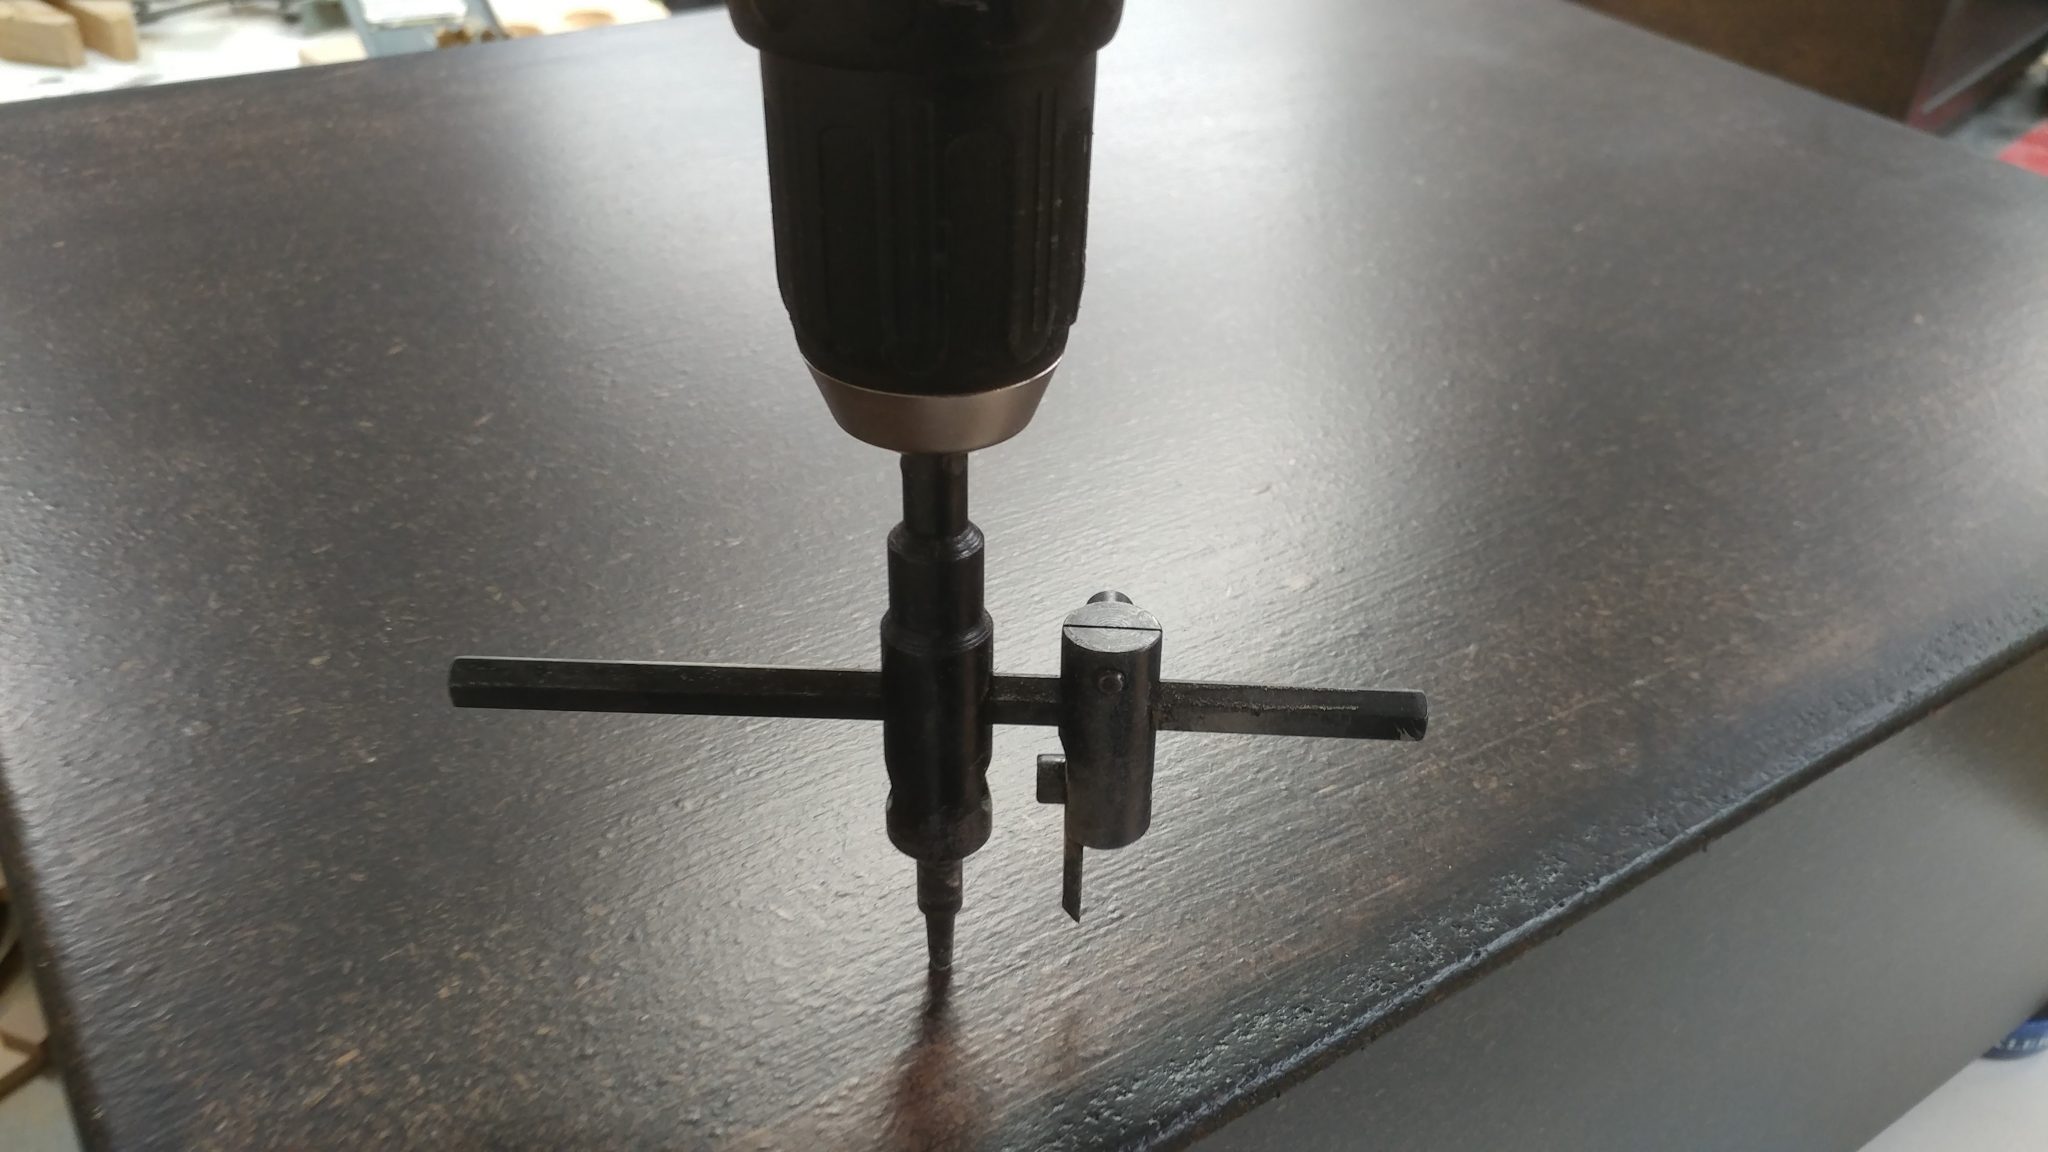
I only used one cutter to do this. Having the second cutter installed was feeling a bit sketchy.
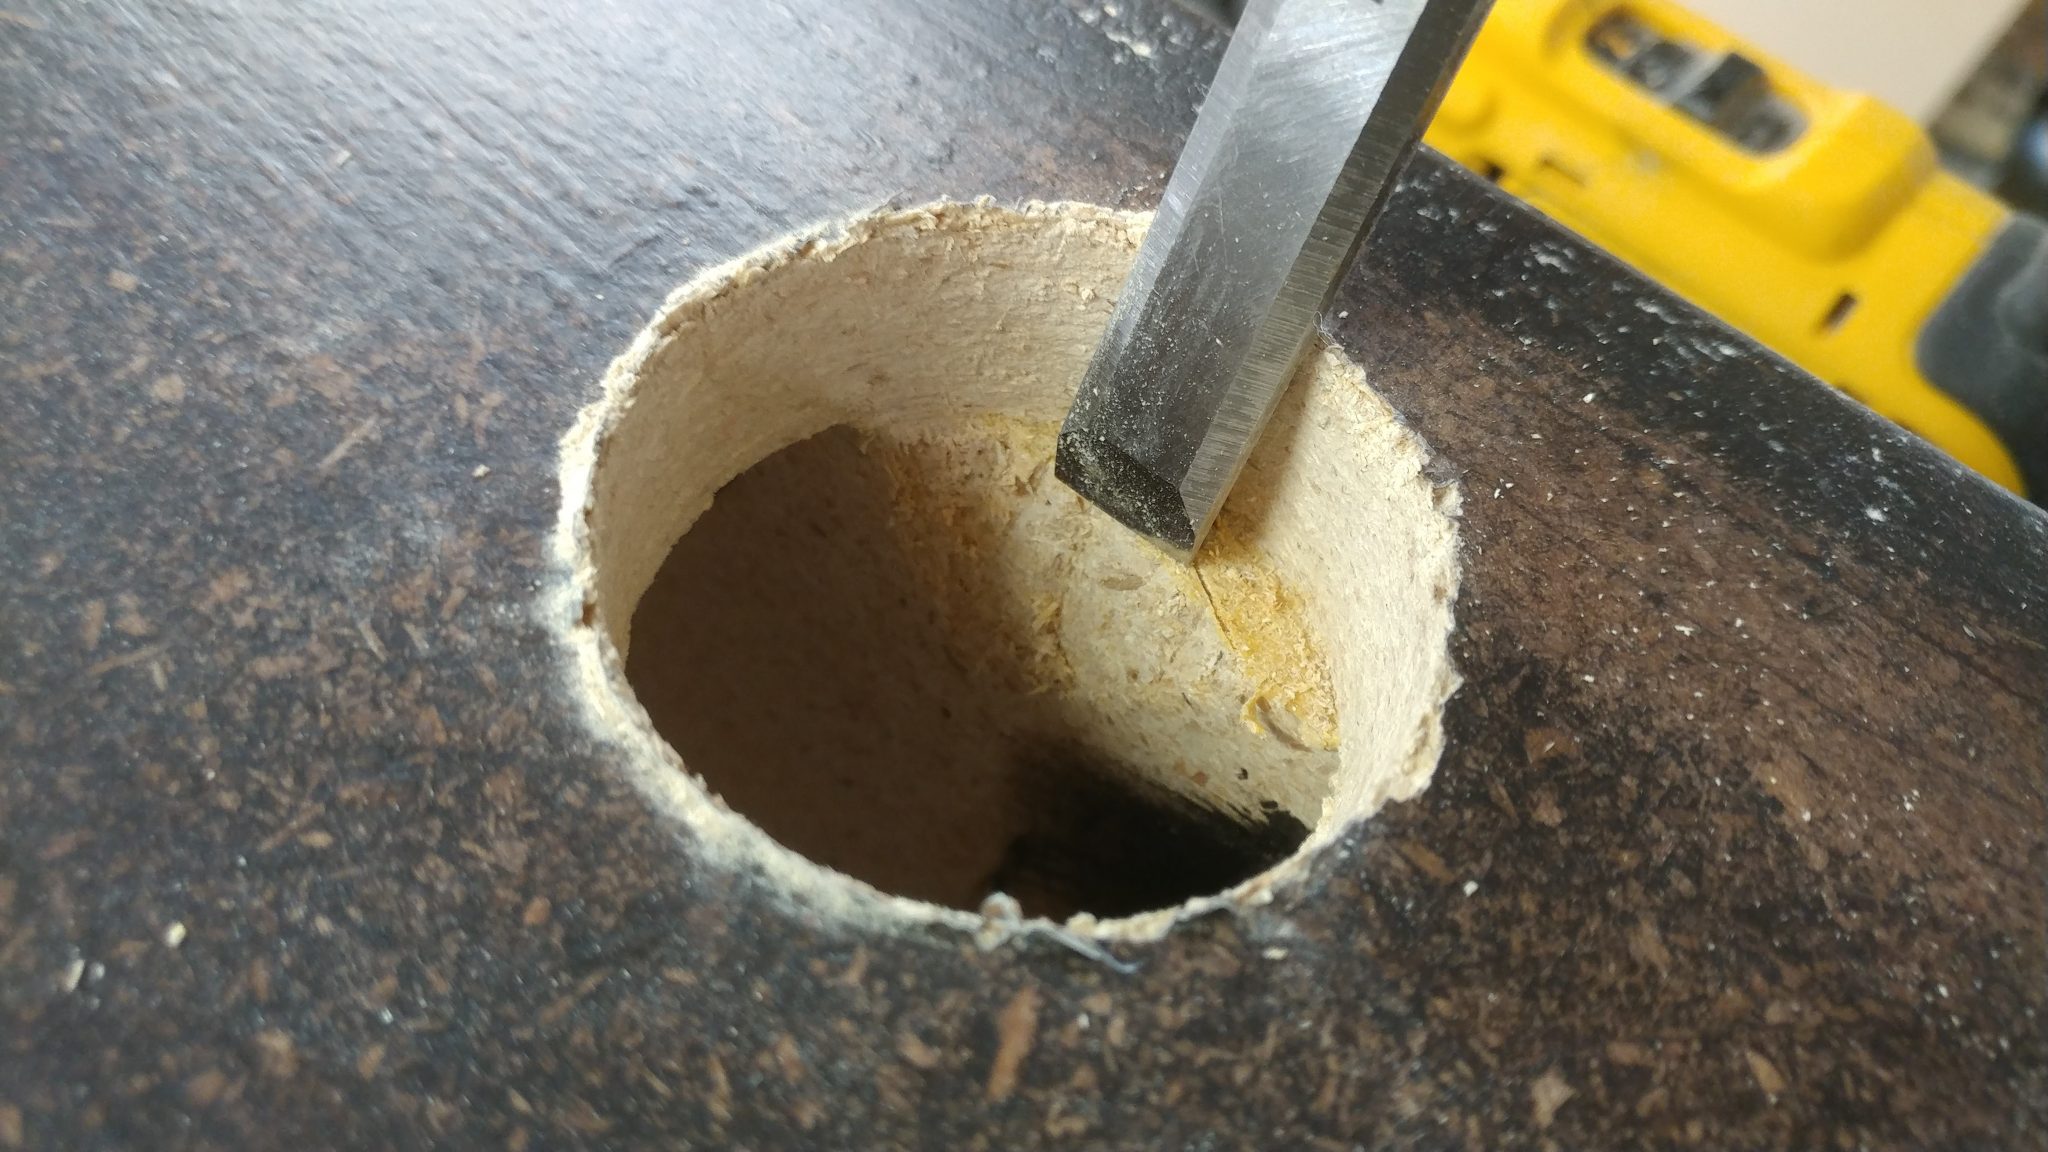
5. Cutting the circle for the grommet
I used the pre-drilled pilot hole to start cutting
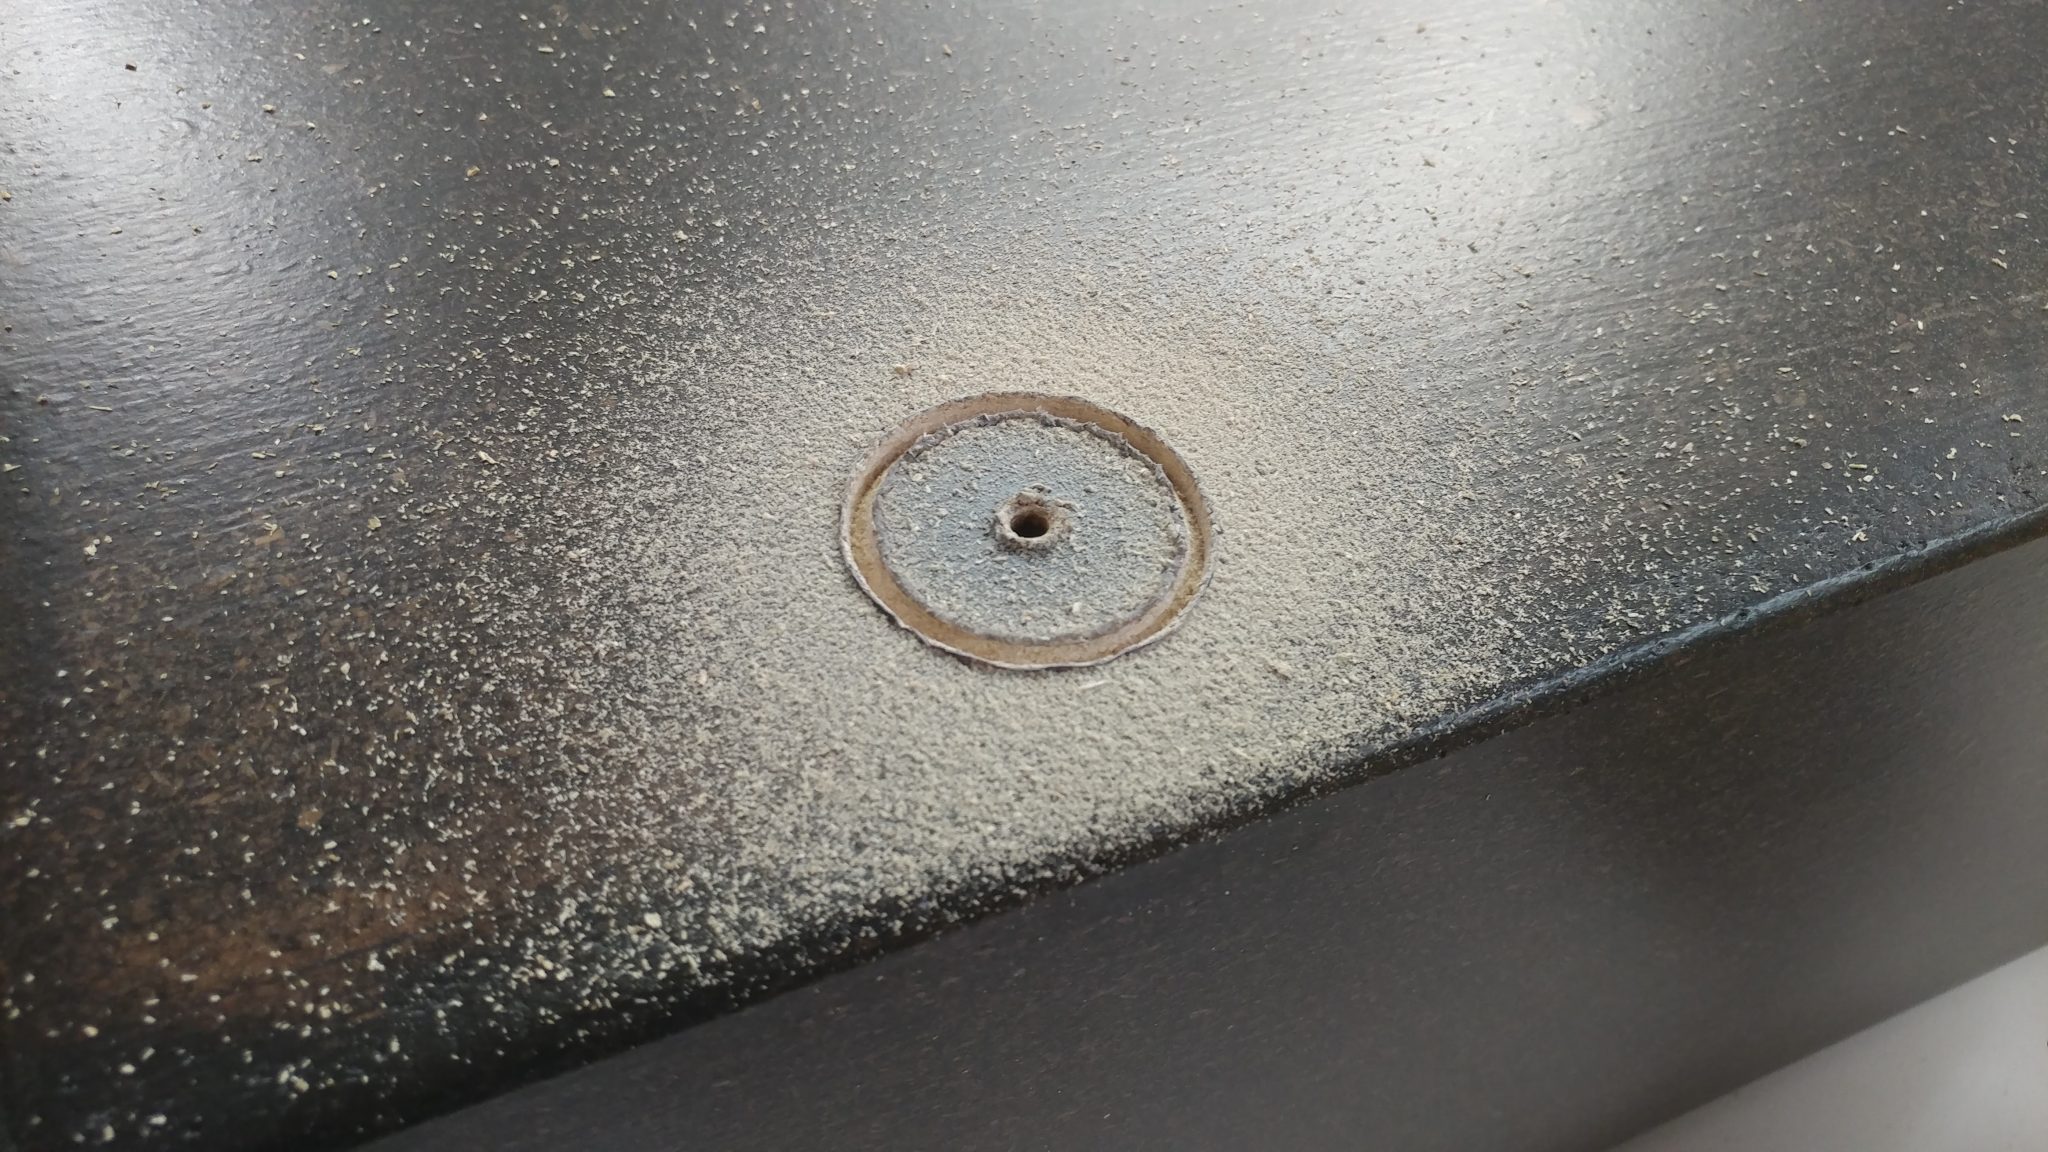
The circle cutter uses the pilot hole to keep it in the proper location.
6. My first major screw-up
This is where I screwed up. I forgot that the top and bottom of the racks have two layers of 3/4″ particle board rather than just one. I didn’t calculate that when I decided on a hole placement. This means that the top of the rack will interfere with the pass-through.
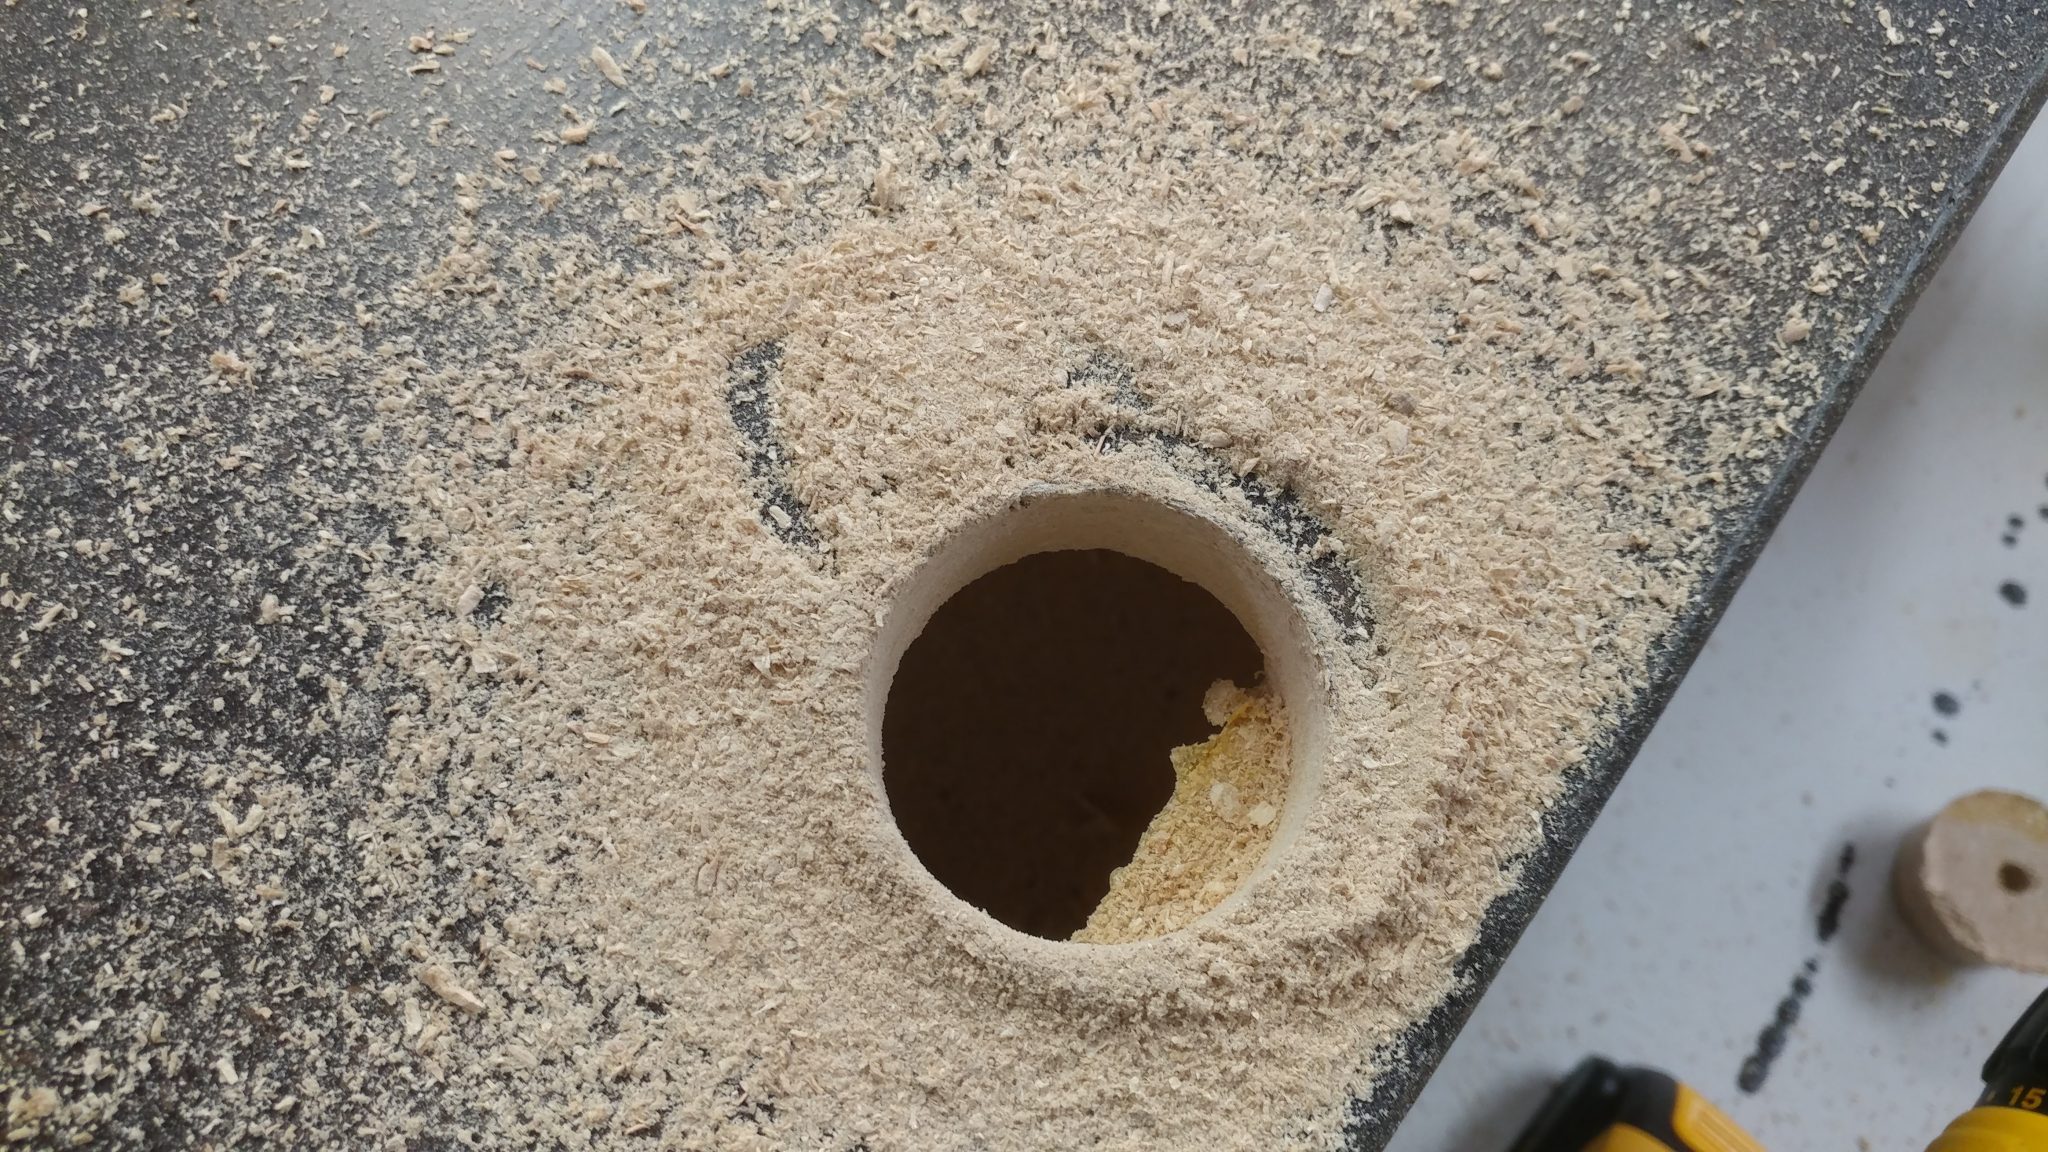
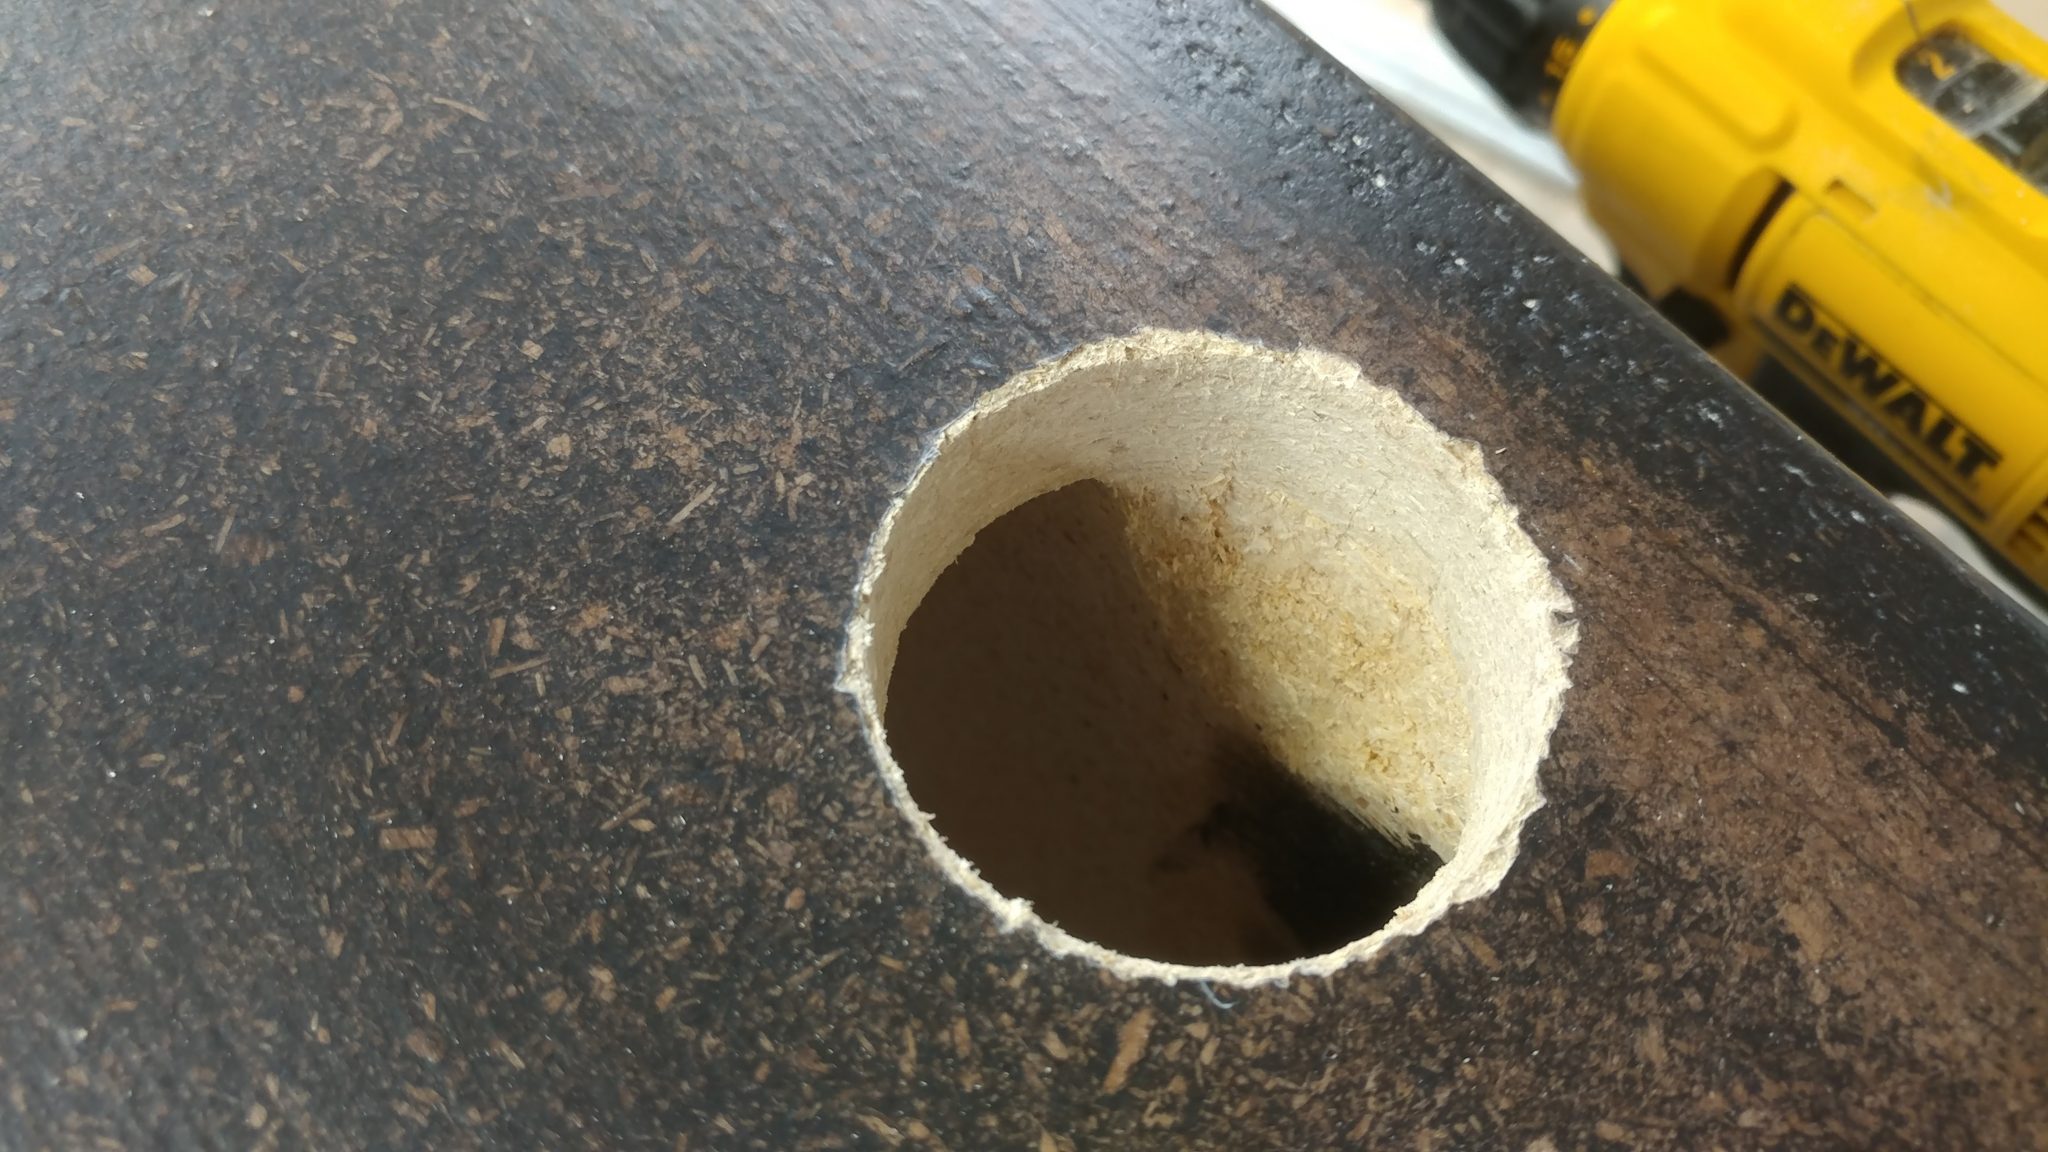
7. Fixing the screw-up
I used a chiseland a raspto clear out enough room to allow the pass-through grommetto be fully inserted and provide more room for cables.
Much better.
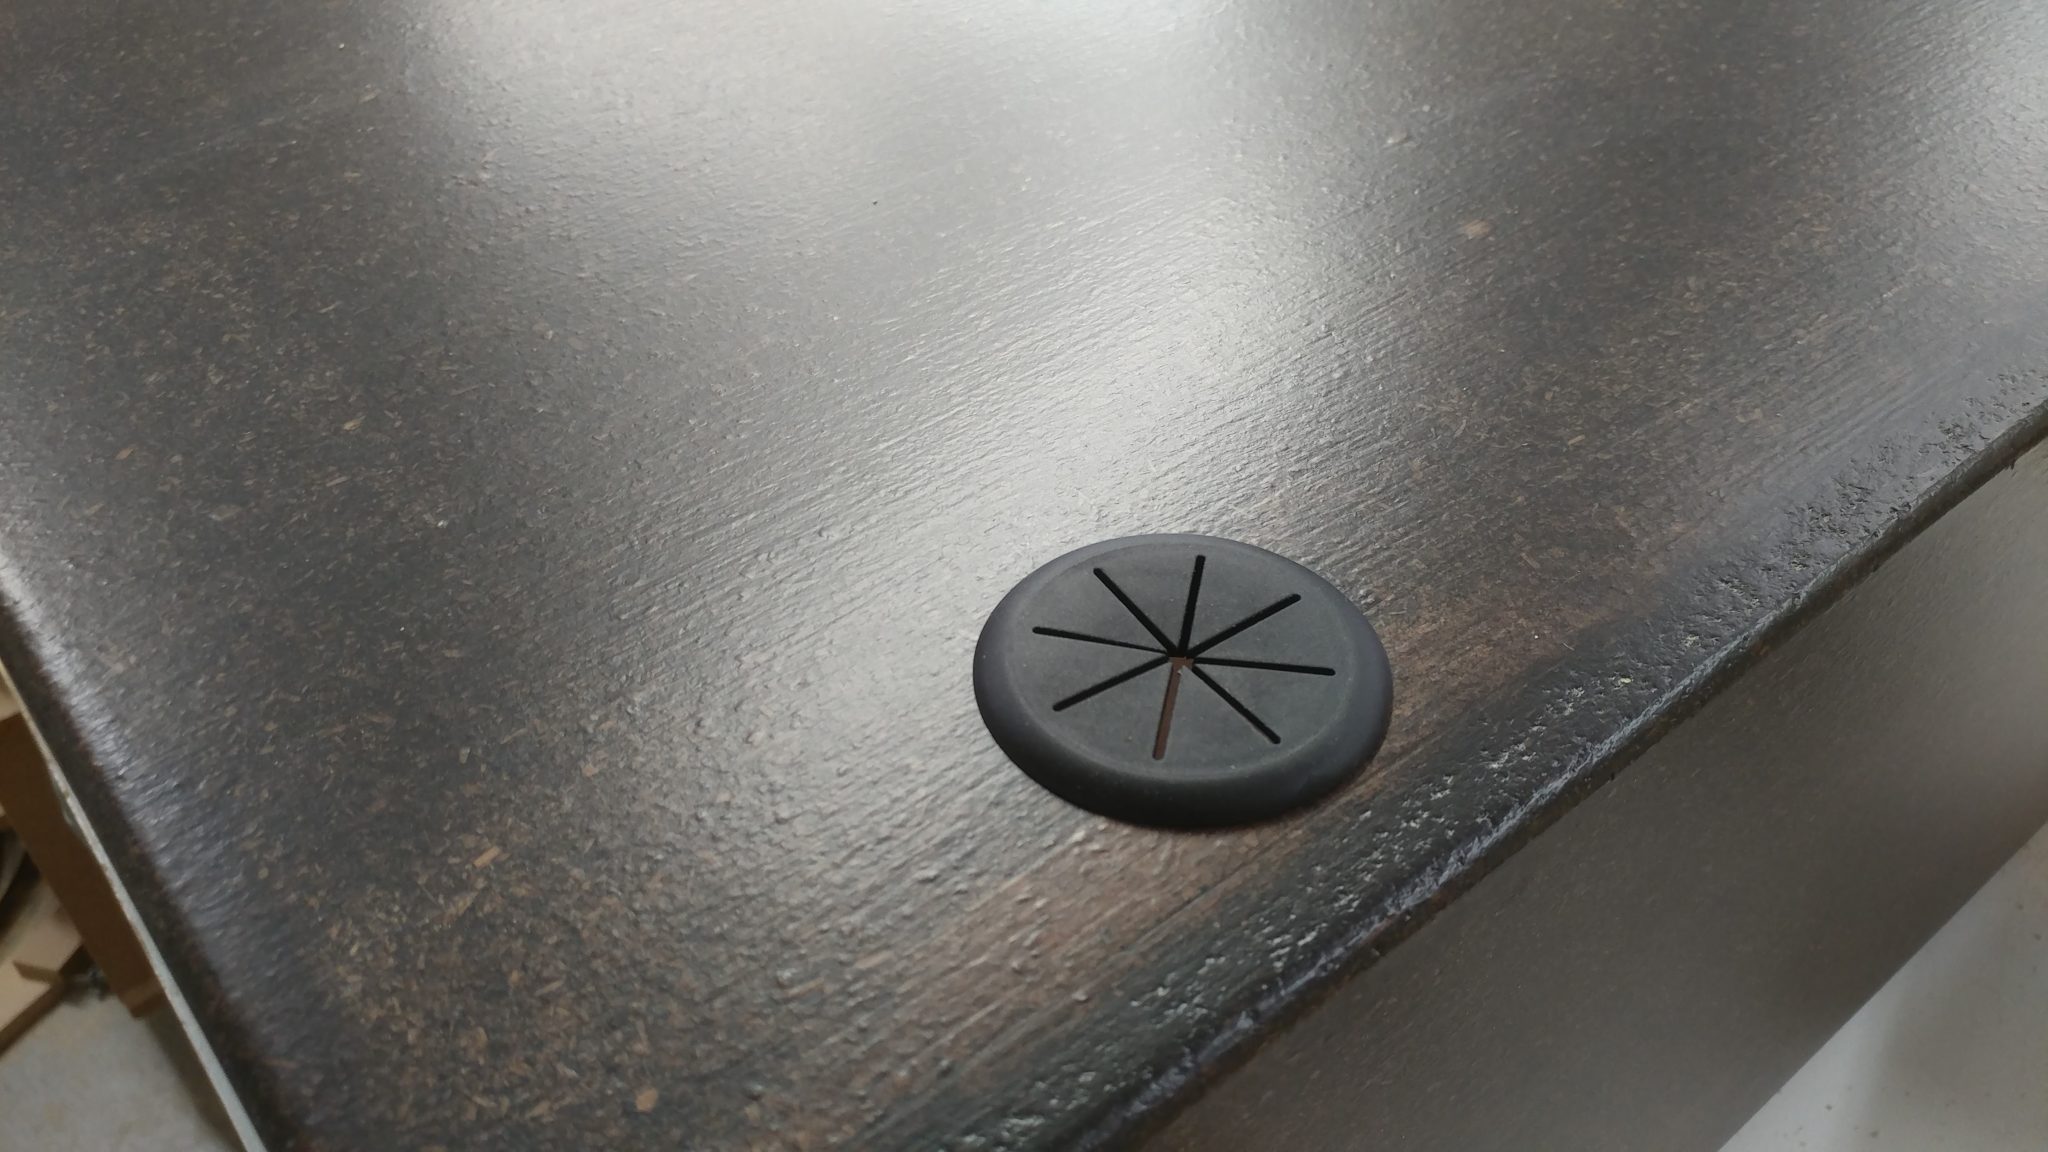
8. Installing the grommet
The grommetfits nicely and covers the jagged edge around the hole. I used some 5-minute epoxy to secure the grommet in place since the hole cutter didn’t really cut a smooth hole in the particleboard..
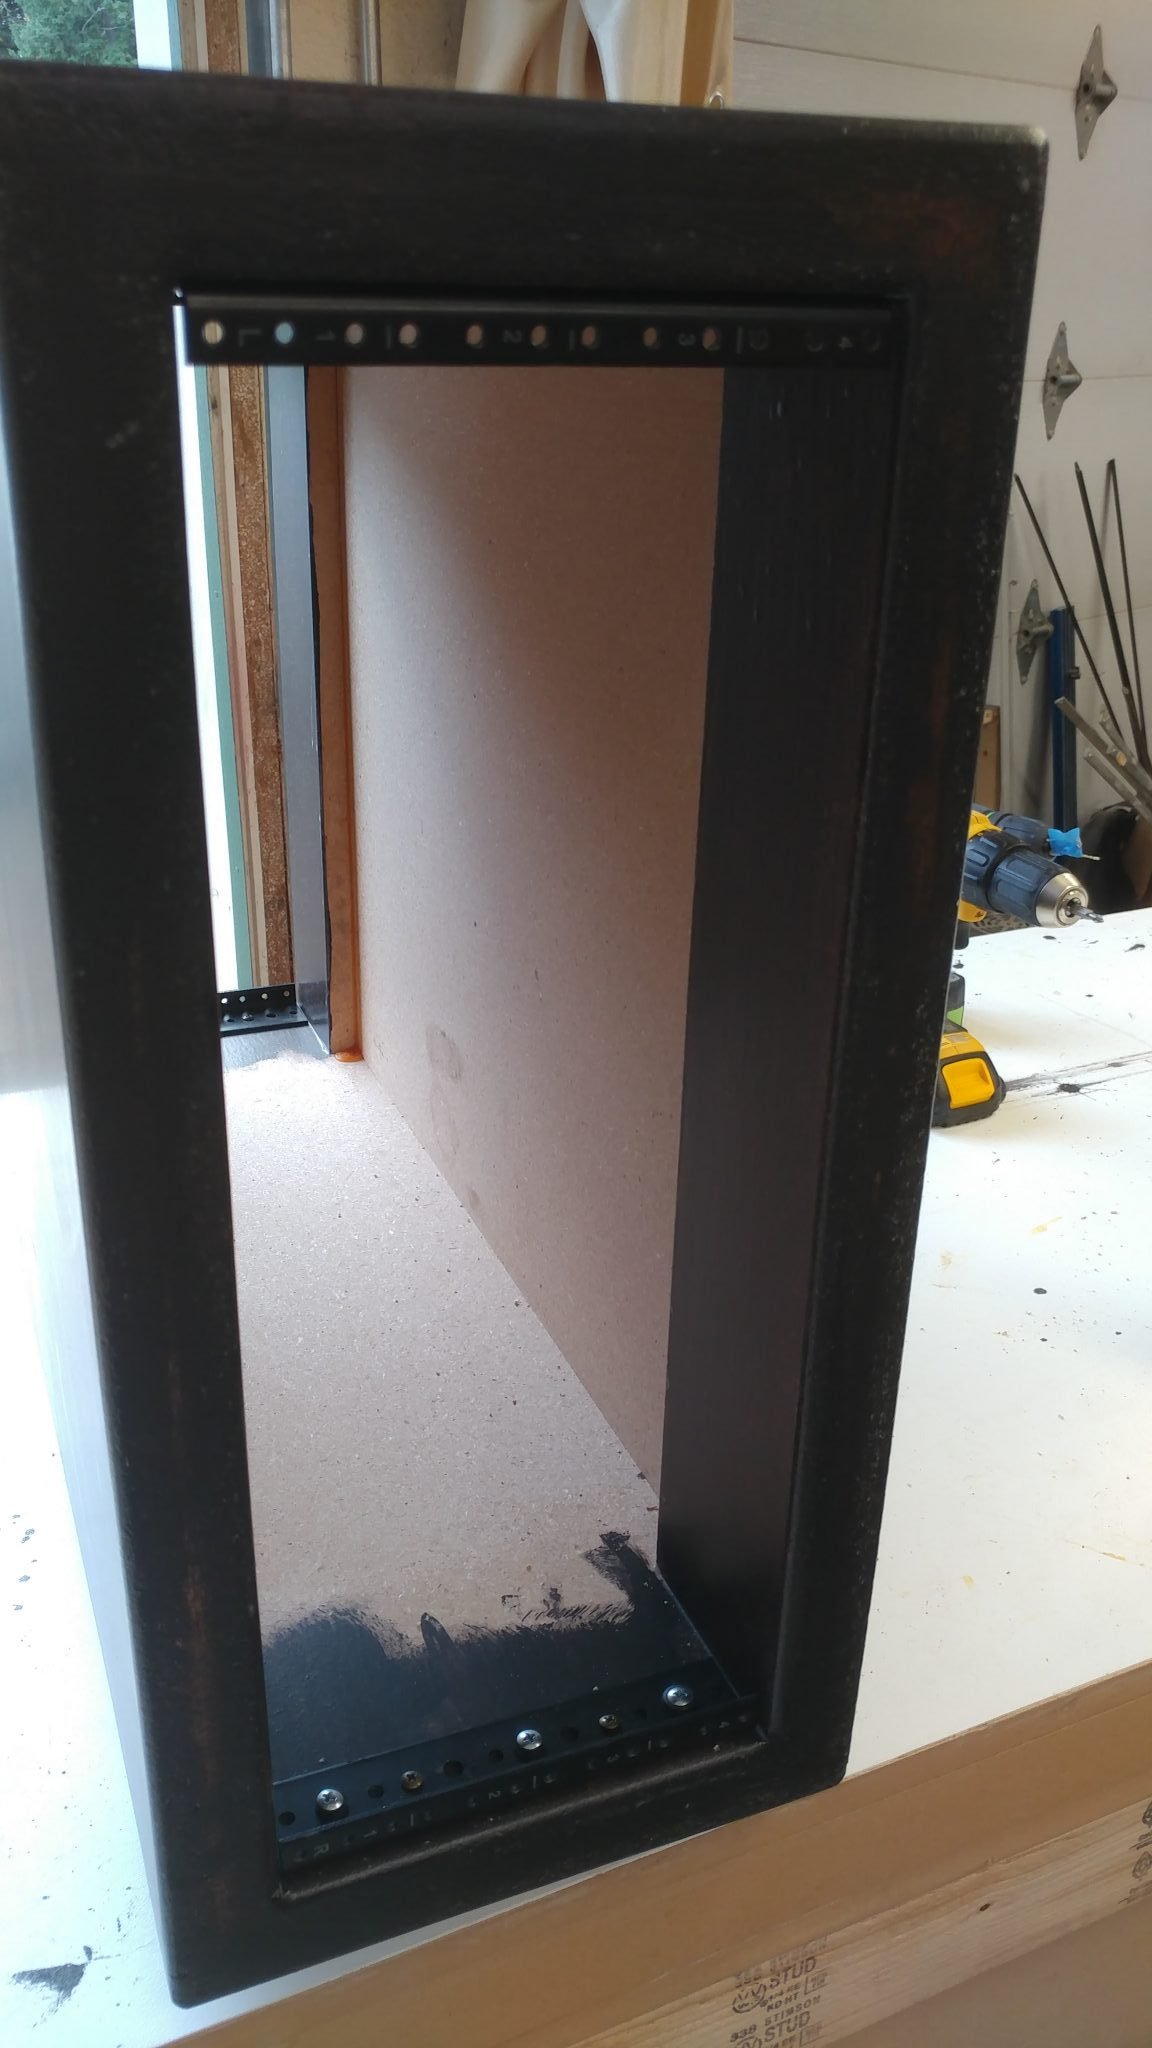
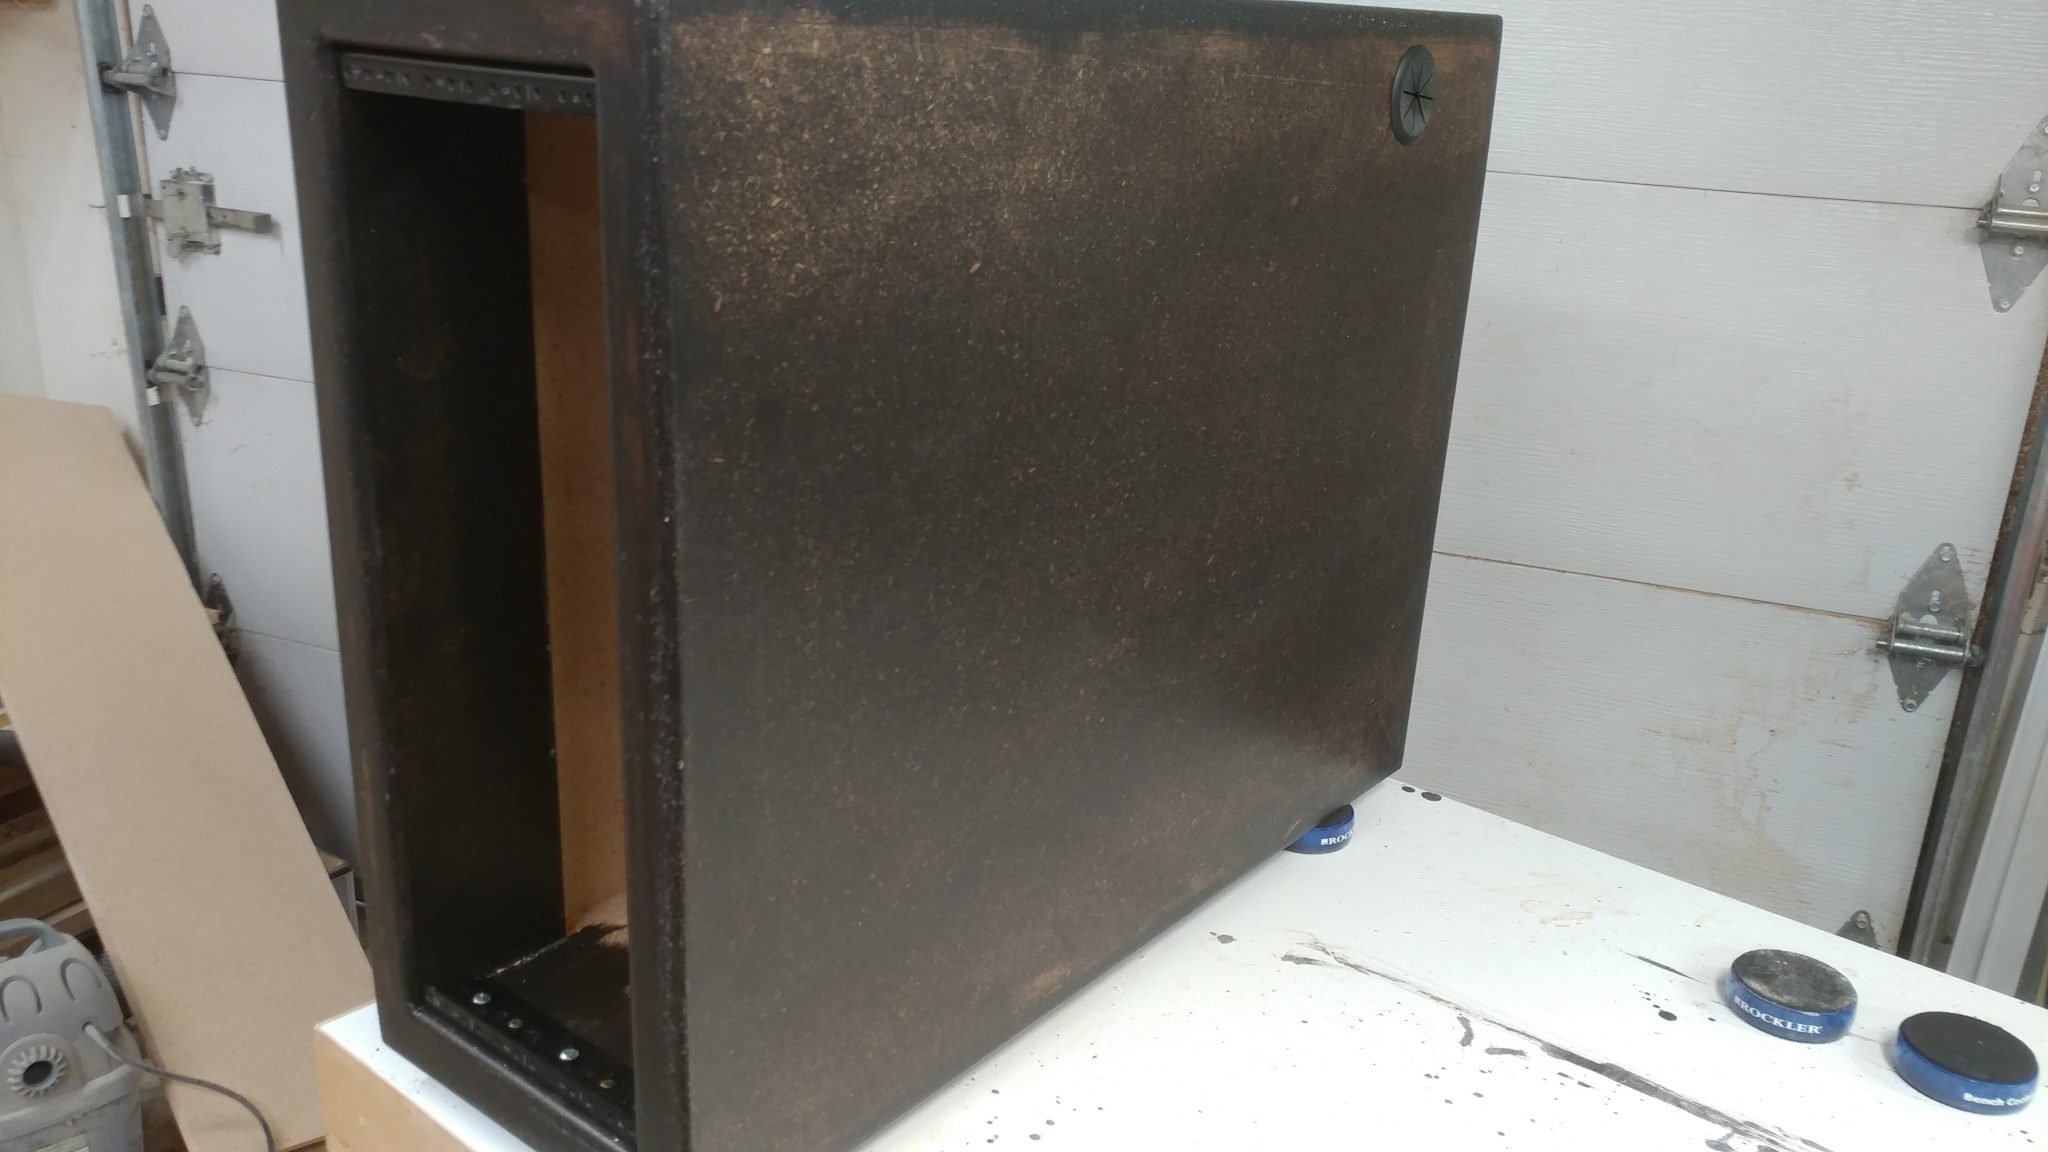
9. Taking it all in
This is how the rack will be positioned in the desk. You can see the pass-through grommetin the upper rear corner on the side of the rack.
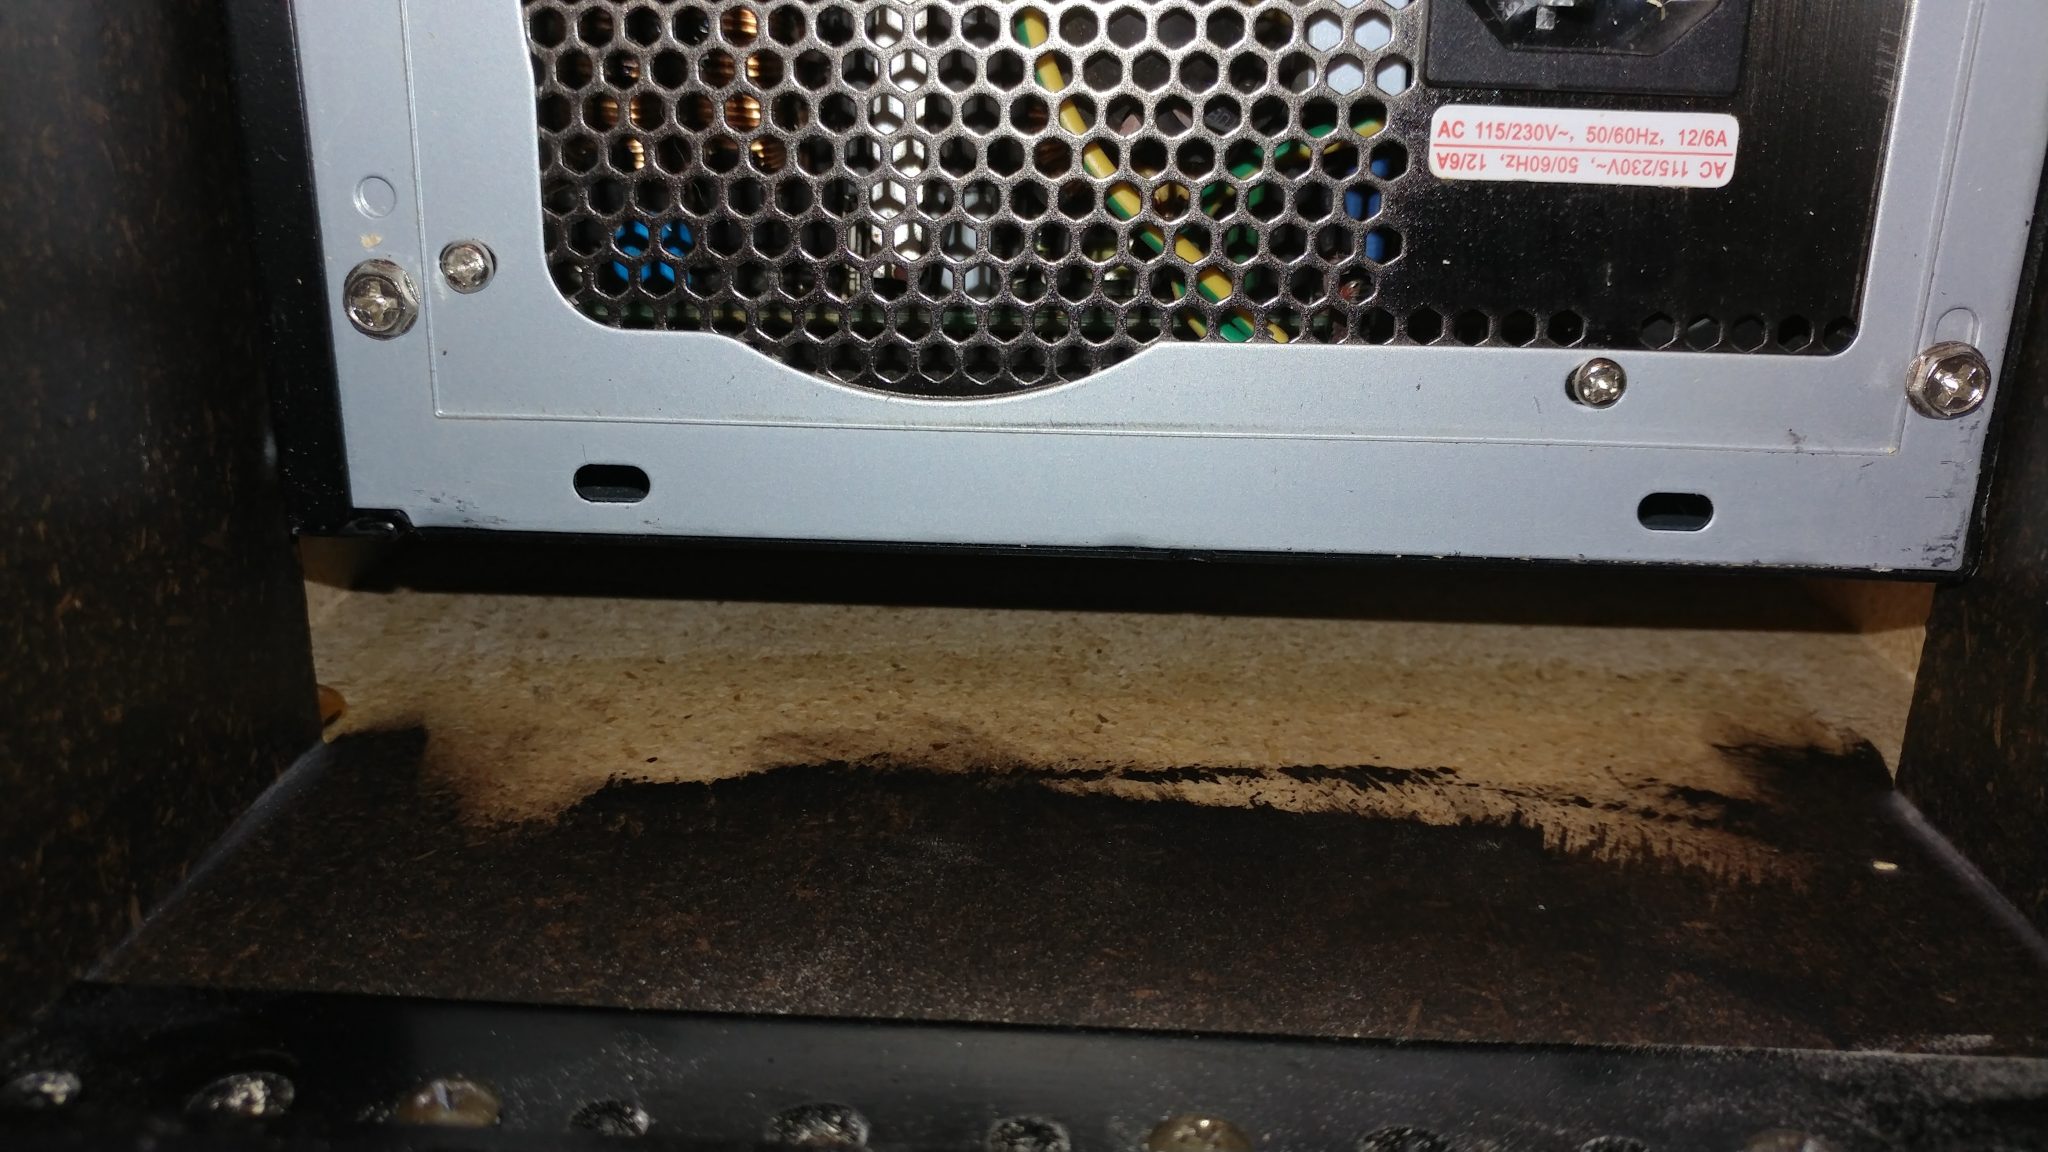
10. Ensuring that the PC will fit in the rack
I set the rack on its back and dropped the computerin. I screwed it to the rack rails but right now there isn’t anything supporting the computer, which is very heavy.
11. Measuring the space under the PC
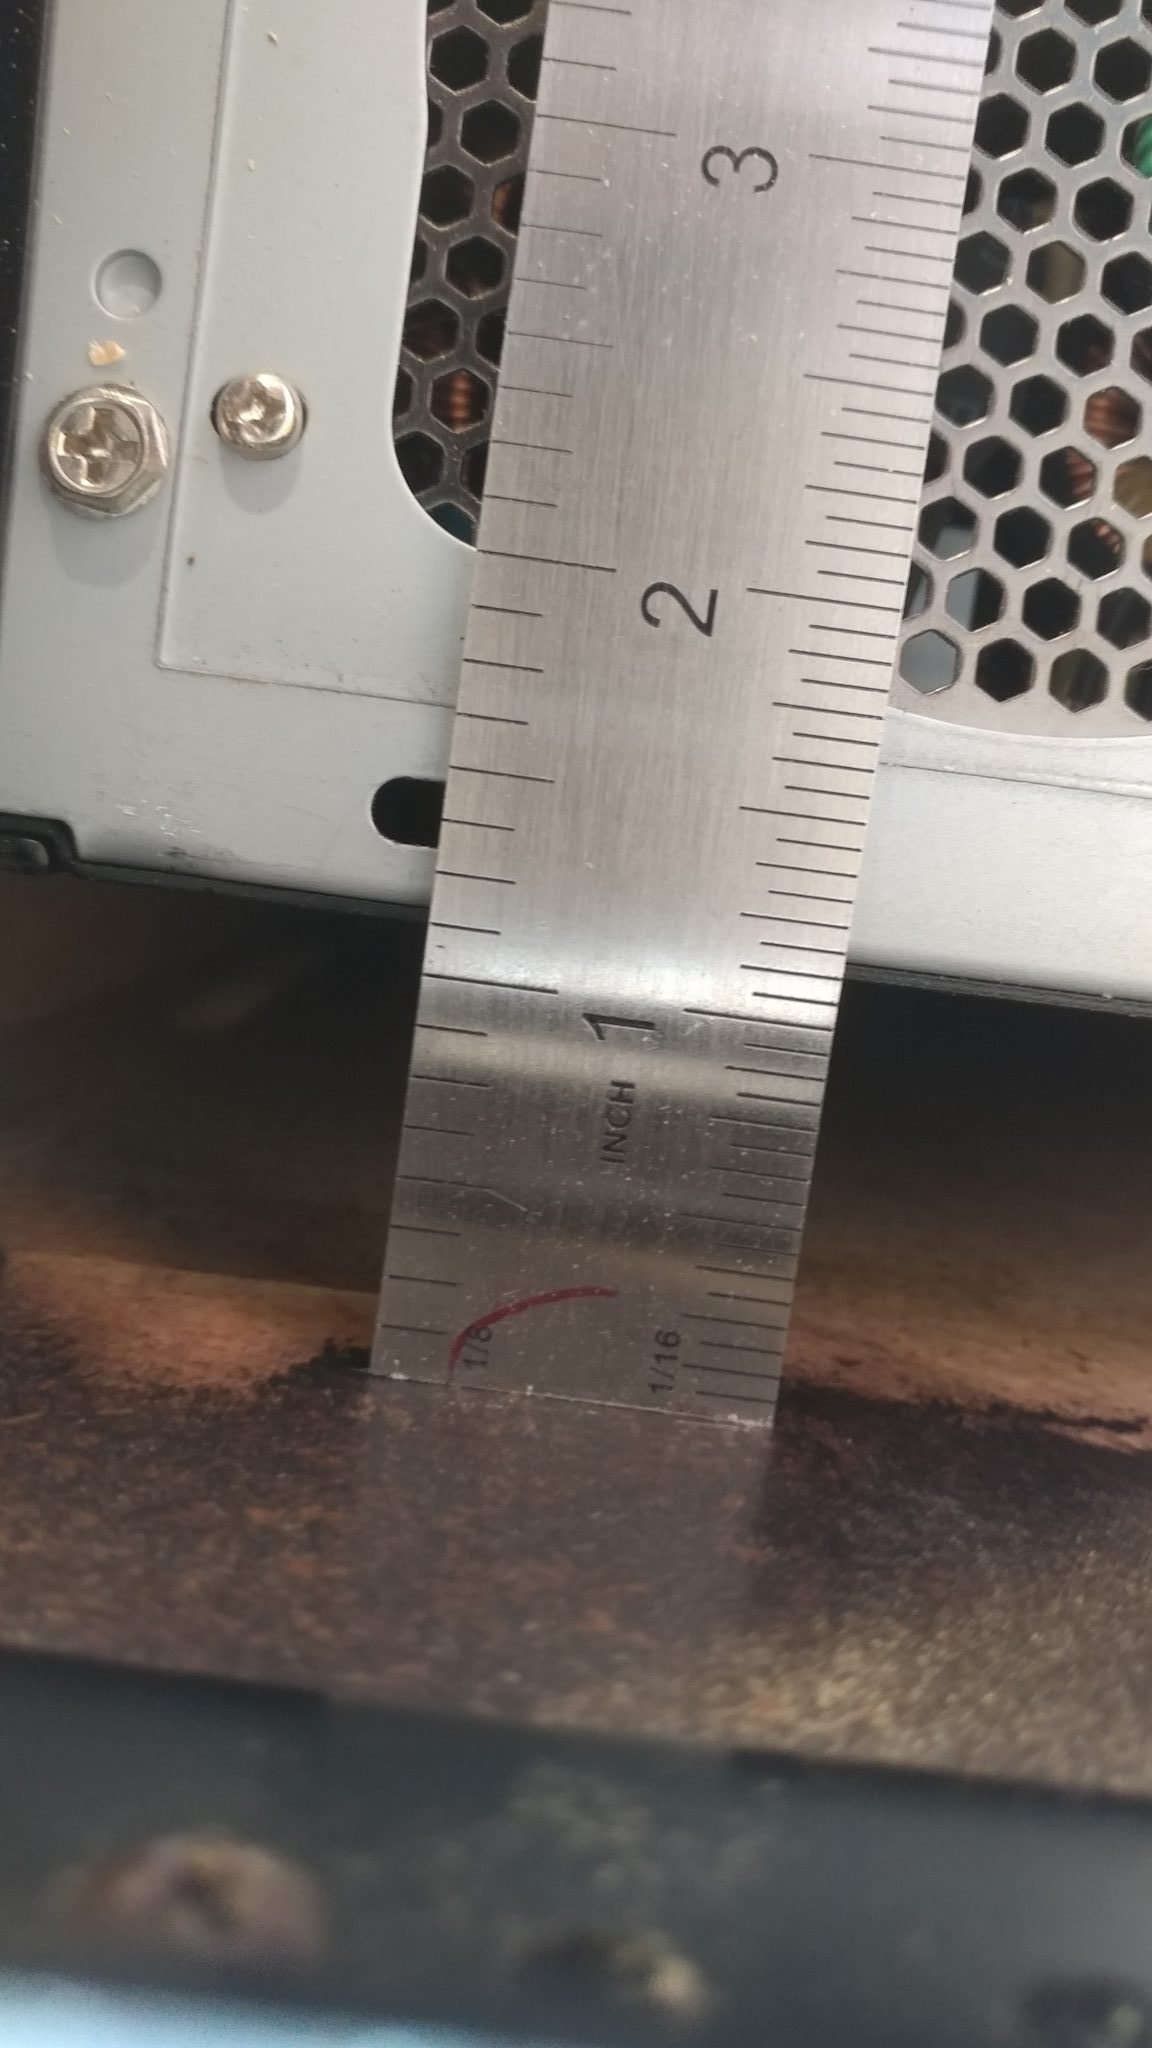
I set the rack upright again and went around the back. You can see that there is a gap between the computerand the inside floor of the rack.
I measured that to be 1-1/8″.
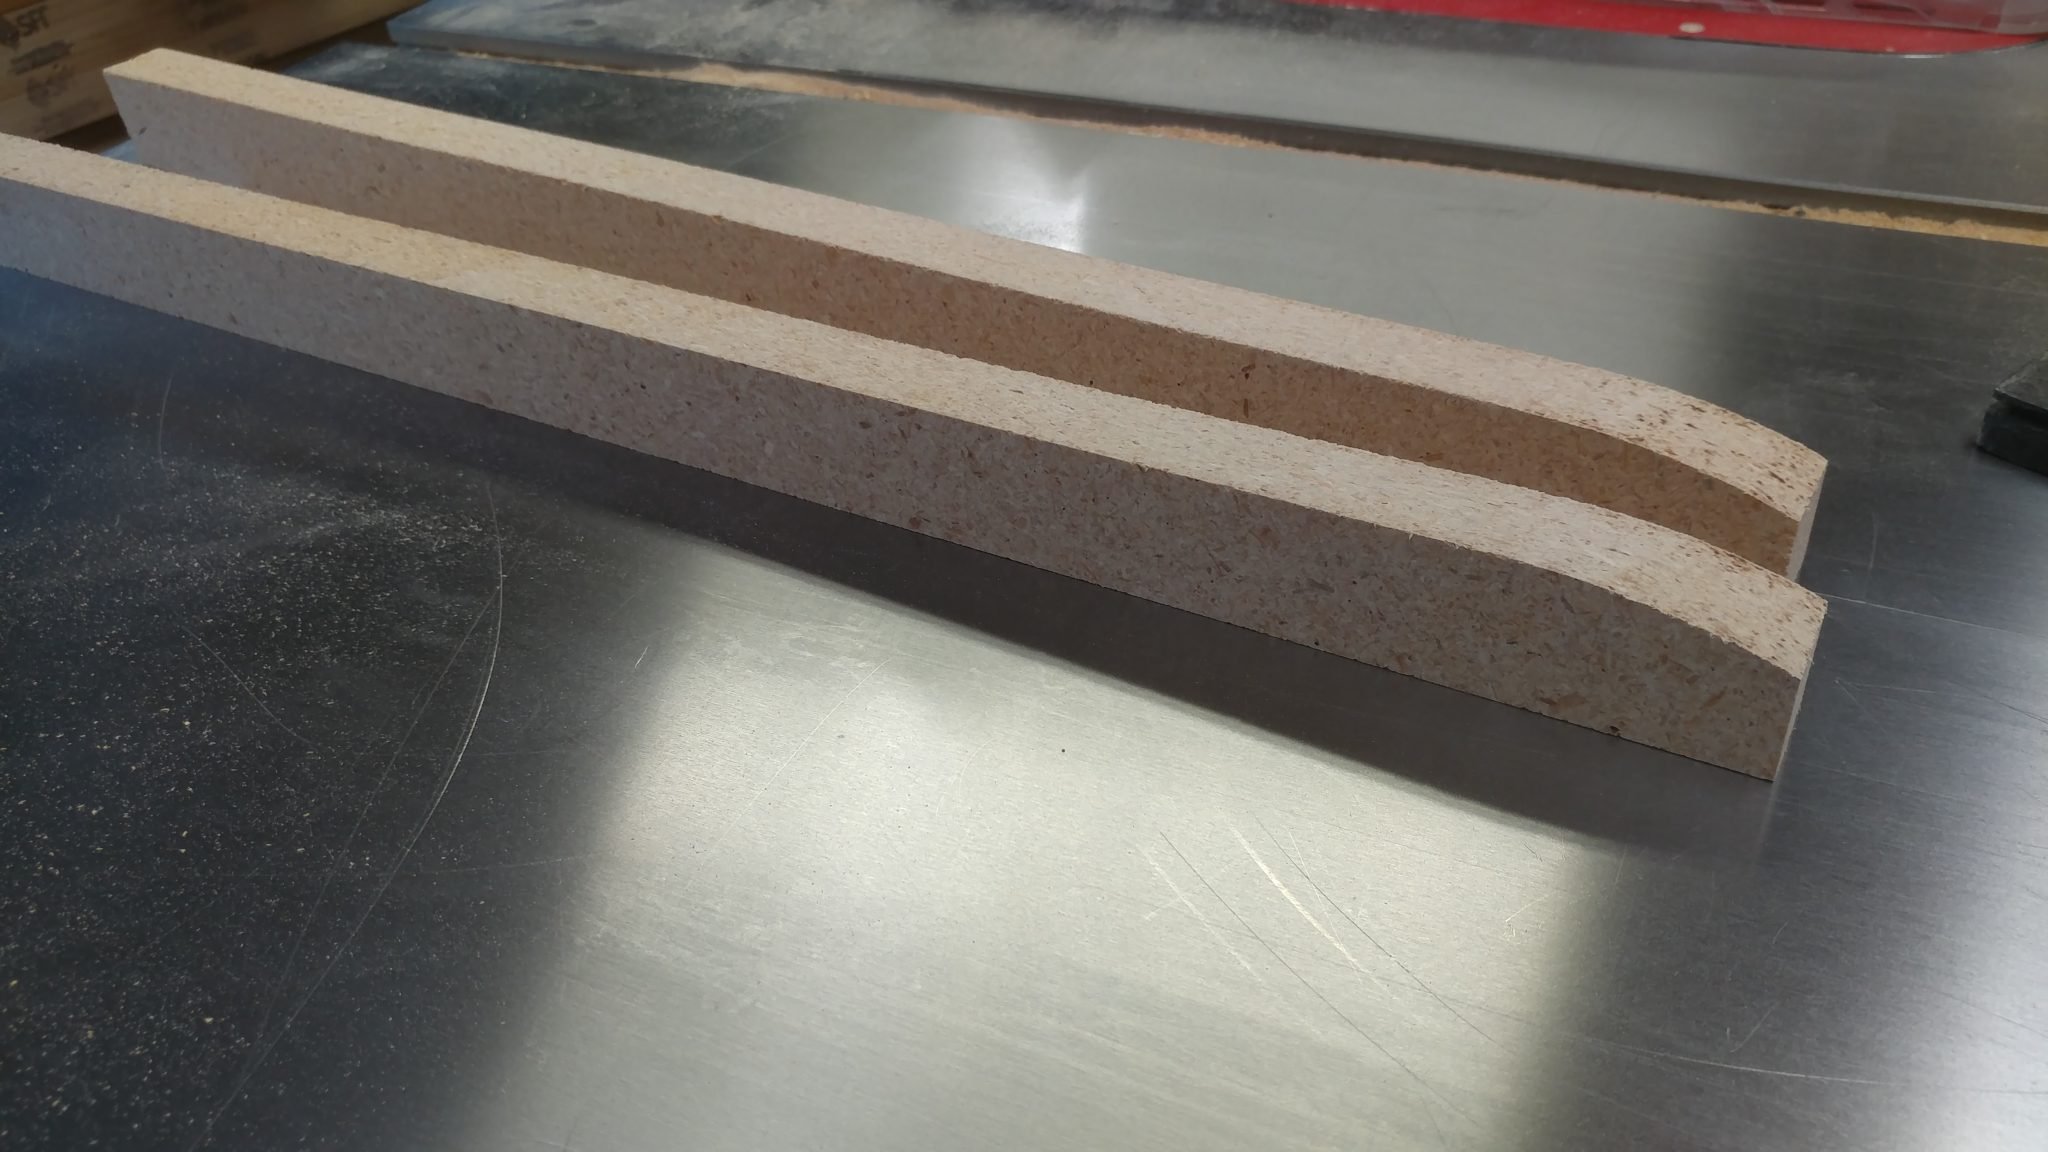
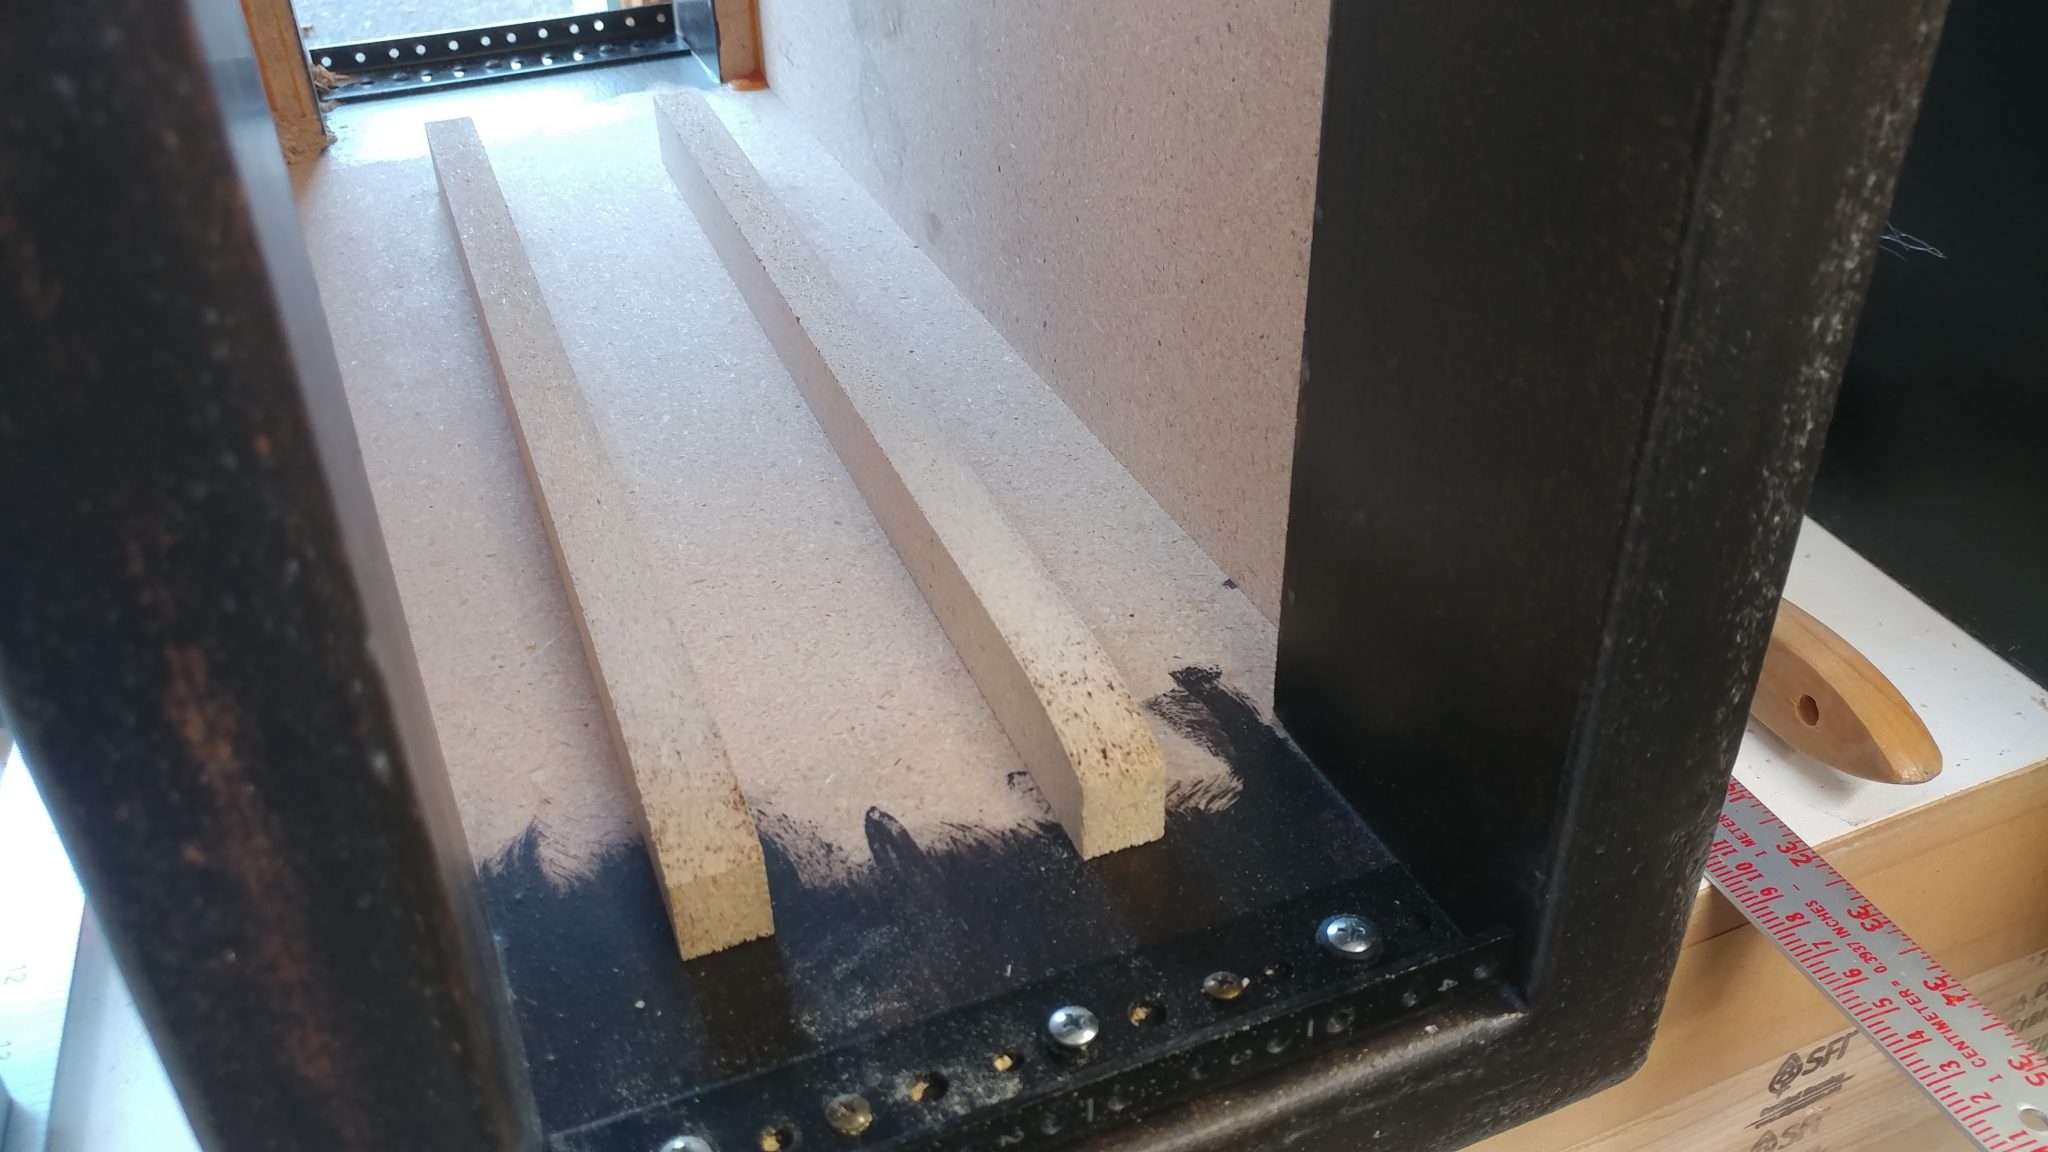
12. Making the PC supports
I cut two strips of MDF at that width and slightly tapered the end on a disc sander. These will go between the computerand the rack floor to help support the computer. The taper at the end will make it easier to insert the computer from the front.
This is where the wood supports will be placed.
13. Installing the 8-space rack rails
I installed the 8-space rack rails to the larger two racks in the same manner. They don’t need the wooden supports added to them but I did install a few grommetson both the left and right to allow the cables to pass between the boxes.
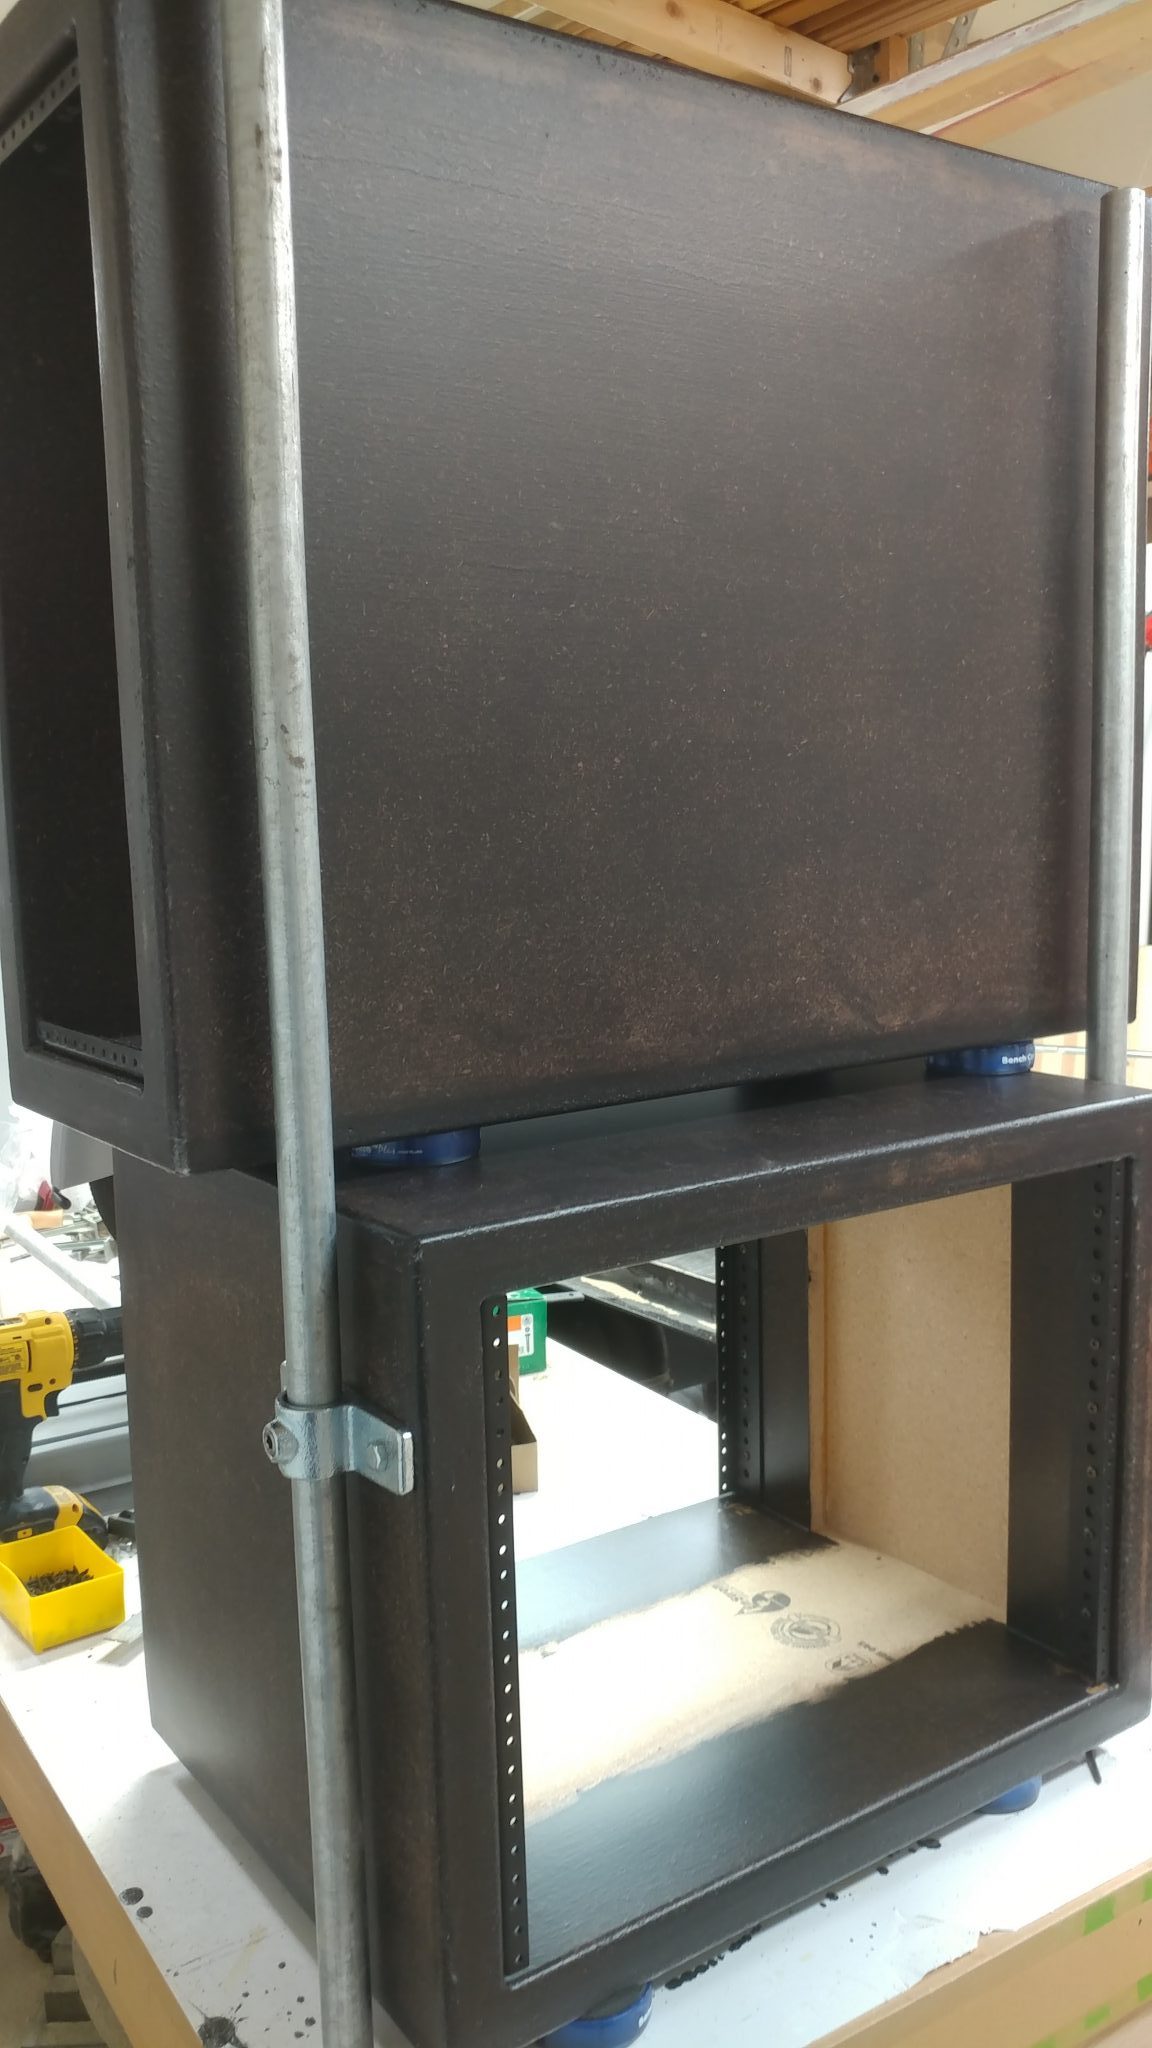
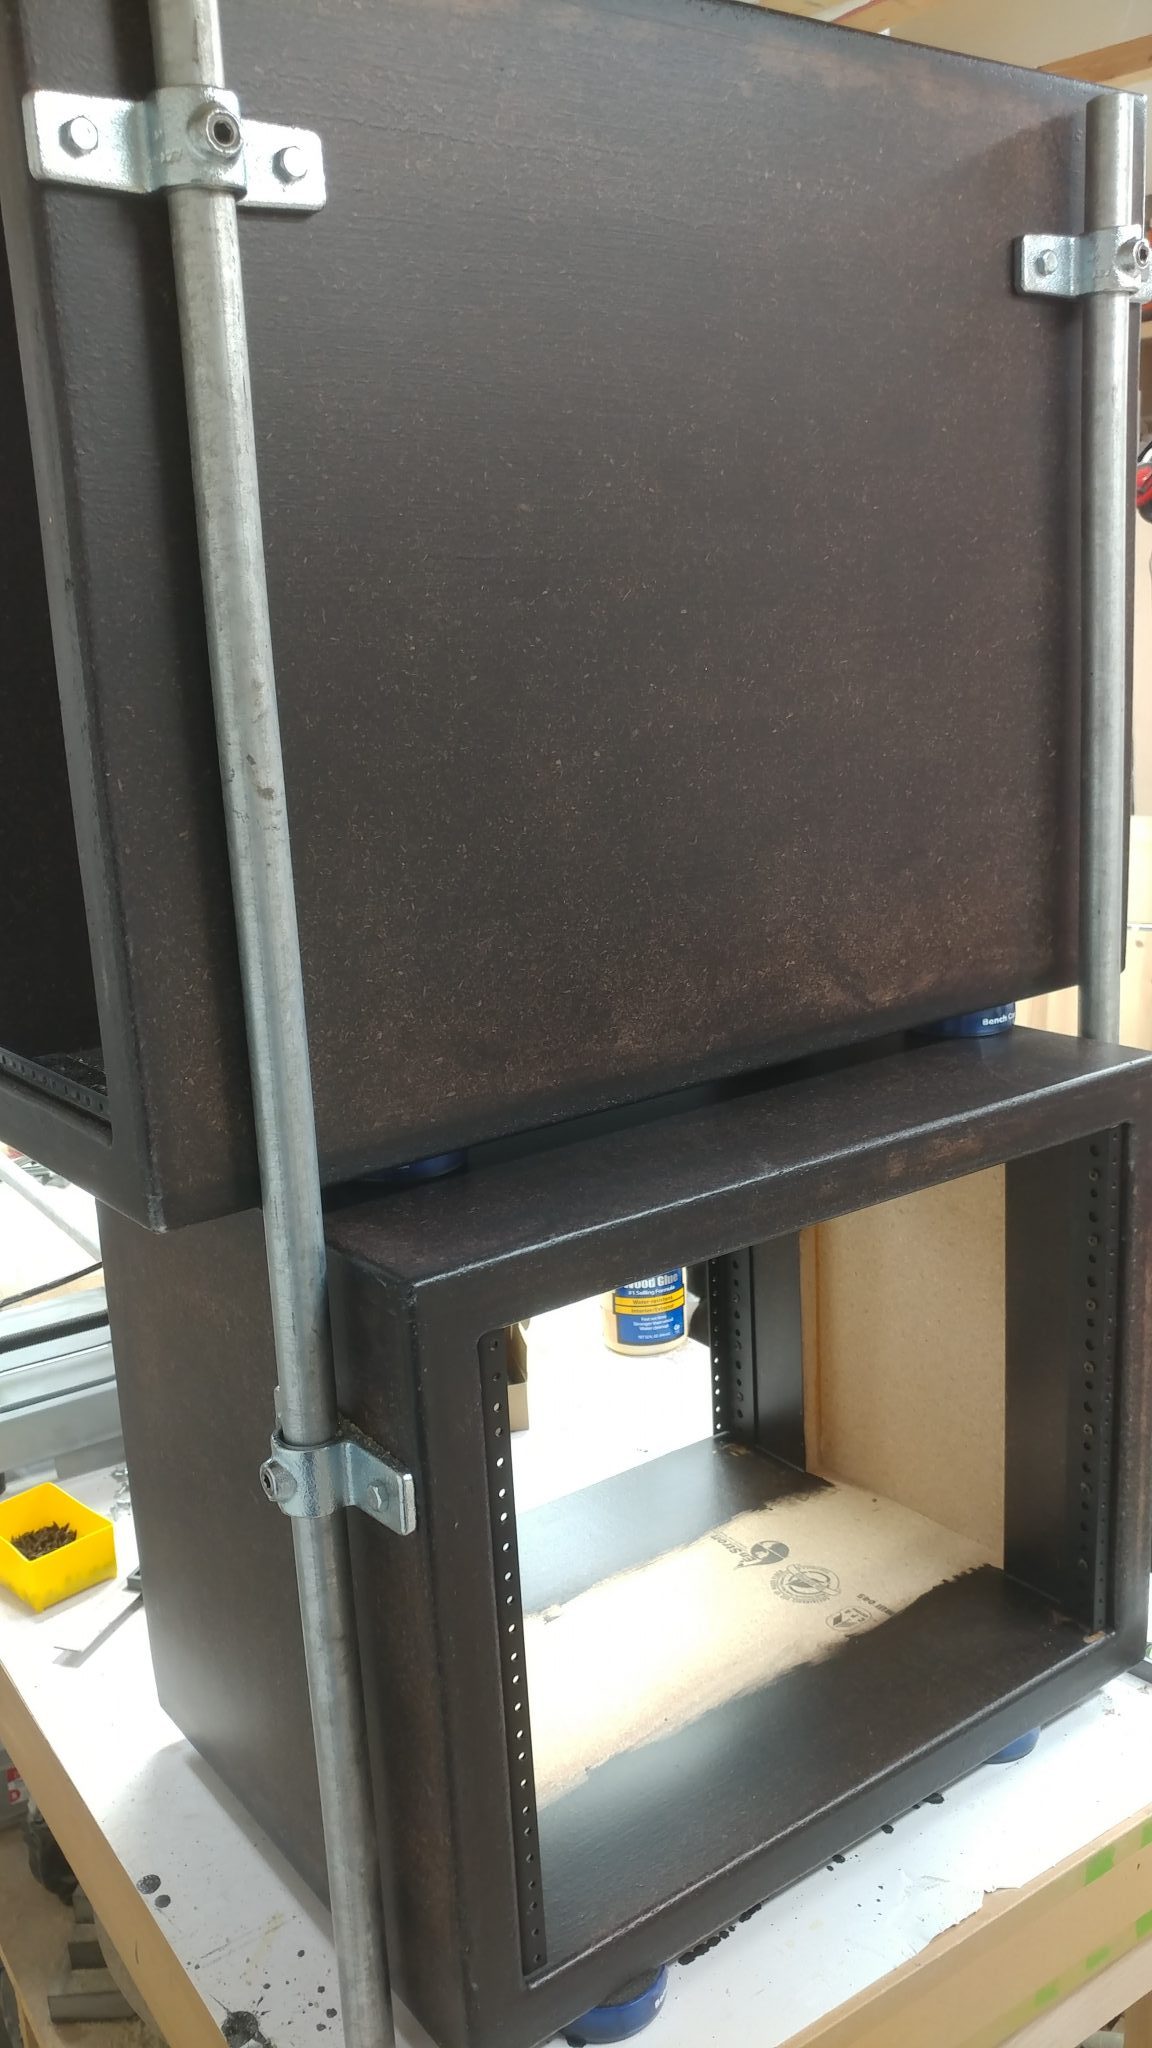
Installing the Leg Mounts
The leg mounting hardware needs to be mounted in a way that will allow each of the three racks to be installed in either location. This didn’t seem like it would be that big of a problem but it took some thinking before I could even get started. Each rack unit will have three legs; two on the sides towards the outside of the desk and one underneath towars the inside of the desk. I decided to start with the legs on the sides.
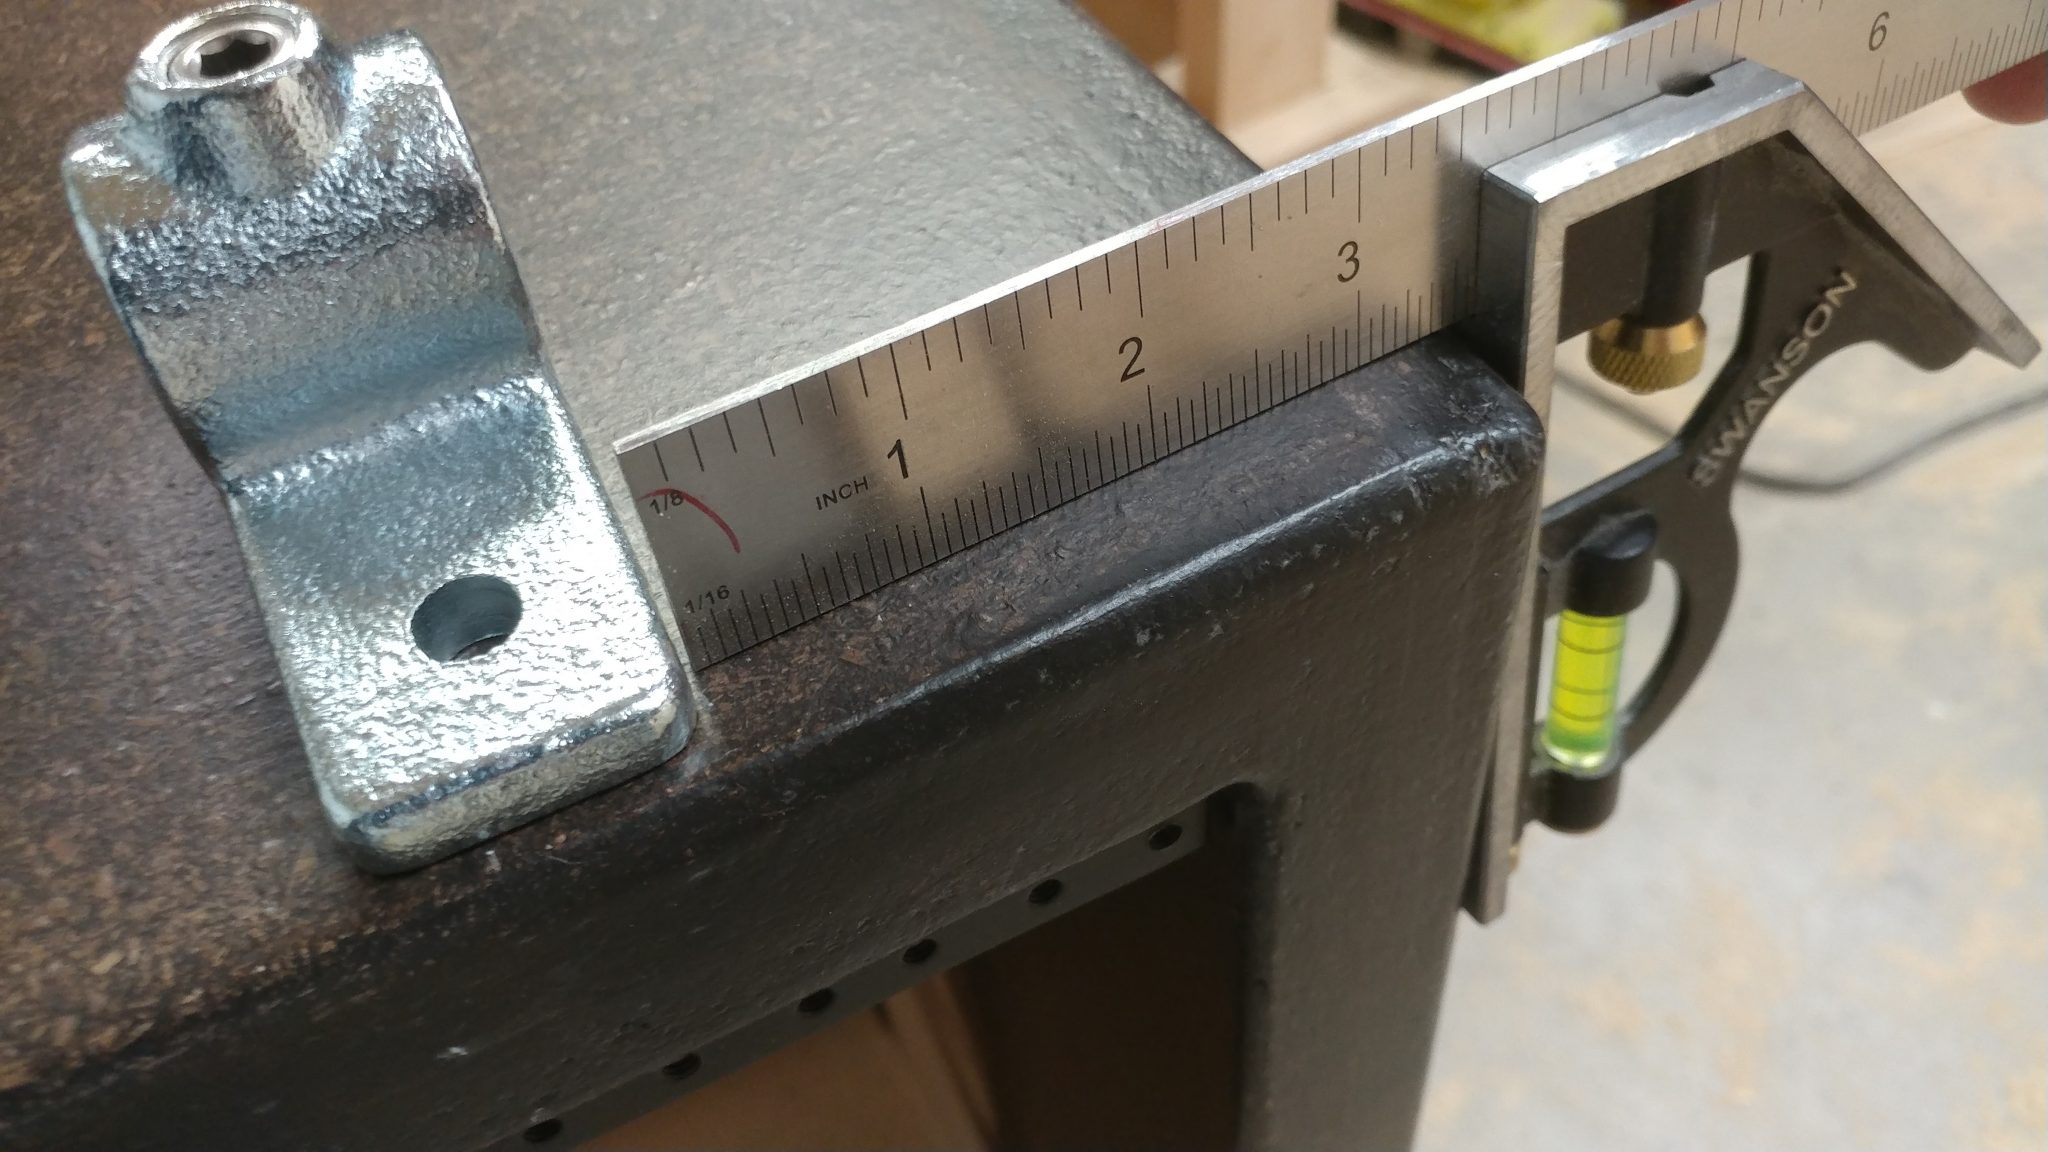
I positioned the side flange on the side of the rack as far forward as I could. I positioned it 3-1/2″ down from the top. This doesn’t add anything in terms of stability, it just looked best and it ensured that the bolts I used to attach the bracket wouldn’t hit the screws for the rail hardware.
3. Attaching the side flanges
The side flanges were installed on both sides of one of the larger 8-space racks. I will install them on the other rack later.
4. Attaching the side flanges
By using some temporary leg rails I was able to place the PC rack on top of one of the larger 8-space racks. This allowed me to determine the locations for the side flanges.
The side flanges were attached three and a half inches from the top, just to be consistent.
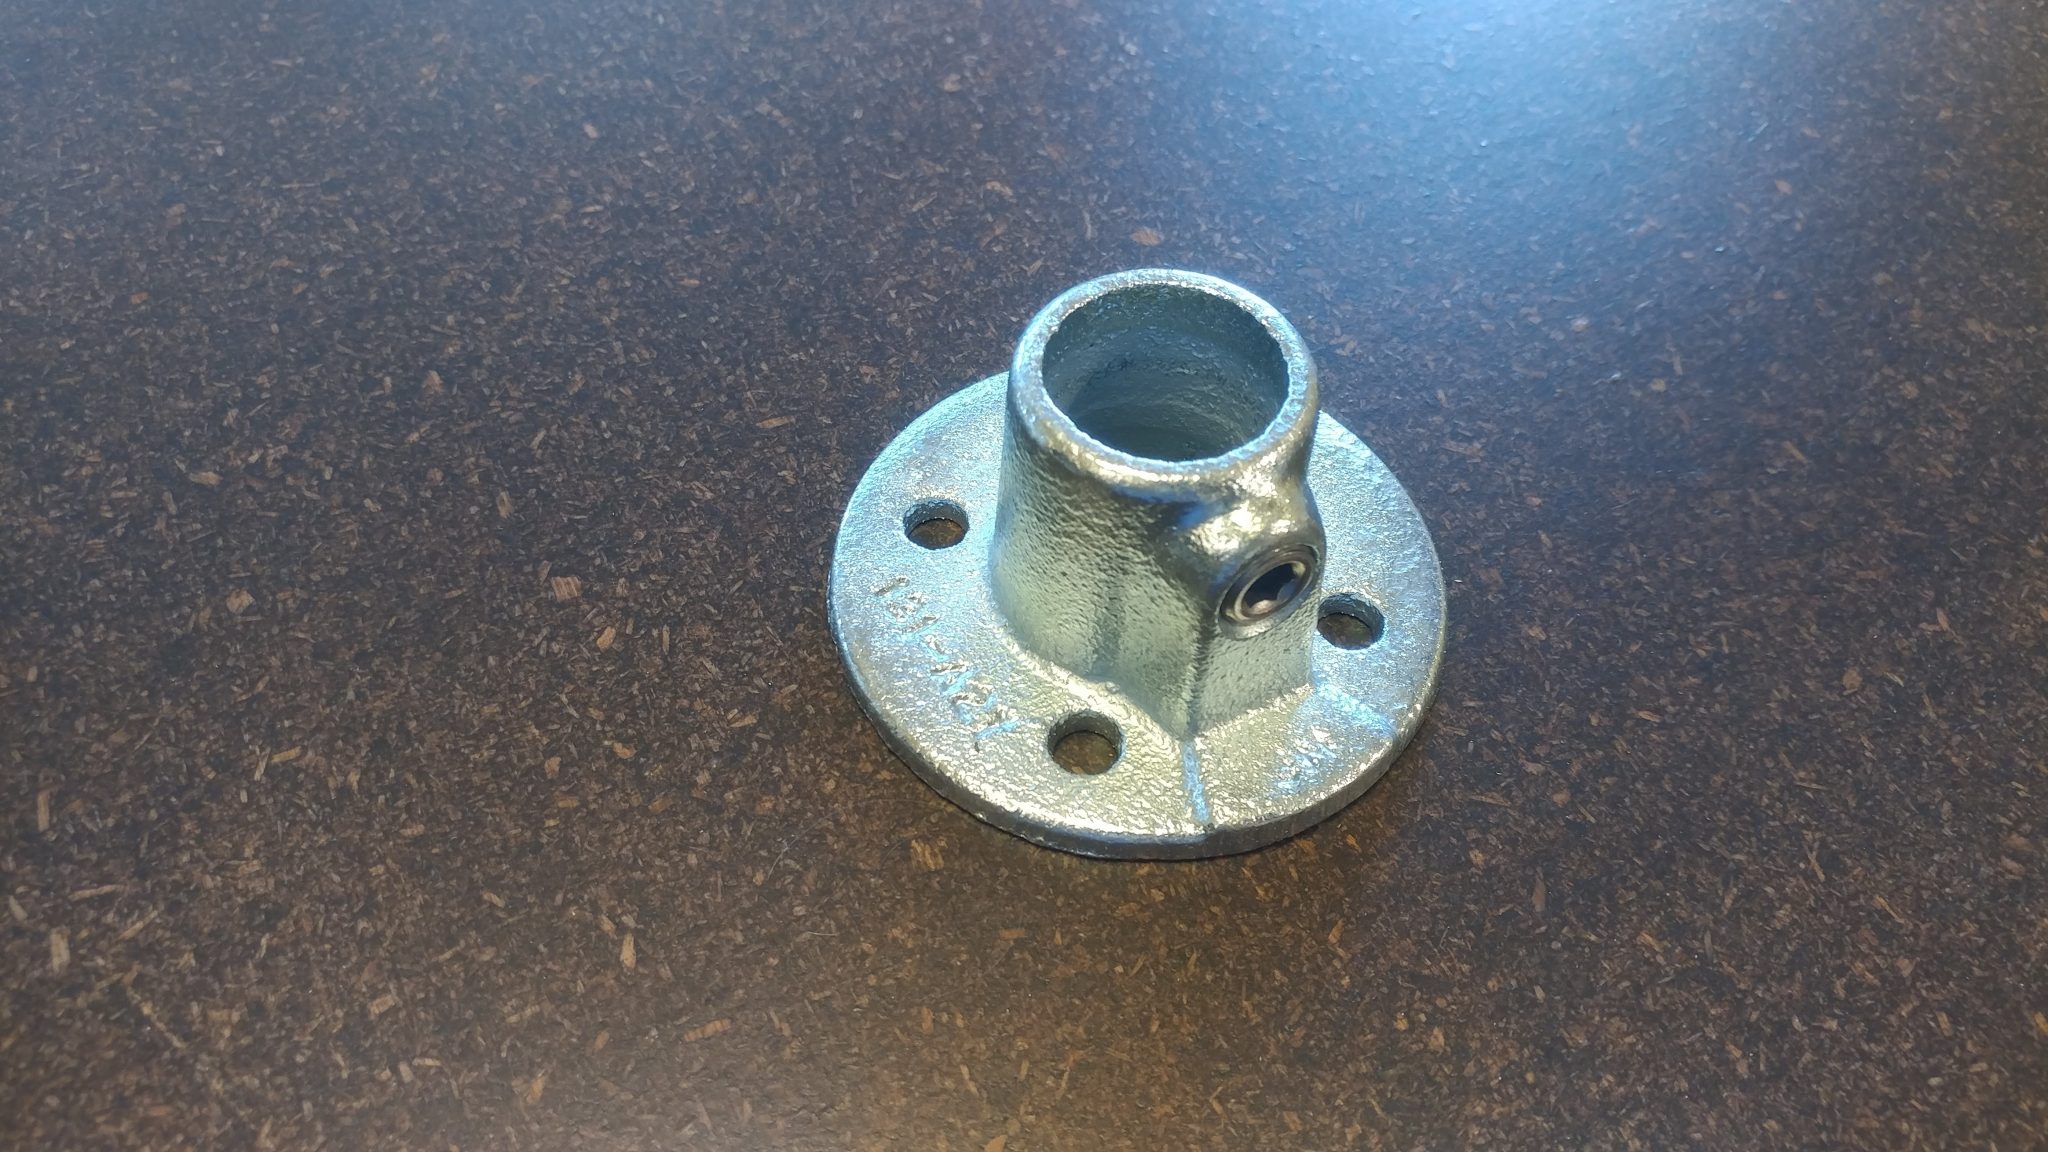
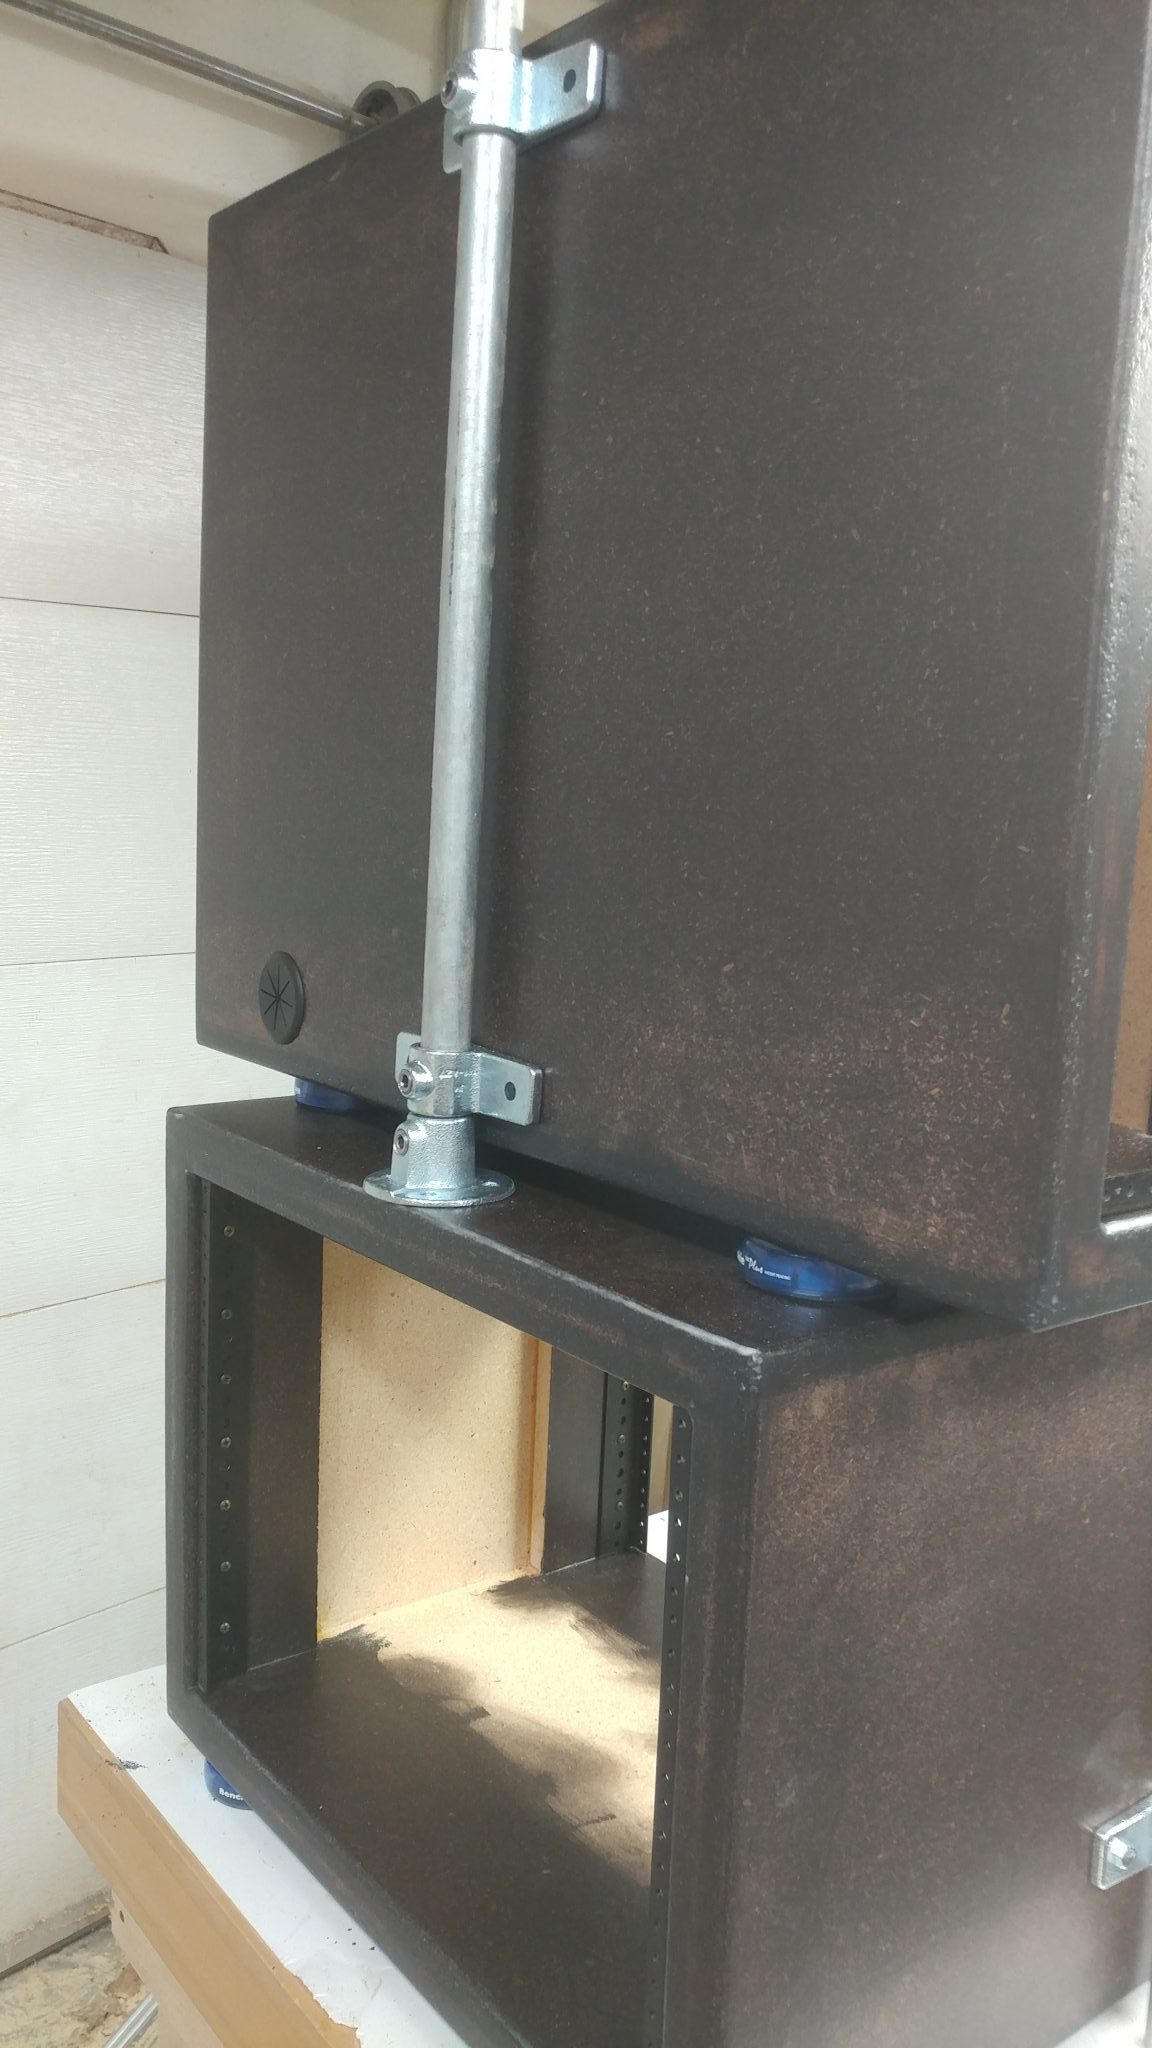
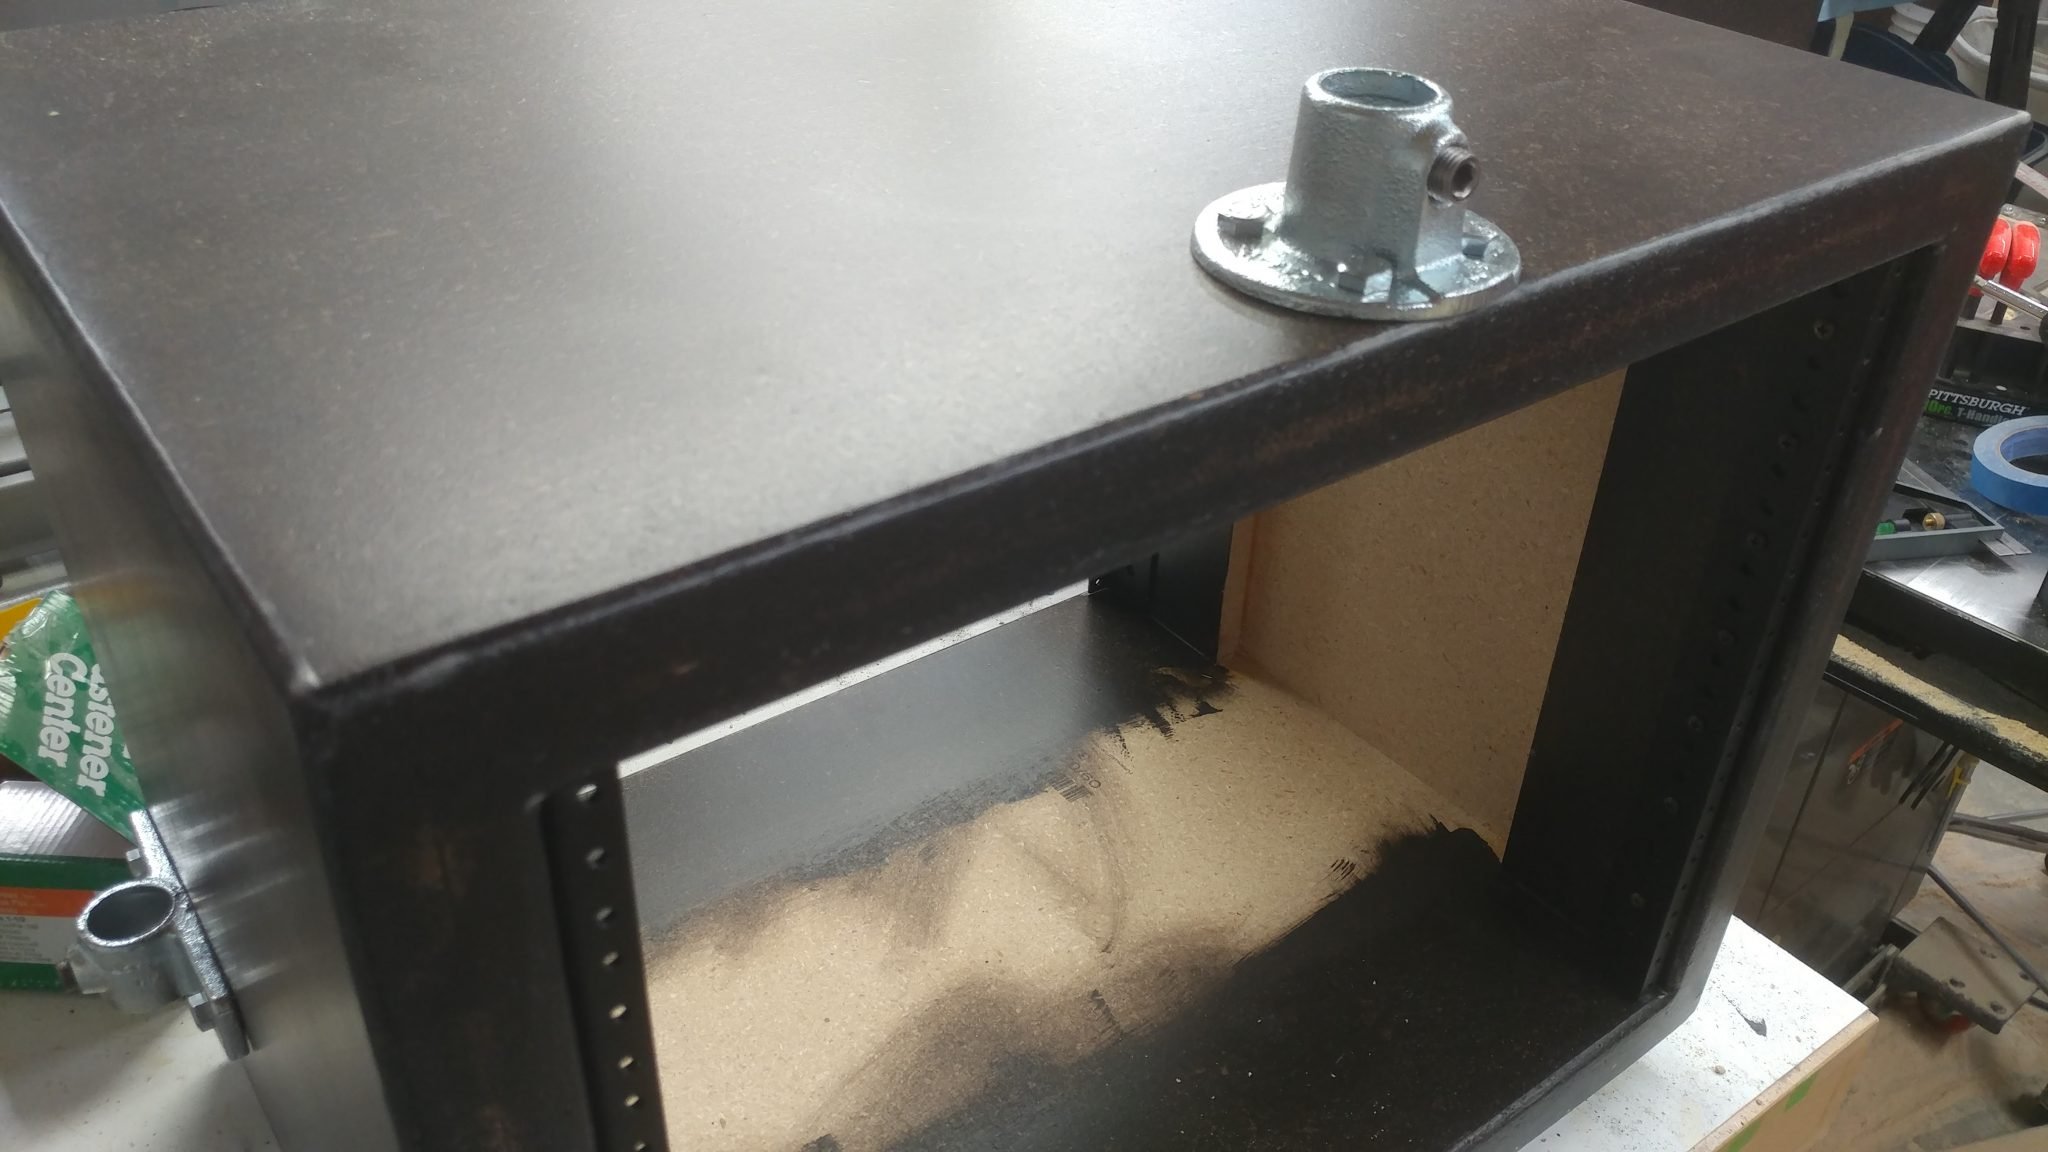
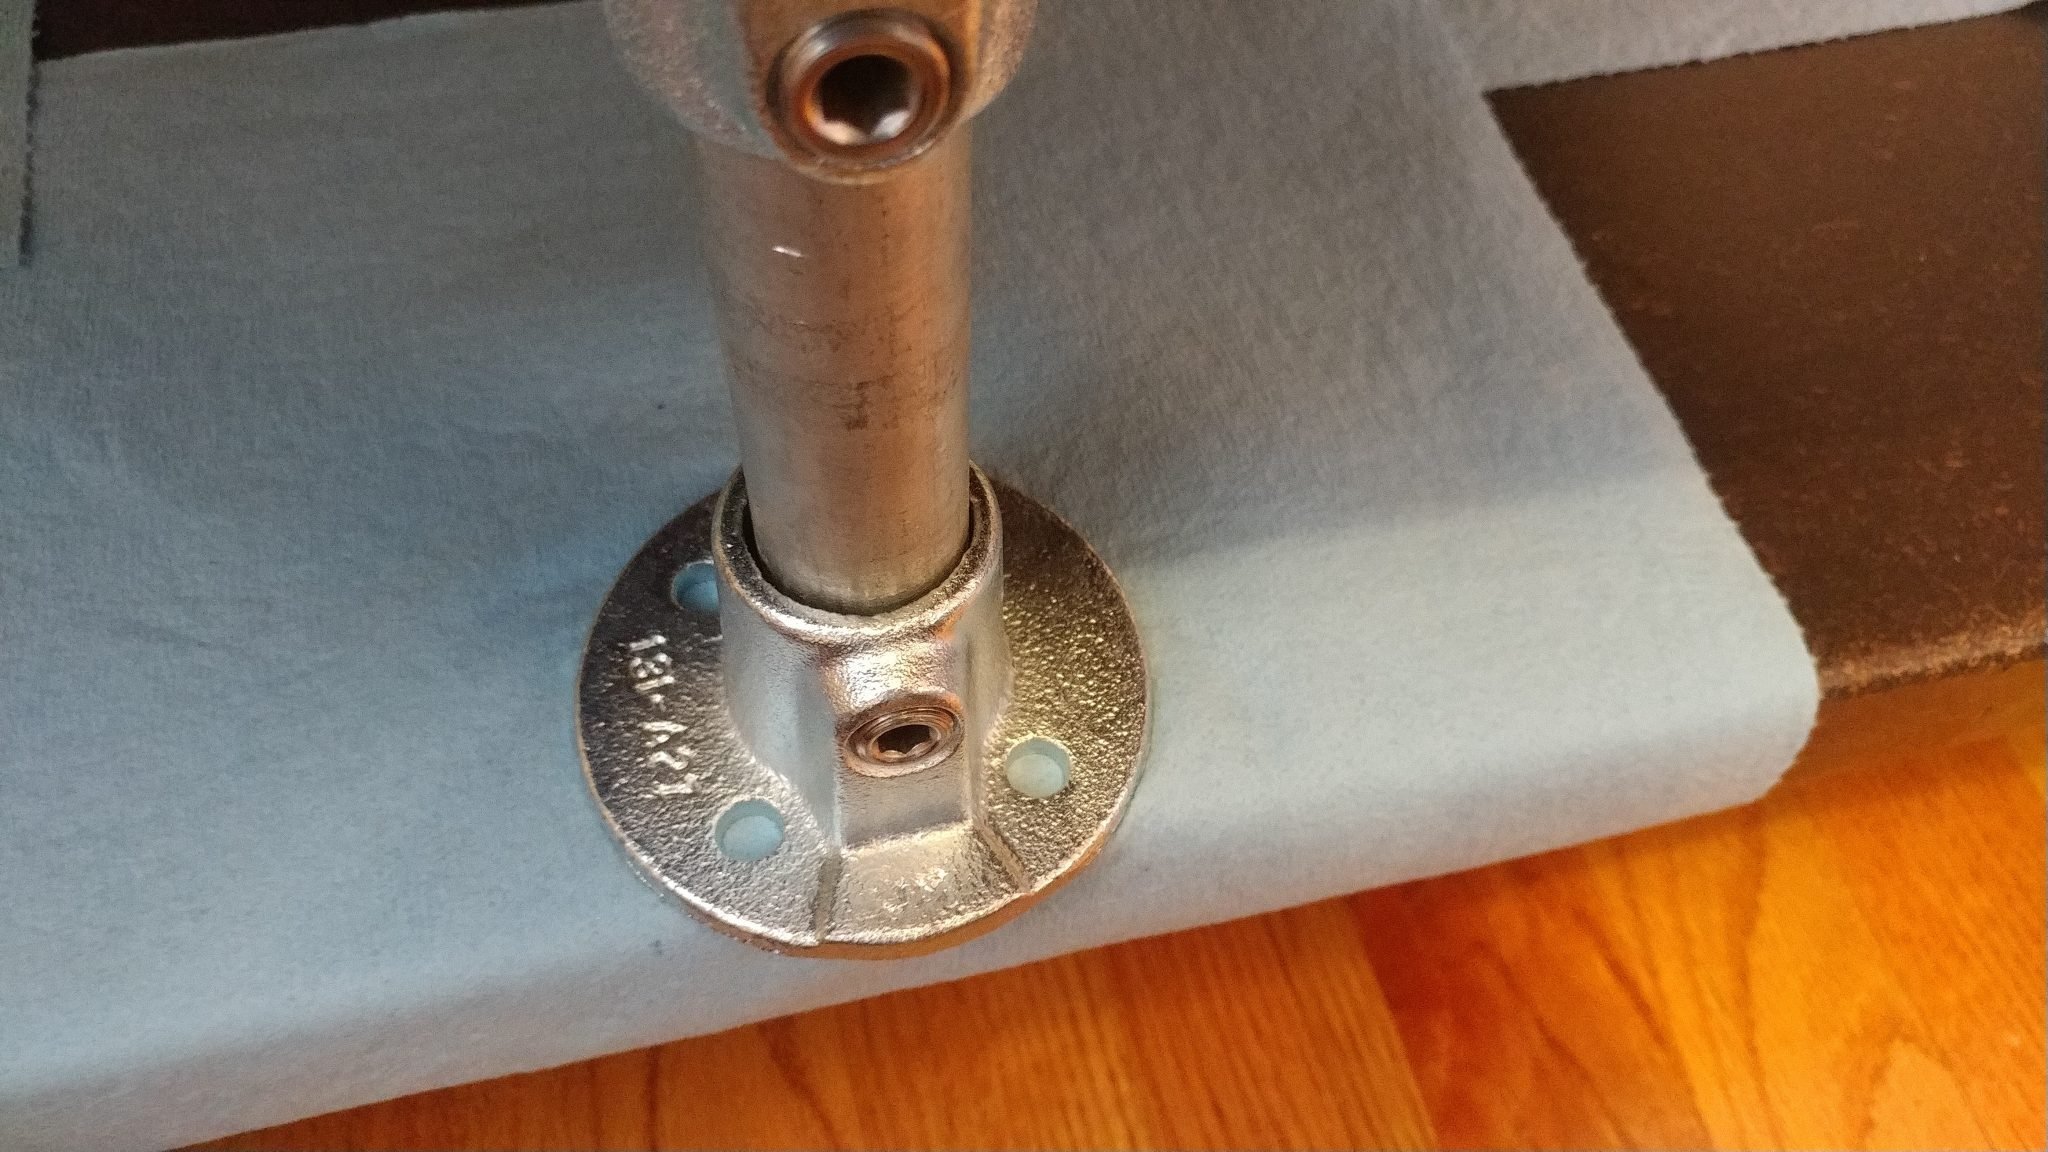
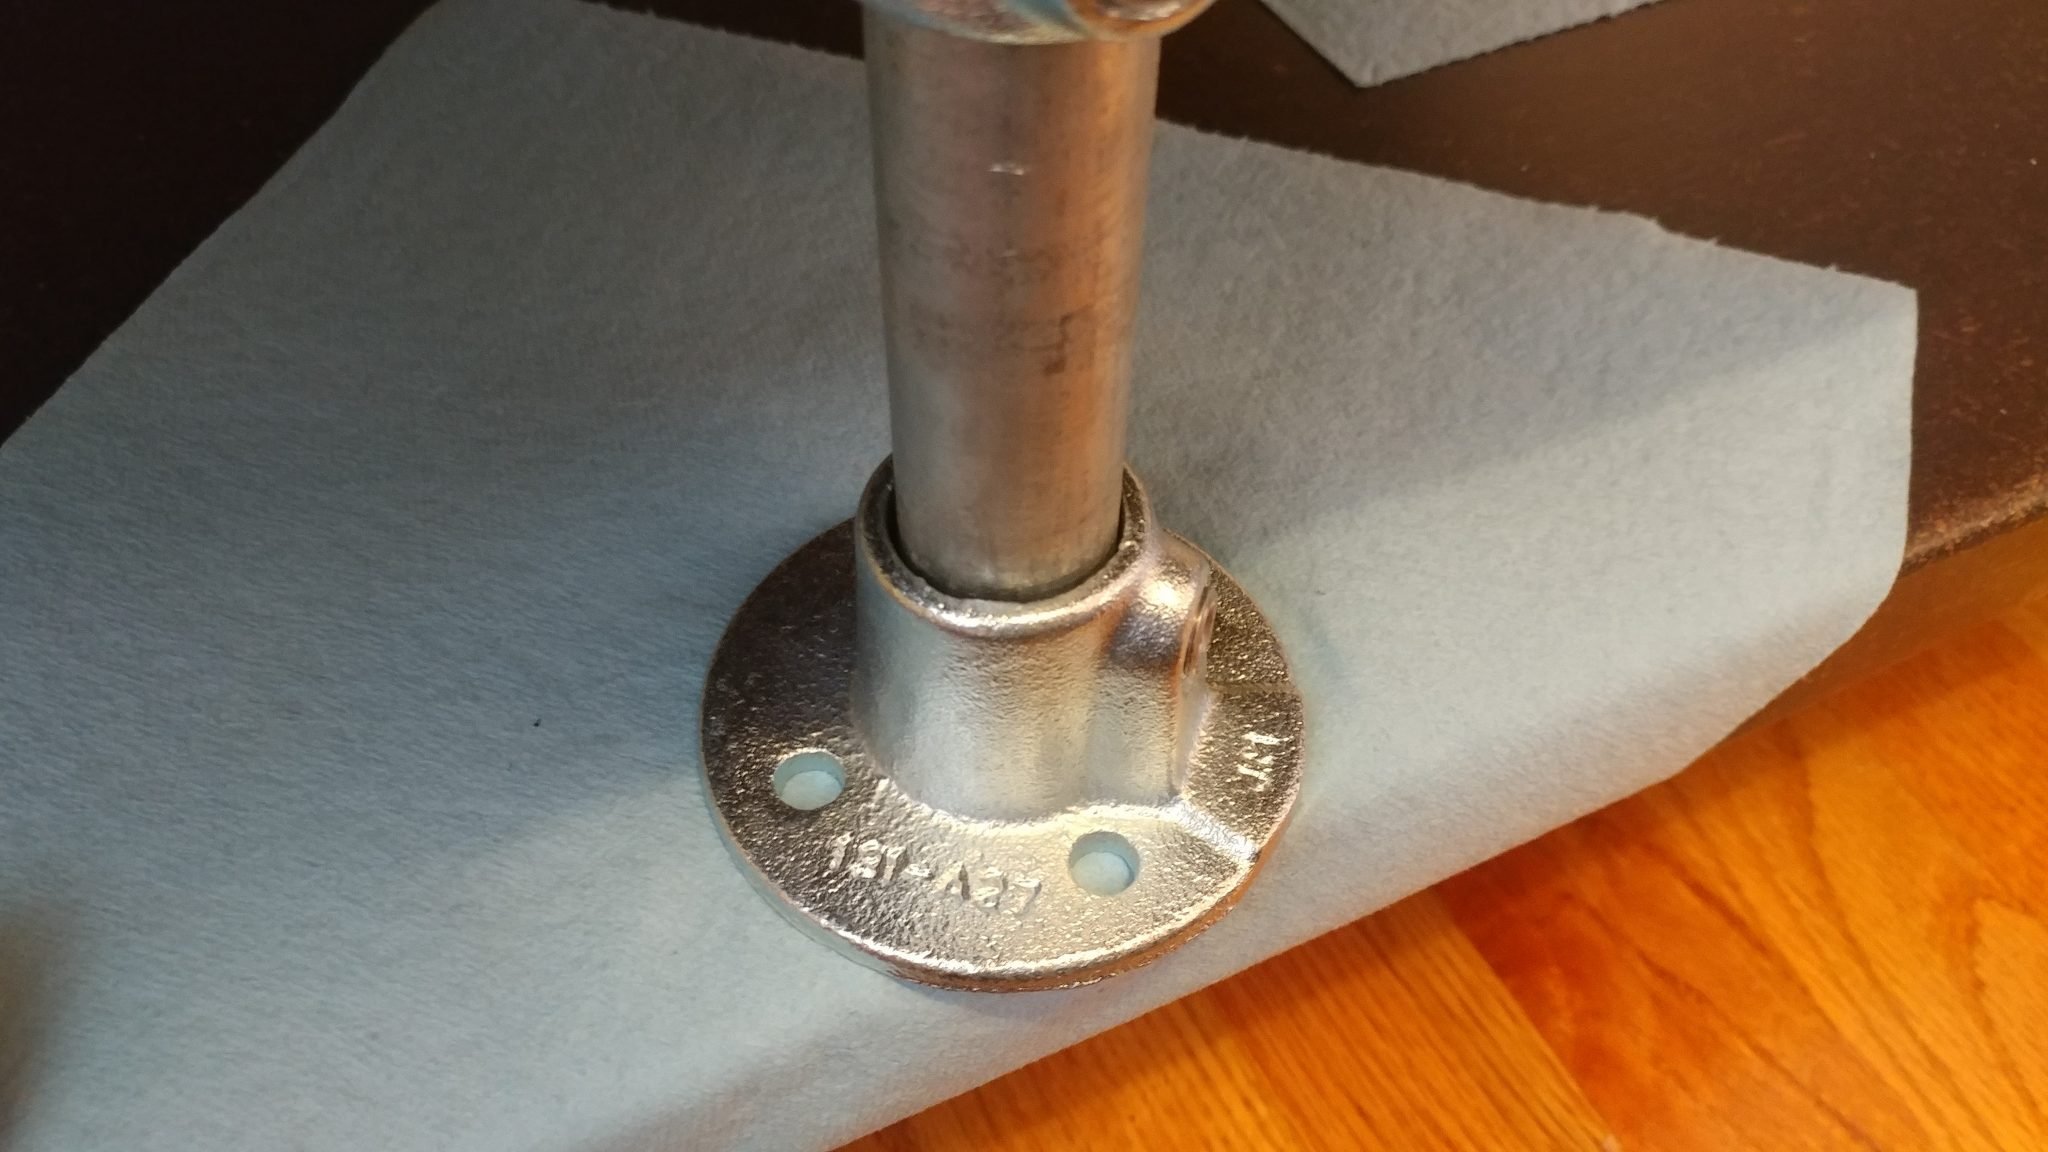
5. Positioning the first floor flange
Then it got a bit squirrely. I took the PC rack off the larger 8-space rack. Then I turned the 8-space rack upside down and set the PC rack back on top and installed the temporary leg rails. I then used another temporary leg rail and two of the leg mounting brackets and one of the floor flanges, which will be installed on the underside of each of the 8-space racks.
This is how the flangelooked after it was installed.
6. Installing the legs
I cut smaller tubesfor the legs that will be installed in the flanges. Then, to get an idea of how it will all look, I put it all together on the workbench, complete with the flanges that will be attached to the desk base.
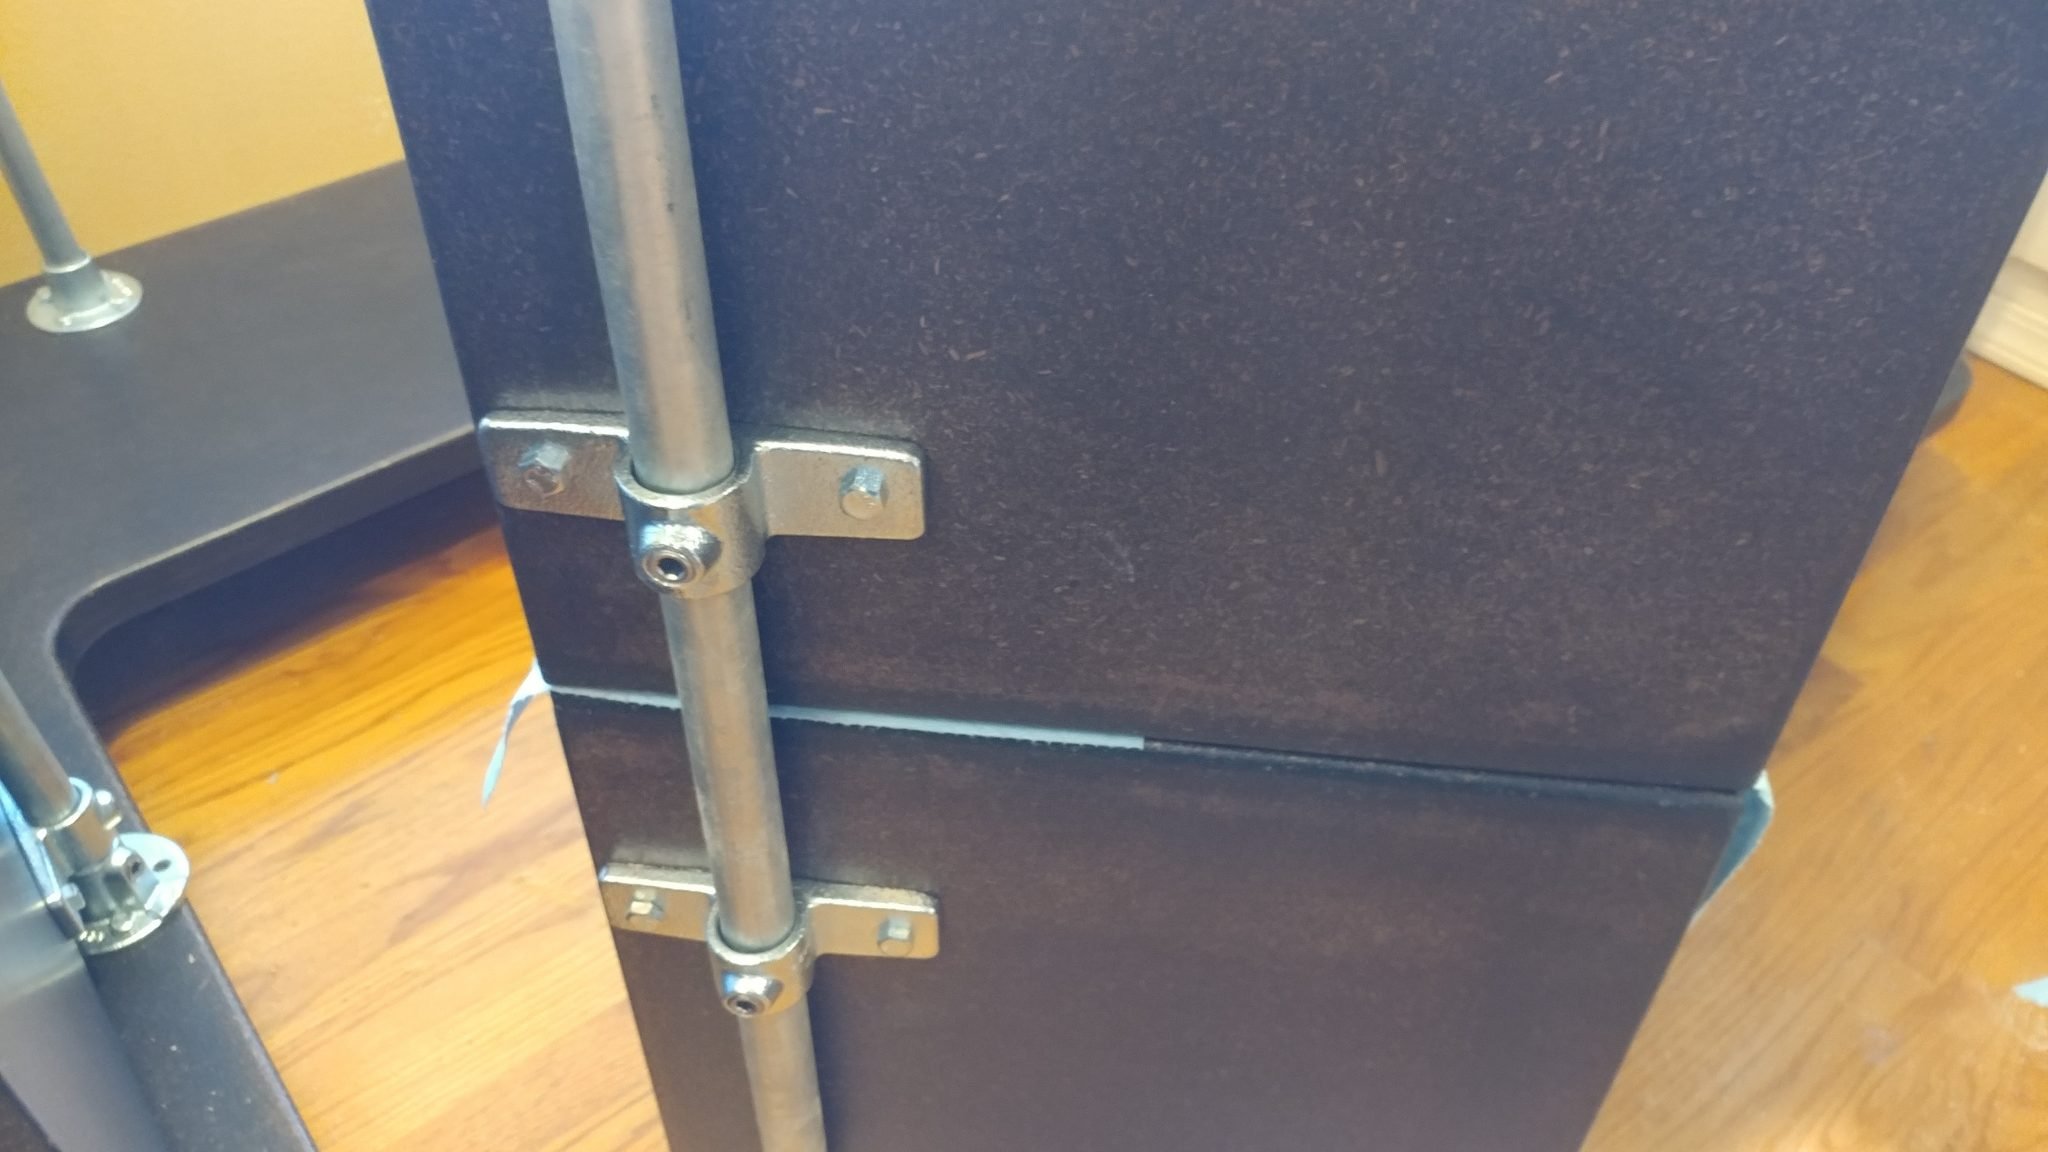
Attaching the Legs to the Base
New I get to take it all out of my shop and move it into the studio. I could almost sense my shop breathing a congested sigh of relief as I moved the components out. Don’t worry, little shop. I’ll fill you with tripping hazards again soon.
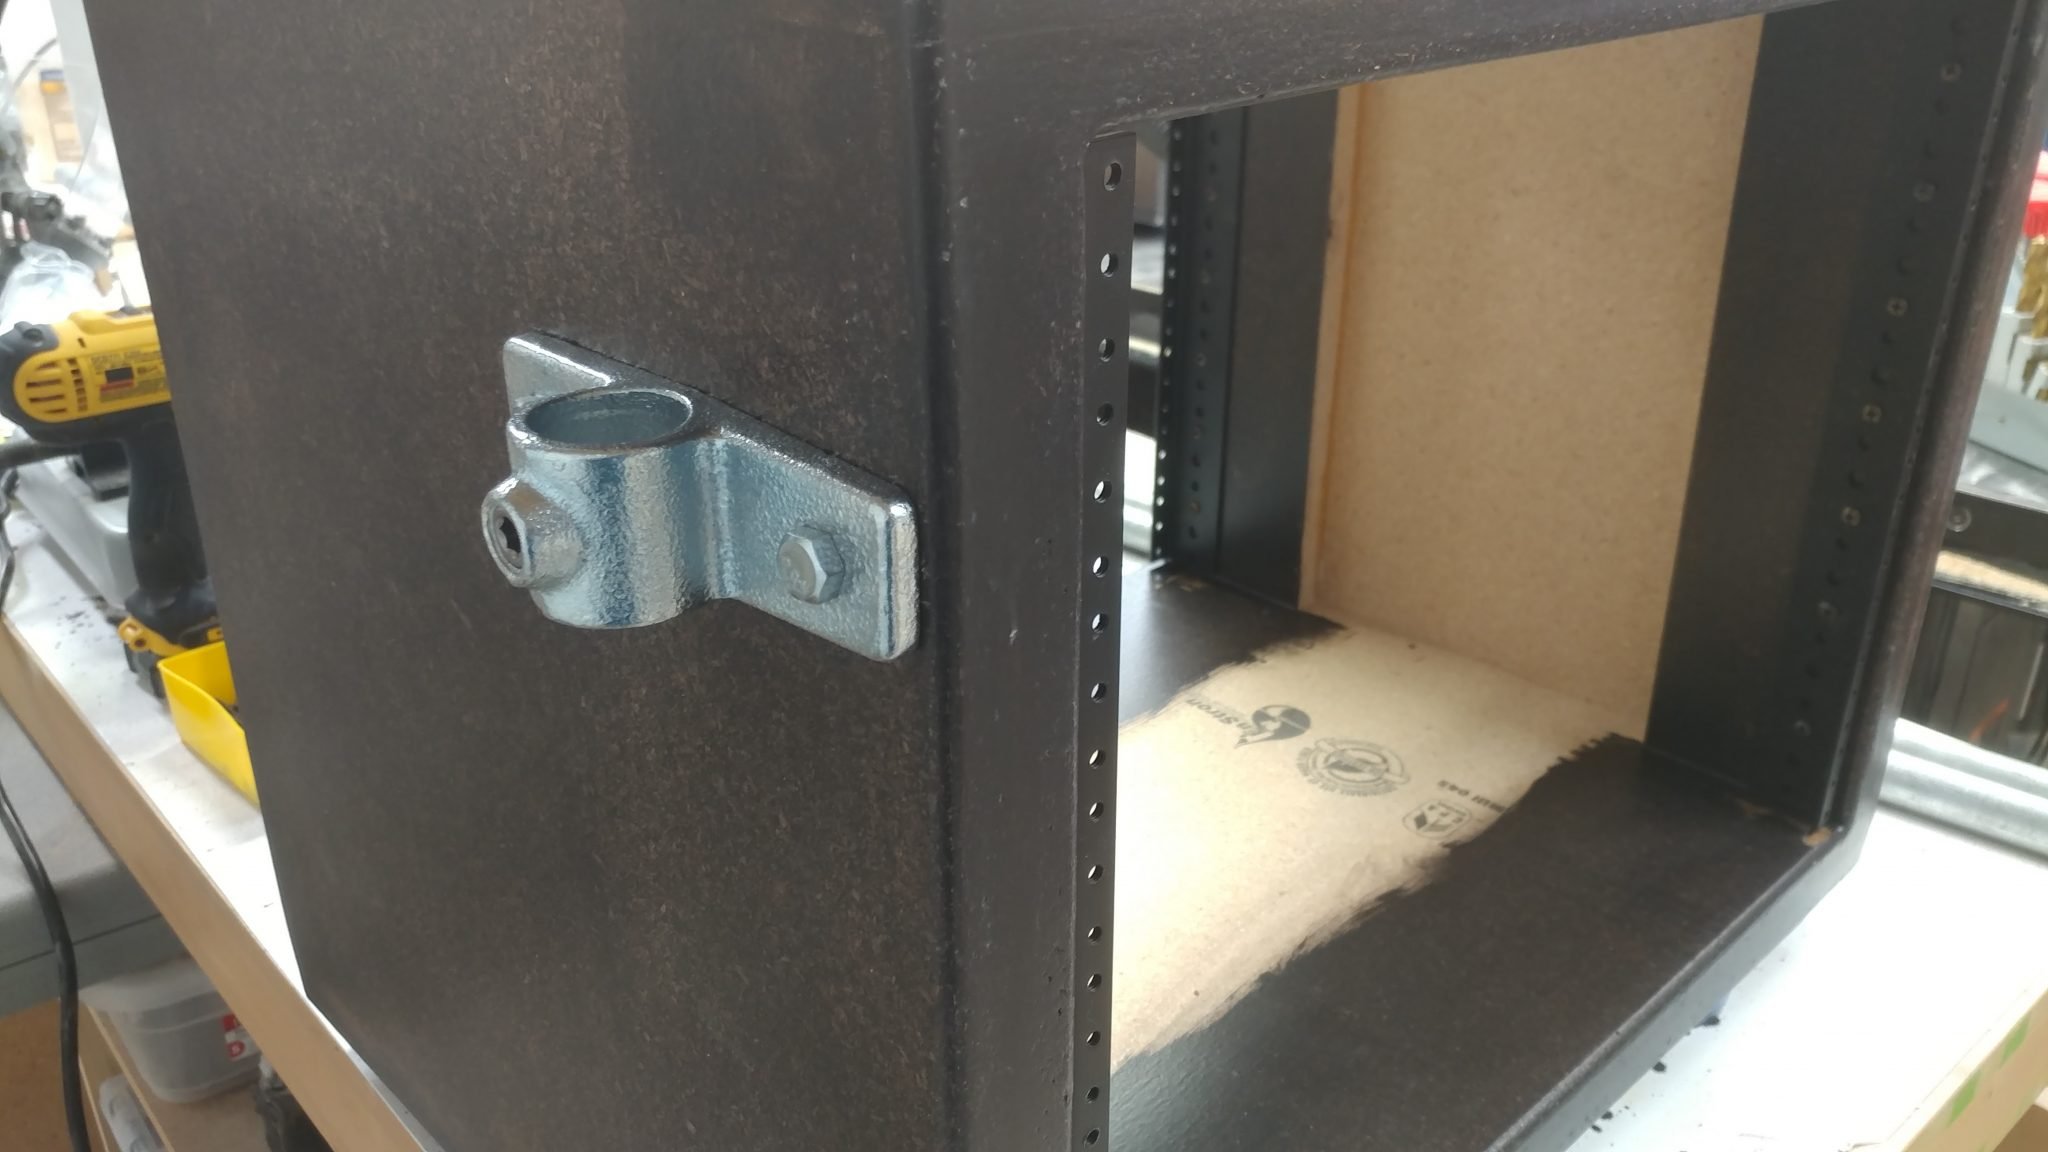
1. Positioning the right-side rack.
With the legsinstalled on one of the larger racks, I positioned the legs and flangesin position, using the wall to ensure the outside face of the rack is flush with the outside face of the base. I set the flanges on blue shop towels to make sure I didn’t scratch the base.
2. Dealing with another screw-up
This is another area where I realized that I really screwed up. As you can see, the flangesticks out past the edge of the base.
I rotated the flange45-degrees so I could attach it to the base with three bolts rather than just two.
I performed the same procedure for attaching the flangeson the left side. To test it out, I installed the PC rack. It went into place perfectly.
5. Attaching the center flanges
I installed the flangesfor the central rack using the rack from the right side.
To make sure that the central rack has the side flanges installed correctly, I used the first 8-space rack to position them by removing that rack from the desk and setting the second rack upside-down on top of it.
6. Attaching the side flanges for the second 8-space rack
I inserted the leg rails in the lower rack and then attached the side flanges in place. I positioned them 3-1/2″ from the lower edge.
7. Attaching the floor flange on the second 8-space rack
To install the central flangeon the underside of the second rack, I set it upside-down on the floor and used the PC rack to position the flange just like I did with the other 8-space rack.
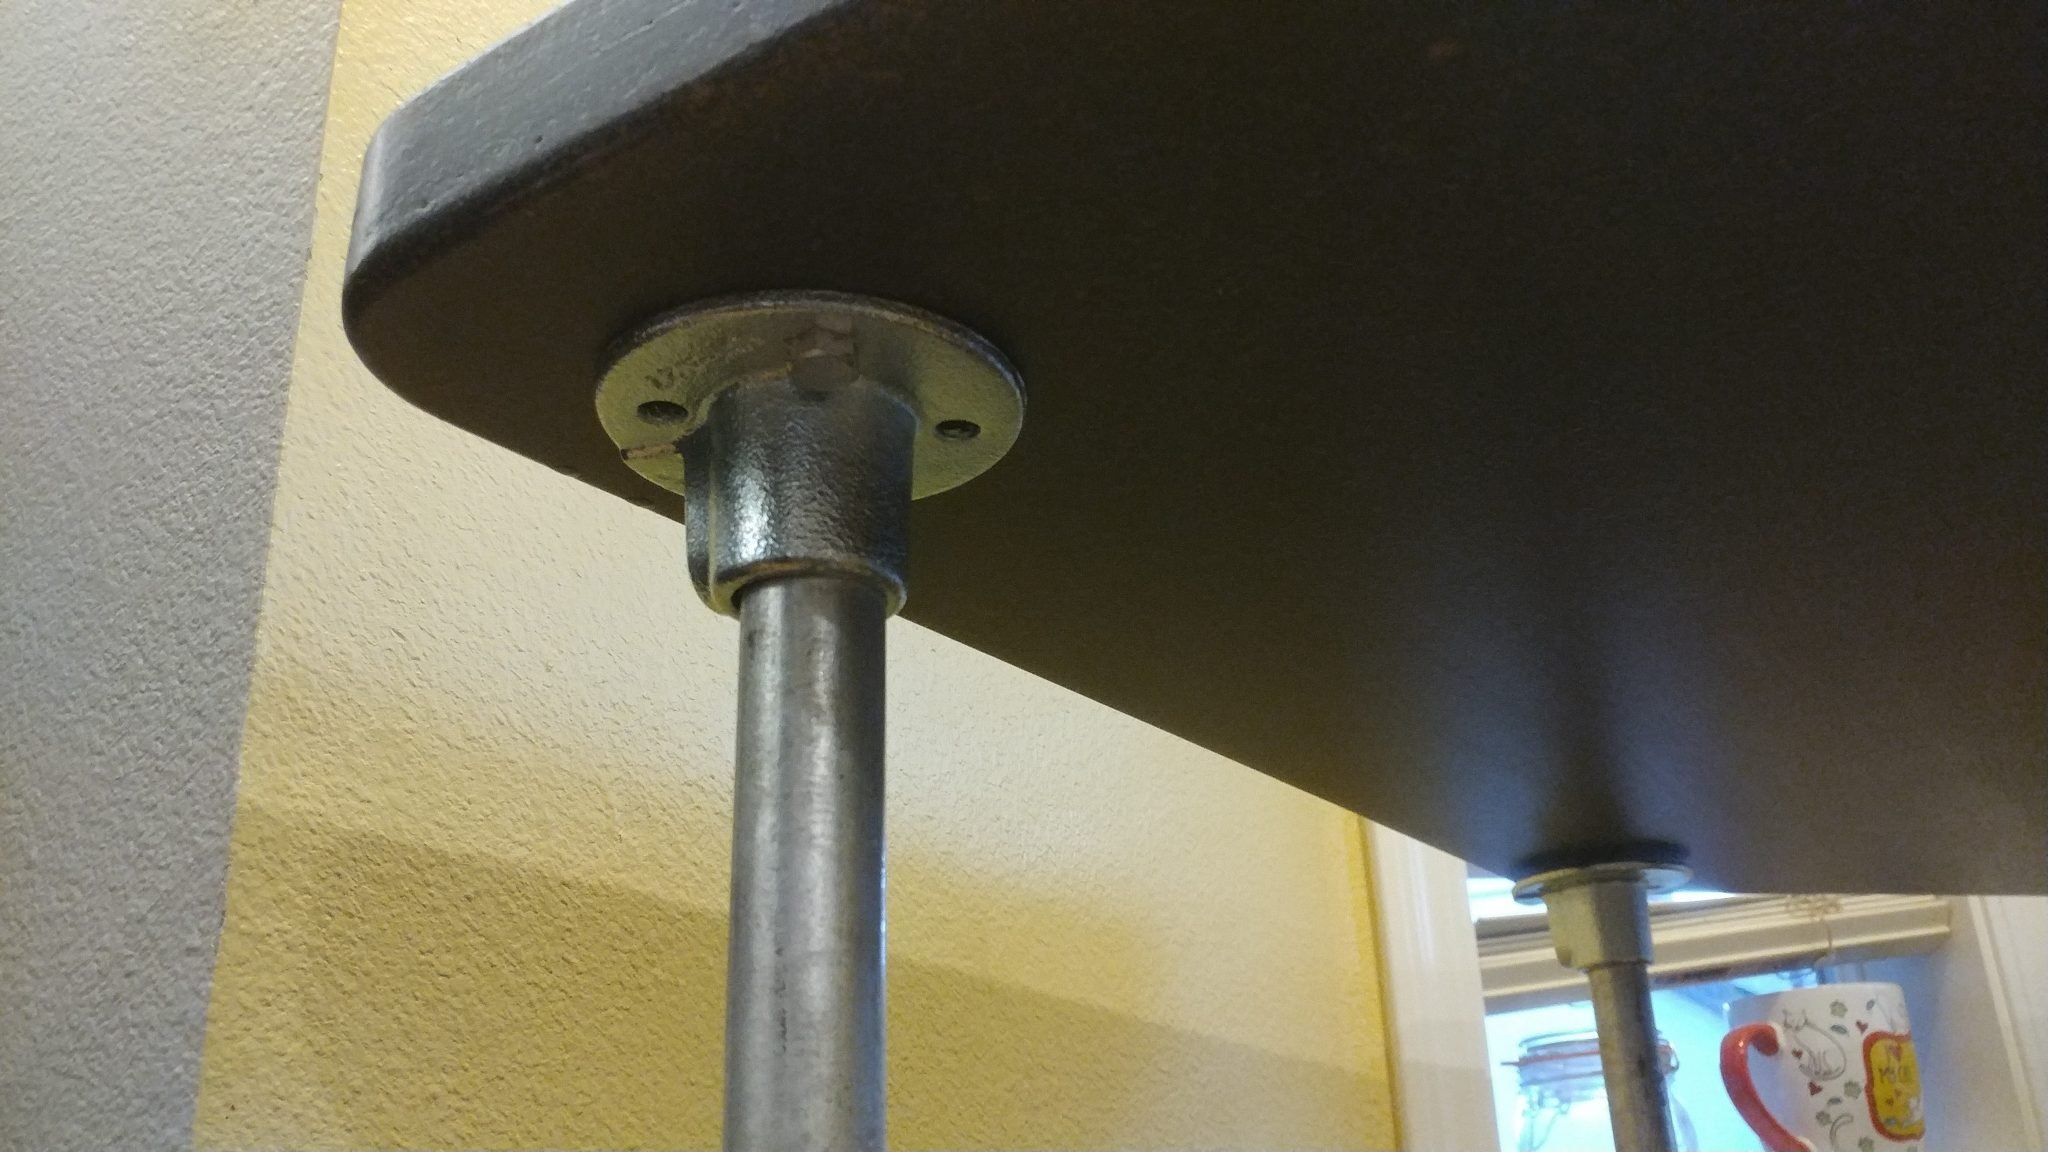
8. Installing the legs and upper flanges
Once I was done with the racks, I set them aside and installed each of the legsand the top flanges. I left the racks off because I need to attach the flanges to the underside of the desk top and the racks will just be in my way.
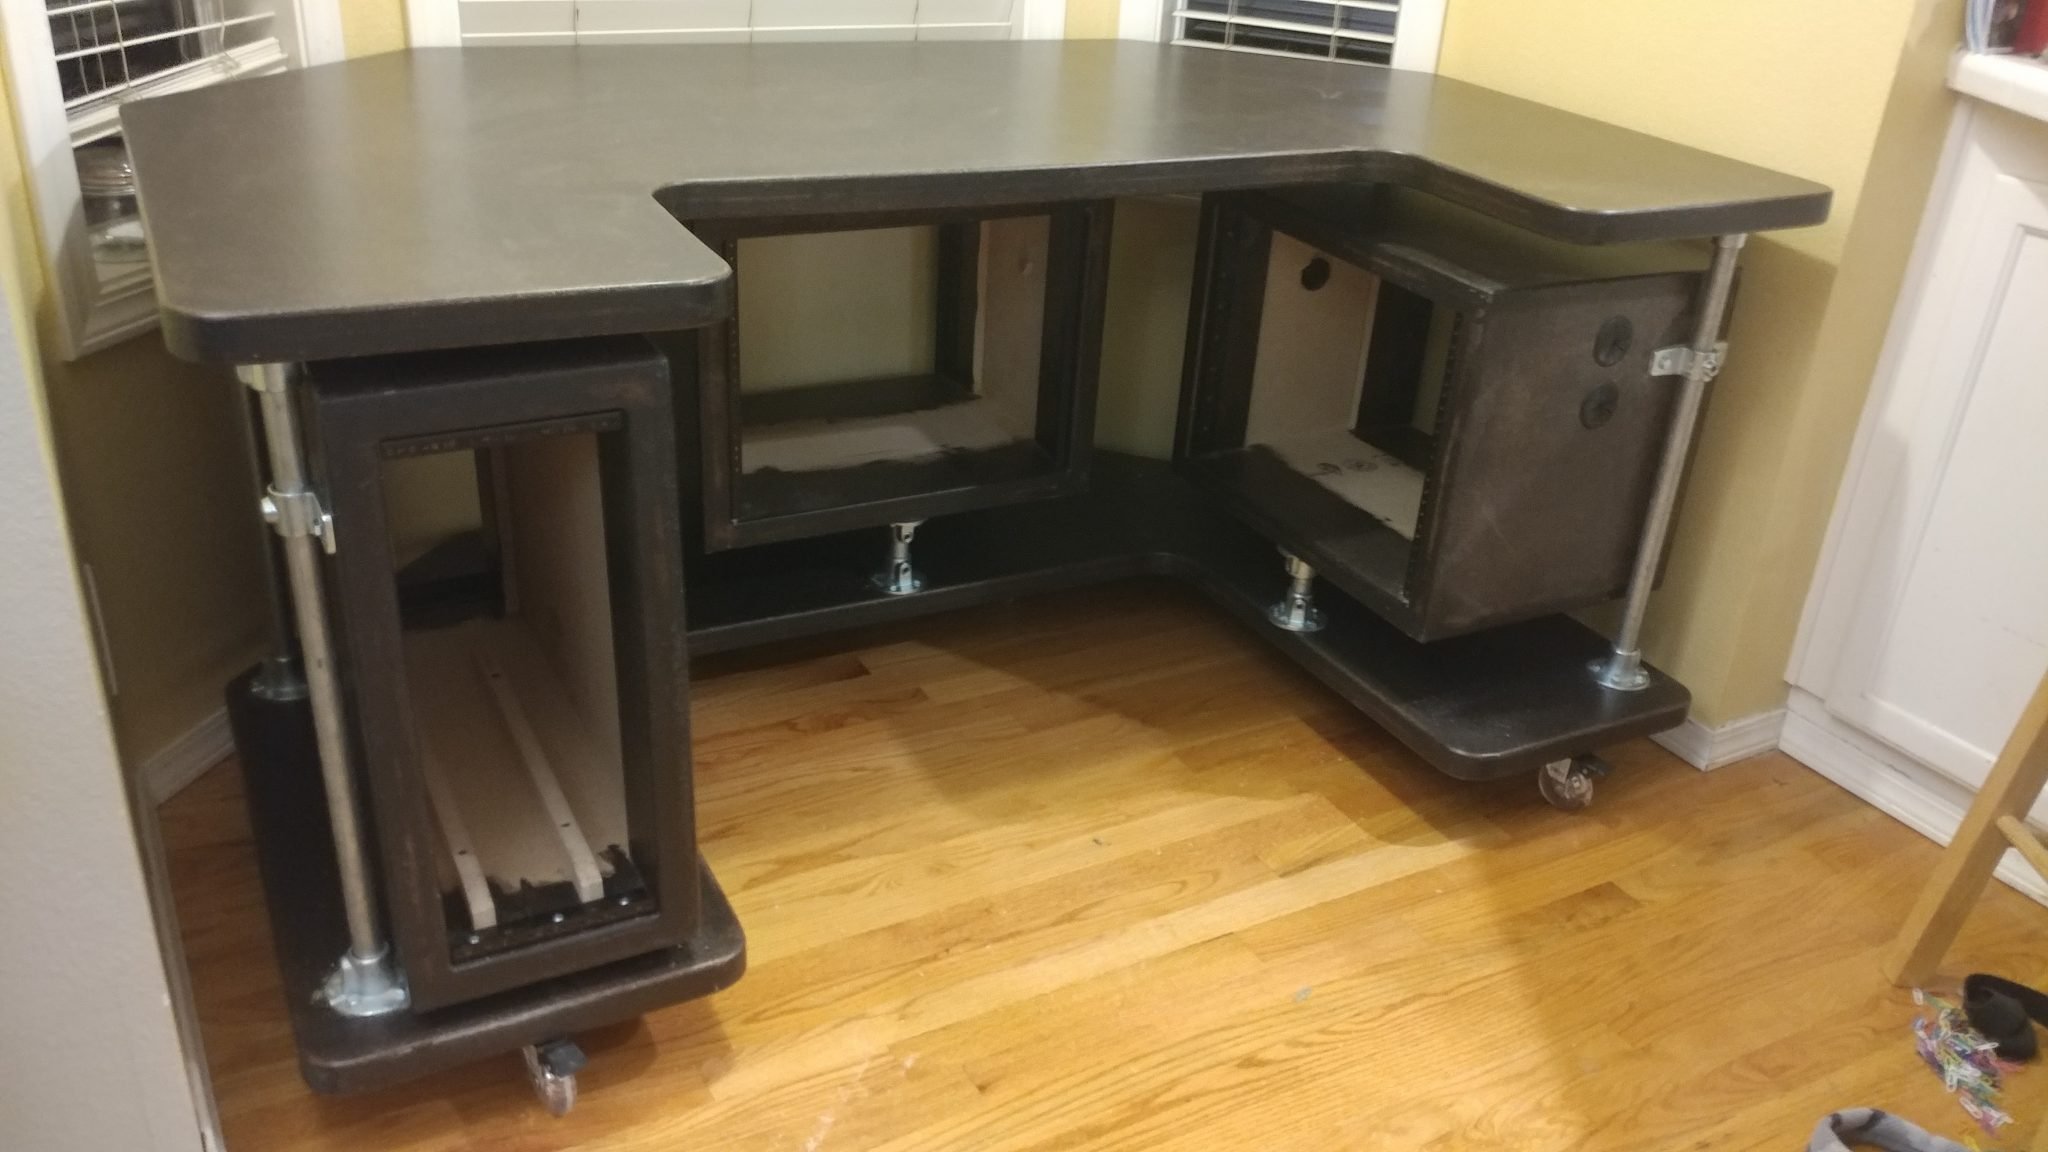
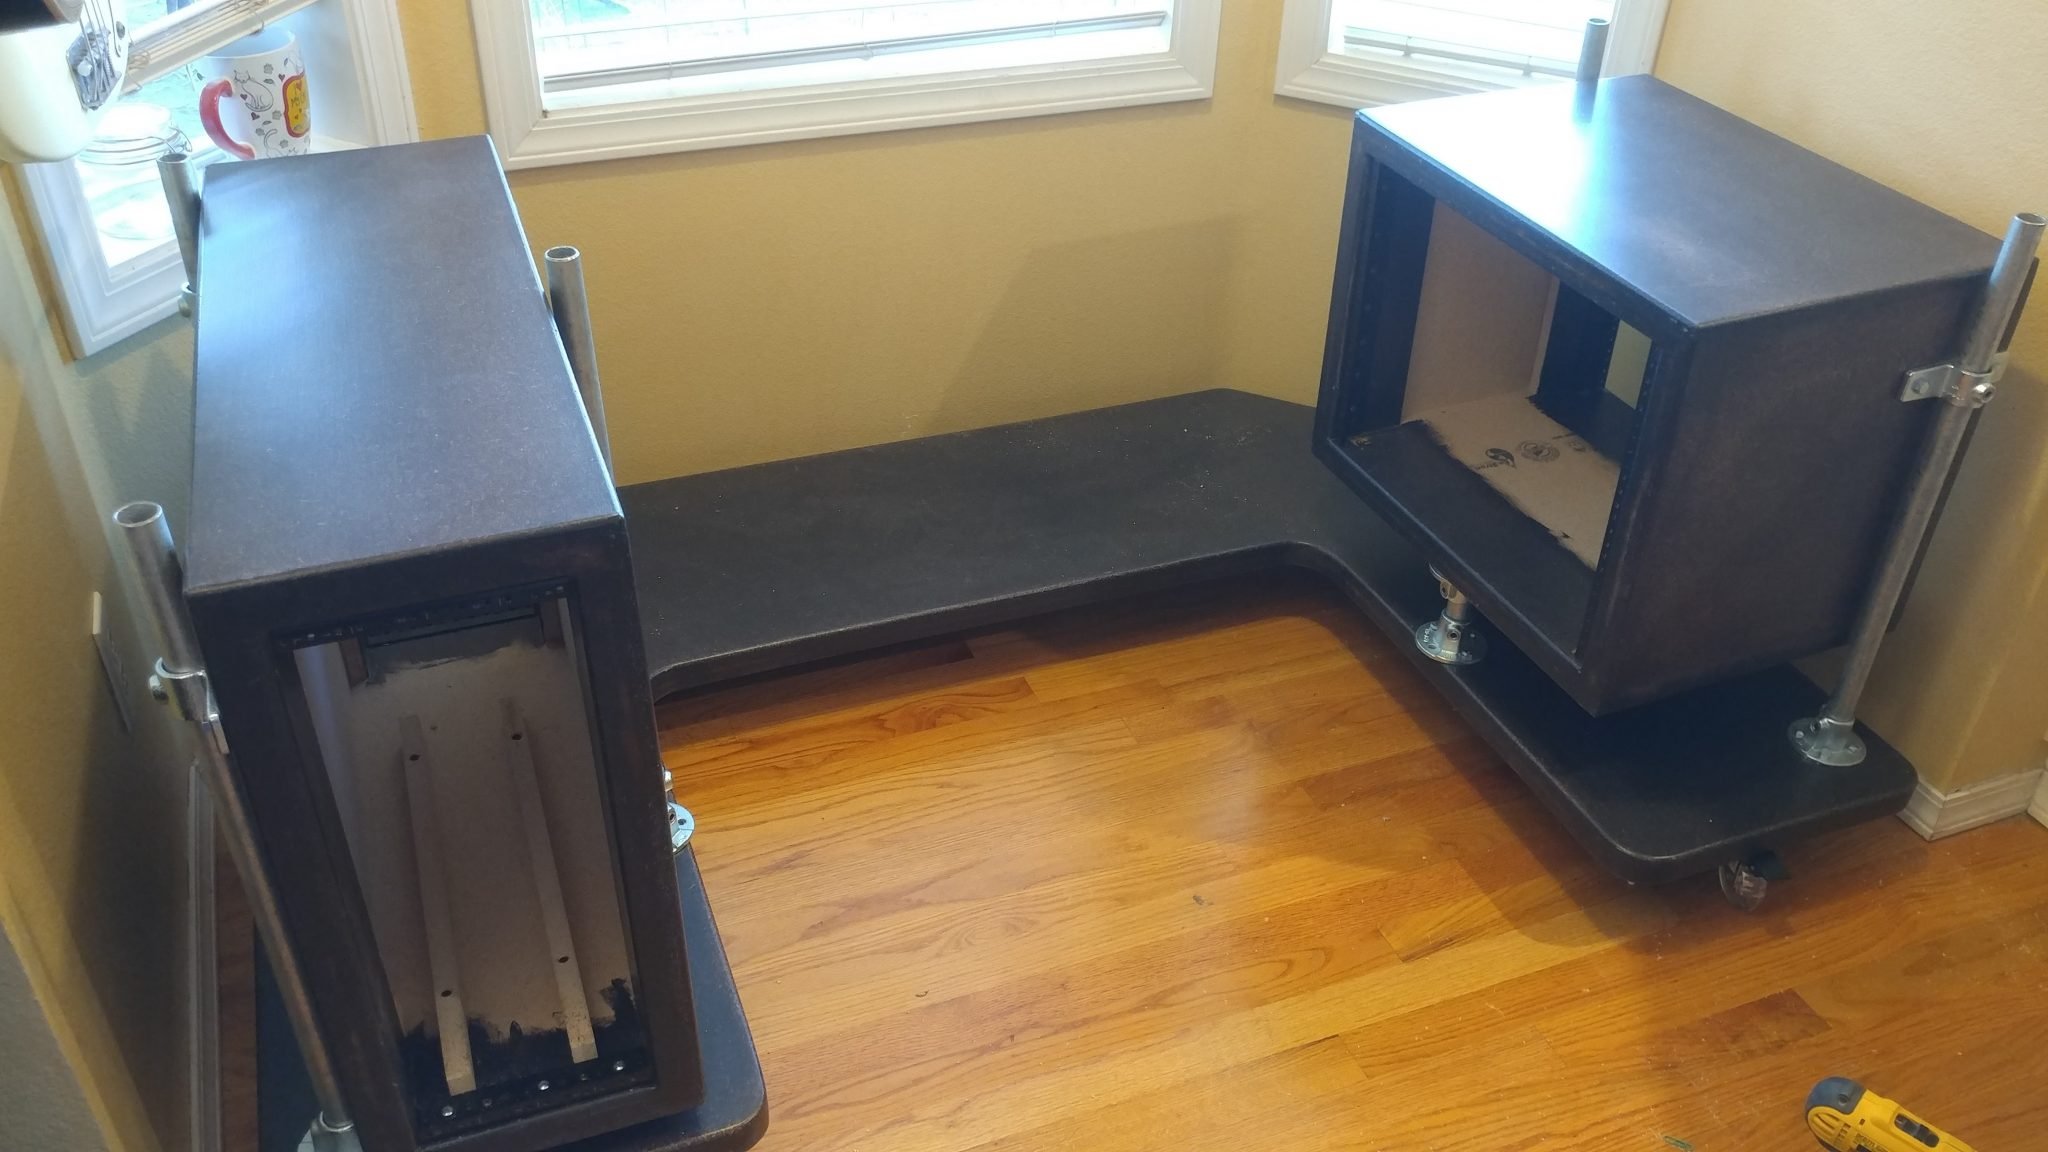
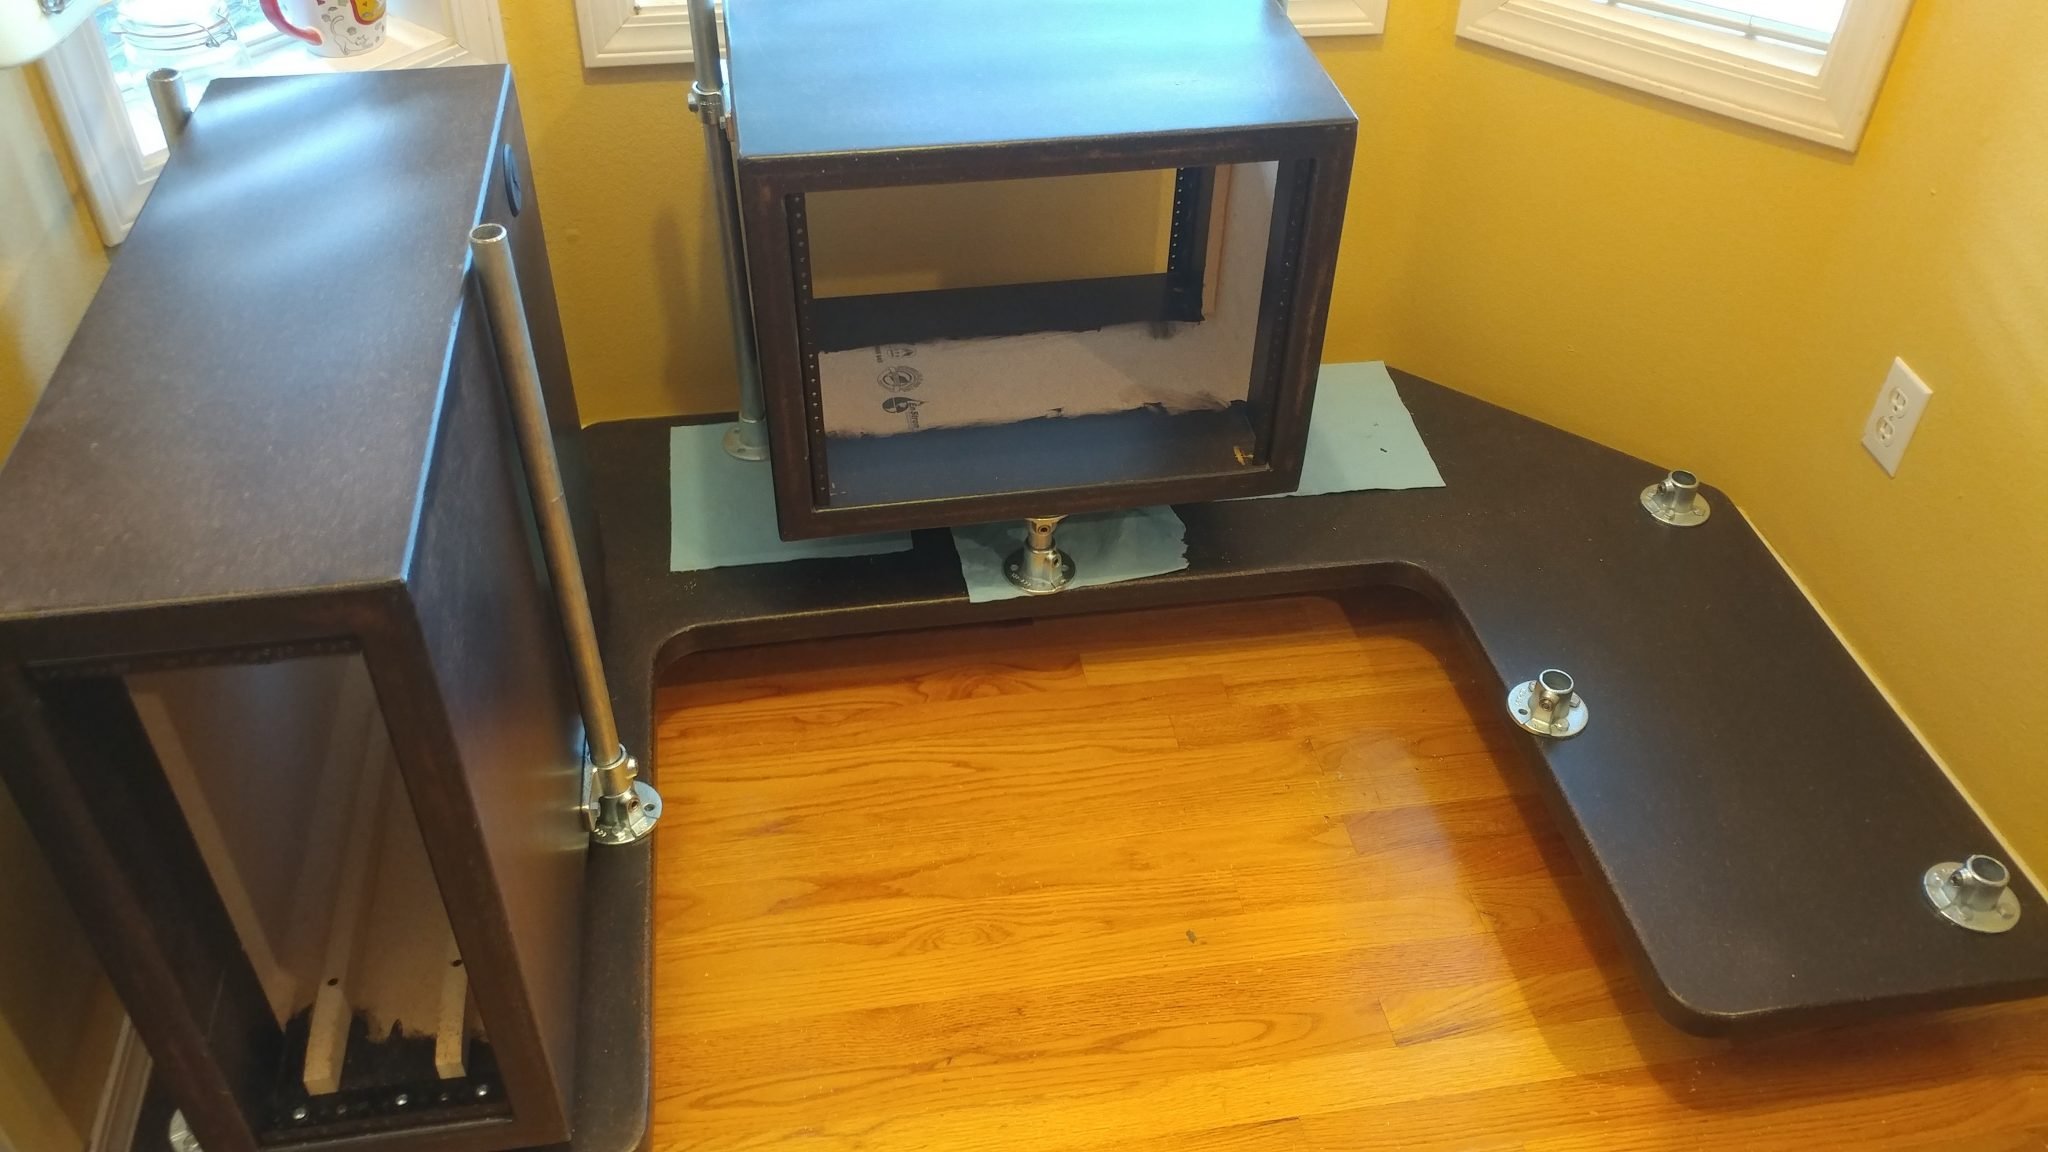
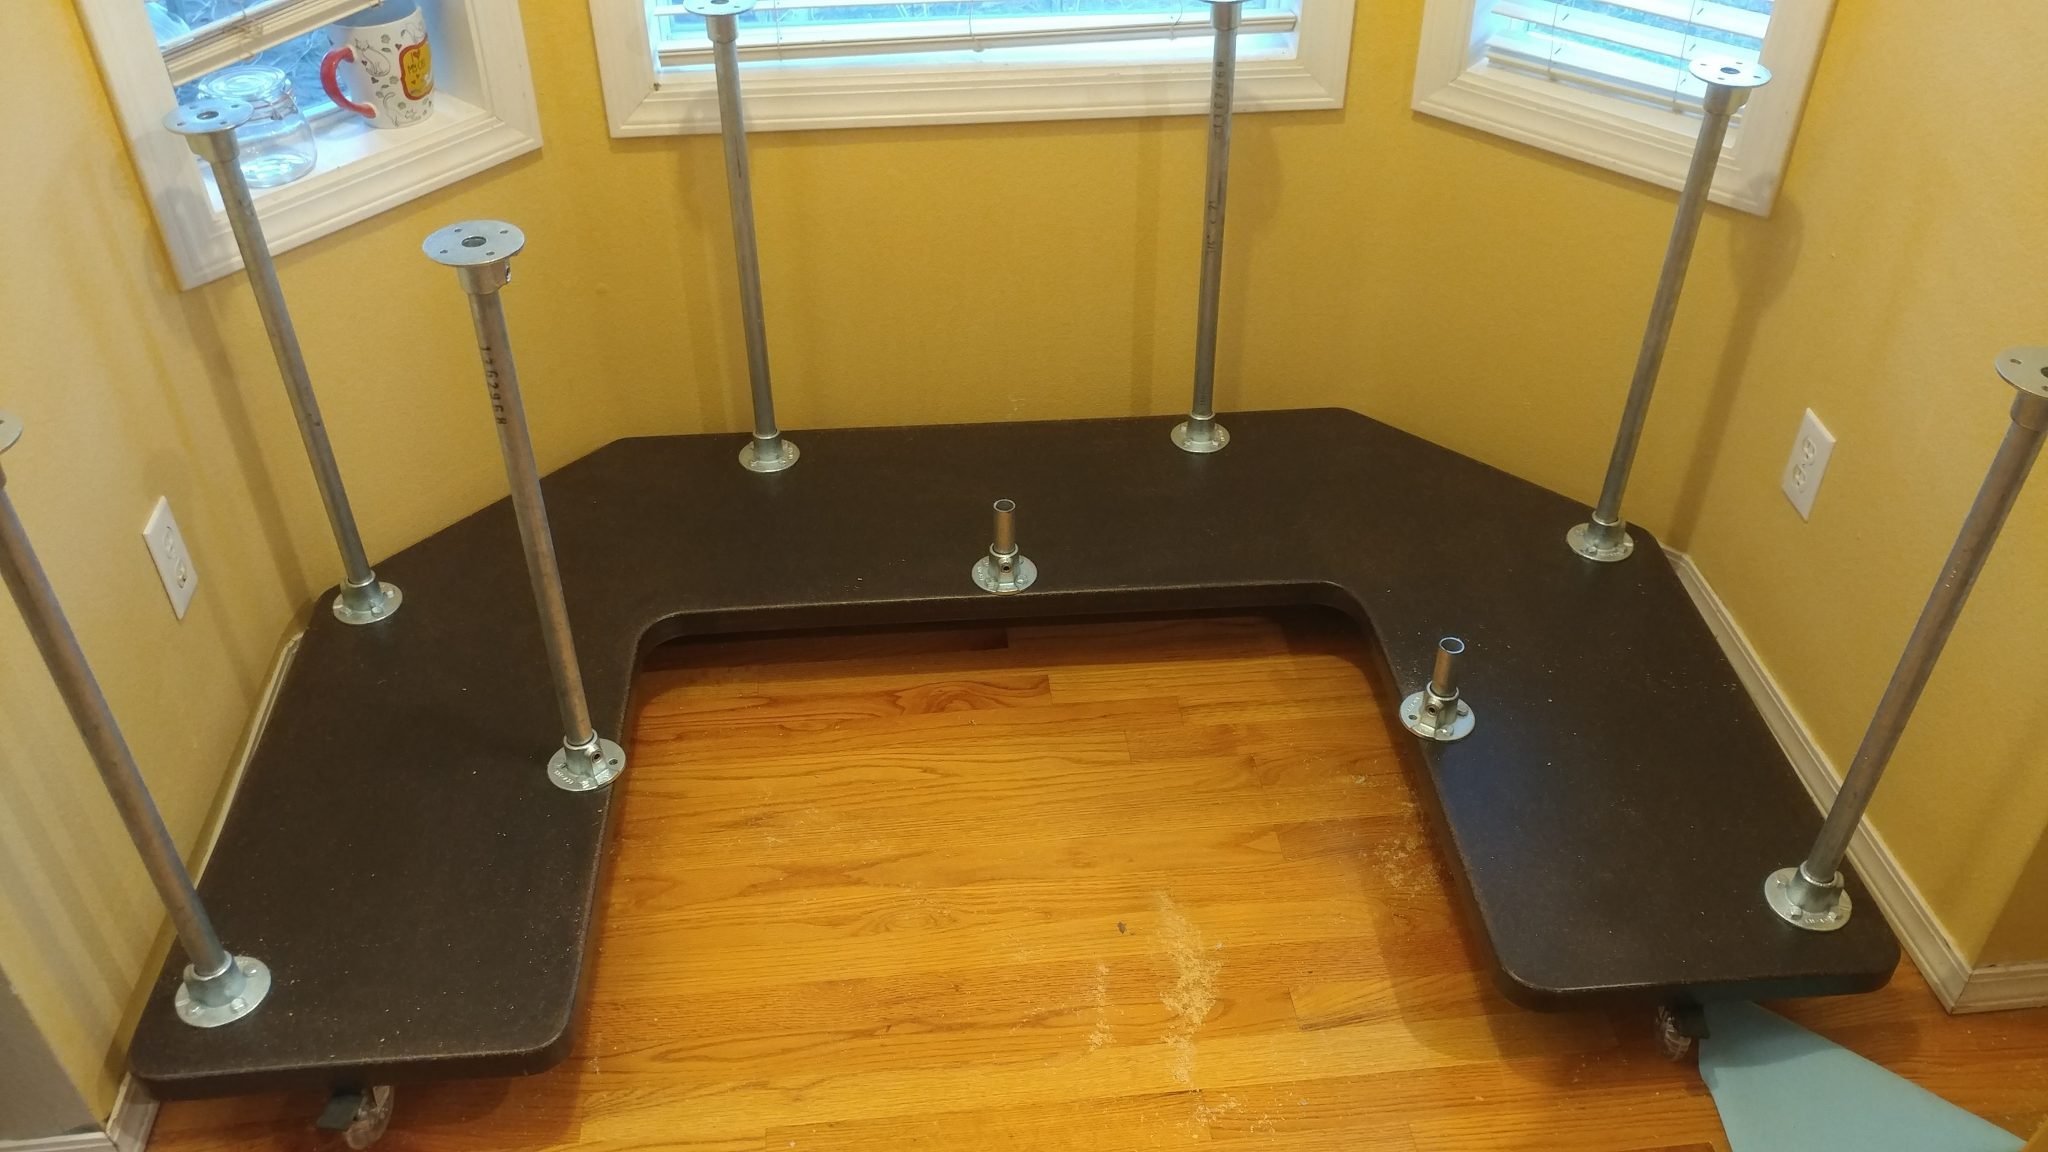
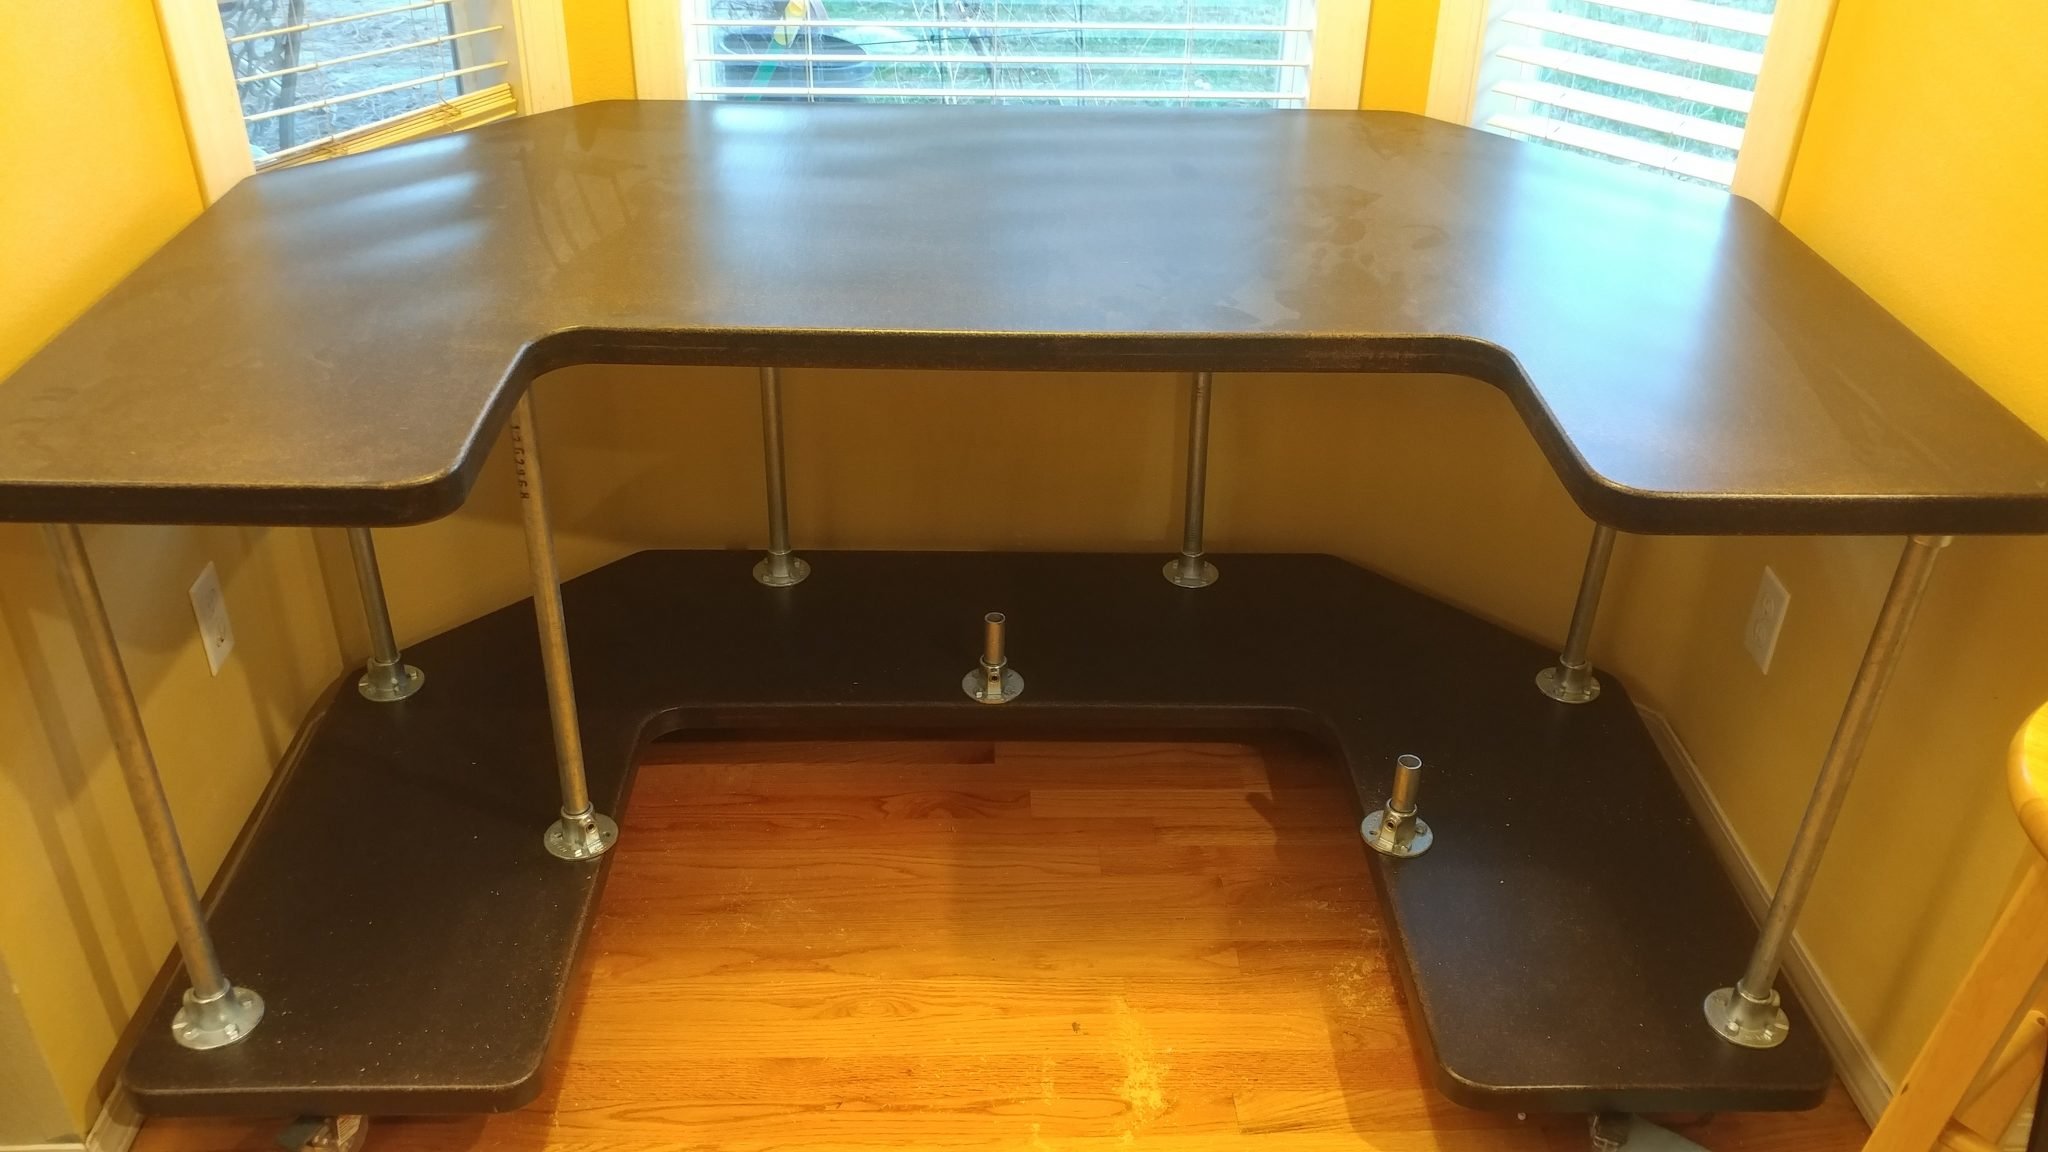
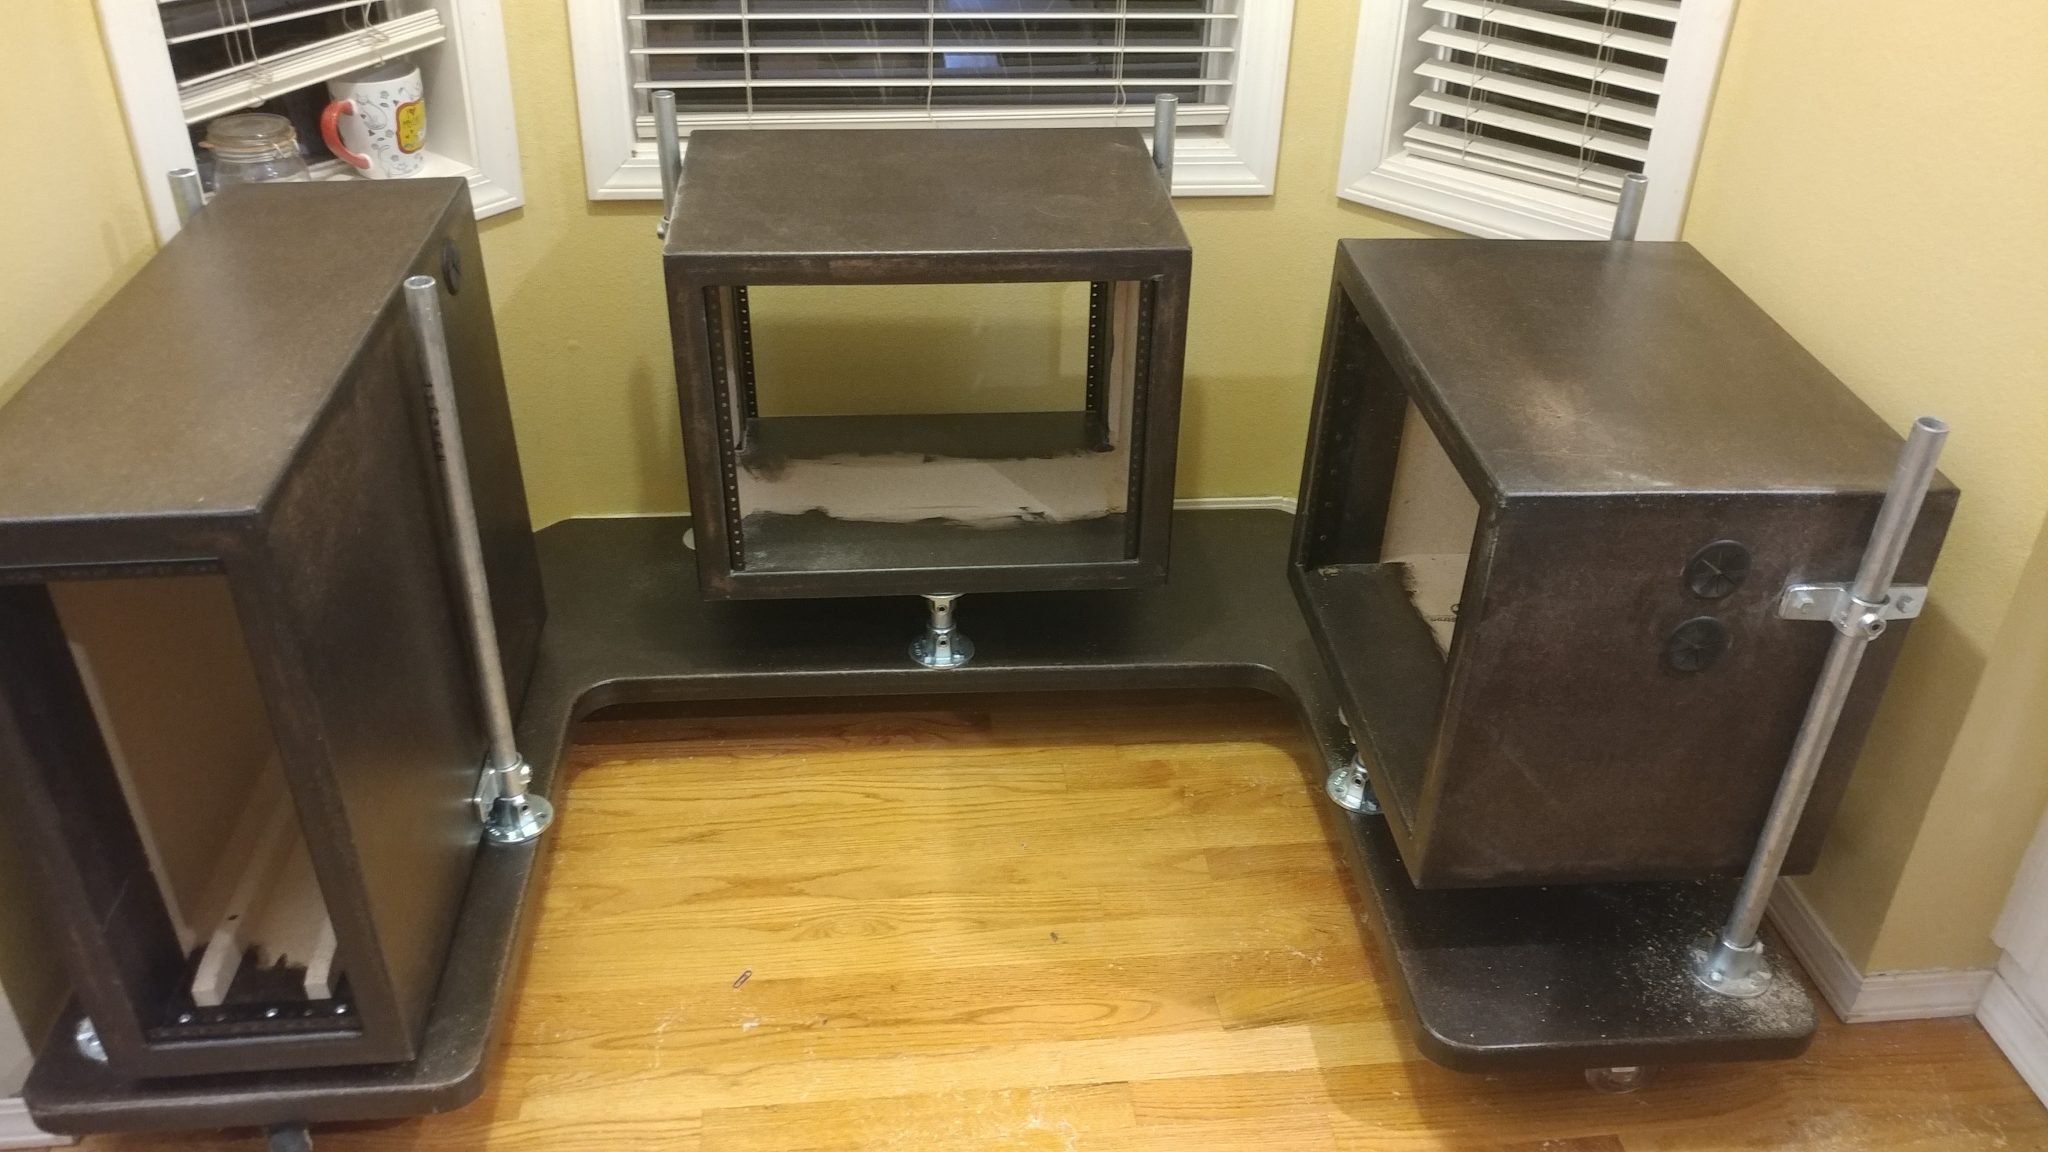
Putting it All Together
The hard work is over and now it’s time to put it all together. I’m really getting tired of working on this, mainly because of how much space it is taking up in my shop so this is a very welcome moment.
1. Positioning the desk top
I placed the desk top loosely in place. It actually started to resemble a desk at this point.
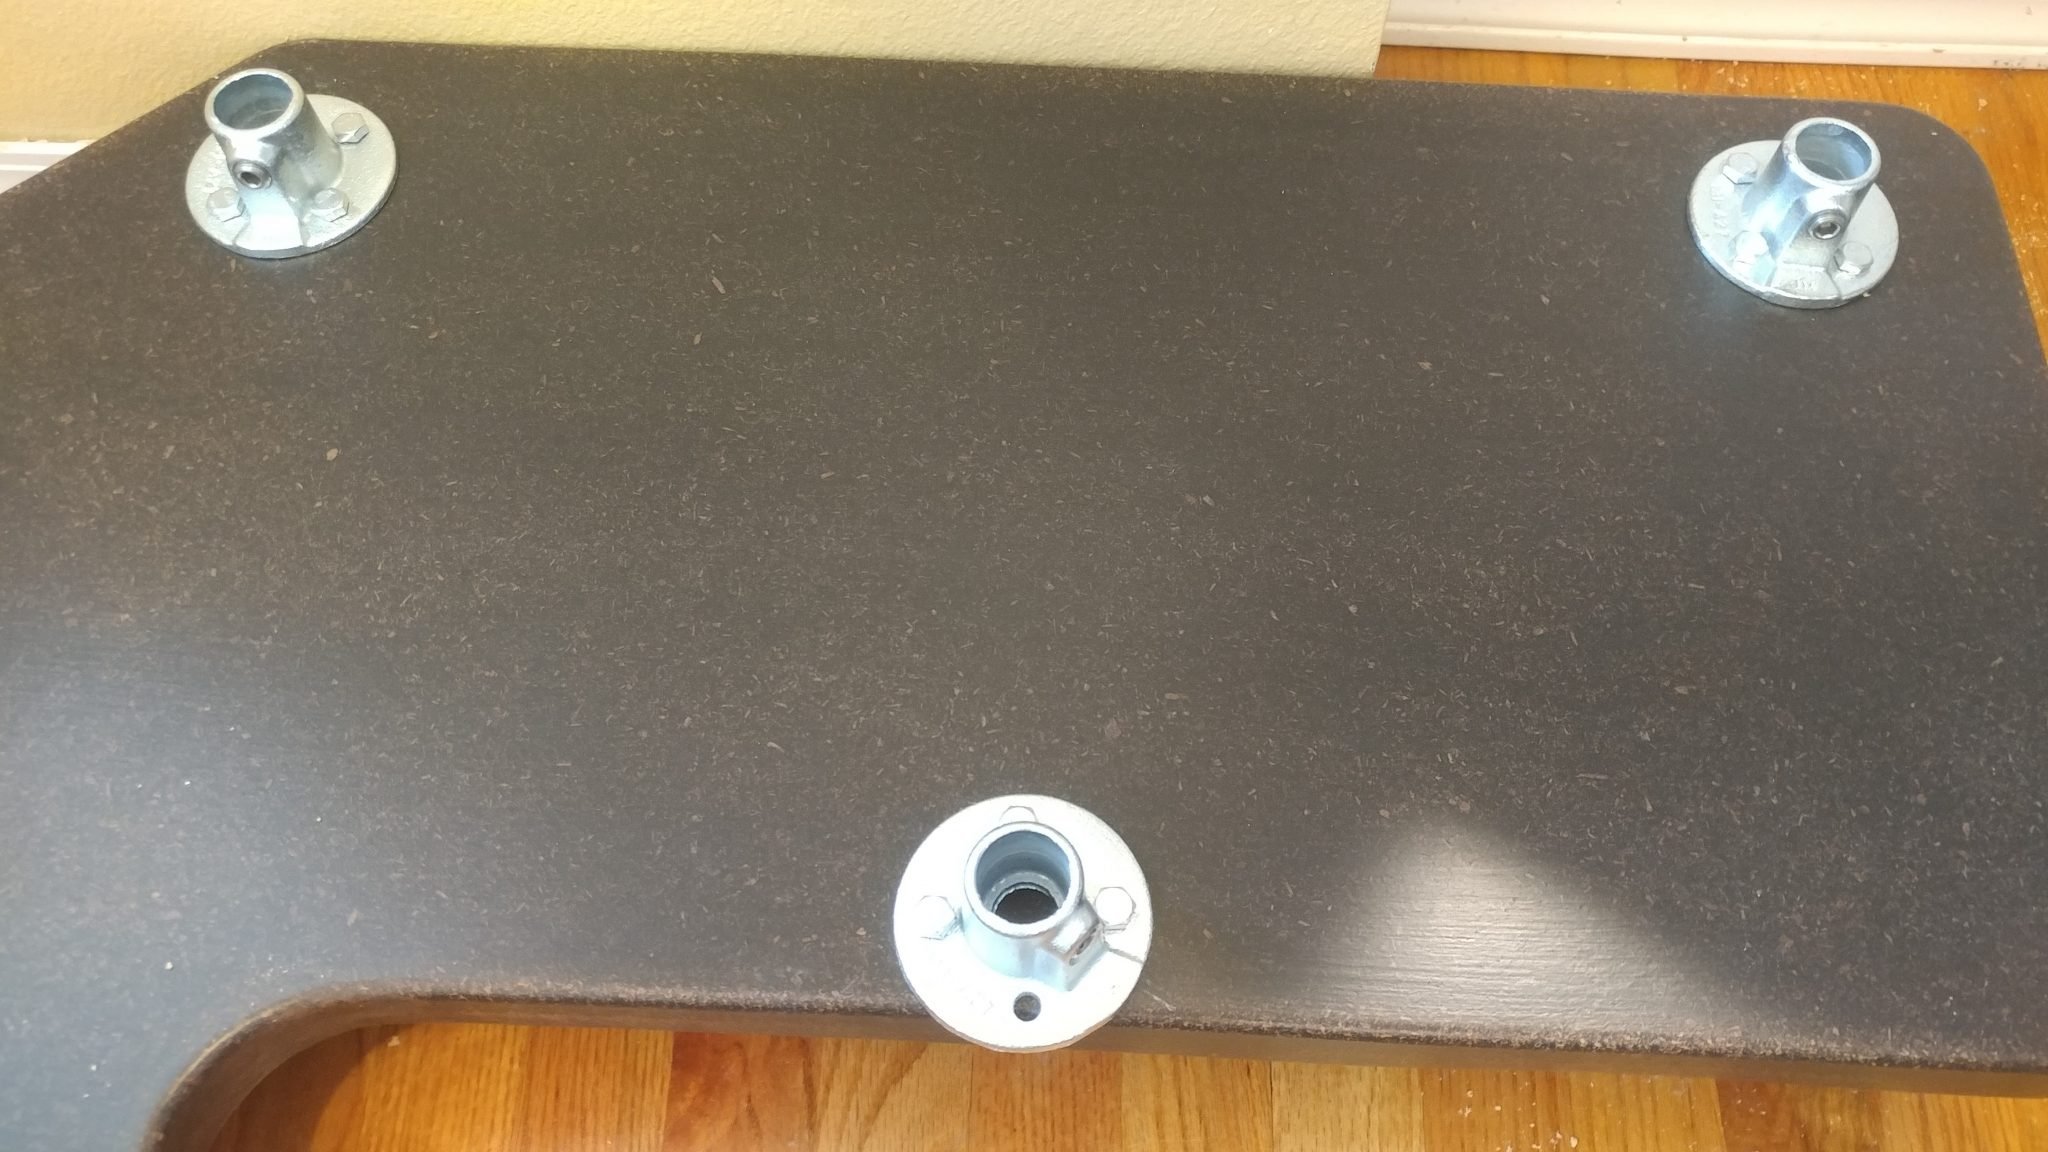
2. Marking the hole locations
From underneath I could see where I needed to drill the holes for the lag bolts. This is where I almost screwed up. I realized that there was some play in the flangesand that would cause the legsto tip a bit. In order to ensure that everything was installed correctly and that the racks would be able to go on squarely, I reinstalled the racks and placed the desktop back on then marked the holes with a silver Sharpie, then rook the top and the racks back off, put the top back on and lined up the holes, then drilled the holes for the lag bolts and attached the flanges. These parts are very heavy and this was a LOT easier said than done. As a result, I was too flustered to take photos of that agonizing process.
3. Installing the racks
Once the flangeswere attached, I removed the top and reinstalled the racks.
4. Attaching the desk top
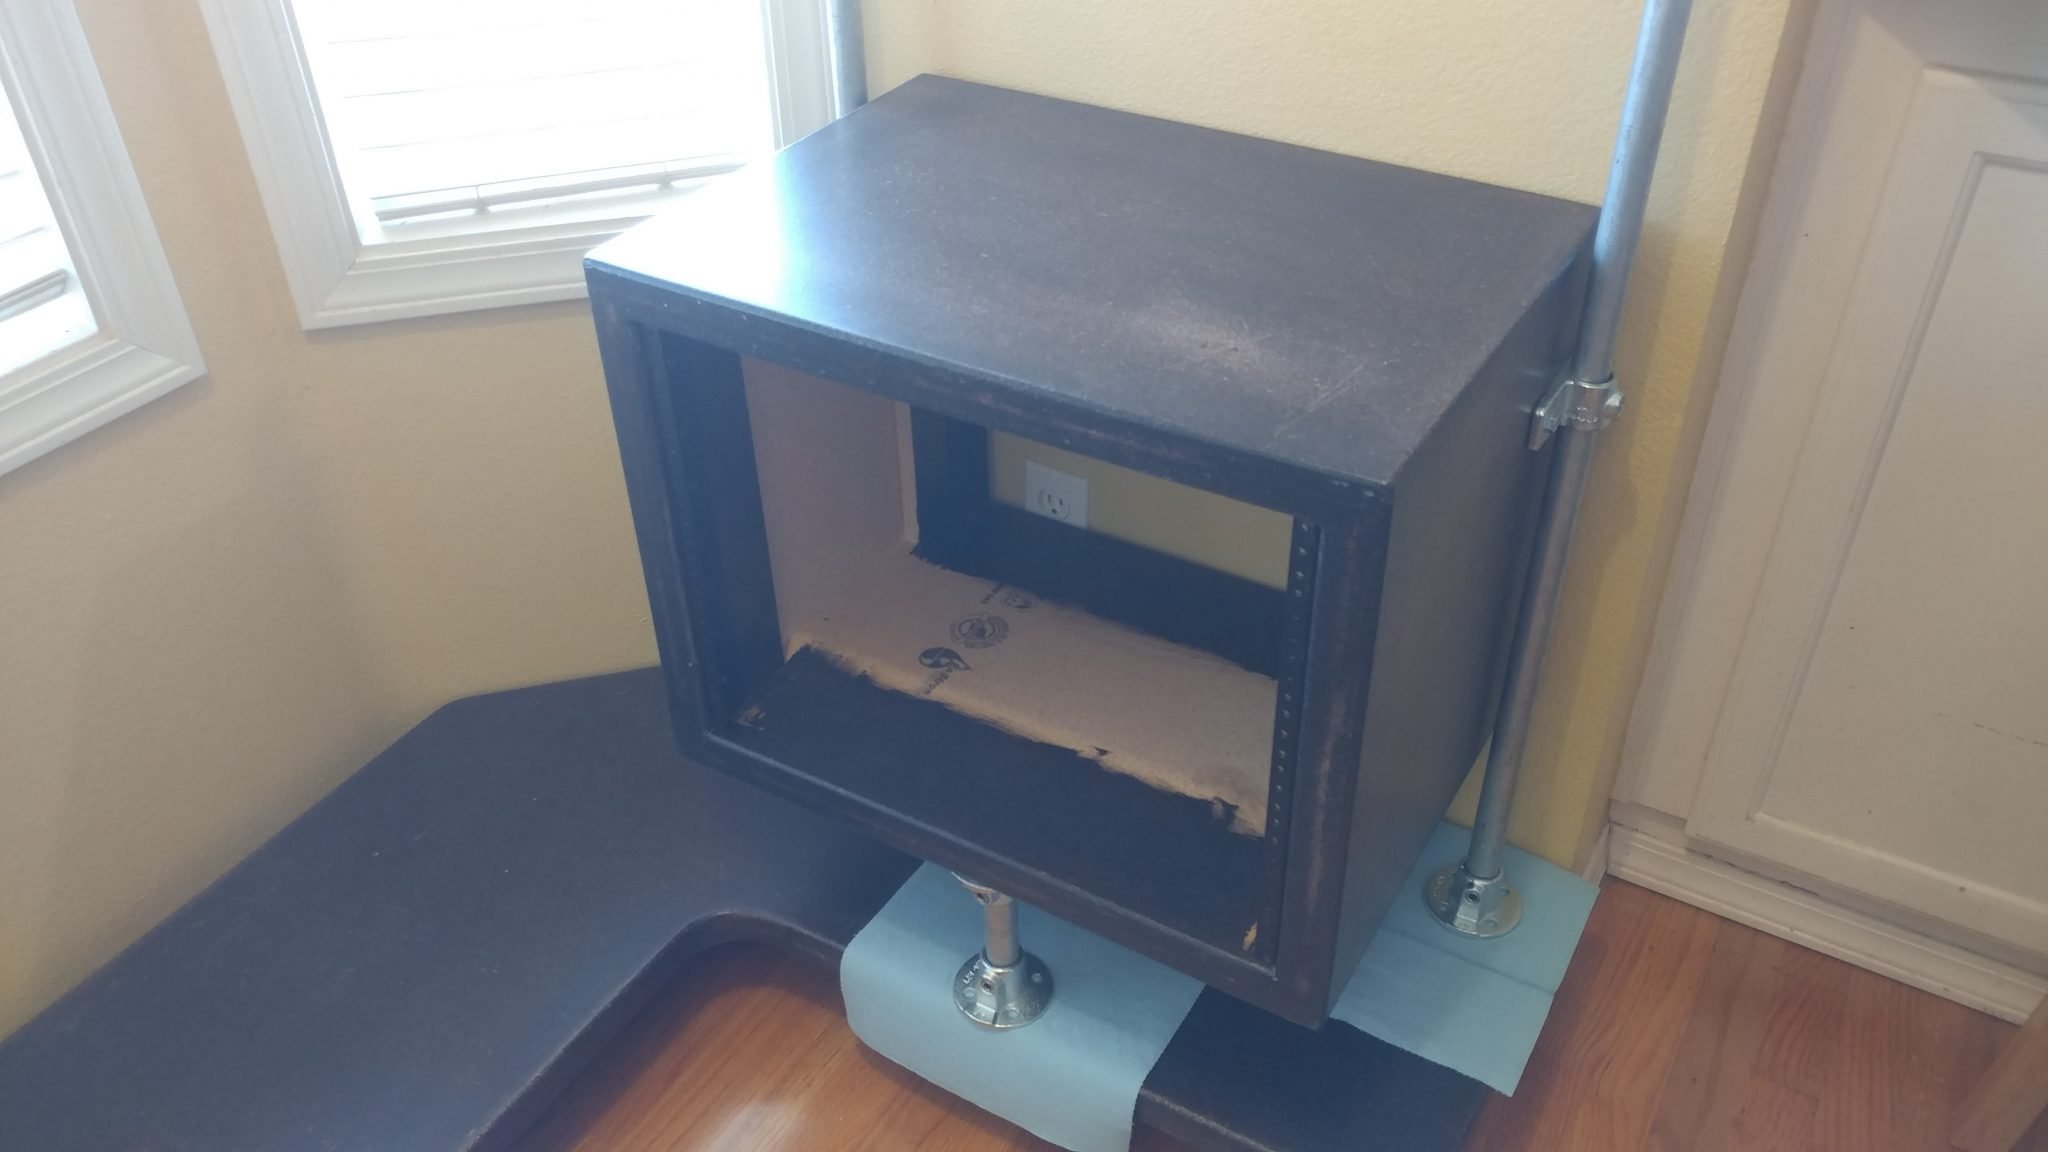
After that I finally put the top back on and the desk assembly was complete.
This concludes part 5.
Closing remarks
This was a pain in the butt. Each of these pieces weighs a ton and was very difficult to maneuver.
This is also where I ran into a major problem. The desk is too heavy for the casters. It’s so heavy that the casters get a flat spot on them if the desk sits in one spot for any length of time.
I don’t know why I missed this but I think it is a good representation of the dangers of keeping your focus on one little detail and not taking in the entire picture. I was so focused on getting polyurethane wheels that I totally missed the weight issue.
I might try doubling up on the casters.
The next step is to do the electrical.
If you have any suggestions, please leave them in the comments below. I’d love to see any desk builds you’ve done. Also, if you haven’t already, please consider signing up for my mailing list so you get e-mail notifications when I post new articles.