
Worked on two songs last night. We’re still solidifying our parts so the playing is a bit rough, especially by yours truly.
My setup for this practice was identical to the setup on 2016-09-15.
Only The Strong
Every Time I Fall
Worked on two songs last night. We’re still solidifying our parts so the playing is a bit rough, especially by yours truly.
My setup for this practice was identical to the setup on 2016-09-15.

Back in 2004 I did some recording for a few groups in Portland. This was an attempt to try different styles and get more experience recording.
One group I recorded with was called Keyenta. It was quite a departure for me. Definitely not my type of music and I think that came out in my playing. Still, here are a few of the songs (stripped of the vocals).
Dirty Brown Water – 3:50
A Dream I Dreamed – 4:06
Till She Went Away – 3:39
See You Again – 3:01
Apartment Number 4 – 4:01
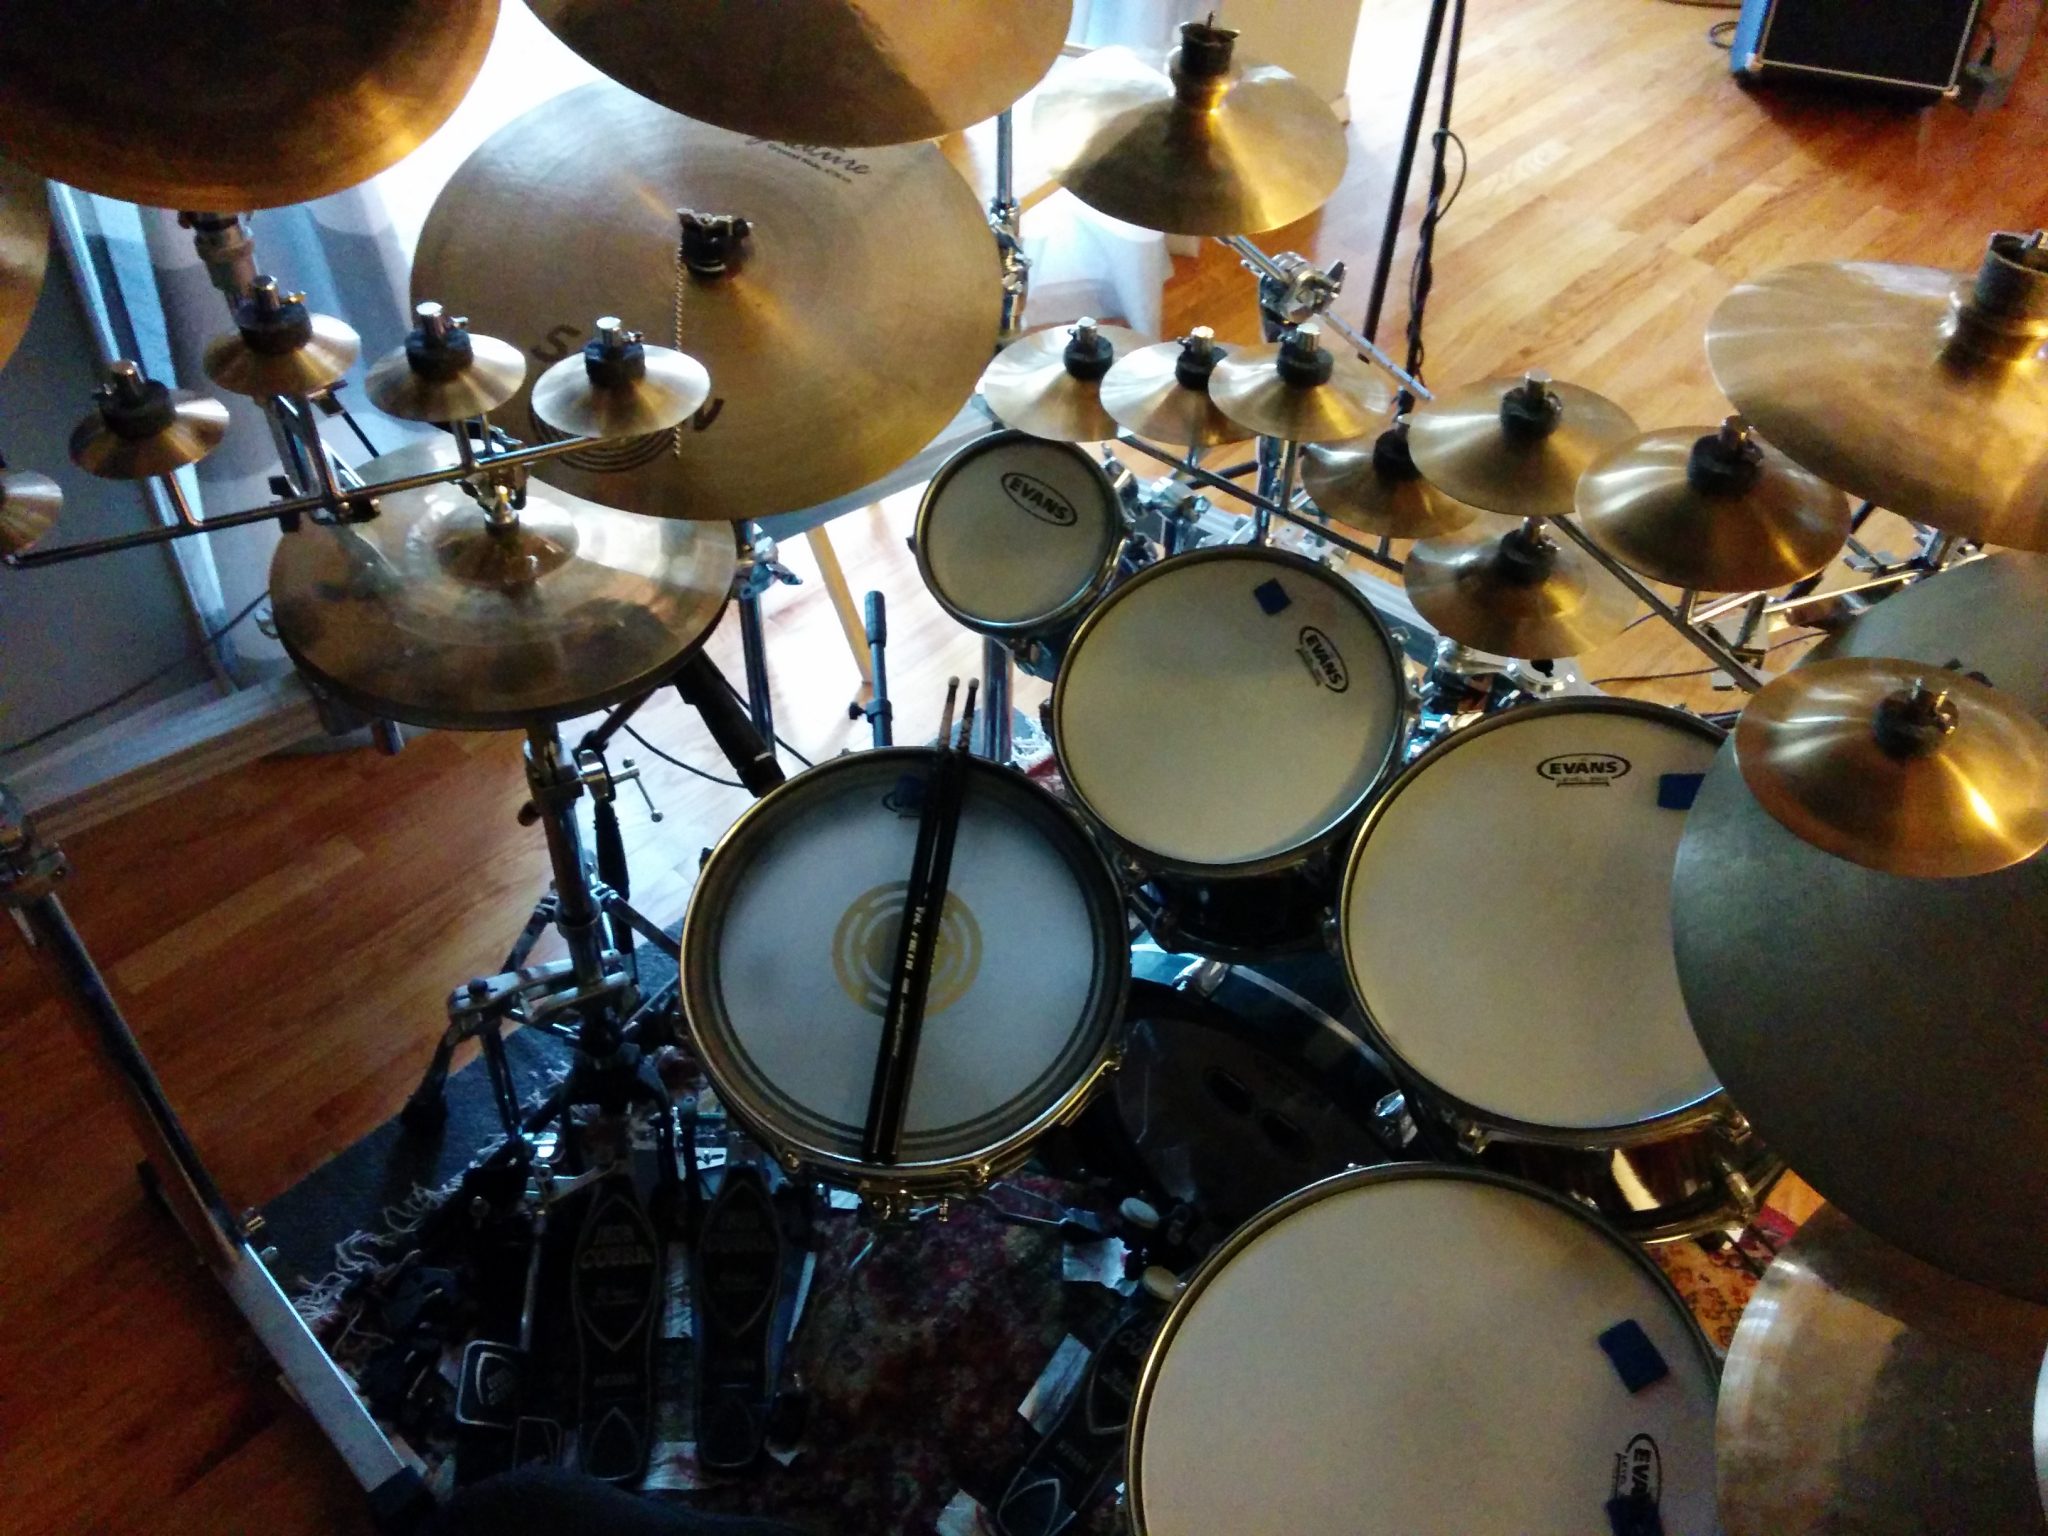
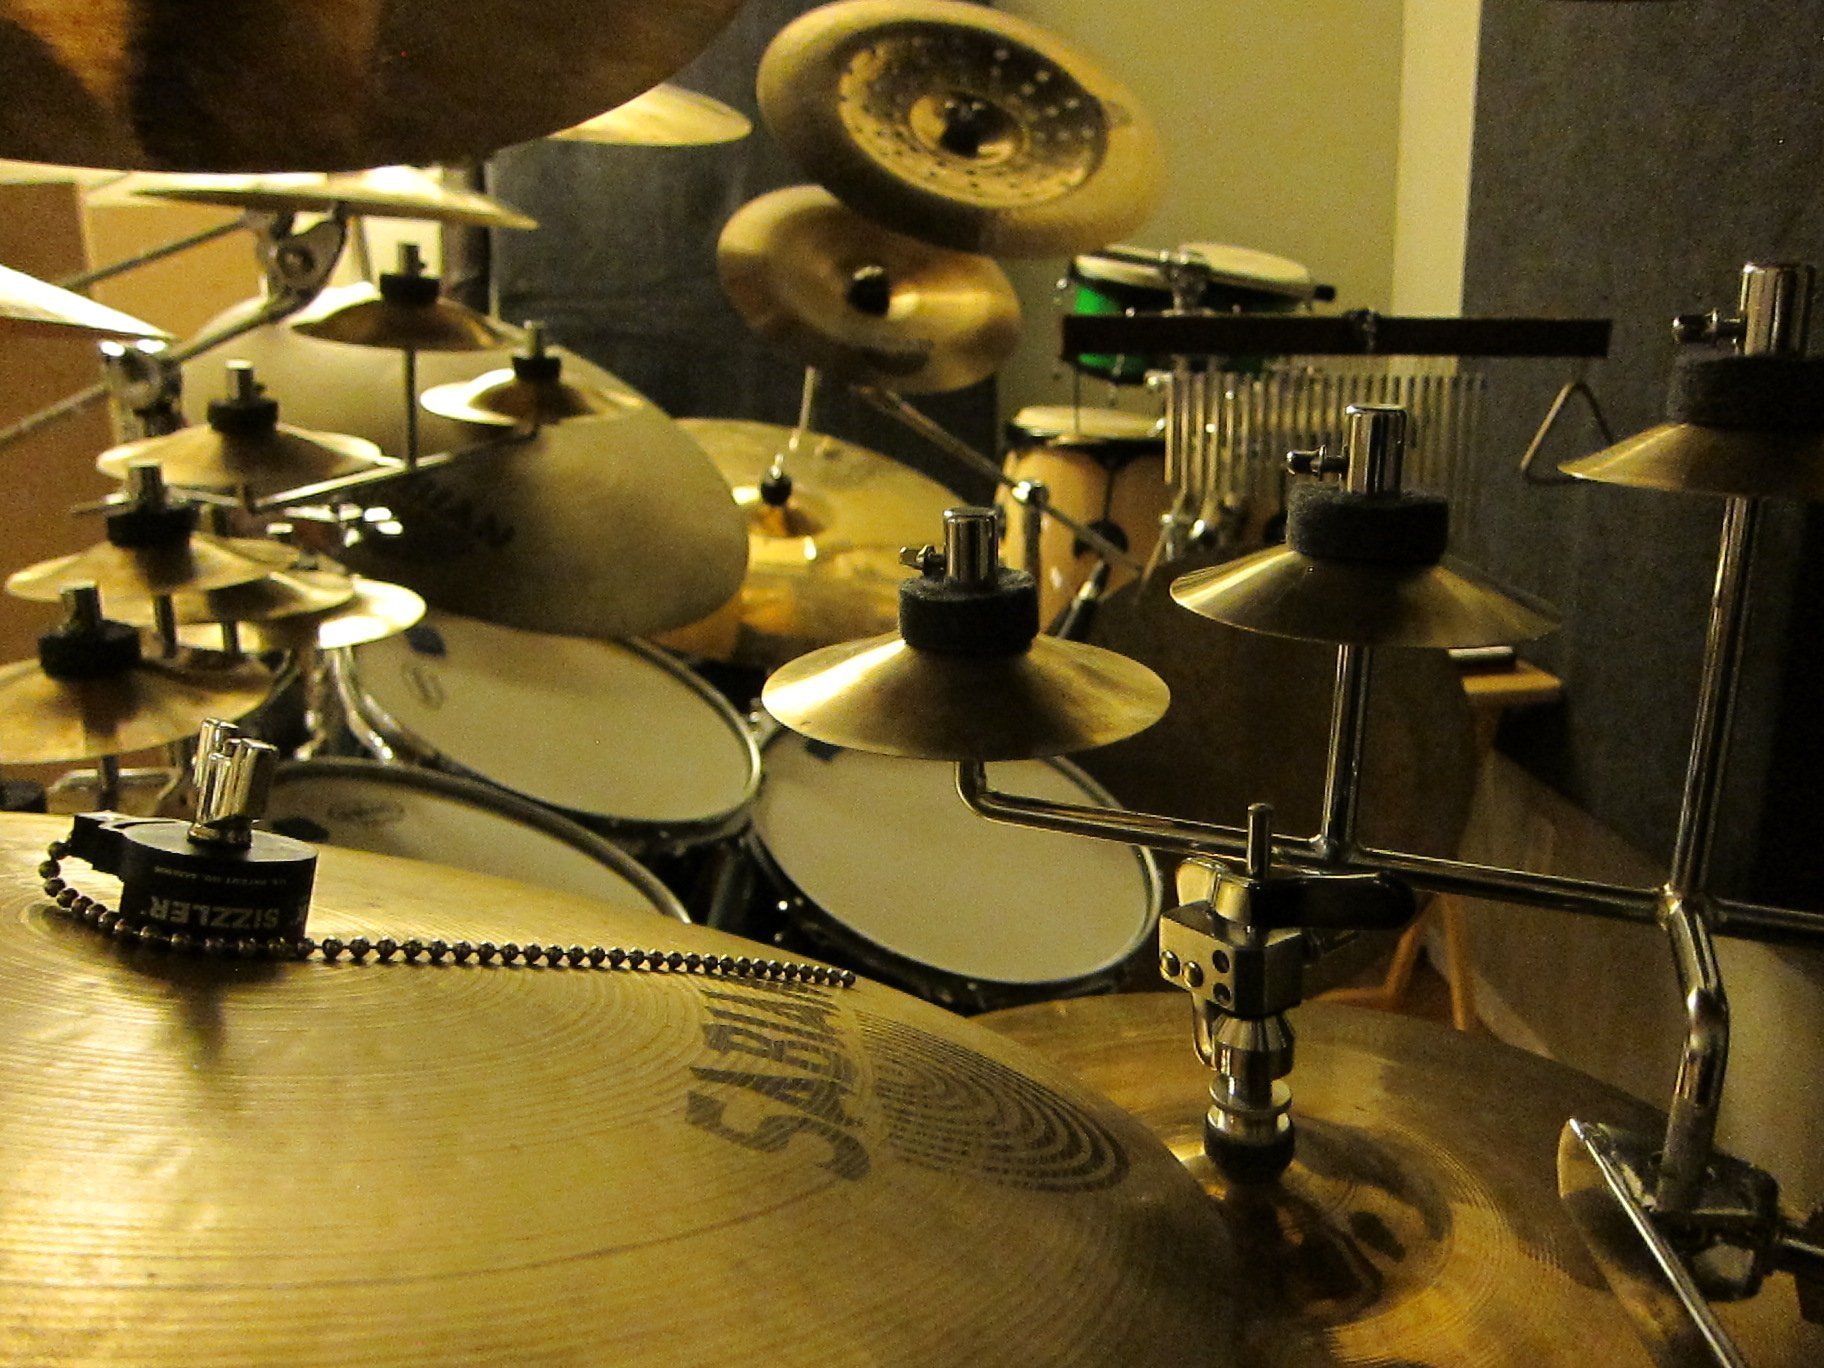
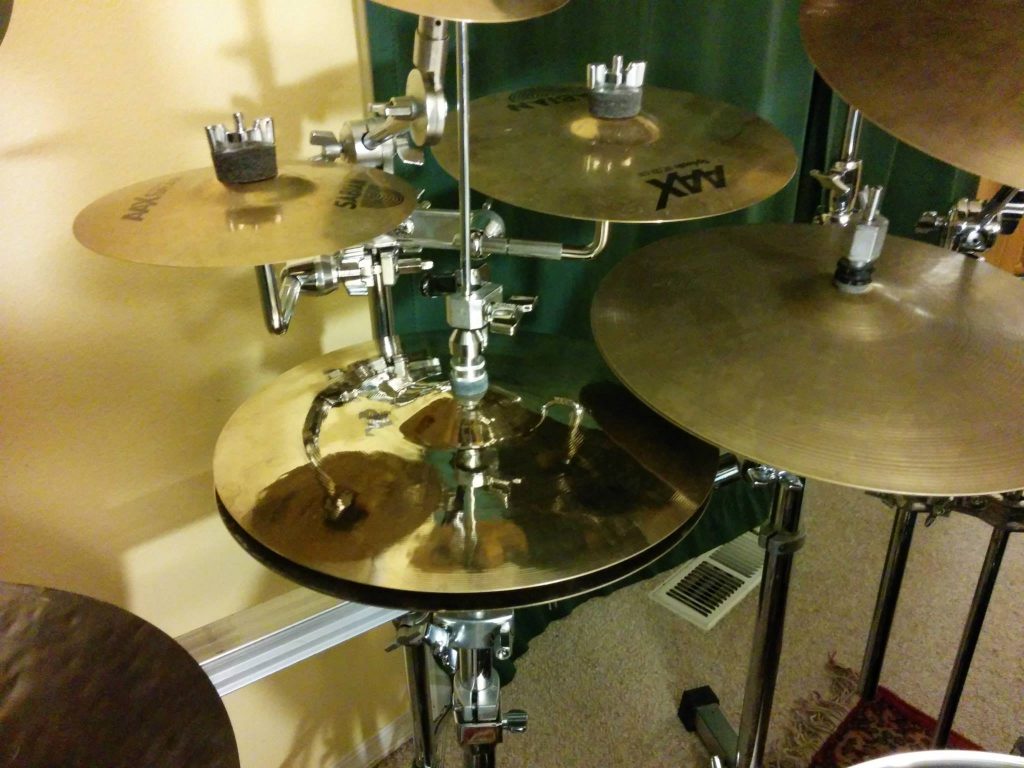
Recorded a few takes last night as we were writing our parts for a few songs. In this I’m testing out some cymbals that I modified. They’re cut down Wuhan Lion cymbals, which is Wuhan’s version of the China cymbals we’re more familiar with. Personally I hate the sound of their Lion cymbals, but once you cut the flange off, they have a pretty nice trashy sound.
Here are some photos of the setup I used during the rehearsal. The Lions are the weird looking ones.


Warning: it’s rough and my timing sucks because…well…I’m a white guy.
No Name #6 – Rough recording
Forgiveness – Rough recording

I played in a band called Tom’s Fury back in 2004 – 2005 that had a slightly heavy Americana feel to it. We recorded an album that to this day has yet to be finalized.
This is the latest version from 2015.
Bury My Heart – 4:20
By Wire – 2:39
Union Pacific – 6:05
Never Enough – 4:25
Not What You Think – 5:58
Comedown – 5:54
Ghost – 4:40
Lucas Falls – 3:49
Burn – 4:43
Paranoia – 5:25
Last Chance Darling – 4:44
Resolve – 7:19
By Wire (Reprise) – 4:16
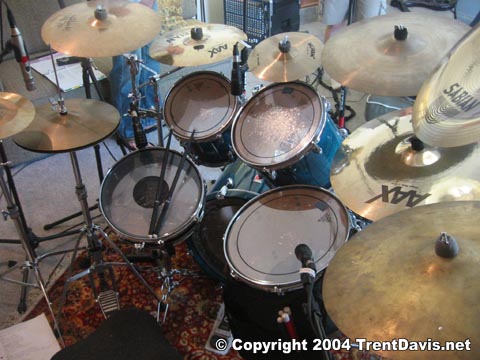
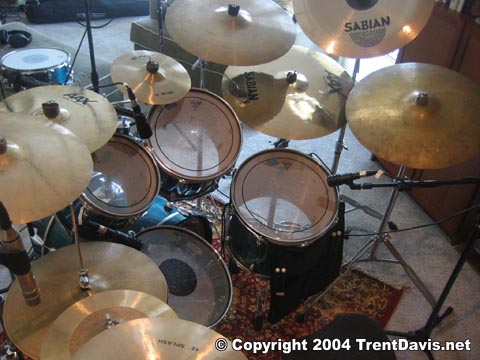
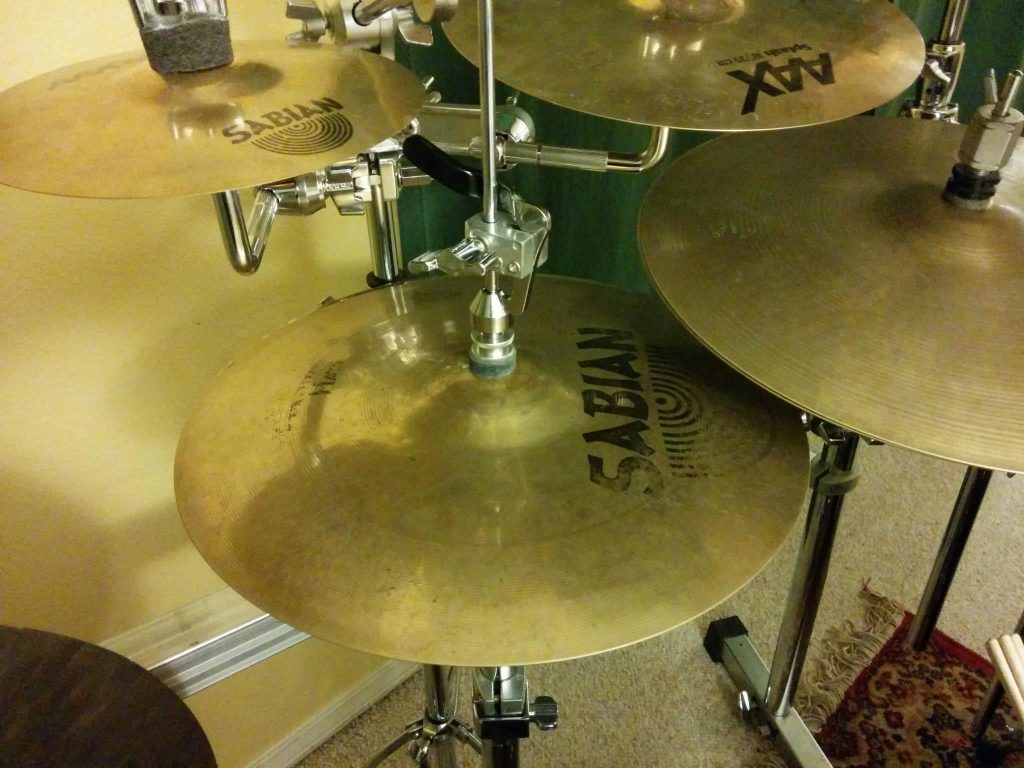
Here are some photos of my setup while we were recording these tracks.

A while ago I sat in at an open mic and got to play on the house drum kit. It actually belongs to Bill Gates (he’s not THE Bill Gates; he’s A Bill Gates). The cymbals on this kit looked like molten gold.
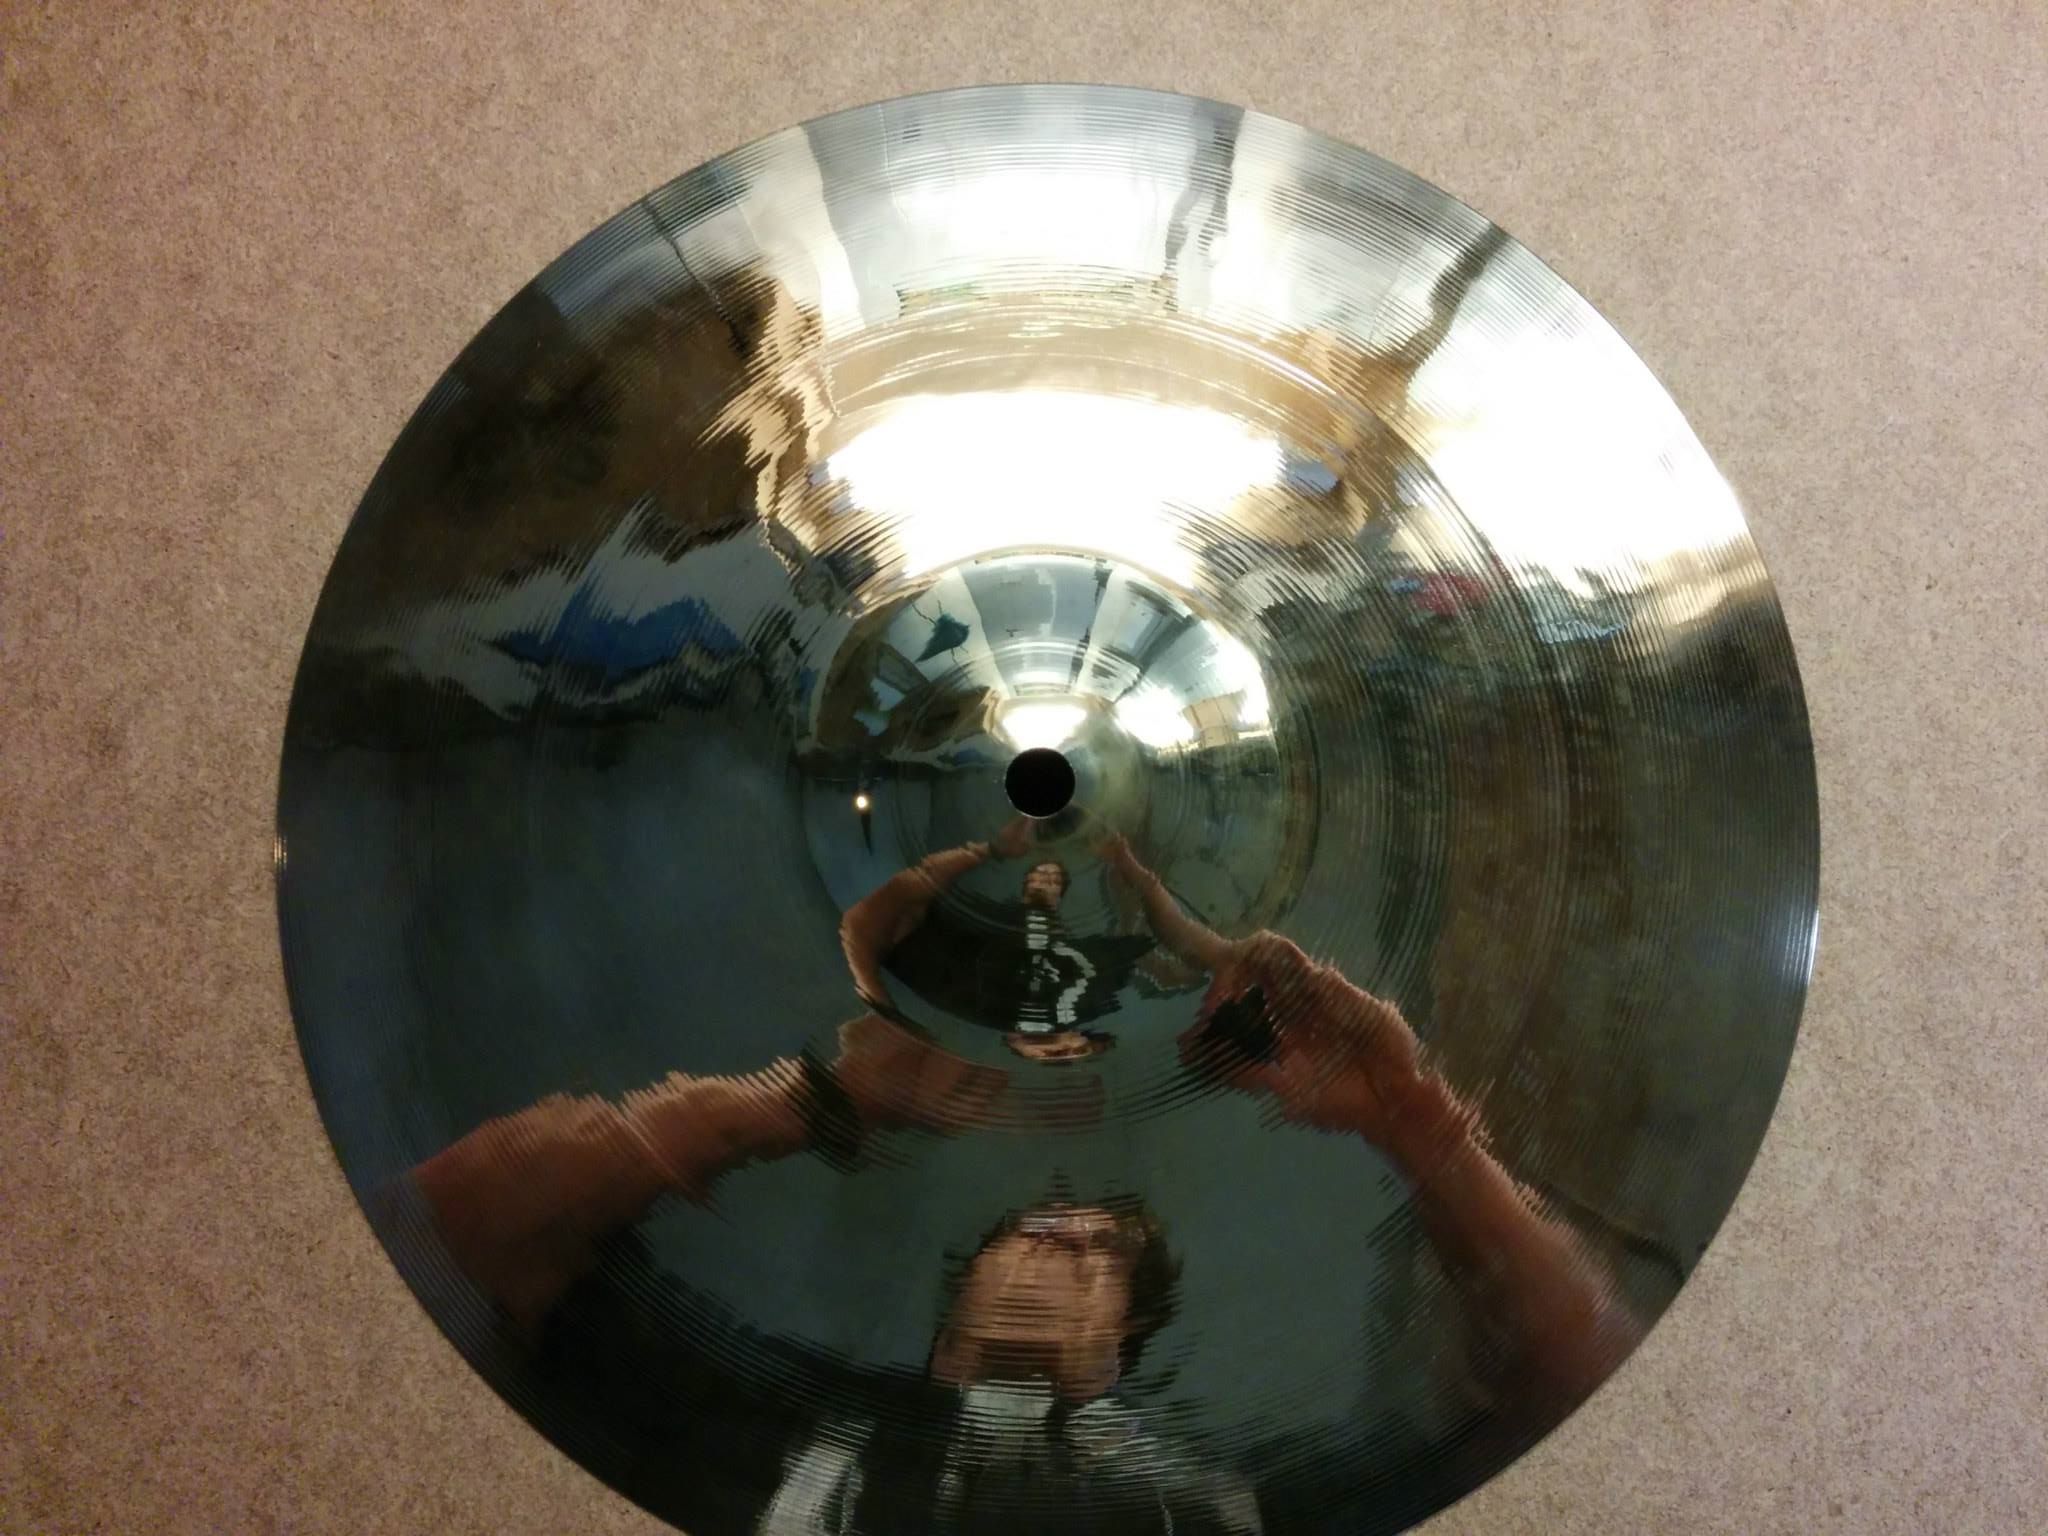
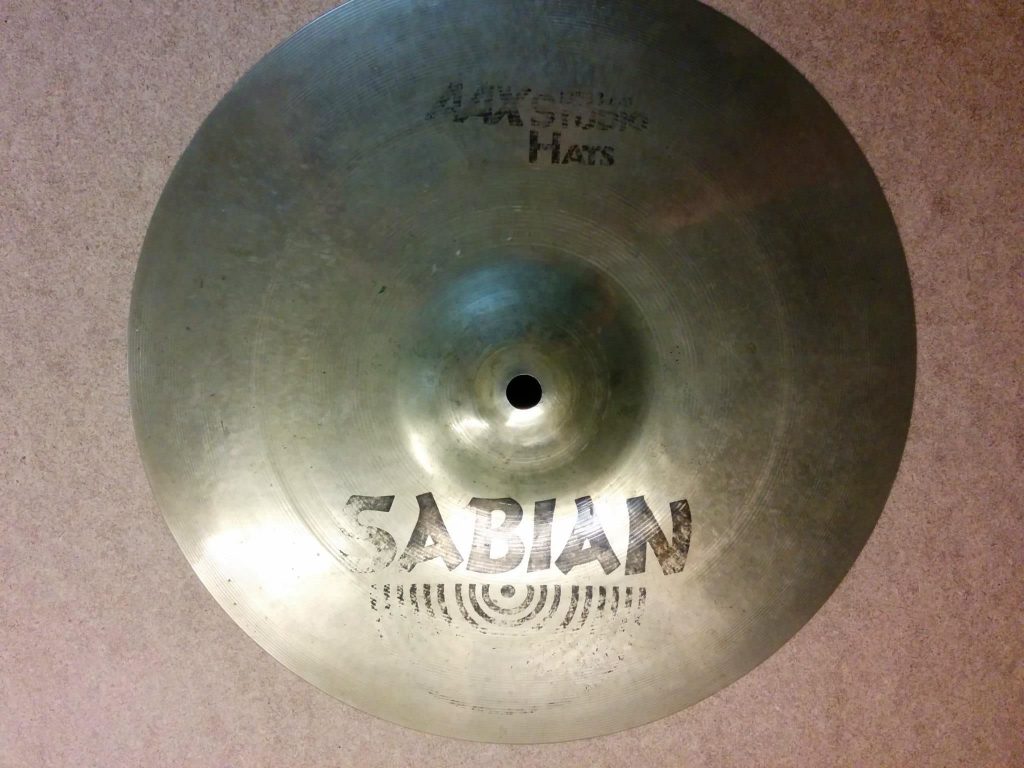
I’m a fan of shiny cymbals. I know a lot of the drummers out there say never clean your cymbals because it affects the sound. If you let the natural patina build up – not to mention the grime that will accumulate in the tonal grooves – it mellows out the cymbal and makes it sound warmer. That’s all fine and everything, but it’s not for me. I like my cymbals shiny and bright sounding. It’s just a personal preference.
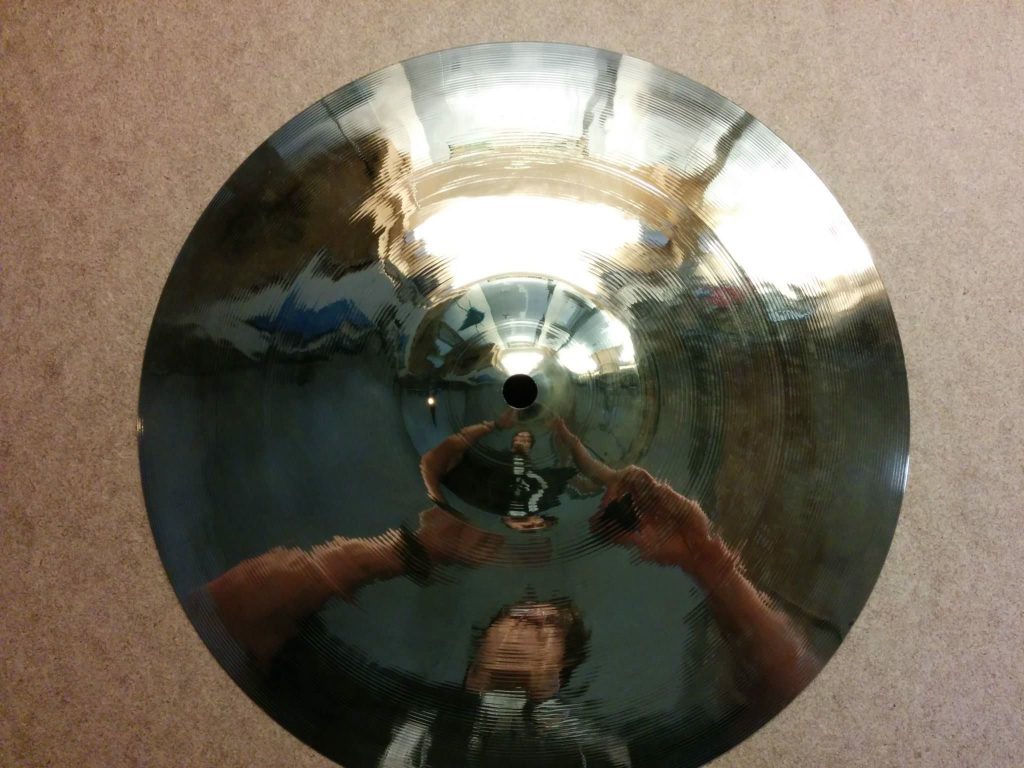
I asked Bill Gates what he used on his cymbals and he told me about a metal polish called Blue Magic. I’ll write up a more in-depth walkthrough on using this stuff but in the meantime here are some before and after shots of my hi-hat cymbals that I used Blue Magic on.
The following is a training document that I put together for my coworkers. I have decided to share it here in case it helps anyone.
Dadoes are slots, or non-through cuts, in material. They are “non-through” meaning that the blade doesn’t actually cut the material in two.
Dadoes are defined as being across the grain.
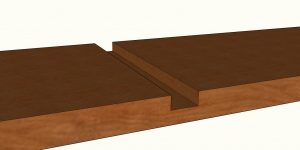
Through dadoes go all the way across the work-piece from edge to edge and are the most common type of dado. They are common when putting together shelves or cabinetry.
Fig. 1.1: Through Dado
Stopped (or “blind”) dadoes end before the edge of the work-piece. They are called “blind” because they are not visible from the front of the piece. When cutting blind dadoes, you run the material over the blade but stop short of the trailing edge. Due to the curve of the blade, this leaves some extra material that can be removed with a chisel.
Fig. 1.2: Stopped Dado

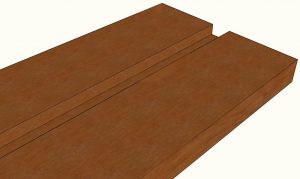
Grooves are essentially dadoes that run with – or parallel to – the grain. Other than that, there isn’t any real difference and as such, grooves are usually referred to as dadoes as well.
Fig. 1.3: Groove
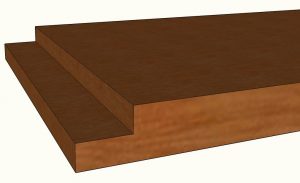
Rabbets (sometimes referred to as rebates) are dadoes at the edge of a work-piece. Where a dado would have three edges – two sides and a bottom -, a rabbet only has two – one side and a bottom. Rabbets are usually implemented when attaching the top to a cabinet or a set of shelves.
Fig. 1.4: Rabbet
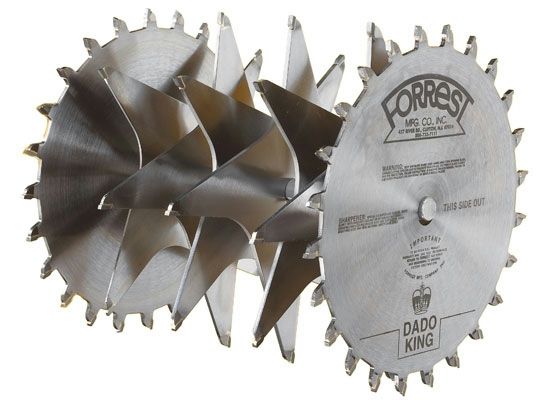
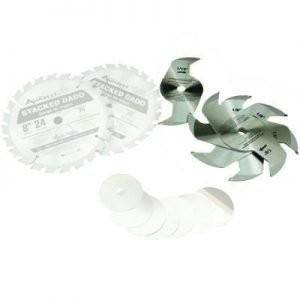
Dado stacks consist of three main components;
The outer blades cut the walls of the dado.These are full blades with usually around 24 teeth.
Fig. 2.1: Outer blades

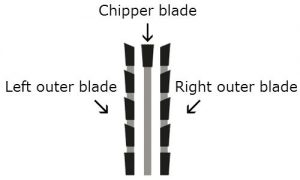
The chippers remove the waste between the outer blades. A dado stack will come with several of these, usually of varying thicknesses that can be combined with the outer blades to make a dado of a specific width. They will typically be available in three different styles. Full-plate chippers are circular blades and are not recommended on a SawStop because, due to their mass, they can damage the arbor shaft if the brake activates. Plus-style chippers, sometimes called 4-tooth chippers, are just how they sound; plus-shaped with 4-teeth. These work fine on a SawStop. Probably the most common style is the wing-style chippers. These are roughly rectangular in shape with usually just one tooth on each end.
Fig. 2.2: Chippers
Most dado stacks come with shims of varying thicknesses that can be used for fine tuning the thickness of the dado stack. These will be inserted in between the blades and/or chippers. This is a common technique when cutting dadoes for shelves since plywood is commonly slightly undersized.
Fig. 2.3: Shims

To install a dado stack, you will start with the left-outer blade.
Note: The outer blades should be labeled as left or right. If not, it may help to look at the carbides. When examining them from the front, the carbides will typically stick out past the edge of the blade on the side that would be considered to be the “outside” of the dado stack. The side of the carbide that is on the inside will probably be flush with the surface of the blade.
Fig. 3.1: Dado blade carbides
After installing the left outer blade, you will follow the directions in the dado stack for setting it to the correct thickness. Some dado stacks come with a chart that shows you what combination of blades, chippers, and shims need to be installed in order to achieve the desired thickness. For example, to make a simple ¼” dado, you will need to only install the two outer blades. To make a ¾” dado, you will need to use both outer blades and all of the chippers. The only thing to be careful of is that you want to make sure that you stagger the teeth so the carbides aren’t touching.
Fig. 3.2: Staggering the blades
Other notes on using dado stacks:
Dado stacks are typically found in 6” or 8” diameters, with 8” being the most common. Although you may run across 10” or 12” sets, they are pretty rare. It takes a lot of power to get a dado stack spinning, so some saw users with weaker machines may find themselves wanting to use a 6” set. The larger the diameter, the faster the outer edge of the blade will spin, which results in cleaner cuts. Only 8” dado stacks will work on a SawStop.
Some blades are equipped with anti-kickback shoulders (sometimes referred to as depth-limiting shoulders). This is a feature that is supposed to help prevent kickback and is common on Freud blades. They consist of points or bumps on the saw tooth immediately following the carbide. These are not recommended for use with a SawStop as they can cause it to take significantly longer to stop the blade if the brake activates.
Fig. 4.1: Anti-kickback shoulders

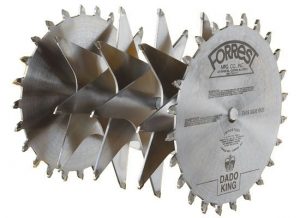
As stated previously, full blade chippers are not recommended on a SawStop due to the amount of mass involved. The types of chippers that we recommend are the “plus-style” or the more common “wing-style” chippers.
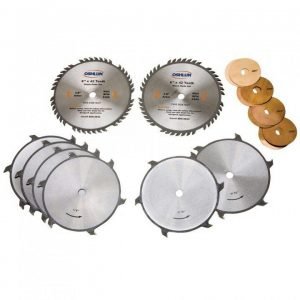
Fig. 4.2: Dado set with full-blade chippers
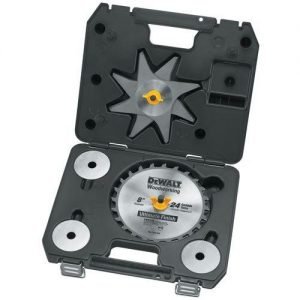
A popular choice for dado stacks is the DeWalt DW7670, which has plus-style chippers and excellent carbides.
Important note: DeWalt has recently changed this dado stack and it now has a diameter of 8 1/8″. It should still work with a CNS, PCS, or ICS, but it’ll be a bit tight. I definitely wouldn’t recommend this to anyone with a JSS or JSS Pro.
Fig. 4.3: The DeWalt DW7670 Dado Set
You may occasionally hear about wobble dado stacks which consist of a single blade with a central hub that it attaches to, allowing it to be adjusted to ride at an angle. The greater the angle, the wider the dado. These are pretty old-school and not that common.
Wobble dadoes have many disadvantages. They are fairly unsafe and don’t give as nice of a cut due to the vibration from the blade and the difficulty in getting it adjusted correctly. Also, the bottom of the dado isn’t flat since the blade rests at an angle.
Fig. 5.1: Wobble dado
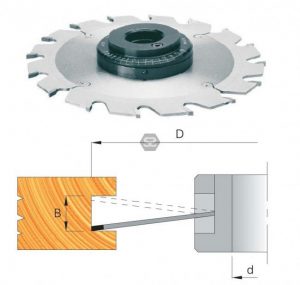
Another type of blade that you may encounter is called a molding head. This consists of a number of interchangeable profiled blades, typically three, that attach to a central hub. You pass the wood across the molding head blade similarly to how you would cut a dado. These are not compatible with a SawStop since there are too few teeth. The minimum tooth count that is recommended is 24.
Fig. 4.3: Molding head

The SawStop dado cartridge (TSDC-8R2) and the standard brake cartridge (TSBC-10R2) have some significant differences. The dado brakes aluminium pawl is both deeper and wider, allowing it to work with a blade that is smaller in diameter and up to 13/16” thick.
There are software differences as well, including having the cartridge allow more time for the blade to get up to speed.